
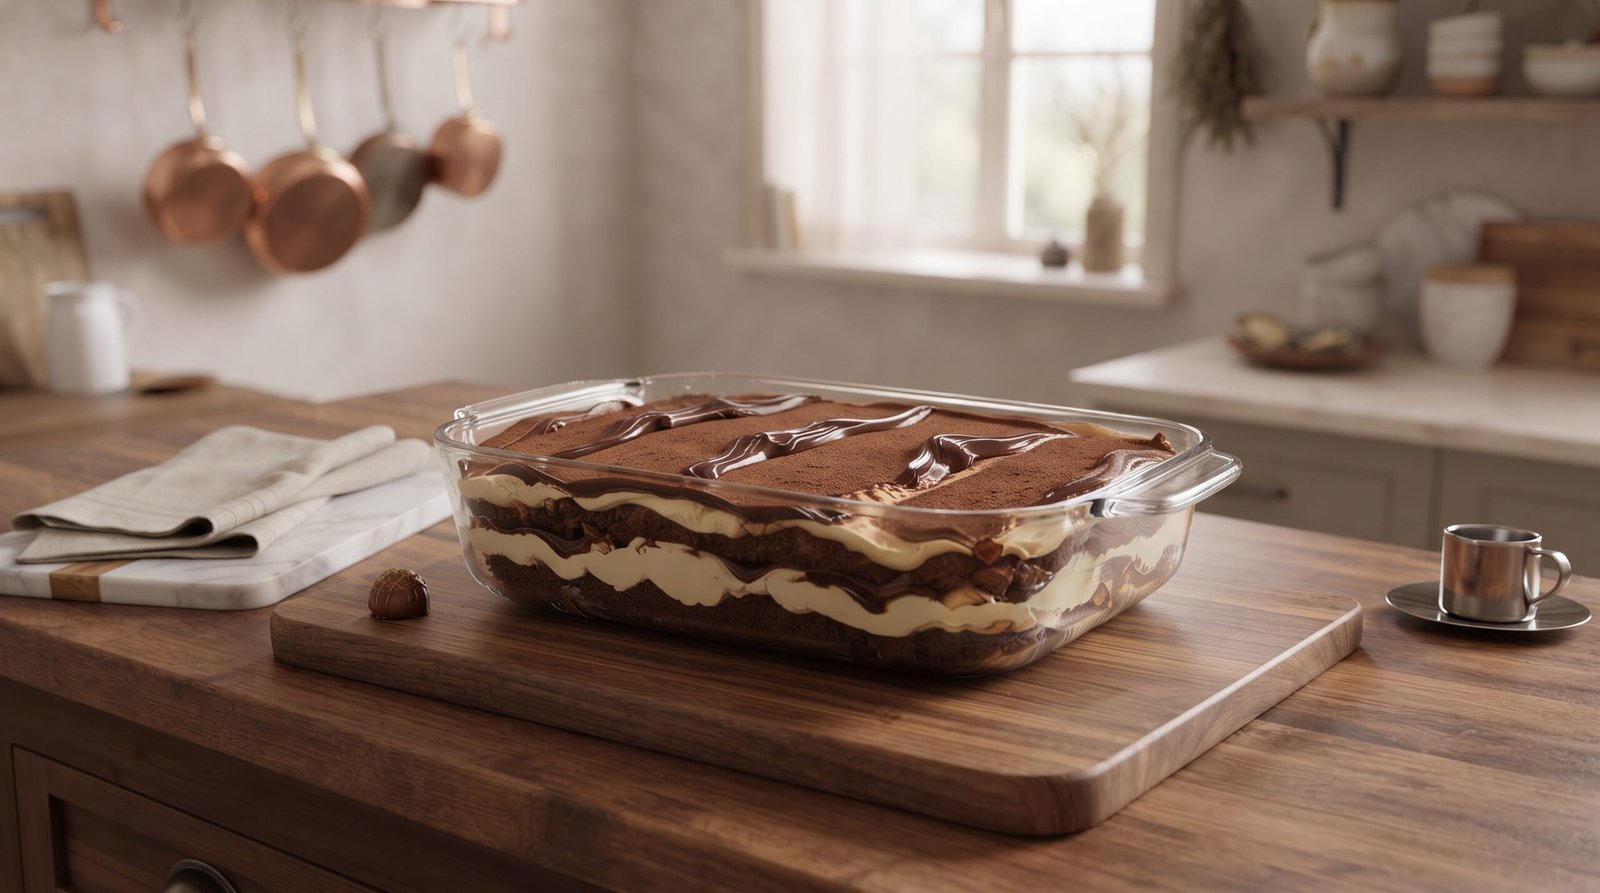
The first time I attempted to make tiramisu at home, it was a absolute disaster.
I was hosting a small dinner party and wanted to impress everyone with an authentic, restaurant-quality Italian dessert. I read a quick recipe online, bought a box of ladyfingers, brewed some dark coffee, and got to work. But instead of the elegant, fluffy slice of heaven I envisioned, I served my friends a sloshy, soup-like mess that collapsed the second my knife hit the dish. It tasted good—because espresso, cream, and sugar are hard to ruin completely—but the texture was an absolute tragedy.
It took me three failed attempts, two ruined batches of mascarpone cream, and a lot of trial-and-error to figure out where I was going wrong.
Fast forward to today: I’ve perfected a version that isn’t just structurally sound, but takes classic tiramisu to a whole new level. We’re combining the deep, rich coffee notes of a traditional tiramisu with velvety layers of homemade chocolate fudge sauce.
JPG
If you’ve ever ended up with a soggy tiramisu or felt intimidated by layering chilled desserts, don’t worry. I’m walking you through every single step, including the exact mistakes I made so you don’t have to repeat them.
Why You’ll Love This Chocolate Fudge Twist
Traditional tiramisu relies on three main components: espresso-soaked ladyfingers (savoiardi), a rich mascarpone cheese cream, and a dusting of bitter cocoa powder.
JPG
While classic tiramisu is amazing, adding a rich chocolate fudge layer between the cream and coffee biscuits balances out the bite of strong espresso. The fudge gives each bite a dense, silky contrast against the pillowy mascarpone layer.
JPG+ 1
Plus, this recipe is eggless and alcohol-free, making it super approachable, easy to store, and friendly for everyone at the table.
Ingredients You’ll Need
Here is everything you need to pull this off. I’ve included notes on key ingredients because choosing the right brands and types makes all the difference.
       [Chocolate Fudge Layer]
                 |
  [Dusting of Dark Cocoa Powder]
                 |
   [Pillowy Mascarpone Cream]
                 |
[Espresso-Soaked Ladyfingers (Savoiardi)]
For the Coffee Dip:
- 1.5 cups (360 ml) Strong Espresso or Dark Roast Coffee: Room temperature or cool. Never hot!
- 1 tbsp Granulated Sugar: Just enough to take off the harsh bitter edge of the coffee.
- 1 tsp Pure Vanilla Extract: Adds a subtle aroma that ties the coffee and chocolate together.
For the Mascarpone Cream:
- 8 oz (225g) Mascarpone Cheese: Keep this well-chilled until right before mixing.
- 1 cup (240 ml) Heavy Whipping Cream: Minimum 36% milk fat, cold from the fridge.
- ½ cup (60g) Powdered Sugar: Sifted to avoid lumps.
- 1 tsp Vanilla Bean Paste (or extract): Paste gives you those lovely little black speckles and deeper flavor.
For the Chocolate Fudge Swirl & Layering:
- ¾ cup (180g) Chocolate Fudge Sauce: You can use a quality store-bought jar (like Ghirardelli or Stonewall Kitchen) or make your own quick ganache with equal parts dark chocolate chips and warm heavy cream. JPG
- 24–30 Hard Italian Ladyfinger Biscuits (Savoiardi): Make sure they are the crisp, crunchy kind, not the soft sponge-cake style ladyfingers!
- 3 tbsp Dutch-Processed Cocoa Powder: For dusting top and middle layers. JPG
- Optional: A few chocolate truffles or chocolate curls for garnishing the serving board. JPG
Tools & Kitchen Equipment Needed
You don’t need specialized baker’s equipment, but having these tools on hand will make your workflow much smoother:
- 9×13 Glass Baking Dish or Rectangular Casserole Dish: Glass is ideal because you can see the gorgeous layers through the sides. JPG
- Electric Hand Mixer or Stand Mixer: Essential for whipping the heavy cream to stiff peaks.
- Shallow Wide Bowl or Pie Dish: Essential for quickly dipping ladyfingers without breaking them.
- Fine-Mesh Sifter/Strainer: For getting that smooth, even dusting of cocoa powder on top. JPG
- Silicone Spatula: For gently folding cream without deflating it.
Step-by-Step Instructions
Step 1: Brew and Cool the Coffee
Start by brewing your espresso or strong coffee. If you don’t have an espresso machine, use a Moka pot or mix 2 tablespoons of high-quality instant espresso powder into 1.5 cups of boiling water.
Stir in 1 tablespoon of sugar and 1 teaspoon of vanilla extract until dissolved. Set it aside to cool completely.
Crucial Tip: Dipping ladyfingers into hot or warm coffee will instantly dissolve the sugar crust and turn your biscuits into mush before they even hit the baking dish.
Step 2: Make the Mascarpone Whipped Cream
In a large, clean mixing bowl (or the bowl of your stand mixer), combine the cold heavy whipping cream, powdered sugar, and vanilla bean paste. Beat on medium-high speed using a whisk attachment until you reach medium peaks.
In a separate bowl, briefly stir the cold mascarpone cheese with a spatula just to loosen it up.
Add the softened mascarpone to your whipped cream. Beat on low speed for roughly 30 to 45 seconds until everything comes together into a thick, holding structure. Be very careful here—over-beating mascarpone will cause it to split into watery butter. Stop as soon as it looks smooth and holds its shape.
Step 3: The “Flash Dip” Technique for Ladyfingers
This is where 90% of tiramisu mistakes happen. Ladyfingers are like dry sponges; they absorb liquid at lightning speed.
- Pour your cooled coffee into a shallow bowl.
- Grab one ladyfinger at a time.
- Dip it into the coffee for 1 second on the front, 1 second on the back.
- Immediately place it in a single layer at the bottom of your glass dish. JPG
Repeat this process, lining the biscuits side-by-side until the bottom of your dish is completely covered. If needed, snap a few biscuits in half to fill any small gaps along the edges.
JPG
Step 4: Layering the Cream and Fudge
Now comes the fun part:
- First Cream Layer: Spread half of your mascarpone mixture evenly over the coffee-soaked ladyfingers using an offset spatula. JPG
- The Fudge Layer: Warm your chocolate fudge sauce slightly in the microwave (about 10–15 seconds) so it’s pourable but NOT hot. Drizzle half of the fudge sauce evenly over the cream layer. JPG
- Dusting: Dust a light coating of cocoa powder over the fudge using your fine-mesh strainer. JPG
- Second Ladyfinger Layer: Repeat the flash-dip process with another layer of ladyfingers, resting them directly on top of the cream and fudge. JPG
- Top Cream Layer: Spread the remaining half of the mascarpone cream smoothly over the second layer of biscuits. JPG
- Final Fudge Swirl & Cocoa: Drizzle the rest of the warm chocolate fudge across the top layer in decorative lines, then dust heavily with cocoa powder. JPG
Step 5: The Chill Phase (Don’t Rush This!)
Cover your baking dish loosely with plastic wrap or foil, making sure it doesn’t press directly into the top layer of cocoa and fudge.
Refrigerate the tiramisu for at least 6 hours, but preferably overnight (8 to 12 hours). During this time, the dry ladyfingers slowly draw moisture from the mascarpone cream and soften into a light, cake-like texture while allowing all the coffee and chocolate flavors to meld together.
3 Big Mistakes I Made (So You Can Avoid Them)
When I was first learning how to make tiramisu, I ruined a few batches by falling into these common traps:
1. Using Soft Sponge Ladyfingers
There are two types of ladyfingers sold in grocery stores: soft bakery ladyfingers (which feel like tiny sponge cakes) and crisp Italian savoiardi (which are dry and hard as rocks). Always buy hard Italian Savoiardi. Soft ladyfingers turn to mush instantly when dipped in coffee.
2. Over-Soaking the Biscuits
I used to submerge my ladyfingers in coffee for 5 to 10 seconds thinking they needed to be drenched to taste like coffee. Wrong! They should still feel slightly firm in the middle when you lay them down. They will continue to soften in the fridge as they absorb moisture from the cream layer.
3. Using Room-Temperature Heavy Cream
If your heavy cream or mascarpone isn’t cold when you whip it, it won’t hold air properly, resulting in a runny cream mixture that sags under the weight of the layers. Keep your dairy in the coldest part of your fridge until the exact minute you use it.
Pro-Tips for the Best Presentation
If you’re serving this for guests or taking photos for a blog or social media:
- Use a sharp, clean knife: Wipe your knife blade with a damp paper towel between every single slice to get clean, distinct cross-section layers.
- Add Texture to the Plate: Serve each slice on a dark wooden board or simple ceramic plate. Dust the plate with a little extra cocoa powder and place a dark chocolate truffle or a small espresso cup alongside it for an elegant cafe-style presentation. JPG+ 1
- Dust Cocoa Right Before Serving: While you dust cocoa before chilling, adding one fresh, light dusting right before cutting gives the top a velvety look. JPG
Frequently Asked Questions
Can I make this tiramisu ahead of time?
Yes! In fact, it tastes even better on day two because the flavors have more time to marry. You can make it up to 48 hours before serving. Keep it tightly covered in the refrigerator.
Can I freeze tiramisu?
You can freeze tiramisu, though the cream texture might change slightly once thawed. Wrap the dish tightly in plastic wrap and aluminum foil, then freeze for up to 1 month. Thaw overnight in the refrigerator before serving.
What can I substitute for mascarpone cheese?
While mascarpone is traditional and offers a rich, butter-like sweetness, you can substitute it in a pinch. Mix 8 oz of full-fat cream cheese with 2 tablespoons of heavy cream and 1 tablespoon of softened unsalted butter until completely smooth.
Final Thoughts
Making a great tiramisu isn’t about complicated culinary techniques—it comes down to timing, temperature, and keeping a light touch when dipping your biscuits. Adding a swirl of dark chocolate fudge brings a richness that takes this classic Italian dessert to another level entirely.
JPG
Give this recipe a try the next time you’re hosting dinner or just craving something sweet with your afternoon coffee. Once you get the “flash dip” method down, you’ll never buy overpriced, soggy bakery tiramisu again!
Have you ever tried adding chocolate or fruit layers to your tiramisu? Let me know in the comments below—I’d love to hear your favorite twists!