
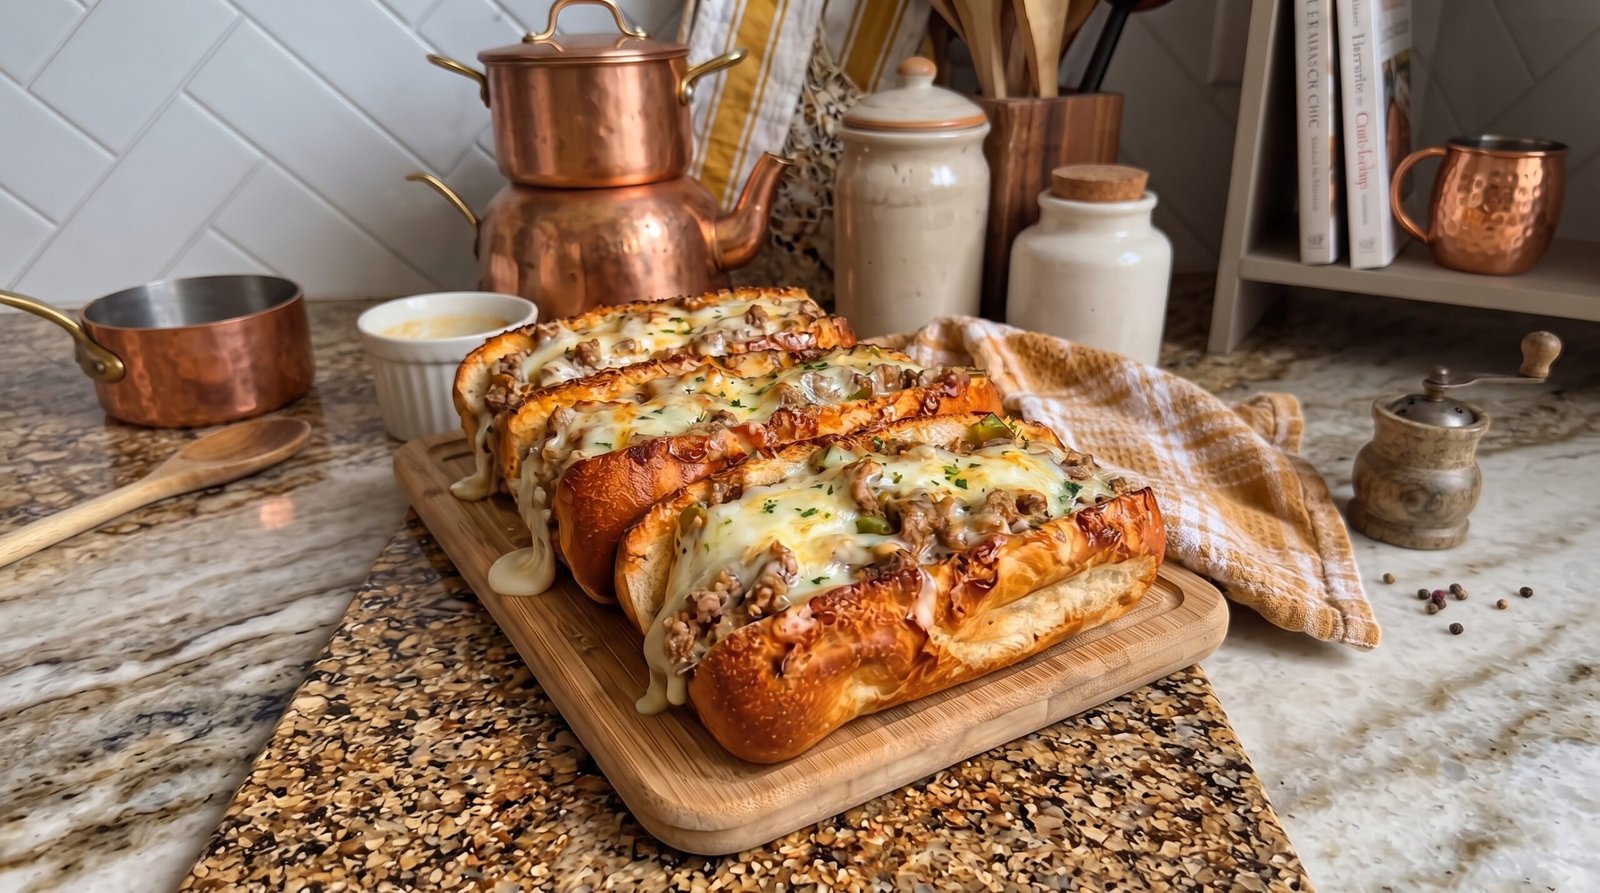
Sometimes dinner feels like a chore, especially when I have had a long day and the fridge looks pretty empty. I usually end up staring at the shelves, wishing for something that feels like comfort food but does not take three hours to prep. These cheesesteak garlic bread subs have saved me more than once. They take the familiar flavor of a classic sandwich and pack it into a crispy, buttery piece of bread that serves as the perfect base. It is a hearty meal that hits the spot without requiring a dozen pots or a complicated shopping list. Whether I am feeding my family or just making a quick lunch for myself, this recipe is a reliable go-to that turns standard ingredients into something satisfying.
You will find that this recipe relies on pantry staples and a few fresh items to get dinner on the table. The process is straightforward, focusing on getting the meat browned, the cheese melted, and the bread just right. By using a pre-made garlic loaf or turning a baguette into one, you skip the need to bake from scratch while still getting those warm, garlicky flavors in every bite. It is one of those meals that feels like it belongs at a casual weekend lunch or a busy weeknight dinner table.
Why This Recipe Works
This recipe relies on the contrast between textures. You have the soft, savory ground beef mixture combined with gooey, melted cheese, all sitting on a base that has been toasted with garlic butter. The bread creates a sturdy foundation that holds everything together, ensuring you do not have a soggy mess on your hands. Because the bread is pre-treated with garlic and butter, it adds an extra layer of flavor that plain sandwich buns simply cannot match. It makes the whole experience richer and more indulgent.
Ease is another factor here. Everything cooks in one skillet, meaning your cleanup is minimal. You are essentially making a savory meat mixture, layering it onto your bread, and then letting the heat do the rest of the work. You do not need to worry about complex assembly or timing multiple components to finish at once. Once the beef is browned and the veggies are softened, it is just about assembly. It is a very forgiving process where you can adjust the heat level or the amount of cheese based on what you have on hand or what your family prefers.
Finally, the flavor profile is something almost everyone enjoys. You have the saltiness of the beef, the sharp or mild notes of the cheese, and the aromatic hit of garlic. It is savory and filling, which makes it a winner for anyone who needs a quick energy boost. Unlike a standard sandwich that might feel light, this feels like a proper, substantial meal. The bread becomes toasted on the edges while staying slightly soft underneath, which provides a nice bite. It is consistent, reliable, and uses ingredients you can find at any local grocery store.
Ingredient Notes
The Beef and Aromatics
The foundation of the filling is ground beef. I suggest using a lean ground beef, around 85/15 or 90/10, so you do not have too much grease pooling in the pan. If you choose a higher fat content, just make sure to drain the excess liquid before adding the final seasonings. For the aromatics, you need a standard yellow onion and green bell pepper. These provide the classic base for a cheesesteak-style filling. When you slice the onion and peppers, try to keep them in thin strips so they cook evenly alongside the meat and do not end up with large, raw chunks in your final sandwich.
The Bread and Butter
For the bread, a soft French loaf or a long baguette works best. You want something with enough structural integrity to hold the heavy topping. If you use a very crusty, hard baguette, it might be difficult to eat as a sub, so look for a standard grocery store French loaf. You will also need butter, minced garlic, and a little bit of fresh parsley. The butter should be softened at room temperature so you can mix it easily with the garlic. If you are in a rush, you can grate the garlic directly into the butter to get a stronger, more even flavor distribution across the bread.
Cheese and Seasoning
For the cheese, provolone or mozzarella are my top choices. Provolone gives you that sharp, authentic cheesesteak tang, while mozzarella is great for the melt and stringy texture. If you want something a bit bolder, you could mix in a little bit of white cheddar. Do not skimp on the cheese because it acts as the glue that holds the meat and veggies onto the bread. For seasonings, keep it simple with salt, black pepper, and maybe a dash of Worcestershire sauce to deepen the savory notes of the beef. Avoid heavy, wet sauces like ketchup or mustard in the pan, as these can make the bread mushy.
| Ingredient | Amount | Notes |
|---|---|---|
| Ground Beef | 1 pound | Lean 85/15 is perfect |
| French Bread | 1 long loaf | Sliced in half horizontally |
| Butter | 4 tablespoons | Softened at room temperature |
| Minced Garlic | 2 teaspoons | Freshly minced is best |
| Yellow Onion | 1 medium | Thinly sliced |
| Green Bell Pepper | 1 medium | Thinly sliced |
| Provolone or Mozzarella | 1.5 cups | Shredded or thinly sliced |
| Salt | 0.5 teaspoon | Adjust to taste |
| Black Pepper | 0.25 teaspoon | Freshly cracked |
| Parsley | 1 tablespoon | Freshly chopped for garnish |
The Recipe
- Prep Time: 15 minutes
- Cook Time: 20 minutes
- Total Time: 35 minutes
- Servings: 4 servings
- Difficulty: Easy
Equipment:
– Large skillet
– Serrated knife
– Baking sheet
– Spatula
– Small mixing bowl
Step-by-Step Instructions
Step 1: Prepare the Garlic Butter
Start by preheating your oven to 375 degrees Fahrenheit. While that is warming up, grab a small mixing bowl and combine the softened butter with your minced garlic and half of the chopped parsley. Stir this until it is a smooth, green-speckled paste. Taking the time to mix this well ensures that every corner of your bread gets an equal amount of garlic flavor. Set this aside and grab your loaf of bread.
Using a sharp serrated knife, slice the loaf in half lengthwise. If your loaf is very long, you might want to cut it into four smaller, individual portions, or keep it as two long pieces to bake on a large sheet pan. Spread that garlic butter generously over the cut sides of the bread. Place the buttered bread on a baking sheet, cut side up, and slide it into the oven for about 5 to 7 minutes. You want the edges to be toasted slightly, but keep the centers soft.
Step 2: Cook the Beef and Vegetables
While the bread gets a head start in the oven, place your large skillet over medium-high heat. Add the ground beef to the pan. Use your spatula to break the meat into small crumbles as it cooks. You are looking for the beef to be fully browned, meaning there is no pink left in the center. If there is a significant amount of grease in the pan, carefully tilt the skillet and use a spoon to remove the excess fat. Leaving too much oil in the pan will make your sandwiches feel heavy and greasy.
Once the beef is browned, toss in your sliced onions and green bell peppers. Sauté these with the beef until the vegetables have softened and the onions become translucent. This usually takes about 6 to 8 minutes. You want the vegetables to be cooked through but still have a slight bite to them. If you overcook them at this stage, they will turn into mush once you add the cheese later on. Season the mixture with your salt and black pepper, and stir in a splash of Worcestershire sauce if you have it.
Step 3: Combine and Melt
When the meat and vegetable mixture is cooked, turn the heat down to low to keep it warm. Check the internal temperature of the beef with a meat thermometer if you are unsure; it should reach 160 degrees Fahrenheit to ensure it is thoroughly cooked. Pull your garlic bread out of the oven. The bread should be warm and fragrant with that buttery garlic scent. If the bread is too soft, you can leave it in for another minute or two, but watch it closely so the garlic does not burn.
Divide your beef and vegetable mixture evenly over the toasted bread. Spread it out with your spatula so that you have a nice, even layer from edge to edge. Take your shredded provolone or mozzarella cheese and sprinkle it generously over the top of the beef. Make sure you cover the edges, as that creates a delicious, crispy cheese seal where the meat meets the bread. Place the baking sheet back into the oven for another 5 minutes, or until the cheese is melted, bubbly, and starting to show a light golden color.
Step 4: Final Touches and Serving
Once the cheese is melted and bubbling, carefully remove the tray from the oven. If you want a bit more color on the cheese, you can switch your oven to the broiler setting for 30 to 60 seconds, but stay right there and watch it like a hawk. Cheese can go from perfectly melted to burned in a matter of seconds. Once it looks right, take it out and let it sit for just a minute or two. This small rest helps the cheese set slightly so it doesn't slide right off the meat when you pick up a slice.
Sprinkle the remaining fresh parsley over the top for a bit of brightness and color. Using a sharp knife, carefully cut the bread into your desired serving sizes. Serve these hot, straight from the tray. Because these are quite substantial, they work well on their own, but you could add a side salad or some simple pickles if you want a complete meal. The combination of the garlicky bread and the savory cheesesteak topping is something best enjoyed immediately while the cheese is still soft and stretchy.
Mistakes I Made (So You Don't Have To)
Overcooking the Garlic
Early on, I used to put the garlic in the pan while the beef was browning. I learned the hard way that garlic burns much faster than ground beef. If the garlic burns, it leaves a bitter, acrid taste throughout the whole dish that you simply cannot mask. Now, I always mix the minced garlic into the softened butter first. This protects the garlic from direct, high heat and ensures it infuses the bread with a mellow, aromatic flavor instead of a burnt one.
Leaving Excess Grease
One time, I was in a rush and didn't bother draining the fat from the ground beef. When I put the mixture on the bread, the fat seeped into the loaf, and by the time I sat down to eat, the bread was soggy and greasy. It was not a pleasant texture. Now, I always take the extra minute to tip the pan and spoon out the excess fat before adding the vegetables. It makes a massive difference in how clean and crisp the bread stays.
Burning the Cheese
The first few times I made these, I used the broiler to melt the cheese and walked away to grab a drink. When I came back, the cheese was black and charred. I had to scrape it all off and start over. I realized that the broiler is incredibly fast and leaves no room for error. Now, I either use the standard bake setting for a gentle melt or, if I use the broiler, I stand in front of the oven and do not look away for even a second.
Not Seasoning the Vegetables
I used to rely only on the seasoning from the beef to flavor the onions and peppers. The result was often bland, and the vegetables tasted like plain water. I started adding a light pinch of salt directly to the vegetables as they hit the pan. This draws out the natural moisture and concentrates the sweetness of the onions. It makes the final sandwich taste much more balanced and professional.
Variations and Tips
Mixing the Cheeses
I love using a combination of cheeses to get the best of both worlds. Using half mozzarella for that classic, gooey pull and half provolone for a sharp, tangy flavor profile really elevates this dish. You can even try using a mild white cheddar if you want something that melts well but has a slightly different bite. Experimenting with different cheese ratios is a great way to customize the flavor to your personal preference.
Adding Heat
If you like things a little spicy, add a few red pepper flakes to the beef mixture while you are sautéing the onions and peppers. You can also mix in some chopped pickled jalapeños before topping the bread with cheese. This cuts through the richness of the butter and meat and provides a nice, sharp contrast that keeps the meal from feeling too heavy.
Making it Ahead
If you need to save time, you can cook the beef and vegetable mixture completely the day before. Let it cool down, store it in an airtight container in the fridge, and just reheat it in a skillet for a few minutes before you are ready to assemble. Do not assemble the sandwich until just before baking, or the bread will lose its structure and turn soft. Having the meat mix ready to go makes this a ten-minute meal on busy evenings.
Bread Substitutions
If you cannot find a French loaf, you can use individual hoagie rolls or even sturdy ciabatta rolls. If you use rolls, keep in mind that they are smaller, so you will need to watch the baking time closely. They tend to toast faster than a large loaf, so start checking them after about 3 minutes. The goal is always to get that golden-brown edge and a warm, soft center regardless of the shape of the bread you use.
Storage and Reheating
If you happen to have leftovers, store them in an airtight container in the refrigerator within two hours of cooking. They will stay fresh for up to two days. Keep in mind that the bread will soften the longer it sits in the fridge because it absorbs moisture from the meat and cheese. If you try to freeze this, the bread usually gets quite mushy upon thawing, so I don't recommend freezing the assembled sandwiches.
To reheat, avoid the microwave, as it will turn the bread rubbery and soggy. Instead, pop the leftovers back into a preheated oven at 350 degrees Fahrenheit for about 8 to 10 minutes. This helps the bread crisp back up and ensures the meat and cheese are heated through to at least 165 degrees Fahrenheit. It is the only way to get back that fresh-out-of-the-oven quality.
Frequently Asked Questions
Can I use ground turkey instead of beef?
Yes, you can certainly substitute ground turkey for beef. It is a lighter option, but because ground turkey is usually much leaner, you might need to add a teaspoon of oil to the pan when you start cooking so the onions and peppers have enough fat to sauté properly. Keep in mind that the flavor will be a bit more subtle, so you may want to increase the seasonings slightly.
What is the best way to slice the onions and peppers?
Aim for long, thin strips, often called julienne. This helps them cook at the same rate as the ground beef and ensures you get a bit of onion and pepper in every bite. If you chop them into small cubes, they might get lost in the meat or turn into a sauce, which isn't the texture you want for this style of sub.
Is it necessary to pre-toast the bread?
I highly recommend it. If you put the raw, buttery bread in the oven with the heavy meat and cheese, the center often stays soft and doughy while the edges might start to burn. Giving the bread a head start ensures the structure is firm enough to hold the weight of the filling without becoming soggy, and it guarantees that delicious garlic butter flavor is baked into the surface.
Can I add mushrooms to the filling?
Mushrooms are an excellent addition to this recipe. If you decide to include them, slice them thinly and add them to the pan at the same time as the onions and peppers. Be aware that mushrooms release a lot of moisture, so you will need to cook the mixture for an extra 2 or 3 minutes to make sure that water evaporates before you spread the filling on the bread.
My bread turned soggy, what did I do wrong?
The most common reason for soggy bread is not draining the grease from the cooked beef mixture. That liquid fat soaks directly into the bread and prevents it from toasting. Also, make sure you don't use too much moisture-heavy ingredient like tomato sauce or heavy dressings. A dry, well-drained meat mixture is the key to keeping your bread crispy and satisfying until the very last bite.
Final Thoughts
Making these cheesesteak garlic bread subs at home has become a regular part of my cooking routine. It is a recipe that proves you do not need hours of time or fancy equipment to create a meal that feels like a treat. The combination of savory meat, melted cheese, and toasted garlic bread is hard to beat, especially when you are craving something hearty.
I hope this becomes a go-to for you as well. Whether you are hosting a quick lunch or just trying to get through the work week, it is a simple way to bring a little extra flavor to the table. Enjoy every bite, and do not be afraid to tweak the ingredients to make it your own.