
I have an embarrassing confession: for the first five years of my adult cooking life, I completely despised pork chops.
Growing up, pork chops were the night my jaw got a serious workout. They were always boneless, thin as cardboard, dusted with dry seasoning, and baked in a scorching oven until completely white, stiff, and chalky. Every single bite demanded a huge swig of water just to swallow.
Then came a freezing Sunday evening in my late twenties. I bought four thick-cut, boneless loin chops from a local butcher on deep discount. Determined to make them edible, I threw together a fast marinade of dark brown sugar, soy sauce, smashed garlic, and smoked paprika, poured it over the chops in a glass baking dish, and cranked the oven to 425°F.
The result? Halfway through cooking, the sugar burned into bitter charcoal around the edges of the pan, filling my kitchen with pungent smoke. The center of the chops, meanwhile, was pale, rubbery, and sitting in a pool of watery grey runoff. I ended up scraping the burnt bits into the trash and feeling thoroughly defeated.
It took me another year of testing to realize two fundamental kitchen truths: pork loin needs a gentle sear-and-bake approach, and sugar-based glazes need acidity and proper basting to bubble into a deep, lacquered, savory-sweet mahogany crust without charring to soot.
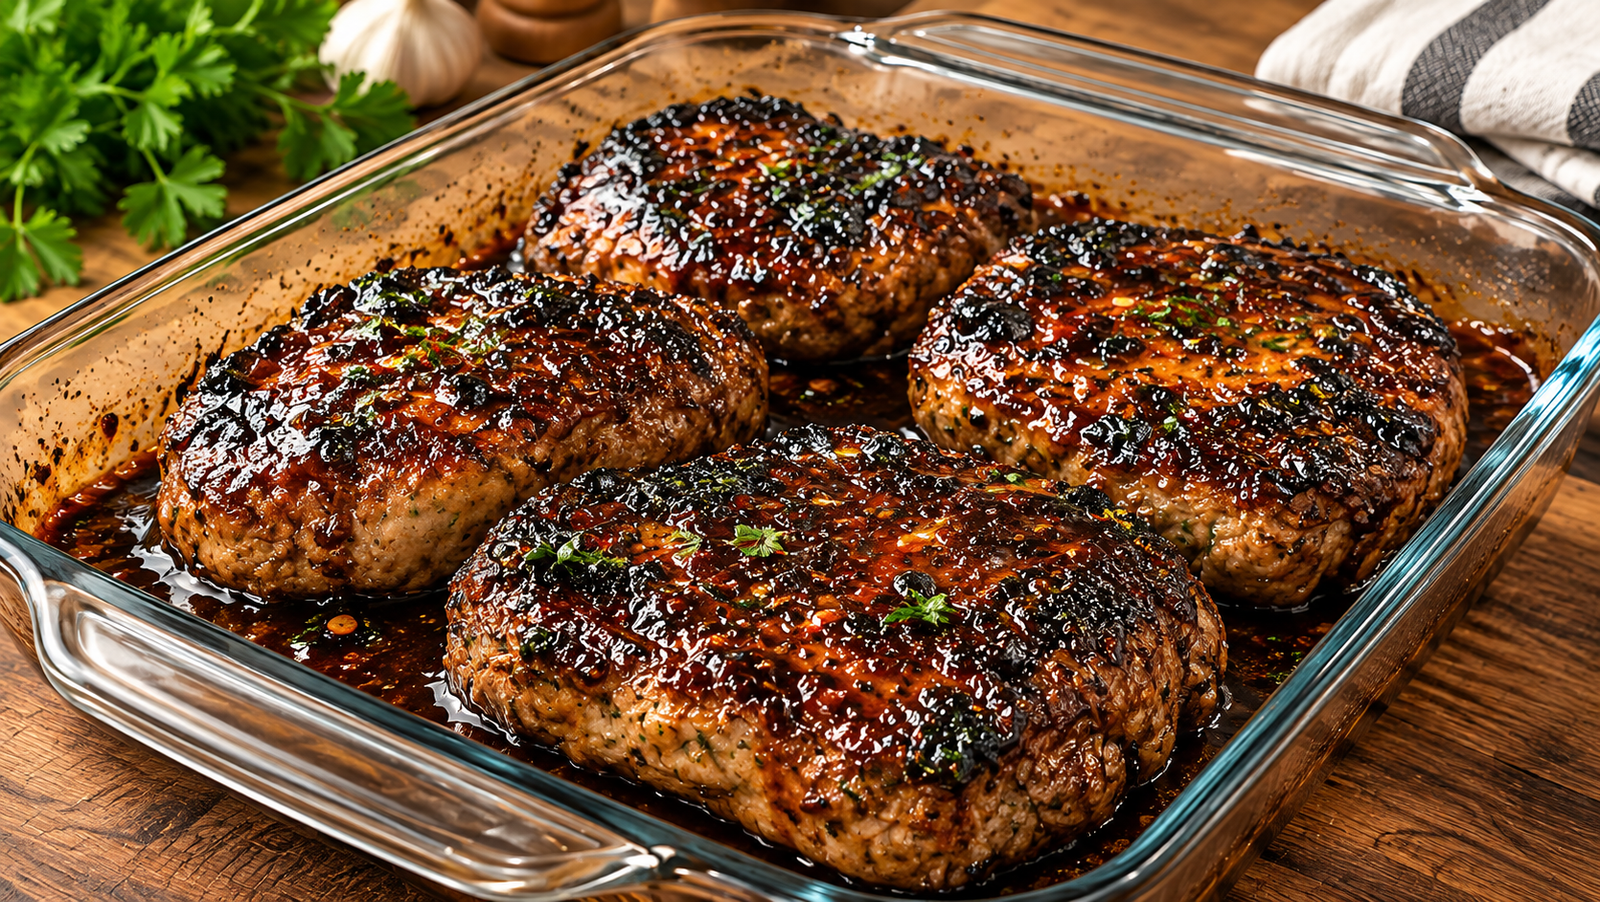
The photo above is the triumph: four tender, juicy pork chops bathed in a rich garlic-soy brown sugar glaze that clings to every crevice, baked right in a simple glass Pyrex dish.
Here is exactly how you make them at home without turning dinner into dry firewood.
Why Baked Pork Chops Turn Out Dry (And How to Fix Them)
Pork chops get a bad reputation purely because of outdated cooking habits. Here is what usually goes wrong:
1. Cooking to the 165°F Ghost of the Past
Decades ago, home cooks were told to blast pork until it reached 165°F (74°C) to eliminate parasites. The USDA officially lowered the recommended internal cooking temperature for whole pork cuts to 145°F (63°C) with a 3-minute rest.
Pork loin is an exceptionally lean muscle. Once you cross 150°F, the proteins contract hard and violently expel every trace of juice. Pulling the pork when your probe hits 140°F–142°F allows carryover heat to gently glide it to that juicy 145°F mark.
2. Buying Paper-Thin Chops
Thin, half-inch chops are virtually impossible to bake with a thick glaze. By the time the glaze has reduced into a sticky coating, the interior is well-done and chalky. Look for chops that are at least 1 to 1.5 inches thick. Thickness gives you the buffer you need to build that caramelized crust while keeping the center tender.
3. Untamed Sugar in the Oven
Brown sugar creates that addictive sticky barbecue sheen, but alone it scorches easily. Balancing it with salty soy sauce, tangy apple cider vinegar, and olive oil lowers the scorch risk, while frequent basting coats the meat in a thick, protective syrup that stays glossy and savory.
Ingredients & Kitchen Gear
Tools That Make This Seamless
- 8×8-inch or 9×13-inch Tempered Glass Baking Dish: (A standard Pyrex baking dish works wonders here; glass distributes heat evenly and lets you see the sauce caramelize).
- 10-Inch or 12-Inch Cast-Iron Skillet: For giving the chops a blistering 90-second sear before baking.
- Instant-Read Digital Probe Thermometer: (A ThermoWorks ThermoPop or similar digital instant-read thermometer is essential; visual guessing is the #1 reason pork ends up overcooked).
- Silicone Basting Brush or Spoon: To keep spooning that hot glaze over the top during the bake.
The Ingredient Breakdown
| Component | Ingredient | Quantity | Practical Role |
| The Star | Thick-Cut Boneless Pork Loin Chops | 4 chops (approx. 6–8 oz each, 1 to 1.5 inches thick) | Thick cuts stay tender and hold their shape during roasting. |
| Sweet Crust | Dark Brown Sugar | ⅓ cup (packed) | Caramelizes into that signature sticky, dark amber glaze. |
| Savory Depth | Low-Sodium Soy Sauce | 3 tbsp | Provides savory umami backbone and prevents the glaze from being cloying. |
| Acid Balance | Apple Cider Vinegar | 1.5 tbsp | Cuts through the sweetness and helps tenderize the meat surface. |
| Aromatic Bite | Fresh Garlic | 5 cloves (finely minced) | Infuses the bubbling pan syrup with deep garlicky warmth. |
| Savory Fat | Olive Oil or Melted Butter | 2 tbsp | Carries fat-soluble flavor and helps the exterior brown evenly. |
| Warmth & Color | Smoked Paprika | 1 tsp | Imparts a gentle smoky hue and subtle barbecue undertone. |
| Earthy Notes | Onion Powder | 1 tsp | Evenly flavors the meat without burning like fresh diced onion can. |
| Herbal Touch | Dried Oregano or Thyme | ½ tsp | Adds an earthy aromatic note to the sauce. |
| Seasoning | Coarse Kosher Salt | 1 tsp (adjust if using regular soy sauce) | Draws moisture to the meat surface to build an outer crust. |
| Seasoning | Freshly Ground Black Pepper | 1 tsp | Coarse cracked black pepper balances the sweet brown sugar. |
Step-by-Step Cooking Instructions
Step 1: Temper and Dry the Chops
Pull your pork chops out of the refrigerator roughly 25 to 30 minutes before you plan to cook.
Placing cold meat straight into heat causes the exterior to seize up, forcing moisture out.
Grab paper towels and thoroughly pat each chop bone-dry on all sides. Any lingering surface moisture will create steam instead of searing. Season the dry chops generously with the kosher salt, black pepper, and onion powder on both sides.
Step 2: Whisk the Sticky Garlic Glaze
In a medium bowl or glass measuring cup, combine:
- ⅓ cup dark brown sugar
- 3 tablespoons low-sodium soy sauce
- 1.5 tablespoons apple cider vinegar
- 2 tablespoons olive oil
- 5 cloves minced garlic
- 1 teaspoon smoked paprika
- ½ teaspoon dried oregano or thyme
Whisk briskly until the brown sugar has mostly dissolved into a rich, dark marinade.
Step 3: The Rapid Stovetop Sear
Preheat your oven to 400°F (200°C).
Place a cast-iron skillet over medium-high heat with a teaspoon of high-smoke-point oil (like avocado oil).
Once the skillet is shimmering hot, lay the seasoned pork chops down. Sear them untouched for just 90 seconds to 2 minutes per side.
Important Note: You are not cooking the chops through here! You are simply jump-starting the Maillard browning reaction so the meat has a deep, savory crust before it ever touches the sauce.
Step 4: Assemble in the Glass Dish
Transfer the seared pork chops directly into your glass baking dish in a single layer. They can sit close, but shouldn’t overlap.
Pour the entire bowl of brown sugar garlic sauce evenly over the tops of the chops.
Use your basting brush or spoon to make sure every square inch of meat is coated in the glossy liquid, letting the rest pool around the base of the chops.
Step 5: Bake and Baste
Slide the uncovered glass dish onto the center rack of your preheated 400°F (200°C) oven.
Bake for 15 to 20 minutes total.
At the 10-minute mark, open the oven door, carefully slide the rack out slightly, and use a spoon to scoop up the bubbling sauce from the bottom of the dish, basting it right back over the tops of each chop.
As the liquid bubbles away in the hot glass pan, the soy and brown sugar will reduce, thickening into a glossy, sticky glaze that clings to the browned edges.
Step 6: The Digital Thermometer Test
At minute 15, insert the probe of your digital instant-read thermometer into the thickest center of the largest chop, avoiding any pockets of bone or surface edges.
You are looking for 140°F to 142°F (60°C to 61°C).
If it hasn’t reached that yet, give it another 3 to 5 minutes. As soon as it hits 142°F, pull the dish out immediately. Do not wait for it to reach 165°F.
Step 7: The Baste and Rest
Set the hot baking dish on a trivet or cutting board.
Ladle the rich, dark, bubbly pan juices over the tops of the chops one more time.
Now, let them rest undisturbed in the dish for 5 to 8 minutes.
During this rest, the internal temperature will rise by 3 to 5 degrees to reach that safe, tender 145°F mark, while the meat fibers relax and reabsorb the flavorful juices. The glaze in the pan will continue to thicken into a savory syrup as it cools slightly.
Pitfalls to Avoid
- Using Bone-Dry Thin Cuts: If your supermarket only stocks thin, half-inch “breakfast chops,” cut the baking time down drastically (8 to 10 minutes total) or skip the oven altogether and cook them entirely in a skillet on the stovetop.
- Skipping the Vinegar: Leaving out the apple cider vinegar results in a sauce that tastes like pure candy syrup. That small splash of acid cuts the heavy sugar, balancing the rich garlic and soy flavors.
- Covering the Dish with Foil: Do not cover the glass pan with aluminum foil while baking! Foil traps steam, which dilutes the sauce and leaves you with watery, grey pork instead of a sticky, caramelized glaze. Let the hot, dry air circulate so the liquid reduces properly.
Leftovers & Meal Prep Ideas
Store any leftover pork chops submerged in their leftover pan sauce inside a sealed glass container in the fridge for up to 4 days.
Because the chops were cooked gently to 145°F, they won’t dry out when reheated properly.
Avoid microwaving them at full power. Instead, slice the cold chop into thin strips across the grain and warm them in a nonstick skillet over medium-low heat with a spoonful of the reserved pan juices until the glaze turns glossy and coats the meat again.
Serve them over a bowl of steamed jasmine rice with sautéed baby bok choy, or layer the sliced glazed pork into warm flour tortillas with crunchy slaw and a squeeze of lime.
OMG, this sounds delicious. I can’t wait to give this a try.