
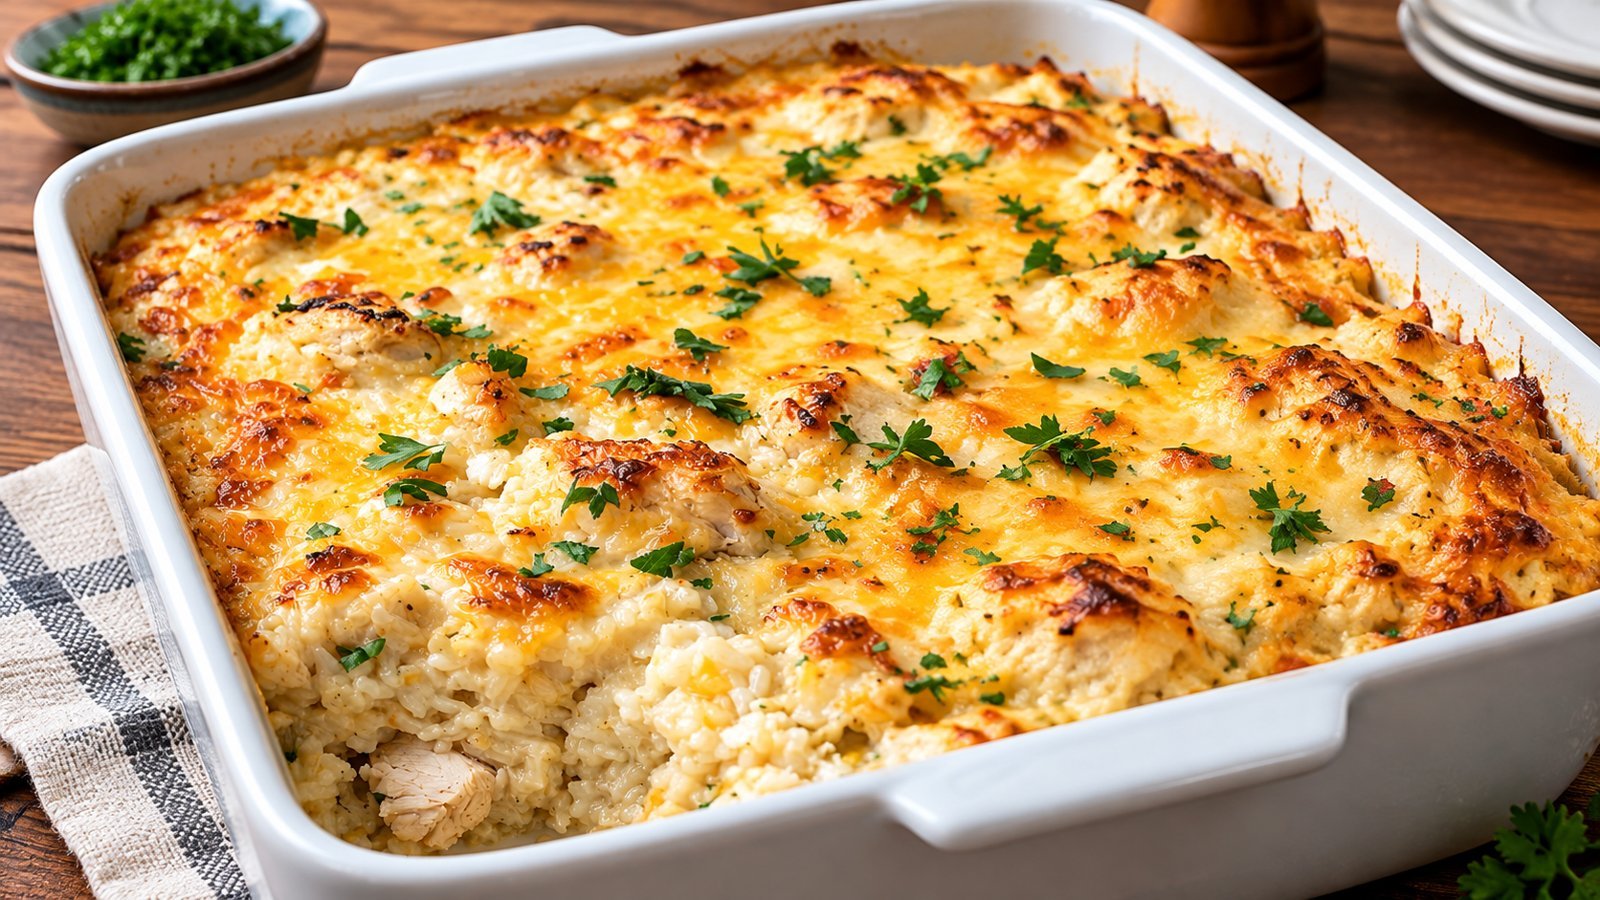
Let us talk about that specific Wednesday night feeling. You know the one I am talking about. You come home, your feet are aching, your brain is absolutely fried from a endless day of decision-making, and the absolute last thing you want to do is spend two hours standing over a hot stove washing five different pans. All you want is a warm, deeply satisfying, hug-in-a-bowl kind of dinner. For me, and for so many of us who grew up with home-cooked meals, that ultimate comforting dinner has always been chicken and rice casserole.
But let us be totally honest with each other here. We have all eaten some truly terrible casseroles in our lives. I still vividly remember the first time I tried to make one on my own in my tiny college apartment. I had zero cooking skills but a massive craving for my mother's cooking. I threw dry white rice, raw cubed chicken breast, a can of condensed cream of mushroom soup, and a mountain of cheap pre-shredded cheddar cheese into a glass dish, popped it in the oven, and hoped for a miracle.
What came out of that oven was nothing short of a culinary tragedy. The rice in the center of the dish was still crunchy enough to chip a tooth, while the rice around the edges had turned into a sad, gummy paste. The chicken was dry, stringy, and completely devoid of any real seasoning, and a thick, oily yellow slick of melted grease from the pre-shredded cheese sat pooled on top. It was bland, heavy, and downright disappointing. I ended up throwing most of it away and ordering a pizza, feeling like a complete failure in the kitchen.
That early disaster set me on a multi-year quest to perfect the humble chicken and rice casserole. I knew it had the potential to be spectacular. I wanted to create a recipe that was incredibly creamy and rich without relying on those metallic-tasting canned condensed soups. I wanted tender, juicy, flavorful bites of chicken. I wanted every single grain of rice to be perfectly fluffy, fully cooked, and coated in a velvety, flavorful sauce. And, of course, I wanted a golden-brown, bubbly cheese crust that pulls apart beautifully when you dig in with a large spoon.
After dozens of tests, messy countertops, and a lot of trial and error in my own kitchen, I finally cracked the code. Today, I am sharing all of my secrets, tips, and the complete step-by-step guide to making the absolute best cheesy chicken and rice casserole you will ever taste. Grab a warm drink, and let us talk about how to transform this classic dish into a gourmet comfort meal.
The Science of a Great Casserole: Why Traditional Recipes Fail
To understand how to make a truly great casserole, we first have to understand why so many of them turn out poorly. A casserole is essentially a self-contained ecosystem inside a single baking dish. Everything in that dish needs to cook at the same rate and harmonize in terms of moisture. If you do not balance your ingredients properly, the physical properties of the food will work against you.
The biggest culprit in a bad casserole is starch management. Rice is packed with starch. If you bake raw rice directly in a heavy cream sauce without enough free liquid, the starch will absorb all the moisture instantly, leaving the sauce dry, clumpy, and chalky. On the other hand, if you add too much liquid to compensate, you end up with a watery, soupy mess where the chicken pieces drown and the rice turns into mush.
Then there is the protein. Chicken breast is incredibly lean. If you cut it into small pieces and bake it for forty-five minutes alongside raw rice, it will overcook and turn into dry sawdust. Chicken needs gentle heat or a protective barrier to retain its moisture, especially when baked.
And let us not forget the cheese. Many people grab a bag of pre-shredded cheddar from the grocery store because of the convenience. What they do not realize is that pre-shredded cheese is coated in anti-caking agents like potato starch or powdered cellulose. This prevents the shreds from sticking together in the bag, but it also prevents the cheese from melting smoothly. Instead of a cohesive, gooey cheese blanket, you get a grainy, greasy layer that separates under high heat.
By addressing each of these elements individually, we can construct a dish that is perfectly balanced. We will use par-cooked rice to ensure even texture, sear our chicken before it goes into the oven to build flavor, create a simple homemade cream sauce that blows the canned stuff out of the water, and grate our own cheese for that picture-perfect pull.
Choosing Your Ingredients with Purpose
Before we grab our baking dish, let us talk about what is actually going into this recipe. Every single ingredient plays a crucial role in building layers of deep, savory flavor.
Ingredients List:
| Ingredient | Amount | Notes |
|---|---|---|
| Long-grain white rice | 1.5 cups | Dry weight, rinsed thoroughly |
| Chicken breasts or thighs | 1.5 pounds | Cut into bite-sized chunks |
| Olive oil | 2 tablespoons | For searing the chicken |
| Unsalted butter | 4 tablespoons | For the sauce roux |
| All-purpose flour | 4 tablespoons | To thicken the sauce |
| Chicken broth | 2 cups | Low sodium preferred |
| Whole milk or heavy cream | 1.5 cups | For richness |
| Garlic powder | 1 teaspoon | For savory depth |
| Onion powder | 1 teaspoon | Essential background flavor |
| Smoked paprika | 0.5 teaspoon | For a touch of color and warmth |
| Italian seasoning | 1 teaspoon | Dried herbs blend |
| Sharp cheddar cheese | 2 cups | Grated from a block |
| Monterey Jack cheese | 1 cup | Grated from a block for extra melt |
| Salt and black pepper | To taste | Season every layer |
| Fresh parsley | 0.25 cup | Finely chopped for garnish |
Let us dive into why these specific ingredients work so well and how you can make smart substitutions if needed.
For the rice, I highly recommend using a sturdy long-grain white rice like Jasmine or Basmati. These varieties have a wonderful natural aroma and hold their shape beautifully during baking without turning into paste. Avoid short-grain rices like arborio unless you are intentionally trying to make a risotto-style dish, as they release too much starch and will make the casserole overly sticky.
If you want to use brown rice, you absolutely can, but you must adjust your cooking time. Brown rice has an outer bran layer that takes much longer to soften. If you use brown rice, you will need to cook it almost completely on the stove before mixing it with the other ingredients, otherwise it will remain unpleasantly chewy in the oven.
When it comes to the chicken, you have two great options. Boneless, skinless chicken thighs are my personal favorite for casseroles because they contain more fat and connective tissue, making them incredibly forgiving. Even if they stay in the oven a bit too long, they remain juicy and tender. However, if you prefer white meat, chicken breasts work wonderfully too. Just make sure to sear them quickly on the stove first to lock in the juices, leaving them slightly underdone in the center so they finish perfectly in the oven.
Another fantastic time-saving option is to use leftover rotisserie chicken. If you have a busy weeknight, grabbing a rotisserie chicken from the grocery store, shredding the meat, and folding it into the rice and sauce is a brilliant shortcut that still yields an incredibly delicious result.
For the cheese, a blend of sharp cheddar and Monterey Jack is the absolute gold standard. Sharp cheddar brings that intense, tangy cheese flavor we all crave, while Monterey Jack provides that creamy, gooey, stretchy texture. Always buy blocks of cheese and grate them yourself using a box grater. It takes less than three minutes, and the difference in how the cheese melts is absolutely mind-blowing. If you want a bit of a kick, you can swap the Monterey Jack for Pepper Jack.
The Sauce: Saying Goodbye to the Can
If there is one thing I want you to take away from this guide, it is this: make your own cream sauce. I know the temptation to open a can of condensed soup is incredibly strong. It is quick, it is cheap, and it is what our parents and grandparents used for decades. But once you make a quick homemade sauce, you will never go back to the canned stuff.
A homemade sauce allows you to control the sodium levels, avoid artificial preservatives, and infuse real, fresh flavors into the dish. We start with a classic roux, which is just equal parts fat (butter) and flour cooked together in a pan. This acts as our thickening agent.
Once the roux is cooked for a minute to get rid of the raw flour taste, we slowly whisk in warm chicken broth and whole milk. Heating your liquids slightly before adding them to the hot roux is a game-changer tip. If you pour ice-cold milk into a hot flour-and-butter mixture, the fat will seize up, resulting in a lumpy sauce. Warm liquid creates a silky, smooth, velvety emulsion almost instantly.
We season this sauce generously with garlic powder, onion powder, smoked paprika, salt, pepper, and a touch of Italian seasoning. This becomes the flavor vehicle that coats every single grain of rice and piece of chicken. It is rich, savory, and incredibly satisfying.
Step-by-Step Guide to Casserole Perfection
Now that we understand our ingredients and the science behind them, let us walk through the actual cooking process. Grab a large skillet, a medium saucepan, a box grater, and a 9×13-inch baking dish.
Step 1: Prep and Par-cook the Rice
First, preheat your oven to 375 degrees Fahrenheit. Grease your 9×13-inch baking dish with a bit of butter, olive oil, or non-stick cooking spray.
Rinse your long-grain white rice in a fine-mesh strainer under cold running water until the water runs completely clear. This washes away excess surface starch, which is the secret to keeping the grains separate and fluffy in the final dish rather than clumping together.
Cook the rice in a pot with salted water or chicken broth, but cut the cooking time short. If the package instructions say to simmer the rice for fifteen minutes, cook it for only eight to ten minutes. You want the rice to be mostly cooked but still have a distinct, firm bite in the center. It will finish absorbing moisture and tenderizing in the oven. Drain any excess water and set the rice aside in a large bowl.
Step 2: Sear the Chicken
Heat your olive oil in a large skillet over medium-high heat. Pat your chicken pieces completely dry with a paper towel. Wet chicken will steam instead of sear, and we want a nice golden-brown crust on our chicken to build deep flavor.
Season the chicken pieces generously with salt, black pepper, and a pinch of garlic powder. Add them to the hot skillet in a single layer. Do not crowd the pan; if your skillet is small, cook the chicken in two separate batches.
Sear the chicken for about two to three minutes per side until a golden crust forms. The chicken does not need to be fully cooked through at this stage; it will finish cooking in the oven. Transfer the seared chicken to a plate and set it aside, making sure to save all those delicious pan juices that accumulate.
Step 3: Make the Homemade Cream Sauce
In the same skillet you used to sear the chicken, turn the heat down to medium and melt the four tablespoons of unsalted butter. There is no need to clean the pan first; those browned bits stuck to the bottom are packed with caramelized chicken flavor.
Once the butter is melted and bubbling, sprinkle in the four tablespoons of all-purpose flour. Whisk constantly for about one to two minutes. You will see the mixture foam up and turn a light golden color. It should smell slightly nutty. This indicates that the raw flour taste has been cooked out.
Slowly, in a steady stream, pour in your warm chicken broth while whisking vigorously with your other hand to prevent lumps. Once the broth is fully incorporated and smooth, slowly whisk in the warm milk or heavy cream.
Bring the mixture to a gentle simmer. Reduce the heat to low and let it cook for about three to five minutes, stirring frequently, until the sauce thickens enough to coat the back of a spoon.
Stir in your garlic powder, onion powder, smoked paprika, Italian seasoning, a teaspoon of salt, and a generous crack of black pepper. Taste the sauce at this point. It should taste slightly salty and highly seasoned. Remember, this sauce is going to flavor a large amount of unseasoned rice and chicken, so it needs to have a strong flavor profile.
Step 4: Assemble the Casserole
Now comes the fun part: bringing everything together. In your greased baking dish, combine the par-cooked rice and the seared chicken pieces, along with any juices that accumulated on the chicken plate.
Pour your gorgeous, velvety cream sauce evenly over the top of the chicken and rice.
Add half of your freshly grated cheddar and Monterey Jack cheese directly into the mixture. Use a large spoon or spatula to gently fold everything together until every grain of rice is coated in sauce and the cheese is evenly distributed throughout the casserole.
Smooth the top of the mixture with your spatula. Now, scatter the remaining half of the cheddar and Monterey Jack cheese in an even, thick layer across the entire top of the casserole. This will melt down to create that irresistible golden-brown cheese crust.
Step 5: The Bake
Cover your baking dish tightly with aluminum foil. This is a crucial step because it traps the steam inside the dish, allowing the par-cooked rice to finish cooking perfectly without drying out the casserole.
Place the dish in the preheated oven and bake for twenty minutes.
Carefully remove the aluminum foil. The cheese on top should be completely melted and gooey. Pop the dish back into the oven uncovered for another ten to fifteen minutes, until the cheese is bubbling vigorously around the edges and develops beautiful golden-brown spots on top. If you want an extra crispy top, you can turn on your oven broiler for the last two minutes, but watch it like a hawk so it does not burn.
Step 6: The Rest
Once you pull the casserole out of the oven, it will be incredibly tempting to scoop a massive portion directly onto your plate. Resist this urge.
Let the casserole rest on the counter for ten to fifteen minutes before serving. During this time, the sauce will cool slightly and thicken up, absorbing back into the rice and chicken. If you scoop into it immediately, the sauce will be runny and pool at the bottom of the dish. A short rest ensures a perfect, cohesive scoop every single time.
Garnish with a generous handful of finely chopped fresh parsley for a pop of color and a clean, herbaceous contrast to the rich, cheesy flavors.
My Hard-Won Lessons: Common Mistakes to Avoid
I have made every single mistake in the book over the years so that you do not have to. Here are the three most common pitfalls when making a chicken and rice casserole, and exactly how to avoid them.
The first mistake is using leftover, fully cooked cold rice. Many quick recipes suggest using leftover rice from the night before to save time. While this sounds like a great way to reduce food waste, it often leads to a dry, crumbly casserole. Cold, leftover rice has already fully expanded and lost its starch elasticity. When you bake it again in a sauce, it acts like a sponge, absorbing all the liquid but turning mushy and losing its structure. If you must use leftover rice, you will need to increase the amount of liquid in your sauce by about twenty-five percent to compensate for the dryness. For the absolute best results, always par-cook fresh rice specifically for this dish.
The second mistake is cutting your chicken pieces too small. It can be tempting to mince your chicken into tiny, pea-sized pieces so that every single bite of the casserole has a bit of chicken. Do not do this. Tiny pieces of chicken have a very high surface-area-to-volume ratio, meaning they lose their moisture almost instantly when exposed to high heat. Cut your chicken into generous, bite-sized chunks, roughly one inch thick. This allows the outside of the chicken to get a nice sear on the stove while keeping the interior juicy as it bakes inside the moist rice mixture.
The third mistake is forgetting to cover the dish during the first half of the baking process. I once tried to bake this casserole completely uncovered, thinking it would get extra crispy and save me a step. Instead, the top layer of rice dried out completely, turning into rock-hard little pebbles that were painful to chew, while the interior remained soupy. Covering the dish with foil for the first twenty minutes is non-negotiable. It creates an internal steaming chamber that cooks everything evenly.
Fabulous Variations to Keep Things Exciting
Once you master this base recipe, you can start customizing it to fit your family's tastes or whatever ingredients you happen to have in your fridge. Here are some of my favorite variations that I make regularly.
For a veggie boost, try the Broccoli Cheddar Style. This is a classic combination that kids absolutely love. Simply chop up two cups of fresh broccoli florets into small, bite-sized pieces. You can toss them raw directly into the rice and chicken mixture before baking. The steam trapped inside the foil-covered dish will cook the broccoli to a perfect, tender-crisp texture. You can also use sweet peas, diced carrots, or sliced bell peppers.
If you want something incredibly indulgent, try the Smoky Bacon and Ranch Twist. Fry up six strips of thick-cut bacon until they are beautifully crispy. Crumble them up and stir half of the bacon into the rice mixture, saving the other half to sprinkle on top with the cheese. Swap out the Italian seasoning in the sauce for a tablespoon of dry ranch seasoning mix. The combination of smoky bacon, zesty ranch, and sharp cheddar is out of this world.
For a vibrant, southwestern flair, try the Mexican-Inspired Fiesta Casserole. Swap out the Italian seasoning for a tablespoon of your favorite taco seasoning. Fold in a can of drained black beans, a cup of sweet corn kernels, and a small can of diced green chiles. Use Pepper Jack cheese instead of Monterey Jack for a subtle kick of heat, and top the finished casserole with fresh cilantro, sliced jalapeños, and a dollop of cool sour cream.
How to Prep Ahead, Freeze, and Reheat
One of the greatest things about a casserole is how incredibly meal-prep friendly it is. Whether you are cooking for a busy week ahead or wanting to deliver a comforting meal to a friend who is going through a tough time, this dish behaves beautifully.
You can fully assemble this casserole, minus the baking step, up to twenty-four hours in advance. Follow all the steps up to the point of putting it in the oven. Cover the dish tightly with plastic wrap and store it in the refrigerator. When you are ready to bake, remove the plastic wrap, cover the dish with aluminum foil, and bake. Because the ingredients will be cold from the fridge, you will just need to add about ten minutes to the initial covered baking time.
To freeze this casserole, I highly recommend assembling it in a disposable aluminum baking pan. Assemble the casserole fully, but do not bake it. Let all the cooked components, like the par-cooked rice, seared chicken, and warm sauce, cool completely to room temperature before assembling. If you assemble it while the ingredients are still hot and freeze it, steam will condense inside the packaging, creating ice crystals that will make the dish soggy when thawed.
Once the casserole is completely cool, wrap the pan tightly with two layers of heavy-duty aluminum foil. It will keep beautifully in the freezer for up to three months. To bake from frozen, thaw the casserole in the refrigerator overnight, then bake as directed, adding about fifteen minutes to the baking time to ensure it is hot all the way through.
Leftover cheesy chicken and rice casserole makes the absolute best desk lunch the next day, but if you microwave it on high power, the cheese will separate and the rice will dry out. To reheat it perfectly in the microwave, place a portion on a plate, splash a tablespoon of water or milk over the top, and cover it with a damp paper towel. Microwave on medium power in one-minute increments, stirring occasionally, until heated through. The damp paper towel creates a steam barrier, keeping the rice beautifully moist.
If you want to reheat a larger portion, place it back into an oven-safe dish, cover it with foil, and bake at 325 degrees Fahrenheit for fifteen to twenty minutes until it is hot and bubbling again.
What to Serve alongside Your Casserole
Because this casserole is rich, creamy, and filling, it pairs best with light, bright, acidic side dishes that cut through the richness and cleanse your palate.
A simple garden salad dressed with a tangy lemon vinaigrette or a classic Italian dressing is my absolute favorite companion for this meal. The crisp, cold lettuce and acidic dressing provide a wonderful contrast to the warm, comforting, cheesy rice.
Roasted green vegetables also work spectacularly well. Try roasting some asparagus spears or Brussels sprouts with a drizzle of olive oil, salt, pepper, and a squeeze of fresh lemon juice. The caramelized, slightly charred edges of roasted vegetables provide a lovely texture contrast to the soft, creamy casserole.
At the end of the day, cooking should not be a stressful chore. It is about creating something warm and nourishing that makes you and the people you love feel cared for. This cheesy chicken and rice casserole is not fancy restaurant food, and it does not pretend to be. It is rustic, home-style cooking at its absolute finest.
By taking just a few small extra steps, like par-cooking your rice, searing your chicken to get that golden crust, and making a simple cream sauce from scratch, you elevate a humble weeknight dinner into an absolute masterpiece. The next time you have one of those long, exhausting days, skip the takeout menu, put on your favorite music, and spend a little quiet time in your kitchen building this ultimate pan of comfort. Your home will smell incredible, your belly will be full, and your soul will feel just a little bit lighter.