
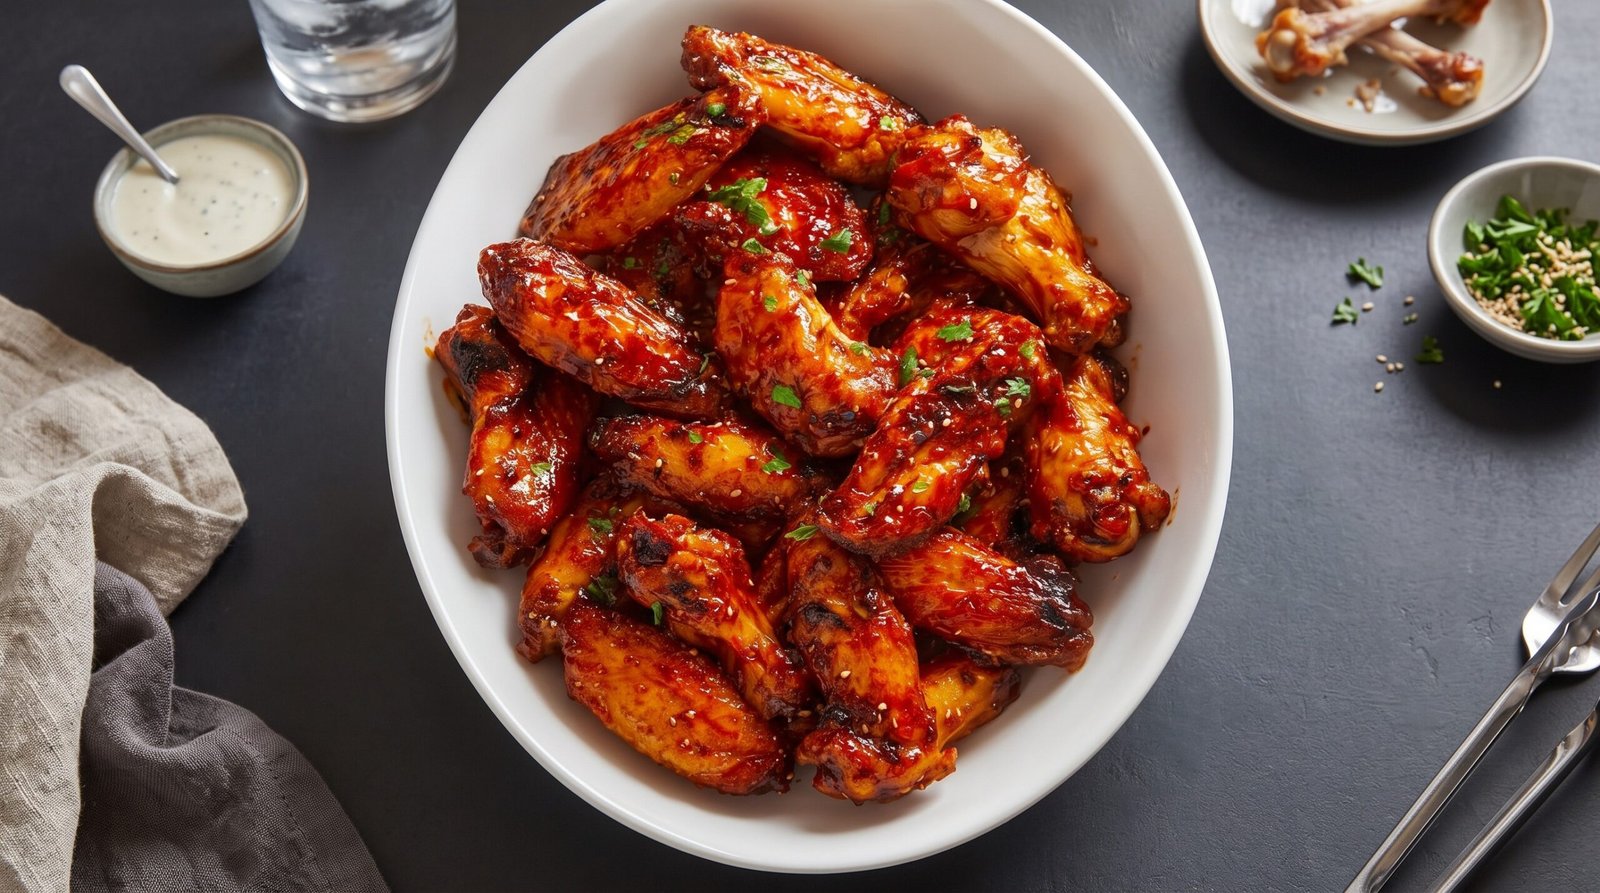
I remember the first time I tried to make really good sticky chicken wings at home. I was hosting a group of friends for a game night, and I thought I could just toss some wings in sauce and throw them in the oven. The result was disappointing because the sauce just slid right off the meat, leaving them looking pale and feeling soggy. I learned that evening that if you want that deep, dark, sticky glaze that clings to every inch of the wing, you have to approach the process in two distinct phases: getting the wing itself textured and cooked, and then building the sauce so it reduces into a thick syrup.
These sticky garlic soy glazed chicken wings are my go-to when I want something savory, a little sweet, and very satisfying. This recipe focuses on how to manage your heat and your ingredients so the sauce doesn't just pool at the bottom of the bowl. You will end up with a plate of wings that have a nice chew and a rich, concentrated coating of garlic and soy that balances out the fatty richness of the poultry.
Why This Recipe Works
The primary reason this recipe hits the mark is the method of cooking the wings before the sauce is applied. By roasting the wings on a wire rack set over a baking sheet, you allow the hot air to circulate all around the skin. This renders out much of the subcutaneous fat, which is the key to preventing a flabby or rubbery bite. When you are working with chicken wings, the skin is often the best part, but only if it has had the chance to crisp up slightly before it meets any liquid.
Another reason this recipe is reliable is the glaze reduction process. A lot of home cooks make the mistake of just dumping a thin soy sauce mixture over wings. Because soy sauce is very watery, it will never coat the chicken effectively on its own. In this recipe, we use a combination of soy sauce, honey, and a touch of aromatics. By simmering this mixture separately in a saucepan until it reaches a syrupy consistency, we ensure that it has the viscosity to stay on the wings. You are essentially painting the wings with a reduction rather than just dipping them in a liquid.
Finally, the balance of flavors is very standard but effective. The saltiness from the soy sauce is tempered by the sweetness of honey or brown sugar. The garlic adds a pungent base note that cuts through the richness of the chicken skin. Because we add the garlic late in the sauce-making process, it retains its flavor without burning and turning bitter, which is a common problem when cooking garlic at high temperatures for too long.
Ingredient Notes
The Wings
| Ingredient | Amount | Notes |
|---|---|---|
| Chicken wings | 3 pounds | Split into flats and drumettes |
| Baking powder | 2 tablespoons | Use aluminum-free for best taste |
| Salt | 1 teaspoon | Fine sea salt works best |
| Black pepper | 1/2 teaspoon | Freshly cracked |
You should always buy your wings split into flats and drumettes to save time. If you buy whole wings, you have to do the work of finding the joints with a sharp knife, which is a messy task. When preparing the wings, pat them extremely dry with paper towels. Moisture is the enemy of a good texture. If the skin is wet, it will steam rather than crisp. The baking powder is a little trick that helps pull moisture out of the skin during the roasting process, leading to a slightly better surface. Do not skip this, but make sure it is baking powder, not baking soda, as soda has a metallic taste that can ruin the meat.
The Sticky Glaze
| Ingredient | Amount | Notes |
|---|---|---|
| Soy sauce | 1/2 cup | Low sodium is preferred |
| Honey | 1/3 cup | Or brown sugar for deeper flavor |
| Garlic | 4 cloves | Minced very finely |
| Rice vinegar | 1 tablespoon | Adds necessary brightness |
| Sesame oil | 1 teaspoon | Added at the very end |
| Fresh ginger | 1 teaspoon | Finely grated |
The soy sauce is the salt foundation, so choosing a low-sodium version allows you more control over the final salt levels. If you only have regular soy sauce, you might want to skip the extra salt in the dry rub for the wings. The honey is essential for the sticky texture; it provides the sugar content that caramelizes and thickens as the sauce reduces. You can substitute half of the honey with dark brown sugar if you want a deeper, molasses-like flavor profile. The rice vinegar is a vital ingredient because it provides a sharp acidity that prevents the wings from feeling too heavy or one-note on the palate. Ginger should be freshly grated rather than powdered to get that clean, spicy zip.
The Recipe
- Prep Time: 15 minutes
- Cook Time: 50 minutes
- Total Time: 1 hour and 5 minutes
- Servings: 4 people
- Difficulty: Intermediate
Equipment needed:
– Large mixing bowl
– Baking sheet
– Wire cooling rack
– Saucepan
– Tongs
– Pastry brush
Step-by-Step Instructions
Step 1: Prep the Wings
Start by preheating your oven to 425°F. While the oven heats up, place your wings in a large bowl. Pat them dry with paper towels until they feel tacky. Add the baking powder, salt, and pepper to the bowl and toss the wings until they are evenly coated in the dry mixture. The coating should be thin and barely visible.
Place the wings on a wire rack set over a rimmed baking sheet. Make sure the wings are not touching each other, as space is necessary for the hot air to circulate. If the wings are crowded, they will steam and the skin will turn out chewy instead of dry and slightly crisp.
Step 2: Roasting the Chicken
Slide the tray into the center of your 425°F oven. Let the wings roast for 45 to 50 minutes. At the 25-minute mark, take the tray out and use your tongs to flip each piece over. This ensures that both sides get even exposure to the heat.
You are looking for the skin to turn a golden-brown color and feel slightly firm when poked with a fork. Use an instant-read thermometer to check the internal temperature of the largest piece. It should reach at least 165°F. Once they hit this temperature and look dry and colored, remove them from the oven.
Step 3: Preparing the Glaze
While the wings are finishing in the oven, grab your saucepan and place it over medium heat. Add the soy sauce, honey, minced garlic, rice vinegar, and grated ginger. Stir everything together until the honey has completely dissolved into the soy sauce.
Bring the mixture to a gentle simmer. You do not want a hard, rolling boil, as this can make the sugars burn quickly. Let the sauce bubble away for about 8 to 10 minutes. You will know it is ready when the bubbles start to look larger and slower, and the liquid coats the back of a spoon. Remove from the heat and stir in the sesame oil.
Step 4: The Glazing Process
Transfer your cooked wings into a large, clean mixing bowl. Pour about three-quarters of the warm glaze over the wings. Using your tongs, toss the wings thoroughly until every surface is coated in the thick, shiny liquid.
If the sauce is the right consistency, it should cling to the skin and look like a lacquer. If you find the wings are a bit dry, add the remaining glaze. Avoid adding too much liquid at once, or you will end up with a puddle of sauce at the bottom of the bowl instead of a coating on the meat.
Step 5: Final Presentation
Once the wings are glazed, move them to a serving platter. If you have any remaining glaze in the bottom of your mixing bowl, use a spoon to drizzle those last drops over the top of the wings.
This is the time to add any final touches like sesame seeds or chopped scallions if you like a bit of extra crunch and color. Serve these while they are hot. The glaze will stay sticky for quite a while, but the best texture is found within the first fifteen minutes of serving.
Mistakes I Made (So You Don't Have To)
Using Too Much Liquid
In my early attempts, I used to add way too much water or broth to my sauce mixture. I thought I needed a lot of liquid to coat all the wings. The problem is that to get that liquid to become sticky, you have to boil it for a very long time, which leads to overly salty and bitter flavors. Fix this by trusting the reduction. A small amount of thick, flavorful sauce is always better than a large bowl of thin, runny liquid.
Crowding the Tray
I used to try to pack as many wings as possible onto a single baking sheet. When the wings are packed tight, they release steam that gets trapped between them. This prevents the skin from ever getting that dry, pleasant texture that allows the sauce to grab on. Always give each wing at least an inch of space. If you have more wings than will fit, use two baking sheets.
Adding the Sauce Too Early
I once tried brushing the sauce on the wings while they were still in the oven, halfway through the roasting process. This was a huge mess. The honey in the sauce started to burn against the hot metal of the rack, creating a black, charred flavor that was very unpleasant. Always bake the wings plain first, and only introduce the sugar-based glaze in the final step.
Not Checking the Temperature
I used to rely only on how the wings looked to decide if they were done. Sometimes they looked browned on the outside but were still raw near the bone. This is a common issue with larger drumettes. Now, I always use a digital meat thermometer. It takes the guesswork out of the process and ensures the chicken is cooked through to 165°F every single time.
Variations and Tips
Using the Air Fryer
If you want to speed up the process, you can cook these in an air fryer. Preheat the air fryer to 400°F and cook the wings for 20 to 25 minutes, shaking the basket halfway through. The result is often even crispier than the oven, but you can only cook as many as will fit in a single layer. This is a great tip for small batches.
Adding Spice
If you like a bit of heat, add a teaspoon of chili flakes or a tablespoon of chili garlic paste to the sauce while it simmers. The sweetness of the honey balances the heat, creating a complex flavor profile that is very popular. Just be careful not to make the sauce too thick if you are adding paste, as it can absorb a lot of liquid.
The Make-Ahead Strategy
You can roast the wings a few hours before you plan to serve them. Just make sure to keep them on the rack. When you are ready to eat, pop them back into a 400°F oven for 5 to 10 minutes to reheat. Make your sauce fresh just before you are ready to toss and serve. This ensures the best texture for your guests.
Using Fresh Herbs
While these wings are traditionally served with just a garnish of sesame seeds, adding fresh cilantro or green onions right before serving adds a nice freshness that cuts through the soy-based saltiness. The brightness of the green herbs makes the plate look much more appetizing.
Storage and Reheating
If you happen to have leftovers, they need to be refrigerated within two hours of cooking. Place them in an airtight container. They will keep in the refrigerator for up to three days. Note that the sauce may soak into the skin over time, so they will not be as crisp the next day.
To reheat, avoid the microwave, as it will make the skin soggy and rubbery. Instead, place them on a wire rack over a baking sheet and heat in a 350°F oven for about 10 to 15 minutes. Ensure they reach an internal temperature of 165°F before serving. These wings do not freeze well after they have been glazed, as the texture of the skin will break down significantly upon thawing.
Frequently Asked Questions
Can I use bone-in, skinless chicken breasts instead of wings?
It is not recommended to use skinless breast meat for this recipe. Chicken wings have a high fat content and skin that becomes delicious when rendered properly. Breast meat lacks this fat and will dry out very quickly in the oven. If you must use a different cut, opt for chicken thighs, which handle the high heat and sticky glaze much better than breast meat does.
Why does my sauce turn into a hard candy instead of a glaze?
This happens if you boil the sauce for too long or if the heat is too high. Honey contains natural sugars that will continue to harden as the water evaporates. If you find your sauce is becoming too thick in the pan, remove it from the heat immediately and stir in a teaspoon of warm water to loosen it up. Keep a close eye on the consistency as it simmers.
Do I really need the baking powder?
The baking powder is technically optional, but it makes a significant difference in the final texture of the skin. It interacts with the surface proteins and creates a drier, more porous crust that crisps up beautifully in the oven. If you do not have any, you can still make the wings, but the skin will be slightly softer and less distinct.
Can I bake the wings directly on the pan without the rack?
You can, but the bottom of the wings will sit in the rendered fat that drips off the meat. This will prevent the bottom side from ever getting crispy, and the wings will be greasier. If you do not have a rack, you can use a crumpled piece of aluminum foil to create an elevated platform for the wings, but a metal wire rack is always the best tool for this job.
What should I serve with these wings?
These wings are quite savory and salty, so they pair best with something cooling and crunchy. A simple side of cucumber salad or some fresh celery sticks provides a nice contrast to the sticky, intense flavor of the glaze. Some people also enjoy serving them with a side of steamed rice, which helps to soak up any extra sauce that might pool on the plate.
Final Thoughts
Making sticky wings at home is a skill that improves the more you do it. The beauty of this recipe is that it focuses on the basics: controlling the heat to manage texture and managing the sauce to control the consistency. Once you get the timing down for your specific oven, you will find it is a very straightforward process that delivers great results every time.
Don't be discouraged if your first batch isn't exactly how you imagined it. The key is to keep the wings separated and to give the sauce enough time to reduce properly. Once you master that simple technique, you can easily adapt the flavor profile with your own favorite spices or aromatics. Happy cooking.