
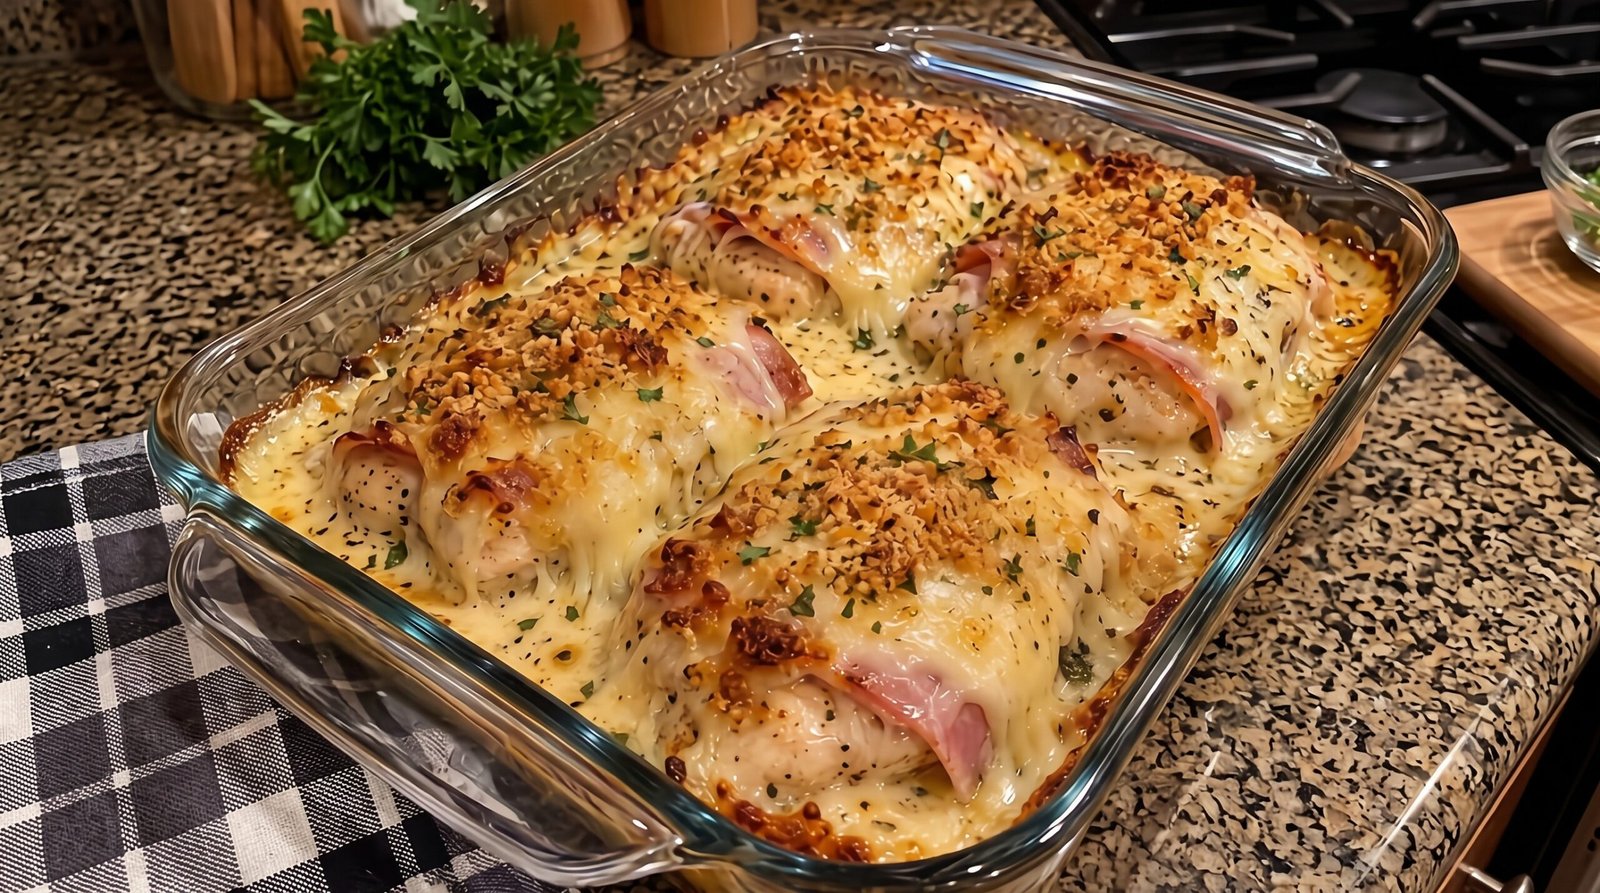
I remember the first time I tried making a fancy stuffed chicken dinner for my family on a Tuesday night. I spent over an hour meticulously rolling up chicken breasts, securing them with toothpicks, and praying the cheese would stay inside. By the time I sat down to eat, I was too tired to enjoy it. That is exactly why this version of a Chicken Cordon Bleu casserole has become a staple in my kitchen. It gives you all the comforting, savory flavors of the classic dish without the tedious assembly. You get tender chicken, salty ham, and melted cheese in a format that works just as well for a quick family dinner as it does when you have a friend over for a meal.
This casserole is built for those nights when you want something satisfying but do not want to spend the whole evening standing at the stove. It captures the essence of the classic dish by layering the components rather than stuffing them. The topping adds a necessary crunch that brings everything together. If you have been looking for a way to get these flavors onto your dinner table without the stress of complicated techniques, this is the approach that will save your sanity.
Why This Recipe Works
The beauty of this casserole is how it handles the chicken. Often, when people bake chicken breasts, they worry about the meat drying out. Because we are layering the chicken with ham and cheese and baking it in a slightly saucy environment, the meat stays tender. The ham provides a salty hit that seasons the chicken from the inside out, while the cheese acts as a binder that keeps everything moist. It is a very forgiving method.
Another reason I rely on this recipe is the topping. A traditional cordon bleu relies on breading, but doing that to every single piece of chicken takes forever. By using a buttered breadcrumb mixture sprinkled over the top, you get that golden, toasted texture in one quick step. It creates a contrast against the soft, melted cheese and the tender chicken underneath. Texture is so important in a baked dish, and this delivers it effortlessly.
The assembly is also quite efficient. You are not dealing with kitchen twine or carefully inserting toothpicks that someone might accidentally swallow later. You simply lay the chicken out, top it, and bake. It is also very easy to scale this up or down. If you are cooking for a crowd, you just need a larger baking dish. If you are cooking for two, you can easily halve the ingredients. It removes the guesswork and the high-maintenance parts of the process, leaving you with a meal that feels special but fits into a busy schedule.
Ingredient Notes
The Chicken and Meat
I always choose boneless, skinless chicken breasts for this dish. They provide a nice, flat surface for the ham and cheese to sit on. If your breasts are very thick, I suggest pounding them slightly so they have an even thickness, which helps them cook at the same rate. You could use chicken thighs if you prefer darker, juicier meat. If you choose thighs, keep in mind they often take a few minutes longer to cook through, so keep a close eye on the thermometer. For the ham, I look for a thin deli-style sliced ham. It is easier to fold over the chicken and does not create a chewy layer. Avoid thick chunks of ham, as they can overwhelm the other delicate flavors.
The Cheese and Sauce
Swiss cheese is the classic choice here, and I highly recommend it for its nutty, slightly sharp flavor. You want a good quality Swiss that melts well, so I usually buy a block and grate it myself. Pre-shredded cheese is tossed in starch to prevent sticking, and that can sometimes stop it from melting into the smooth, silky consistency we want. For the sauce base, I use a combination of sour cream and a touch of Dijon mustard. This adds a bit of tang that cuts through the richness of the cheese. Make sure your sour cream is at room temperature before you mix it, as it will incorporate more smoothly into the other ingredients.
The Topping
This is where the crunch comes from. I use Panko breadcrumbs because they are coarser and stay crispier in the oven compared to fine, powdery breadcrumbs. I mix them with melted salted butter and some dried parsley for a bit of color. If you are feeling fancy, a little bit of garlic powder in the crumbs adds another layer of flavor. Do not skip the butter. It is essential for browning the crumbs. Without it, the topping will taste like dry, dusty flour. You can use any crusty bread you have on hand and blitz it in a food processor if you do not have Panko, just ensure the pieces are relatively uniform so they brown at the same speed.
| Ingredient | Amount | Notes |
|---|---|---|
| Chicken breasts | 4 medium | Boneless and skinless |
| Deli ham | 8 slices | Thinly sliced |
| Swiss cheese | 2 cups | Freshly grated |
| Sour cream | 1/2 cup | Full fat is best |
| Dijon mustard | 1 tablespoon | For tang |
| Panko breadcrumbs | 1 cup | For the crust |
| Melted butter | 3 tablespoons | Salted or unsalted |
| Dried parsley | 1 teaspoon | For color |
| Salt and pepper | To taste | Go easy on the salt |
The Recipe
- Prep Time: 15 minutes
- Cook Time: 35 minutes
- Total Time: 50 minutes
- Servings: 4
- Difficulty: Easy
Equipment Needed:
– 9×13 inch glass baking dish
– Small mixing bowl
– Meat thermometer
– Chef's knife and cutting board
Step-by-Step Instructions
Step 1: Prep the Oven and Dish
Start by preheating your oven to 375°F (190°C). Getting the oven to the right temperature before the chicken goes in is crucial for even cooking. While the oven warms up, lightly grease your 9×13 inch glass baking dish. I use a little bit of butter or non-stick spray. You do not need much, just enough to ensure the chicken does not stick to the bottom.
Taking these few minutes to prep the space will make the assembly much faster. Once the oven is hot and the dish is ready, gather all your ingredients on the counter so you have everything within reach.
Step 2: Prepare the Chicken
Lay the four chicken breasts out on your cutting board. If they are uneven in thickness, take a rolling pin or a heavy pan and gently pound the thicker ends until the breast is roughly uniform. This ensures that the thin end does not dry out while the thick end is trying to reach the proper temperature.
Pat the chicken dry with a paper towel. This helps the seasonings stick better. Season the chicken very lightly with a small pinch of salt and black pepper on both sides. Remember that the ham and the cheese are both quite salty, so you really do not need much extra salt at this stage.
Step 3: Layer the Components
Place the chicken breasts into your prepared baking dish. You want them side by side, not touching too much. In a small bowl, whisk together the sour cream and the Dijon mustard until it is a smooth, creamy sauce. Spread a thin layer of this mixture over the top of each chicken breast.
Next, place two slices of ham on top of each chicken breast. Fold the ham if necessary so it sits neatly on the meat. Finally, take your freshly grated Swiss cheese and pile it generously over the ham. The cheese should cover the top of the chicken and the ham completely. This keeps the ham tucked in and ensures the chicken stays moist.
Step 4: The Crunchy Topping
In a clean small bowl, toss your Panko breadcrumbs with the melted butter and the dried parsley. Mix it with a fork until every crumb looks moist and slightly coated in the butter. If the mixture seems too dry, add just another half tablespoon of butter.
Evenly sprinkle this buttery crumb mixture over the piles of Swiss cheese. Make sure you cover the edges as well, as this will help keep the cheese from running everywhere and burning on the side of the glass dish. The topping should look like a light, sandy crust across the top of the casserole.
Step 5: Bake the Casserole
Slide the baking dish into the center rack of your 375°F (190°C) oven. Set a timer for 35 minutes. You are looking for the chicken to be fully cooked and the cheese to be melted and bubbly. The breadcrumb topping should have turned a light golden brown color.
At the 35-minute mark, use your meat thermometer to check the thickest part of the chicken breast. You want it to reach an internal temperature of 165°F (74°C). If it is not quite there, give it another 3 to 5 minutes, but keep a close eye on it so the breadcrumbs do not burn.
Step 6: Rest and Serve
Once the internal temperature reaches 165°F (74°C), take the dish out of the oven. This is the hardest part, but you must let the chicken rest for about 5 minutes before you try to serve it. This allows the juices to redistribute back into the meat.
If you cut into it immediately, the juices will run out and the chicken will be significantly drier. Use a spatula to carefully lift each piece of chicken, keeping the ham and cheese topping intact as you transfer it to a plate. Serve immediately while it is still hot and the cheese is soft.
Mistakes I Made (So You Don't Have To)
Overcooking the Chicken
The most common mistake I made early on was leaving the chicken in for too long. Chicken breasts are lean, and 40 or 45 minutes at 375°F (190°C) is often too much. It turns the chicken into a dry, chalky mess. The fix is simple: use your meat thermometer. Once that internal temp hits 165°F (74°C), get it out of the oven immediately. Do not guess based on time alone, as ovens can vary.
Using Thick Slices of Ham
I once tried this with thick, honey-baked ham slices from a holiday leftover pile. Because the ham was so thick, it did not bend over the chicken and it made the layers slide off. It also added too much sugar, which caused the cheese to brown unevenly. Always stick to thin deli-cut ham. It stays in place and allows the flavor to permeate the chicken without being intrusive.
Forgetting the Butter on the Panko
I tried to skip the butter one time to save calories. The result was dry, pale breadcrumbs that tasted like sawdust. They did not brown at all. The butter is the catalyst for the crunch and the color. If you are worried about the amount, you can reduce it to two tablespoons, but do not omit it entirely. You need that fat to toast the bread.
Not Grating the Cheese Fresh
I used a bag of pre-shredded cheese once because I was in a rush. It turned out gritty and it did not melt into the creamy, gooey layer that this recipe needs. The anti-caking agents in bagged cheese prevent it from becoming that smooth, molten layer we love. Grating your own cheese from a block takes only an extra minute, and the texture difference is huge.
Variations and Tips
Add Some Herbs
If you want to change the flavor profile, try adding a little fresh thyme or minced chives to the breadcrumb mixture. The woodsy aroma of thyme works really well with the Swiss cheese and ham. Just make sure to finely chop fresh herbs so they do not overpower the bite.
Swapping the Cheese
While Swiss is traditional, you can use Gruyere if you want a deeper, earthier flavor. Gruyere melts beautifully and tastes a bit more sophisticated. If you prefer a milder taste, white cheddar works too, although it will be a bit more oily than the Swiss.
The Make-Ahead Strategy
This dish is a lifesaver if you do the prep work early. You can assemble the chicken, sauce, ham, and cheese in the dish, cover it, and keep it in the fridge for up to 4 hours before baking. Just wait to add the Panko topping until right before you put it in the oven. If the crumbs sit on the moist cheese for too long, they will get soggy before they even hit the heat.
Adding Veggies
I sometimes tuck a few stalks of blanched asparagus underneath the ham. It cooks right along with the chicken. Make sure the asparagus is thin and tender before you start; if it is too thick, it will not cook through in 35 minutes. It adds a nice pop of color and freshness to an otherwise rich, savory meal.
Storage and Reheating
If you have leftovers, store them in an airtight container in the refrigerator within 2 hours of cooking. They will stay fresh for up to 3 days. When you are ready to eat them, the best way to reheat is in the oven at 350°F (175°C) for about 10 to 15 minutes, until it is warmed through to 165°F (74°C).
Using the microwave can make the Panko crust go soft, but it is faster if you are in a hurry. If you use the microwave, heat it in short 30-second bursts to avoid making the chicken rubbery. I do not recommend freezing this dish. The cheese and cream sauce tend to separate and become watery when thawed and reheated, and the chicken texture usually suffers quite a bit. It is best enjoyed fresh or from the fridge within a few days.
Frequently Asked Questions
Can I use chicken thighs for this?
Yes, you definitely can. Chicken thighs are more forgiving than breasts and stay juicy even if you accidentally bake them a little longer. If you use thighs, keep the cooking time roughly the same, but always use your meat thermometer to check for that 165°F (74°C) mark. They might take 5 minutes longer depending on the size of the thighs.
What should I serve with this casserole?
Since the dish is quite rich with the cheese and the creamy sauce, I like to serve it with something light. A simple green salad with a sharp vinaigrette helps cut through the richness. Steamed green beans or roasted broccoli are also great sides that do not compete with the flavors of the main dish.
Why is my cheese not melting smoothly?
The most likely culprit is using pre-shredded cheese. The cellulose used to keep the shreds from clumping in the bag interferes with the melting process. Always grate your Swiss cheese from a block. Also, make sure you are not burying the cheese under too many other toppings; it needs a little bit of airflow to melt into that gooey, delicious consistency.
Can I skip the Dijon mustard?
You can, but I really encourage you to keep it in. The mustard does not make the dish taste like mustard. Instead, the acidity of the Dijon helps balance the heavy, salty profile of the Swiss cheese and the ham. If you absolutely cannot use it, a small squeeze of fresh lemon juice in the sour cream can achieve a similar result.
What if I do not have Panko breadcrumbs?
If you have regular breadcrumbs, you can use them, but the texture will be less crunchy and more of a soft crust. If you have some crusty bread in your pantry, pulse it in a food processor to create your own coarse crumbs. Just make sure the pieces are around the same size so they brown evenly without burning.
Final Thoughts
Making this casserole has simplified my dinner routine so much. It is one of those meals that feels like a bit of a treat, especially with that crunchy topping and the melted cheese, but it is easy enough for any night of the week. There is no stress about rolling or securing the meat, just layering it and letting the oven do the hard part.
I hope this becomes a go-to for your kitchen as well. It is straightforward, honest food that hits the spot when you are looking for something warm and savory. Just keep your thermometer handy, take your time with the prep, and enjoy the result.