
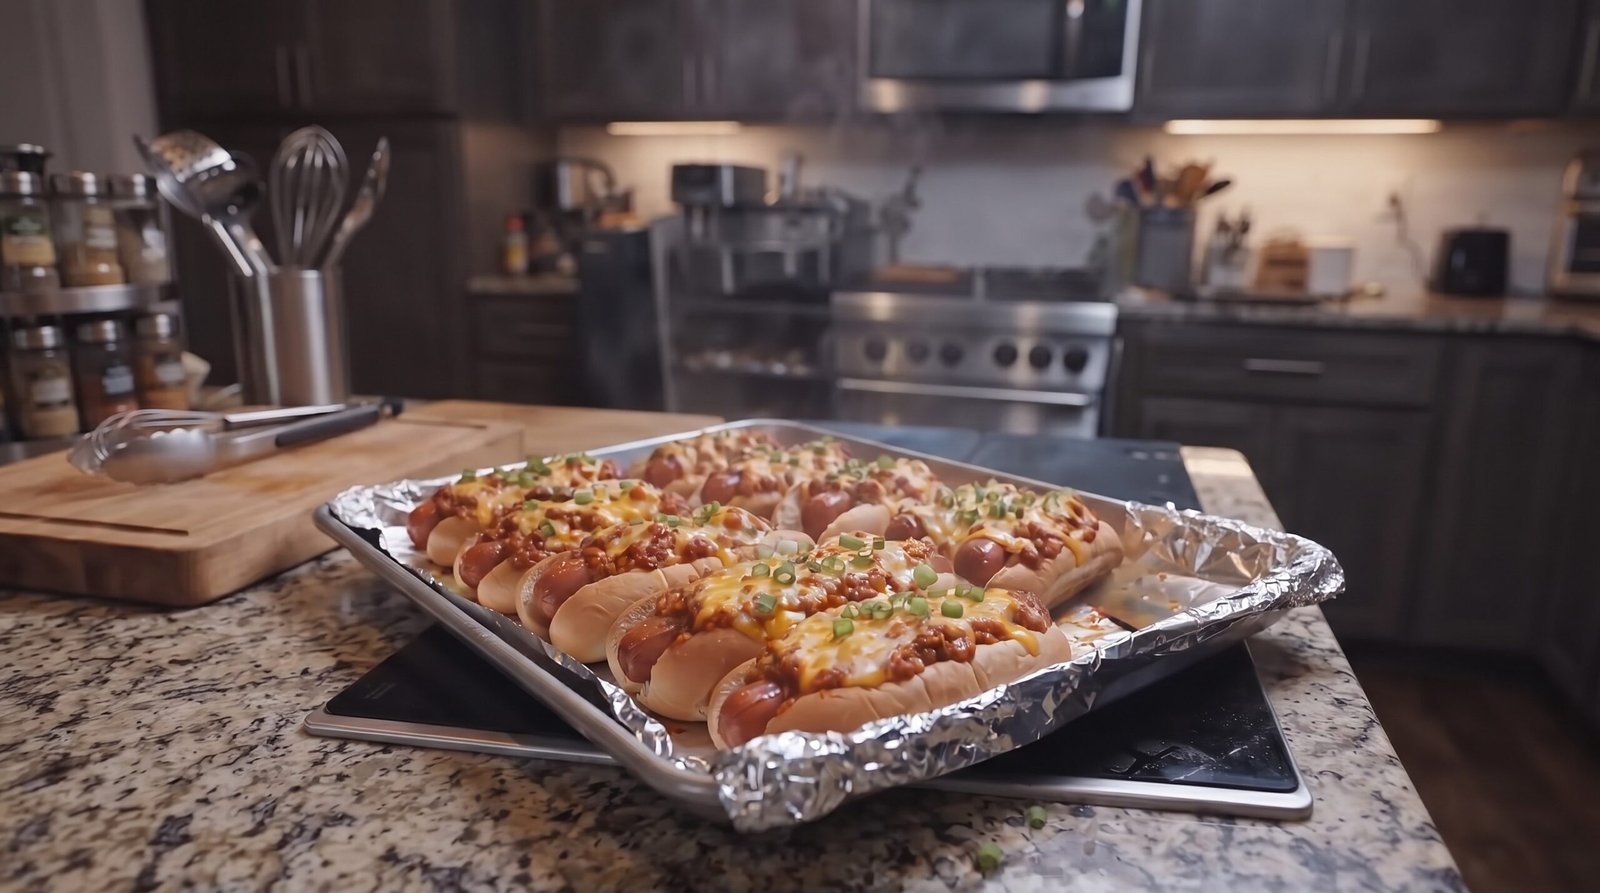
Sometimes dinner sneaks up on me, and I find myself staring at the fridge wondering how to make something satisfying without spending hours standing at the stove. Chili cheese hot dogs are my reliable fallback because they feel like a treat while being incredibly straightforward to put together. Everyone in my house is always happy to see these on the tray, especially when the weather turns cool or we have a busy weekend evening ahead. It is the kind of comfort food that does not require a fancy kitchen setup but still delivers on flavor every single time.
My approach to these involves building the chili on the stove while the oven does the heavy lifting for the buns and hot dogs. By assembling them on a sheet pan, you ensure that everything gets warm at the same time, the cheese reaches that molten state, and the buns get just enough heat to hold everything together. This guide walks you through making these chili cheese hot dogs from scratch so you can have a reliable meal ready in about forty minutes.
Why This Recipe Works
The beauty of this method lies in how the textures interact once the tray comes out of the oven. Because we toast the buns slightly with the meat inside, the bread does not get soggy immediately. The chili settles into the crevices of the hot dog, while the cheese creates a layer that binds everything together. It is a simple assembly that relies on the contrast between the savory meat sauce and the soft texture of the bun.
Another reason this recipe is a staple in my rotation is the control you have over the flavor. Making the chili from scratch means you can adjust the spice level to suit whoever is at the table. If you prefer a bit of heat, you can add extra chili flakes or diced peppers, but if you want to keep it mild for younger eaters, you can keep the seasonings simple. The consistency of the chili is also important; by letting it simmer until it thickens, you ensure it stays inside the bun rather than sliding off onto the tray.
Consistency is key when feeding a crowd. When you bake these on a single sheet pan, you do not have to worry about flipping individual dogs in a pan or managing multiple burners. Everything bakes at 400 degrees Fahrenheit, which provides a steady heat that warms the meat through without drying out the buns. It takes the stress out of the preparation and lets you focus on side dishes or cleaning up while the timer counts down.
Finally, the cleanup is minimal. Using a sheet pan lined with heavy-duty foil makes the transition from oven to table very easy. Once you serve the dogs, you can simply pull the foil off the pan and toss it, which saves you from scrubbing stubborn baked-on cheese. It is a practical way to enjoy a meal that usually leaves behind a significant mess in the kitchen.
Ingredient Notes
The Hot Dogs and Buns
When buying hot dogs, look for high-quality beef franks that feel firm in the package. Since the dog is the base of the entire flavor profile, choosing a brand you trust makes a difference. I usually go for standard-sized franks, but you can use jumbo ones if you adjust the assembly slightly. For the buns, look for split-top brioche or sturdy potato rolls. These handle the weight of the chili and cheese much better than the basic white hot dog buns found at the grocery store, which tend to tear easily once they get warm.
The Chili Base
The chili needs to be thick and flavorful. I prefer using lean ground beef, around 85 percent lean, so there is enough fat for flavor but not so much that the chili becomes greasy. Tomato paste is essential here because it adds depth and helps the sauce thicken as it simmers. I season my chili with chili powder, cumin, a pinch of garlic powder, and a dash of Worcestershire sauce. You do not need a lot of ingredients to make a hearty sauce that coats the hot dogs well.
The Cheese and Toppings
For the cheese, skip the pre-shredded bags if you can. Those contain anti-caking agents that prevent the cheese from melting smoothly. Instead, buy a block of sharp cheddar or mild cheddar and grate it yourself. It makes a significant difference in how the cheese melts over the hot dogs. For the green onion topping, use fresh scallions and slice them thin. The sharp, oniony bite cuts through the richness of the cheese and the savory chili, which balances the whole dish.
| Ingredient | Amount | Notes |
|---|---|---|
| Beef Hot Dogs | 8 count | Use all-beef franks |
| Hot Dog Buns | 8 count | Brioche or potato rolls |
| Ground Beef | 1 pound | 85 percent lean |
| Tomato Paste | 3 tablespoons | For thick consistency |
| Chili Powder | 2 tablespoons | Adjust for spice preference |
| Ground Cumin | 1 teaspoon | Adds earthiness |
| Garlic Powder | 1 teaspoon | Use fine powder |
| Worcestershire Sauce | 1 tablespoon | Adds savory depth |
| Sharp Cheddar | 2 cups | Grate by hand for best melt |
| Scallions | 3 stalks | Thinly sliced for garnish |
| Water or Beef Broth | 0.5 cups | To thin the sauce |
The Recipe
- Prep Time: 15 minutes
- Cook Time: 25 minutes
- Total Time: 40 minutes
- Servings: 8 hot dogs
- Difficulty: Easy
- Equipment Needed:
- Large skillet
- Sheet pan
- Heavy-duty aluminum foil
- Box grater
- Spatula
- Meat thermometer
Step-by-Step Instructions
Step 1: Prepare the Chili Sauce
Start by placing your skillet over medium-high heat. Add the ground beef and break it into small crumbles using your spatula. You want the meat to brown thoroughly, so avoid moving it around too much for the first few minutes. Once the pink is mostly gone and the meat has some color, drain any excess grease carefully. Add the garlic powder, chili powder, and cumin to the beef, stirring for one minute until the spices become fragrant.
Stir in the tomato paste and the water or beef broth. Reduce the heat to medium-low and let the mixture simmer. You want the liquid to reduce until the chili is thick and glossy, which usually takes about ten minutes. If the chili looks too dry, add a splash more broth. The final texture should be thick enough to stay on the hot dog when you scoop it, not runny like a soup.
Step 2: Prepare the Oven and Pan
Preheat your oven to 400 degrees Fahrenheit. Line your large sheet pan with a piece of aluminum foil that covers the bottom and comes up the sides slightly. This ensures that even if some cheese drips, the cleanup remains simple. Arrange your hot dog buns on the tray. If they are the type that stay closed, you may need to open them slightly so the hot dog has a secure place to sit.
Place one hot dog into each bun. Some people prefer to grill the hot dogs first for extra flavor, but for this tray-bake method, placing them raw into the buns is fine because they will cook through during the baking process. If you choose to pre-cook the hot dogs in a pan, reduce the final oven time by about five minutes to ensure they do not become shriveled.
Step 3: Assemble the Hot Dogs
Once the chili has thickened, take it off the heat. Use a spoon to distribute the chili evenly over each hot dog. Start with a small amount and work your way down the line to ensure everyone gets a fair share. Make sure the chili covers the top of the hot dog and touches the sides of the bun. This helps the flavors meld together while they are in the oven.
Sprinkle the freshly grated cheddar cheese generously over the top of the chili on each bun. Do not be shy with the cheese; it acts as a glue for the chili and provides that gooey texture we want. Make sure some cheese falls onto the sides of the bun, as the edges will get nice and crispy in the oven.
Step 4: Bake the Hot Dogs
Place the sheet pan into the center rack of your preheated 400-degree oven. Bake for twelve to fifteen minutes. You are looking for the cheese to be completely melted and bubbling, and the buns should be slightly toasted on the edges. The internal temperature of the hot dogs should reach 165 degrees Fahrenheit when checked with a thermometer to ensure they are hot throughout.
Keep a close eye on the oven near the end of the baking time. Because the cheese can brown quickly, you do not want it to burn. If your oven has a hot spot, rotate the tray halfway through the process to ensure an even cook. The smell of the chili and toasting buns will be a good indicator that they are nearing completion.
Step 5: Garnish and Serve
Once the time is up, pull the tray out of the oven carefully. Let them rest for two or three minutes on the counter. This allows the cheese to set slightly so the hot dogs do not fall apart when you move them to plates. Sprinkle the sliced scallions over the top while the cheese is still warm so they adhere to the surface. Serve them immediately while they are steaming.
Mistakes I Made (So You Don't Have To)
Using Pre-Shredded Cheese
I once used a bag of pre-shredded Mexican blend cheese because I was in a rush. The cheese did not melt into that smooth, gooey consistency I love; instead, it stayed in little strips and tasted slightly powdery. The anti-caking additives prevented the cheese from binding properly with the chili. Now, I always take the extra two minutes to grate my own block of cheddar because it makes the topping infinitely better.
Overfilling the Buns
The first few times I made these, I tried to pile as much chili as possible onto each dog. This caused the buns to soak up too much moisture, which led to them falling apart the moment I tried to pick them up. It also made a mess on the tray. I learned to keep the chili strictly on the hot dog and avoid letting it pool too much on the bottom of the bun. A thinner layer actually tastes better because you still get the taste of the bread.
Not Draining the Beef
I used to skip the step of draining the grease from the ground beef, thinking it would add flavor. It turned out to be a mistake because the grease made the bottom of the buns soggy and created an oily layer on top of the chili. It also made the dish feel much heavier than intended. Now, I always drain the pan after the beef is browned and before I add the tomato paste and spices. It makes for a much cleaner-tasting meal.
Using Cheap Buns
I once tried to use the cheapest white bread buns available. They were very thin and airy, and they did not hold up to the heat of the oven. By the time the cheese was melted, the buns were flat and hard, almost like crackers. Switching to a sturdier brioche or potato roll was a massive improvement. These buns have a higher fat content and a tighter crumb, which helps them stay soft on the inside even while the edges get a bit of a crust.
Variations and Tips
Adding a Spicy Kick
If you want to take these to the next level of heat, add a diced jalapeño to the chili while it simmers. Make sure to remove the seeds if you want a milder experience, or leave them in if you really enjoy the heat. You can also mix a teaspoon of hot sauce into the chili base before spooning it over the hot dogs. This simple change transforms the profile of the meal significantly without requiring extra equipment.
The Make-Ahead Strategy
You can prepare the chili a day in advance and keep it in the refrigerator. When you are ready to eat, simply reheat the chili on the stove until it is warm, assemble the hot dogs on the tray, and bake them as usual. This saves you significant time on the day you plan to serve them. Just remember that if the chili is cold, you might need to add an extra two minutes to the total baking time to ensure the hot dogs are heated through.
Topping Ideas
While I love scallions, you can experiment with other toppings depending on what you have in your kitchen. Diced white onions add a nice crunch that works well with the soft texture of the cheese. A squeeze of yellow mustard right before serving adds a tangy contrast that cuts through the savory meat. Some people even enjoy a dollop of sour cream on top after baking, though you should add this right before eating so it does not melt away entirely.
Alternative Cooking Methods
If you do not have an oven, you can prepare these in a large skillet. Toast the buns in a separate pan, then heat the hot dogs, ladle the chili over them, and sprinkle the cheese on top. Cover the pan with a lid for about two minutes to help the cheese melt. It is not as uniform as the sheet pan method, but it works perfectly well if you are camping or just prefer not to turn on your oven.
Storage and Reheating
If you happen to have leftovers, you should store them in the refrigerator within two hours of cooking. Place the hot dogs in an airtight container. They will stay good for about three days. Because the bread is already toasted and softened by the chili, do not expect them to have the exact same texture as when they were fresh. The buns will become denser as they absorb moisture from the chili in the fridge.
When you want to reheat them, I recommend using the oven rather than the microwave. The microwave will make the buns rubbery and the chili may splatter. Place the leftovers on a tray and heat them at 350 degrees Fahrenheit for about ten minutes, or until the cheese is bubbling and the meat is hot. Always ensure the internal temperature reaches 165 degrees Fahrenheit for food safety. I do not recommend freezing this dish, as the buns do not handle the thawing process well and the texture of the chili can change significantly.
Frequently Asked Questions
Can I use turkey or chicken hot dogs for this recipe?
Yes, you can substitute beef hot dogs with turkey or chicken varieties. Just keep in mind that these typically have less fat, so they might dry out faster if they stay in the oven too long. Keep a close eye on them during the baking process and consider pulling them out as soon as the cheese is melted and bubbly to prevent the meat from becoming tough or shriveled.
Why does my cheese always burn before the hot dogs are hot?
If your cheese is burning before the center is hot, your oven temperature might be too high or the rack position is too close to the top element. Try moving your sheet pan to the middle or lower rack. You can also cover the pan loosely with a sheet of foil for the first ten minutes of baking, then remove it for the final few minutes to let the cheese melt and develop a bit of color.
Can I make the chili without meat?
You can certainly make a vegetarian version using lentils or a store-bought meat substitute. If you use lentils, make sure they are fully cooked before you add them to the sauce. You might need to add a bit more liquid to the chili, as lentils absorb moisture differently than ground beef. The rest of the assembly remains exactly the same, and the result is just as satisfying.
How do I know when the hot dogs are cooked through?
The safest way to know is to use a meat thermometer. Stick it into the center of the largest hot dog on the tray. Once it reaches 165 degrees Fahrenheit, you know it is safe and ready to eat. If you do not have a thermometer, look for the edges of the hot dog to look slightly plumped and firm to the touch. They should be hot enough that steam releases when you bite into them.
Can I use a different type of cheese?
While sharp cheddar is traditional for this dish, you can absolutely use other varieties. Monterey Jack melts very well and gives a slightly milder flavor, while pepper jack adds a nice kick of spice. Avoid using cheeses that do not melt well, such as feta or aged parmesan, as they will stay in crumbles rather than creating that cohesive, gooey layer that defines a classic chili cheese dog.
Final Thoughts
There is something so comforting about sitting down to a plate of chili cheese hot dogs. It brings back memories of simple meals and quiet evenings at home. I find that when I keep the process simple, I am much more likely to actually get into the kitchen and cook rather than ordering takeout, which is always a win in my book.
I hope you find this recipe as useful as I do for those times when you want something hearty without a lot of fuss. Once you get the hang of the timing, you can customize the spices and toppings to make this your own. Just remember to use a quality bun and grate your own cheese, and you will have a meal that hits the spot every time.