
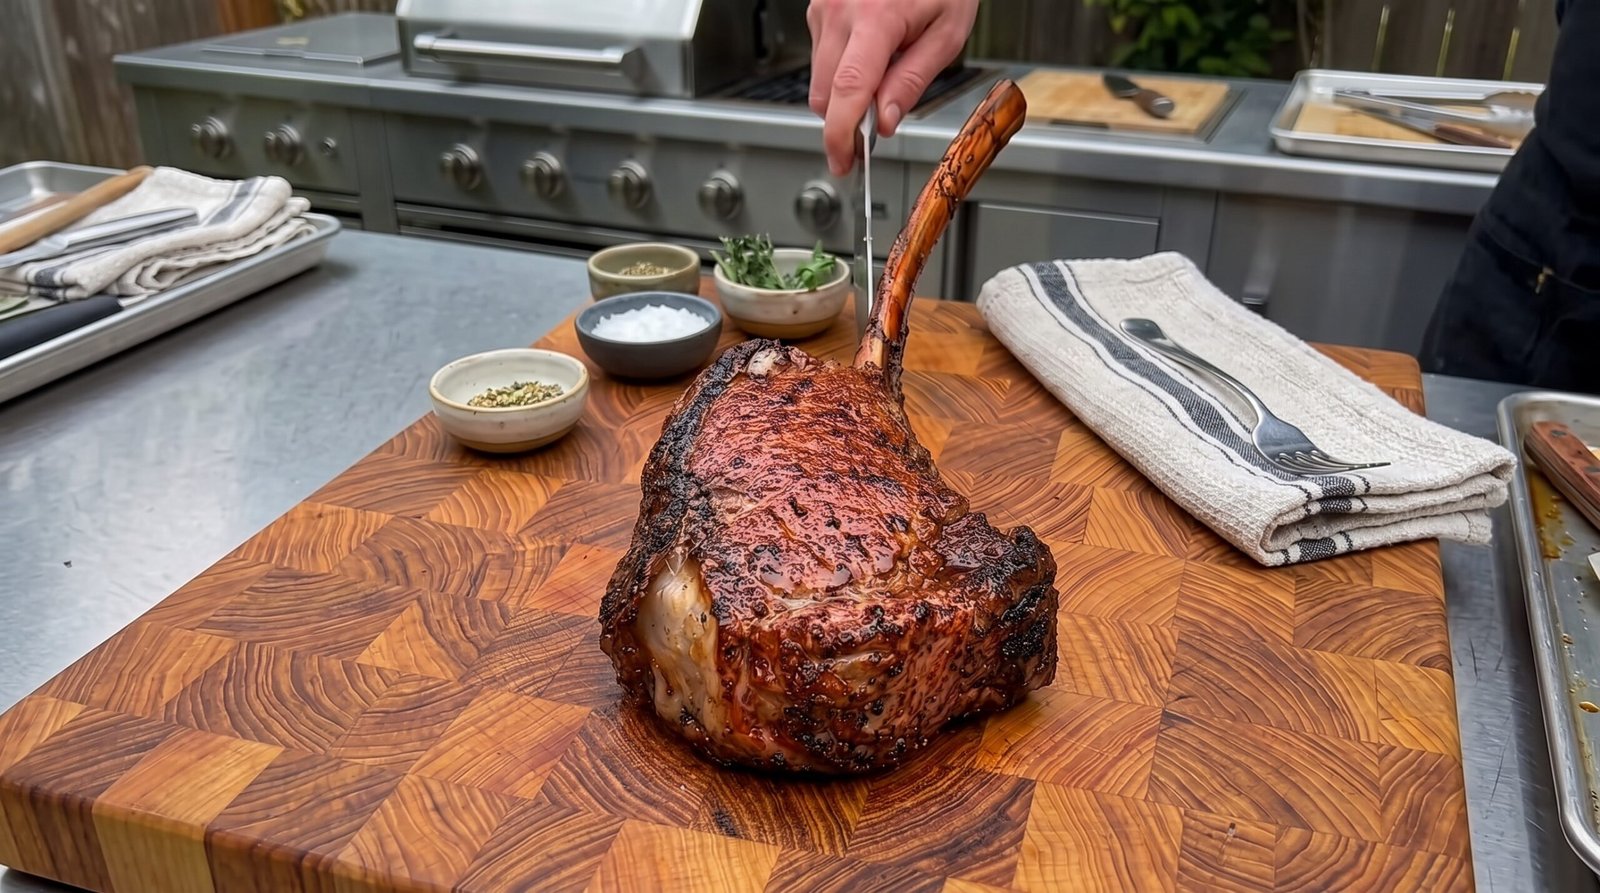
I remember the first time I walked into the butcher shop and pointed at a massive tomahawk ribeye. It looked more like a prehistoric tool than something for dinner. I was intimidated by the sheer size of the meat and worried that I would ruin such an expensive piece of beef. Over the years, I have learned that the key to cooking a steak this large is patience and respect for the heat. When you bring a thick, bone-in cut into your own home, you are in charge of creating that deep, savory crust while keeping the center tender and juicy. It is a rewarding experience once you pull it off, and it really changes how you view a steak dinner at home.
Bringing this piece of meat to your table requires focus and a good meat thermometer. It is not about fancy techniques or complicated sauces. It is about understanding how the heat travels through the beef and knowing when to pull it off the burner. This guide covers how to manage the sear and the internal temperature so that every slice you cut is consistently cooked. You do not need to be a professional chef to get these results in your own kitchen. You just need to follow a few simple steps and trust your tools.
Why This Recipe Works
This recipe relies on the classic sear-then-finish method. Because the tomahawk ribeye is so thick, simply throwing it in a pan is not going to work. You need to sear the outside to build up a flavorful, dark exterior that offers a little resistance when you bite into it. Once that crust is established, the meat needs time to cook gently until the center reaches your preferred level of doneness. I usually aim for medium-rare, which is around 130 degrees Fahrenheit, because that is where the fat in a ribeye really softens and contributes to the overall flavor.
The bone is also a huge part of why this works. The bone helps conduct heat into the center of the meat, which can actually help with an even cook, though it can also make the meat near the bone cook slower than the rest. By leaving the bone intact, you are also adding a visual centerpiece that makes a meal feel special. The fat cap on a ribeye is substantial, and if you render that down during the searing process, you are essentially basting the steak in its own juices. This creates a depth of flavor that you just cannot get from a thin, boneless cut.
The simplicity of the seasoning is another reason this is a favorite of mine. I stick to coarse salt and freshly cracked black pepper. When you have high-quality beef, you do not want to mask the flavor with heavy marinades or complex rubs. The sear brings out those nutty, toasted notes in the fat, and the salt pulls everything together. It is straightforward, honest cooking that focuses on the quality of the product.
Ingredient Notes
The Meat
The star of the show is the tomahawk ribeye. When shopping for this, look for a cut that is at least two inches thick. If it is thinner than that, the outside will burn before the inside hits your target temperature. You want a bright red color and plenty of white, clean-looking marbling throughout the flesh. Avoid meat that has yellowish fat or looks dry on the edges. The bone should be clean and white, which indicates it has been properly butchered. If you find one that is three inches thick, that is even better, though you will need to adjust your cooking time.
The Seasoning
For a steak this size, use coarse sea salt. Fine table salt can dissolve too quickly or make the meat taste too salty in one spot. Coarse salt stays on the surface and creates a better crust during the sear. I also prefer whole peppercorns that I grind right before seasoning. Pre-ground pepper loses its aromatic kick very quickly, and you want that punch of heat to balance the richness of the fat. Some people like to add dried herbs like rosemary or thyme, but I prefer to keep those for the basting stage rather than rubbing them on raw, where they might just burn in the hot pan.
The Cooking Fat
You need a fat with a high smoke point for searing a thick steak. Butter is great for flavor, but it burns at high temperatures. I recommend using a high-quality avocado oil or grapeseed oil for the initial sear. These oils can handle the heat of a ripping-hot cast iron skillet without turning acrid. Once the steak is flipped and near the end of the cooking process, you can throw in a knob of butter to baste the meat. This gives you the best of both worlds: a clean, high-heat sear and a rich, buttery finish.
| Ingredient | Amount | Notes |
|---|---|---|
| Tomahawk Ribeye | 1 steak (2-3 lbs) | Look for 2 inch thickness |
| Coarse Sea Salt | 2 tablespoons | Adjust to taste |
| Black Peppercorns | 1 tablespoon | Freshly cracked |
| Avocado Oil | 2 tablespoons | For the high heat sear |
| Unsalted Butter | 3 tablespoons | Added during the last few minutes |
The Recipe
- Prep Time: 15 minutes
- Cook Time: 15-20 minutes
- Total Time: 35 minutes
- Servings: 2-3 people
- Difficulty: Moderate
Tools you will need:
– Large cast iron skillet
– Instant-read meat thermometer
– Tongs
– Paper towels
– Sharp carving knife
Step-by-Step Instructions
Step 1: Prepare the Steak
The most important step happens before the meat touches the pan. Take your tomahawk ribeye out of the refrigerator at least 45 minutes before you plan to cook it. If you put a cold steak into a hot pan, the temperature of the pan drops immediately, and you end up steaming the meat instead of searing it. Once the meat has reached room temperature, pat it completely dry with paper towels. Moisture is the enemy of a good sear. If the surface is damp, you will just get gray, boiled meat instead of a deep, dark brown color.
Season the steak liberally with the coarse salt and cracked black pepper. Make sure to get the sides of the steak as well. Don't be afraid to use a good amount of salt, as most of it will fall off in the pan during the cooking process. Use your hands to press the seasoning into the meat so it adheres to the surface. Leave the steak on a plate while you get your skillet ready.
Step 2: Heat the Skillet
Place your large cast iron skillet over high heat. Let it get very hot. You can tell it is ready when a drop of water sizzles and evaporates instantly when it hits the surface. Pour in the avocado oil and tilt the pan to coat the bottom evenly. The oil should shimmer and just start to smoke slightly. If you see thick, clouds of heavy smoke, the pan is too hot, so turn the heat down slightly.
Carefully lay the steak into the skillet using your tongs. Do not drop it in, as you do not want hot oil splashing on your hands. The meat should immediately make a loud, aggressive hissing sound. If it doesn't, your pan isn't hot enough. Let the steak cook undisturbed for about 3 minutes. Resist the urge to poke it or move it around, as you need that constant contact to form the crust.
Step 3: The Sear
After 3 minutes, lift the corner of the steak to check the color. You are looking for a deep, dark brown mahogany color. If it looks pale, let it go for another 60 seconds. Flip the steak carefully using your tongs. The second side will likely take about 2 or 3 minutes to reach the same level of color. Use the tongs to stand the steak up on its side, holding it against the edge of the pan if necessary, to sear the fat cap as well. This renders the fat and adds a lot of flavor to the pan juices.
Step 4: Cooking to Temperature
Once you have a good crust on all sides, turn the heat down to medium. This is the part where you need to pay attention to your meat thermometer. Insert the probe into the thickest part of the steak, avoiding the bone, as the bone will give you a false, hotter reading. For medium-rare, you want to pull the steak off the heat when it hits 125 to 130 degrees Fahrenheit. The temperature will continue to rise as it rests.
During these final minutes of cooking, add the butter to the pan. Once it melts and begins to foam, tilt the pan slightly and use a large spoon to baste the melted butter over the steak. Do this repeatedly for the last 2 minutes. This basting process adds a nutty, rich finish to the crust and keeps the meat moist while the center finishes cooking.
Step 5: Resting the Meat
Remove the steak from the pan and place it on a cutting board. It is vital that you let it rest. If you cut into it right away, all the juices will run out onto the board and the meat will be dry. Let it sit undisturbed for at least 10 minutes. The internal temperature will climb a few degrees as the heat redistributes. This resting period is just as important as the actual cooking process for achieving a tender result.
Step 6: Carving and Serving
Once the rest is over, hold the steak firmly by the bone. Use a very sharp carving knife to slice the meat away from the bone in one large piece. Then, slice the meat against the grain into thick strips. Serving it this way makes it easy for everyone to share. If there are any juices left on the board, spoon them over the meat before serving. You should see a consistent pink center, which indicates the meat was cooked properly.
Mistakes I Made (So You Don't Have To)
Mistake 1: Crowding the Pan
Early on, I tried to cook two smaller steaks in one pan at the same time. The result was a mess because the pan temperature dropped too fast and there wasn't enough room for moisture to escape. The meat ended up gray and rubbery. Now, I always cook one large steak at a time in a dedicated pan. If you need to cook for more people, cook them in batches and keep the finished steaks warm in a low oven until everything is ready.
Mistake 2: Ignoring the Bone
I once cut the bone off before cooking because I thought it would make the steak easier to fit in the pan. I quickly realized that the bone acts like a handle and helps with the heat distribution. When I cut it off, the meat near the bone area didn't sear correctly, and I lost that dramatic presentation. Now, I always leave the bone on. If your pan is too small, rotate the steak so the bone hangs over the edge of the stovetop if you have to, but keep it attached.
Mistake 3: Salting Too Early
One time I salted the steak three hours before cooking and left it in the fridge uncovered. The salt drew too much moisture out, and the surface became tacky and dry, which actually prevented it from searing well. Now, I season the steak about 15 minutes before it hits the pan. This gives the salt time to dissolve into the surface of the meat without drawing out all the internal juices.
Mistake 4: Not Using a Thermometer
I used to rely on the finger-test method to check for doneness, poking the meat and feeling the resistance. With a cut this thick, that method is just guessing. I ended up with one side raw and the other overcooked. Using an instant-read meat thermometer is the only way to be sure. It takes the stress out of the process and ensures that I hit the perfect medium-rare every time I cook.
Variations and Tips
Compound Butter Finish
A simple way to add flavor is to make a compound butter. While the steak is resting, mash together some softened butter, minced garlic, and fresh parsley. Place a dollop of this on the steak right before you serve it. As the butter melts, it mixes with the pan juices and creates an instant sauce that is fantastic with the beef.
Using the Oven for Large Cuts
If your steak is extremely thick, say three inches or more, the sear might leave the center too cold. In this case, sear it in the pan for the crust, then transfer the whole pan into a 375 degree Fahrenheit oven for 5 to 10 minutes. Keep your thermometer in the meat the whole time so you don't overcook it. This creates a very even transition from the crust to the center.
Making Ahead
You cannot fully cook a tomahawk steak ahead of time, but you can season it and have your butter and herbs ready. Having everything prepped before you turn on the high heat allows you to focus entirely on the timing of the cooking process. Trying to chop parsley while the steak is searing is a recipe for a burnt crust.
Choosing Your Herbs
Rosemary and thyme are the classic herbs for beef, but you can experiment with what you have. A sprig of fresh sage can add a nice earthy note, or even a couple of smashed cloves of garlic added during the final butter-basting stage. Just make sure the herbs are fresh, as dried herbs tend to burn and get bitter when they are exposed to the hot butter at the end.
Storage and Reheating
If you have leftovers, store them in an airtight container in the refrigerator. They will stay good for up to 3 days. Do not try to freeze the cooked steak, as the texture changes and it becomes quite dry when thawed and reheated. When you want to eat the leftovers, the best way to reheat it without making it tough is to slice it thin and toss it into a warm pan just for a minute or two until it is heated through, but not cooking it further.
If you are reheating a whole piece, put it in a low oven at 250 degrees Fahrenheit until it hits an internal temperature of about 110 degrees, then do a very quick sear in a hot pan to crisp up the outside again. Reheating until steaming hot, or 165 degrees Fahrenheit, will definitely overcook the meat, so keep that in mind if you prefer your steak medium-rare.
Frequently Asked Questions
Why does my steak have gray edges?
Gray edges on a steak mean it was cooked at too low a temperature for too long. This is called the gray band. To minimize this, make sure your pan is truly hot before adding the steak, and flip it frequently after the initial crust has formed. This helps move the heat through the meat faster so the surface doesn't overcook while the center is reaching the target temperature.
Can I cook this in an air fryer?
I would not recommend cooking a tomahawk ribeye in an air fryer. The air fryer is basically a convection oven, and it cannot provide the direct, high-heat surface contact needed to create the crust on a steak of this size. You will end up with a cooked center, but you will miss out on the deep, caramelized crust that defines a good steak. Stick to a cast iron skillet for the best results.
Does the bone add flavor to the meat?
There is a common belief that the bone adds flavor during the cooking process, but most of that flavor is locked inside the bone itself. However, the bone does act as a heat sink. It conducts heat into the center of the meat, which can change how the meat near the bone cooks compared to the rest of the steak. The biggest benefit of the bone is the visual appeal and the fact that it prevents the meat from curling up in the pan.
What should I do if the fat isn't rendering?
If you have a large fat cap that isn't softening up, use your tongs to hold the steak vertically in the pan. Press the fat side directly against the hot metal. This direct contact with the searing surface will melt the fat down much faster than just relying on the heat from the pan. Just be careful with the hot oil splatter, and have your ventilation fan running.
How do I know if the thermometer is accurate?
You can test your thermometer by putting it into a glass of ice water. It should read exactly 32 degrees Fahrenheit. If it is off by more than a couple of degrees, you might need to adjust your target cooking temperature accordingly. Knowing your tool is accurate is the best way to gain confidence when cooking expensive cuts of beef.
Final Thoughts
Cooking a tomahawk ribeye is a great way to mark a special occasion or just challenge yourself in the kitchen. It looks impressive on the plate, but the process is manageable if you respect the temperature and the resting time. Don't let the size of the steak intimidate you. Once you have mastered the high-heat sear, you will find yourself reaching for these cuts more often.
The most important takeaway is to keep things simple. Let the quality of the beef shine by using minimal seasoning and focusing on the technique. Enjoy the process of listening to the sear and watching the color develop. It is one of those meals that reminds you why cooking at home is so much better than going out.