
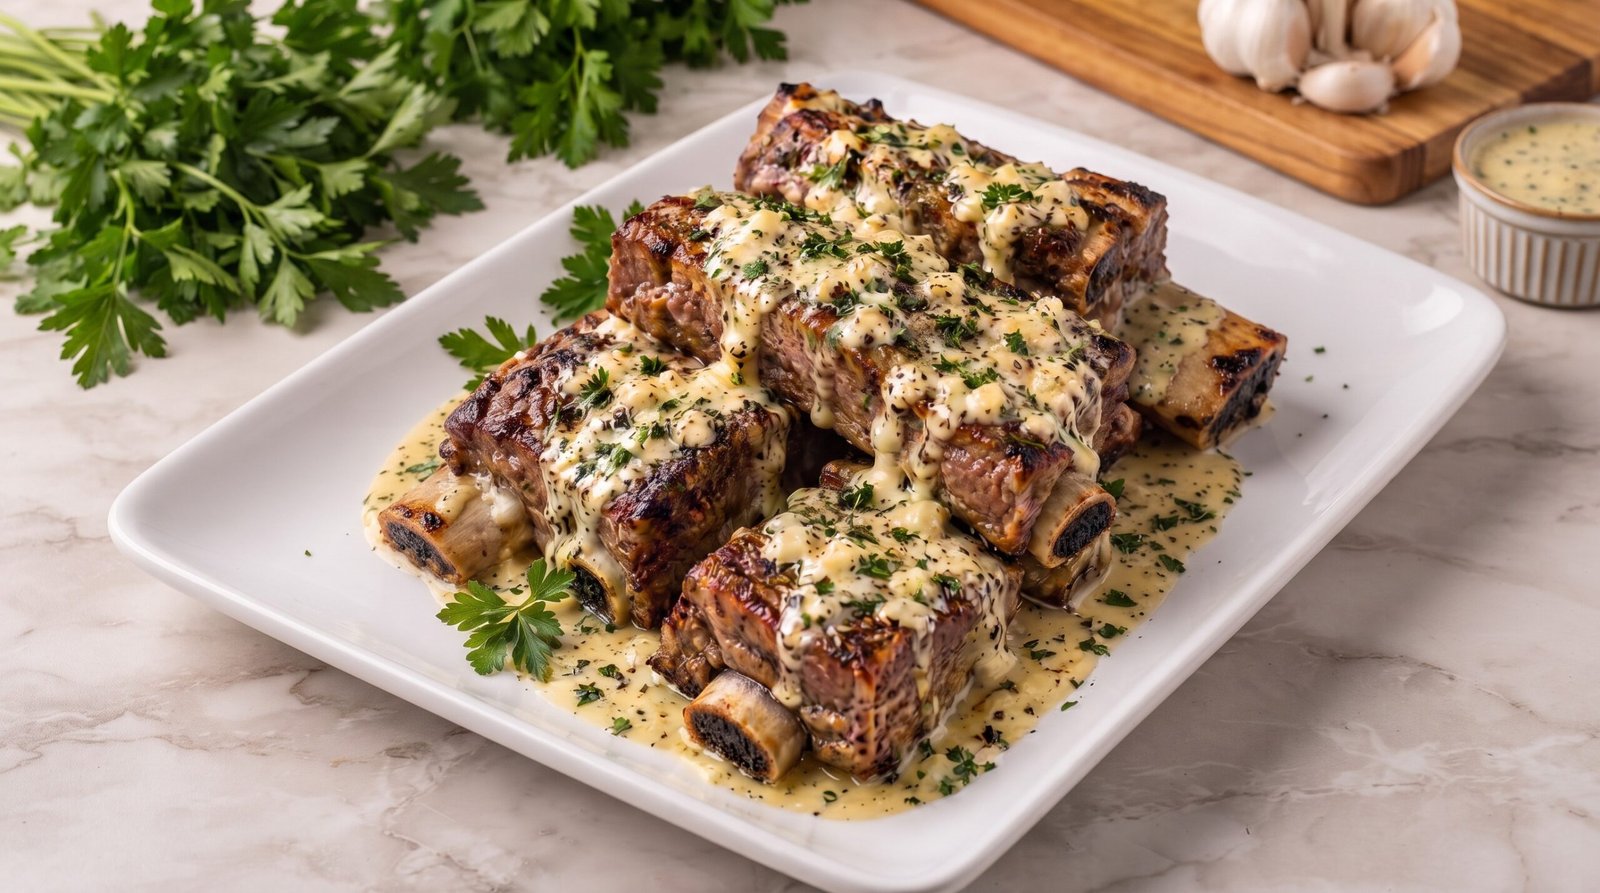
I remember the first time I tried to make beef ribs at home. I was worried they would end up tough, chewy, or just not worth the effort of turning on the oven. I had tried slow-cooking them, but they often turned out mushy, losing all their texture. Then I discovered the joy of a proper sear followed by a slow braise. These garlic butter braised beef ribs are the result of many quiet Sunday evenings spent refining the process in my kitchen. The goal was to get that deep, savory richness of the meat to balance against a sharp, bright garlic butter sauce.
When you bring this dish to the table, the smell of garlic and beef fills the room instantly. It is the kind of meal that makes a busy weeknight feel a bit more grounded. You get tender, succulent meat that pulls away from the bone with just the pressure of a fork, all coated in a creamy, buttery sauce that begs to be mopped up with a piece of crusty bread. It is a simple preparation that relies on time and patience rather than complicated techniques.
Why This Recipe Works
This recipe succeeds because it treats the meat with the respect it deserves. Beef ribs are a tough cut with a lot of connective tissue, and they need a slow, moist cooking environment to break down that collagen into gelatin. By searing the ribs first, we lock in a layer of flavor from the crust that develops in the pan. This browning process, known as the Maillard reaction, is what gives the meat its complex, savory depth. If you skip this step, you lose out on the foundational flavor that carries the entire dish.
The choice to braise in a liquid bath is critical for the final texture. When you submerge the ribs partially in a flavorful braising liquid, you create a controlled environment where the heat penetrates evenly. This is not a fast recipe, and that is exactly why it works. The slow breakdown of the fat and muscle fibers is what results in that melt-in-your-mouth experience. Because we keep the temperature low and the cooking time consistent, the meat stays hydrated throughout the process.
Then there is the garlic butter sauce. Adding the butter and fresh herbs towards the end ensures that the garlic does not burn or turn bitter. Instead, it infuses the sauce with a sweet, pungent aroma that cuts through the richness of the beef fat. The fresh parsley adds a necessary brightness that cleanses the palate. This balance of heavy, deep beef flavors and light, aromatic herbs creates a harmony that makes the dish feel cohesive. It is a robust, honest meal that centers on quality ingredients and a steady hand.
Ingredient Notes
Beef Selection
When you go to the store, look for high-quality bone-in beef short ribs. I prefer the English-cut ribs, which are thick and usually contain a nice layer of fat on top. You want to look for meat that has good marbling, which means you can see little white flecks of fat running through the red muscle. Avoid ribs that are mostly bone with very little meat attached. If you find flanken-cut ribs, which are sliced thinly across the bones, they will cook much faster and will not work for this specific braising method.
The Braising Liquid
The base of the liquid should be a good quality beef stock. Low sodium is better because it allows you to control the salt level as the liquid reduces. I often use a splash of red wine to deglaze the pan after searing the meat, as the acidity helps to loosen the browned bits stuck to the bottom of the pot. If you prefer not to use wine, a tablespoon of apple cider vinegar mixed into your beef stock will provide a similar level of brightness.
Aromatics and Fat
Unsalted butter is essential here because it allows you to manage the saltiness of the finished sauce. You will need a large amount of garlic. Do not use the pre-minced jars you find at the grocery store, as they often have a metallic aftertaste. Peel and mince fresh cloves yourself to get the best result. For the herbs, fresh flat-leaf parsley is my top pick. You can also toss in a sprig of fresh thyme during the braising phase for an earthy undertone, but make sure to remove the woody stems before serving.
| Ingredient | Amount | Notes |
|---|---|---|
| Beef short ribs | 4 pounds | Bone-in, English-cut |
| Beef stock | 2 cups | Low sodium preferred |
| Unsalted butter | 6 tablespoons | Room temperature |
| Garlic cloves | 10 large | Freshly minced |
| Salt | 1 tablespoon | Kosher salt for seasoning |
| Black pepper | 1 teaspoon | Freshly cracked |
| Fresh parsley | 1/2 cup | Finely chopped |
| Olive oil | 2 tablespoons | For the initial sear |
| Red wine | 1/2 cup | Dry variety like Cabernet |
The Recipe
- Prep Time: 20 minutes
- Cook Time: 3 hours
- Total Time: 3 hours 20 minutes
- Servings: 4
- Difficulty: Intermediate
Equipment needed:
– Heavy-bottomed Dutch oven or large oven-safe pot with a lid
– Tongs
– Measuring cups and spoons
– Sharp knife and cutting board
– Meat thermometer
– Whisk
Step-by-Step Instructions
Step 1: Prep and Season the Ribs
Start by taking your beef short ribs out of the refrigerator about thirty minutes before you plan to cook them. Pat them dry with paper towels on all sides. This is a very important step because moisture is the enemy of a good sear. If the meat is wet, it will steam in the pan instead of browning. Once they are dry, season the ribs generously with salt and black pepper, making sure to get every side coated.
Step 2: Sear the Meat
Place your Dutch oven over medium-high heat and add the olive oil. Once the oil starts to shimmer, carefully place the ribs in the pot in a single layer. Do not crowd the pan, or the temperature will drop and the meat will not brown. Let the ribs sear undisturbed for about three to four minutes per side until they have a deep brown crust. Use your tongs to turn them, searing the edges as well. Once they are browned, remove them from the pot and set them aside on a plate.
Step 3: Deglaze and Build the Braise
Lower the heat to medium and pour in your red wine to the hot pot. Use a wooden spoon to scrape up all the browned bits from the bottom of the Dutch oven. These bits are pure flavor. Let the wine simmer for about two minutes until it reduces by half. Stir in half of your minced garlic and cook for just thirty seconds until it is fragrant. Pour in the beef stock and return the ribs to the pot, nestling them into the liquid so the bones are standing upright.
Step 4: The Low and Slow Braise
Cover the pot with a heavy lid and transfer it to an oven preheated to 325 degrees Fahrenheit. Let the ribs braise for two and a half to three hours. You are looking for the meat to become extremely tender, pulling back from the bone by about an inch. When you insert a meat thermometer into the thickest part of the meat, it should register at least 200 degrees Fahrenheit, as this temperature is necessary to break down the connective tissue. If it is not quite there, give it another thirty minutes.
Step 5: Finishing the Garlic Butter Sauce
Carefully remove the pot from the oven and lift the ribs out onto a serving platter. Strain the remaining liquid in the pot through a fine-mesh sieve into a saucepan to remove any solid bits. Place the saucepan over medium-high heat and reduce the liquid until it thickens slightly, about five to seven minutes. Whisk in the softened butter and the remaining minced garlic. Keep whisking until the butter has fully emulsified into a silky, glossy sauce. Stir in the fresh parsley.
Step 6: Serving
Pour the warm, buttery garlic sauce over the arranged ribs on the platter. Serve immediately while the sauce is still hot and creamy. The ribs should be served with something to absorb the sauce, like mashed potatoes or crusty bread. Ensure that every guest gets a portion of the sauce, as it is the highlight of the dish. Remember to check that the ribs have reached that tender consistency before serving, as the texture is what makes the meal successful.
Mistakes I Made (So You Don't Have To)
Using Too Much Salt Early On
In my early attempts, I would salt the beef stock heavily right at the beginning. As the liquid evaporates during the three-hour braise, the salt concentration becomes very intense, leading to a dish that is nearly impossible to eat. Now, I only season the meat itself with salt before searing. I wait until the very end, after the sauce has reduced and the butter is added, to taste it and adjust the salt levels. It is much easier to add more salt later than to try and dilute a salty sauce.
Not Searing Enough
There was a time when I was in a rush and only gave the ribs a quick flash in the pan. They didn't have that dark, flavorful crust, and the finished dish tasted a bit one-dimensional. I learned that you need to be patient. Give the meat enough time to develop that rich, dark brown color. If the ribs are wet, the browning process takes even longer, which is why drying them thoroughly with paper towels is the single most important prep step you can take.
Crowding the Pot
I once tried to cram all four pounds of ribs into a pot that was just too small. Because they were packed so tightly, they started to steam rather than sear. They ended up being gray and flabby instead of having that nice, firm exterior. Now, if I have a large batch, I sear them in two separate rounds. It takes a little more time, but the difference in flavor and texture is significant. Don't be afraid to use a bigger pot if you have one.
Burning the Garlic
One time, I added all the minced garlic to the pot before searing the meat. The heat was too high, and the garlic scorched almost instantly, turning bitter and ruining the base of the sauce. I now save half the garlic for the very end when I make the butter sauce. Adding the fresh garlic into the butter at the final stage ensures it stays bright and fragrant without any hint of burning. It keeps the sauce tasting fresh and sweet rather than sharp and acrid.
Variations and Tips
Swapping the Herbs
While fresh parsley is classic and works perfectly, you can experiment with other herbs to change the flavor profile. Fresh rosemary or thyme are wonderful additions to the braising liquid. If you use woody herbs like rosemary, tie them together with kitchen twine so you can easily fish the stems out before you reduce the sauce. For a fresher, lighter finish, you could even stir in some chopped chives along with the parsley right before serving.
Adding Root Vegetables
If you want to turn this into a one-pot meal, you can add chunks of carrots or parsnips to the pot during the last hour of braising. The vegetables will cook in the beef juices and absorb all that wonderful flavor. Make sure to cut them into large, uniform pieces so they do not turn into mush during the long cooking time. It is a great way to serve the meat with a side of tender vegetables without having to dirty another pan.
A Time-Saving Approach
If you are pressed for time on the day you want to serve these, you can cook the ribs entirely a day in advance. Braise them as instructed, then let them cool in the liquid in the refrigerator overnight. The next day, you can easily skim off any fat that has solidified on the surface. Reheat the ribs gently in the liquid on the stovetop, then proceed with making the garlic butter sauce. This often makes the meat even more tender and ensures the flavors have time to meld.
The Importance of Resting
Just like a steak, these beef ribs benefit from resting. Once you take them out of the oven, let them sit on the platter for about ten minutes before you pour the final sauce over them. This allows the juices within the meat to redistribute, ensuring that every bite is succulent. If you serve them the second they come out of the oven, the meat might feel a little tighter. That short rest makes a noticeable difference in the texture.
Storage and Reheating
If you have leftovers, they should be refrigerated within two hours of cooking. Place the ribs and any remaining sauce in an airtight container. They will stay good in the refrigerator for up to three days. Because this is a meat and butter-based dish, do not leave it sitting out at room temperature for extended periods.
To reheat, the best method is to place the ribs and the sauce in a saucepan over medium-low heat. Add a tiny splash of water or extra beef stock to prevent the sauce from scorching as it warms up. Cover the pan with a lid and heat until the meat is steaming hot all the way through, reaching an internal temperature of 165 degrees Fahrenheit. I do not recommend freezing this dish, as the texture of the meat and the emulsion of the butter sauce can break down during the freezing and thawing process, resulting in a less than ideal consistency.
Frequently Asked Questions
Can I use bone-in short ribs for this?
Yes, bone-in short ribs are actually the best choice for this recipe. The bones add a significant amount of flavor and body to the braising liquid as the meat cooks. The collagen found around the bones also breaks down into gelatin, which makes the sauce rich and silky. You should always aim for bone-in cuts for a braise like this.
What should I serve with these ribs?
These ribs are very rich, so they pair best with sides that can soak up the garlic butter sauce. Creamy mashed potatoes, polenta, or even a simple risotto are excellent foundations. A side of roasted asparagus or a bright, acidic green salad helps to cut through the richness of the beef and butter, providing a balanced meal that doesn't feel too heavy.
My ribs are still tough after three hours. What should I do?
If the meat is still tough, it simply needs more time. The breakdown of connective tissue depends on the specific cut of meat and the size of the ribs, so sometimes it takes an extra thirty to forty-five minutes. Keep them in the oven, covered, and check them again. They are done when the meat is tender enough to be easily pierced with a fork.
Is it necessary to sear the meat before braising?
Yes, searing is an essential step. It creates the Maillard reaction on the surface of the meat, which gives the dish its deep, roasted flavor. Without that step, the final dish will taste like boiled beef, and you will miss out on the complex, savory notes that define this recipe. It takes only a few extra minutes but drastically improves the result.
Can I prepare this in a Dutch oven on the stovetop instead of the oven?
You can, but it is harder to maintain a consistent, gentle temperature on the stovetop. If you must use the stovetop, keep the heat on the absolute lowest setting and ensure the lid fits tightly to keep the moisture in. However, the oven provides a more even, ambient heat that is much better suited for long braising, which is why I strongly prefer the oven method.
Final Thoughts
Making these garlic butter braised beef ribs is a labor of love that pays off in flavor. It is a dish that rewards your patience, filling the kitchen with aromas that signal a home-cooked meal is coming. I find that when I take the time to properly brown the meat and slowly reduce the sauce, the result is always worth the wait.
The next time you have a long, quiet afternoon and want to make something special, give this recipe a try. You will quickly see how a few simple steps and good quality ingredients can turn a tough cut of beef into a centerpiece meal for your table. It is one of my favorite ways to spend time in the kitchen.