
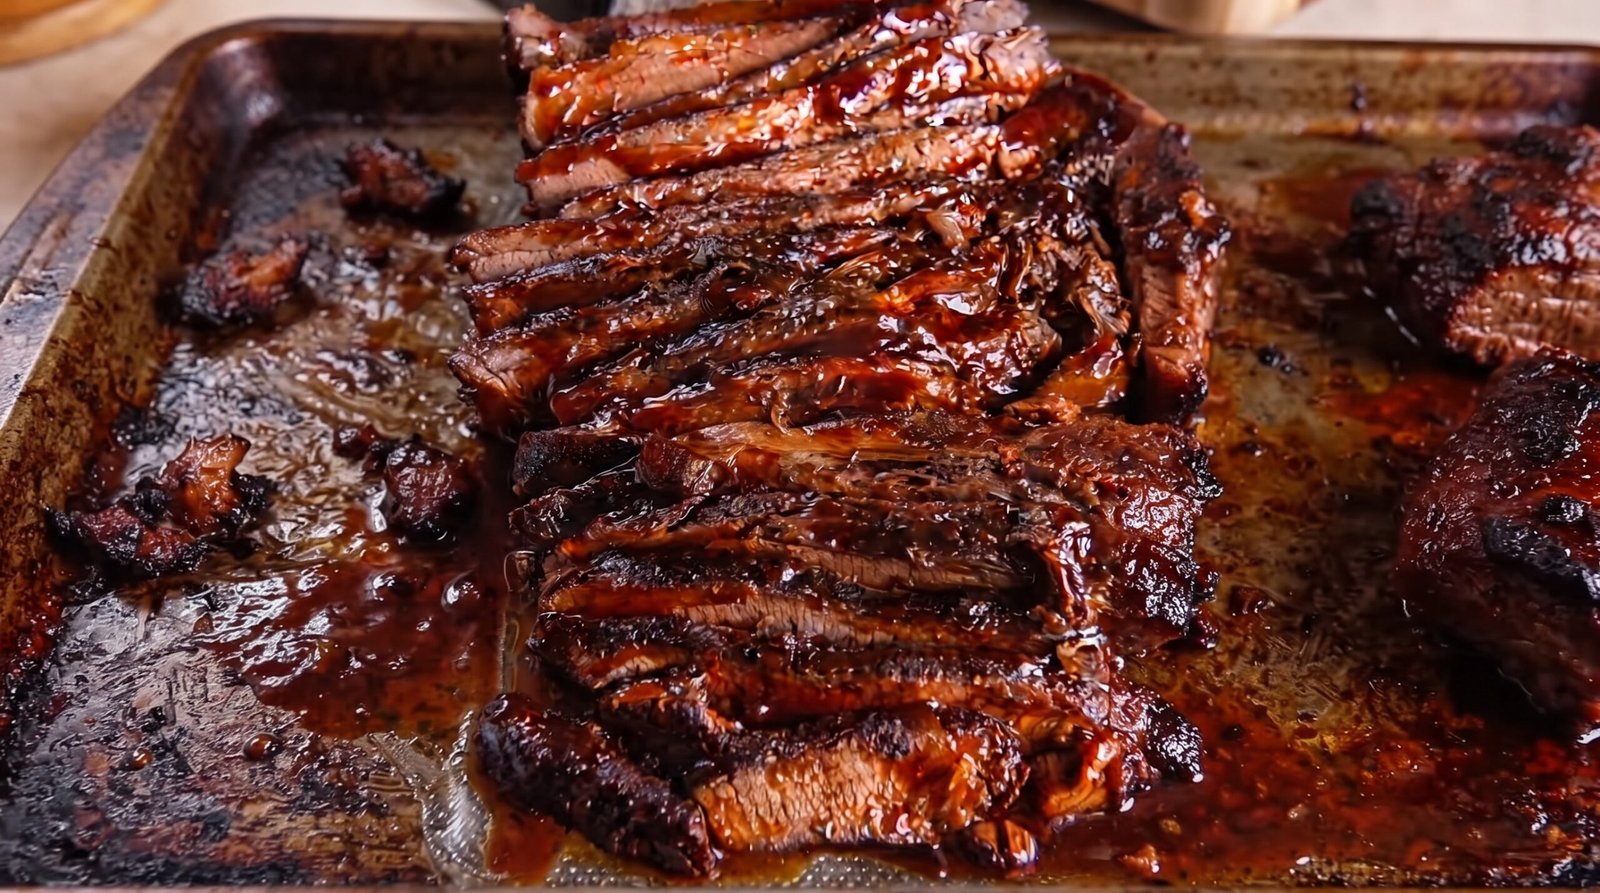
I remember the first time I tried to tackle a beef brisket at home. I was intimidated by the sheer size of the cut and the reputation that it only belonged in a professional smoker. I spent hours worrying about temperatures and moisture, convinced I would end up with a dry, tough piece of leather. As it turns out, you can get a tender, flavorful result right in your home oven with much less stress.
This oven roasted beef brisket is a reliable way to feed a crowd or have plenty of leftovers for sandwiches throughout the week. By focusing on a low temperature and a tight seal to lock in the steam, you can achieve a texture that pulls apart with very little effort. It is a straightforward approach that relies on time and patience rather than fancy equipment, making it a staple in my kitchen when I want something comforting and filling without having to babysit a grill for half a day.
Why This Recipe Works
The primary reason this method succeeds is the controlled environment of the oven. Unlike a smoker, which can fluctuate with wind and fuel levels, your oven stays at a steady temperature. When you wrap the meat tightly in foil, you are essentially braising it in its own juices and the fat rendering from the brisket. This creates a moist environment that is essential for breaking down the tough connective tissues found in this cut of beef.
Flavor is another big factor here. Because we use a dry rub followed by a barbecue glaze during the final stages of cooking, you get layers of flavor. The initial spice rub helps to form a dark, savory crust on the surface of the meat during the long roasting time. Once the beef reaches the point where it is tender, the glaze adds a sweet and tangy note that balances the richness of the fat. The glaze also provides a nice visual appeal when you take the meat out of the oven.
Ease of preparation is a major benefit. Once you season the meat and get it into the pan, the oven does all the heavy lifting. You do not need to stand over a stove or constantly monitor the heat. You can put it in, set your timer, and go about your day. This makes it a great project for a weekend when you are busy around the house. The cleanup is also relatively easy, especially if you line your roasting pan with heavy-duty foil. It is a practical way to serve a large piece of meat while keeping the kitchen routine simple and manageable.
Ingredient Notes
The Beef
When you head to the butcher, look for a whole packer brisket if you are serving a crowd, or a flat cut if you prefer something smaller. The flat cut is more uniform, which makes it easier to slice later on. Try to find a piece with a decent layer of fat on one side, which we often call the fat cap. This fat is your best friend during the long cooking process because it keeps the meat hydrated. You can trim some of the excess, but leave about a quarter-inch to help protect the beef.
The Spice Rub
For the dry rub, I stick to basic staples that work well with the natural beef flavor. You will need kosher salt, coarse black pepper, garlic powder, onion powder, and a touch of smoked paprika. The coarse pepper is important here because it provides a nice crunch and bite. I avoid adding sugar to the rub early on because it can burn during the long roasting period. We save the sweetness for the glaze at the end.
The Glaze
The glaze is where you can personalize the flavor. I usually start with a bottle of good quality barbecue sauce as a base. To that, I add a splash of apple cider vinegar to cut through the fat, and maybe a little bit of brown sugar or honey if I want it extra sticky. You do not need to go overboard. Since the meat has been roasting for hours, you want the glaze to complement it rather than overpower the seasoning you already applied.
| Ingredient | Amount | Notes |
|---|---|---|
| Beef Brisket | 4 to 5 pounds | Look for a well-marbled flat cut |
| Kosher Salt | 2 tablespoons | Coarse grains work best |
| Black Pepper | 2 tablespoons | Freshly cracked provides more flavor |
| Garlic Powder | 1 tablespoon | Adds a savory background note |
| Onion Powder | 1 tablespoon | Essential for depth of flavor |
| Smoked Paprika | 1 teaspoon | Gives a hint of wood-smoke taste |
| Barbecue Sauce | 1 cup | Your favorite brand works fine |
| Apple Cider Vinegar | 2 tablespoons | Helps balance the sauce sweetness |
The Recipe
- Prep Time: 20 minutes
- Cook Time: 5 hours
- Total Time: 5 hours 20 minutes
- Servings: 8 to 10
- Difficulty: Moderate
Equipment Needed
- Large roasting pan
- Heavy-duty aluminum foil
- Meat thermometer
- Sharp slicing knife
- Small mixing bowl
Step-by-Step Instructions
Step 1: Prep the Meat
Start by taking your brisket out of the refrigerator about thirty minutes before you plan to season it. This allows the meat to take the chill off. Use a sharp knife to trim any thick pieces of fat that are hanging off, but keep that layer on top. Pat the meat dry with paper towels. Moisture on the surface of the meat makes it harder for the spices to stick and for the crust to develop.
Mix all your dry rub ingredients in a small bowl. Sprinkle the seasoning mix generously over the entire brisket. Use your hands to rub it firmly into the meat, making sure to get the sides and the bottom as well. Don't be afraid to use all the seasoning you mixed up; this is a large cut of meat that can handle a lot of flavor.
Step 2: Seal and Roast
Preheat your oven to 300 degrees Fahrenheit. Line your roasting pan with two large sheets of aluminum foil, making sure they overlap and are long enough to wrap over the top of the meat completely. Place the brisket in the pan with the fat side facing up. This allows the fat to melt down into the meat as it cooks.
Fold the edges of the foil up and over the brisket, creating a very tight seal. This steam-tight package is the key to getting the meat tender. If the air can escape, the meat will dry out before it gets soft. Place the pan in the middle rack of your oven and roast for four and a half hours. Resist the urge to peek or open the foil during this time, as you want to maintain the internal temperature and moisture.
Step 3: Check for Doneness
After four and a half hours, carefully open the foil. Be cautious, as a lot of hot steam will release quickly. Use your meat thermometer to check the temperature in the thickest part of the brisket. You are looking for an internal temperature of about 200 to 205 degrees Fahrenheit. At this stage, the meat should feel very tender and give way easily when you poke it with a fork.
If the internal temperature is lower than 200 degrees or if the meat still feels tough, close the foil back up and return it to the oven for another thirty minutes. It is better to go by feel and temperature rather than just the clock, as every piece of meat is a little different depending on its thickness and fat content.
Step 4: Glazing
Once the brisket is tender, carefully drain some of the excess liquid from the pan, leaving just a little bit at the bottom. Mix your barbecue sauce and apple cider vinegar in a small bowl, then brush or spoon it all over the top of the brisket. Leave the foil open for this final stage.
Increase your oven temperature to 400 degrees Fahrenheit or turn on the broiler. Place the pan back into the oven for 10 to 15 minutes. You want the glaze to get bubbly and slightly sticky on the surface. Keep a very close eye on it during these few minutes so the sugar in the sauce does not burn. Once it looks glossy and set, remove the pan from the oven.
Step 5: Rest and Slice
This is the hardest part, but you must let the brisket rest for at least 30 to 45 minutes before slicing. If you cut it too soon, all the juices will run out onto your cutting board, leaving the meat dry. Transfer the brisket to a cutting board and cover it loosely with a piece of foil while it cools down.
When you are ready to serve, use a sharp knife to slice the brisket against the grain. If you look closely at the meat, you will see the muscle fibers running in one direction. Cut perpendicular to these lines to ensure each slice is easy to chew. Serve the extra juices from the pan on the side for people to drizzle over their slices.
Mistakes I Made (So You Don't Have To)
Cutting with the grain
My first few attempts resulted in a brisket that felt stringy and tough, even though the meat itself was cooked through. I eventually learned that the direction you slice makes a massive difference. You have to identify the direction the muscle fibers are running and cut across them. This shortens the fibers and makes the meat feel much more tender in your mouth. Now, I always take a second to look for the grain before I start slicing.
Not sealing the foil tight enough
There was one time I was in a rush and didn't overlap my foil sheets properly. The steam escaped throughout the cooking process, and the result was a piece of beef that had a dry, chewy texture rather than the fork-tender consistency I wanted. Since then, I always use an extra-long piece of heavy-duty foil and double-fold the edges to ensure absolutely no steam escapes. It makes a world of difference for the final result.
Skipping the resting time
I used to be so excited to eat that I would slice into the brisket almost immediately after pulling it out of the oven. Every time I did this, I watched the juices flood the cutting board, and the meat would turn dry within minutes. The meat needs time to relax and reabsorb those juices. Now, I set a timer for at least thirty minutes. It gives me time to get the rest of the meal ready and ensures the meat stays juicy until the very last bite.
Adding sugary glaze too early
In my early days, I tried adding the barbecue glaze at the beginning of the cooking process. Because the brisket cooks for several hours, the sugars in the sauce ended up burnt and bitter long before the meat was finished. I learned that the glaze should only be applied at the end for a quick finish. Now, I save the glaze for the last fifteen minutes of roasting, which gives me that nice sticky exterior without the burnt flavor.
Variations and Tips
Try a dry finish
If you prefer a simpler taste, you can skip the barbecue glaze entirely. Instead of adding the sauce at the end, simply roast the brisket until it reaches the 200-degree mark. Once it rests, you can sprinkle it with a bit more of the coarse pepper and sea salt. It allows the flavor of the beef to really shine through. This is my go-to choice when I want to serve the meat with a side of horseradish or a simple mustard sauce rather than something sweet.
The overnight seasoning trick
For even better flavor, apply your dry rub the night before you plan to cook the brisket. Place the seasoned meat in a covered dish or a large resealable bag in the refrigerator. Letting the spices sit on the meat for several hours allows the salt to penetrate deeper into the beef. It also helps the flavors of the garlic and onion powders to fully develop. Just be sure to take the meat out of the fridge an hour before you start roasting so it loses the chill.
Cooking for a smaller group
If you cannot find a smaller cut and end up with a large brisket, you can easily divide it before you season it. Cut the brisket into two smaller, equal-sized pieces. You can then roast them side-by-side in the same pan. This often helps them cook more evenly and gives you more surface area for that crust to develop. It is a smart way to handle a big cut of meat if you don't have a large enough platter or pan to serve the whole thing at once.
Don't throw away the pan juices
After you remove the brisket to a cutting board, don't discard what is left in the foil and the bottom of the pan. That liquid is concentrated beef flavor and fat. You can strain it, let it sit for a minute so the fat rises to the top, and skim the fat off. The remaining liquid can be warmed up and served as a dipping sauce. It adds a lot of moisture back into the meat if you are reheating leftovers later in the week.
Storage and Reheating
If you have leftovers, store them in an airtight container in the refrigerator within two hours of cooking. The brisket will stay good for up to three days. It does not freeze particularly well because the texture can become a bit mealy upon thawing, so I try to eat the leftovers within that three-day window.
To reheat, slice the beef and place it in a shallow baking dish with a splash of beef broth or water to keep it moist. Cover the dish tightly with foil and heat it in a 325-degree oven until the meat is steaming hot, reaching an internal temperature of at least 165 degrees Fahrenheit. Reheating it gently like this helps prevent it from drying out. Avoid using the microwave if you can, as it tends to cook the edges too quickly and makes the meat tough.
Frequently Asked Questions
Do I need to remove all the fat before cooking?
You should not remove all the fat. Leave about a quarter-inch of the fat cap on the brisket. This fat melts during the long, slow cooking process and baste the meat from the top down, which is essential for keeping the beef moist and flavorful. If you trim it all off, the brisket is much more likely to become dry and tough.
Can I cook this in a different type of pan?
A heavy-duty roasting pan works best because it can handle the long oven time and the heat without warping. If you don't have one, a large, deep glass baking dish can work, but you must be very careful when lifting it in and out of the oven because it will be heavy. Always ensure the dish is oven-safe for the temperatures you are using.
Why is my brisket still tough after four hours?
Brisket is a tough cut of meat full of connective tissue that needs time to break down. If it is still tough, it simply hasn't cooked long enough or hasn't reached the right internal temperature. Use your thermometer to check for that 200 to 205-degree range. If it is lower, it needs more time. Keep it covered and give it another thirty minutes before checking again.
What should I serve with this dish?
This brisket is rich and savory, so it pairs best with lighter or acidic sides. A fresh coleslaw with a vinegar-based dressing, roasted root vegetables, or a simple potato salad work well to balance the heaviness of the beef. Since you have plenty of time while the meat is in the oven, you can easily prepare a few side dishes without feeling rushed.
Can I use a meat thermometer throughout the process?
You don't need to use a thermometer for the entire five hours. In fact, opening the foil to check the temperature will let out the steam and slow down the cooking process. Just use the thermometer near the end of the expected cooking time. Once it hits the target temperature, you know it is ready, and you won't need to guess.
Final Thoughts
Making a brisket in your own kitchen is a rewarding way to spend a weekend. It proves that you don't need fancy equipment to produce a meal that tastes like it took all day to prepare. Once you get the hang of the timing and the sealing technique, it becomes a very low-effort way to feed a crowd.
I hope this method helps you feel more confident in tackling larger cuts of meat. It really is about being patient and letting the oven do the work. The result is a satisfying, tender main course that is sure to become a regular part of your cooking rotation.