
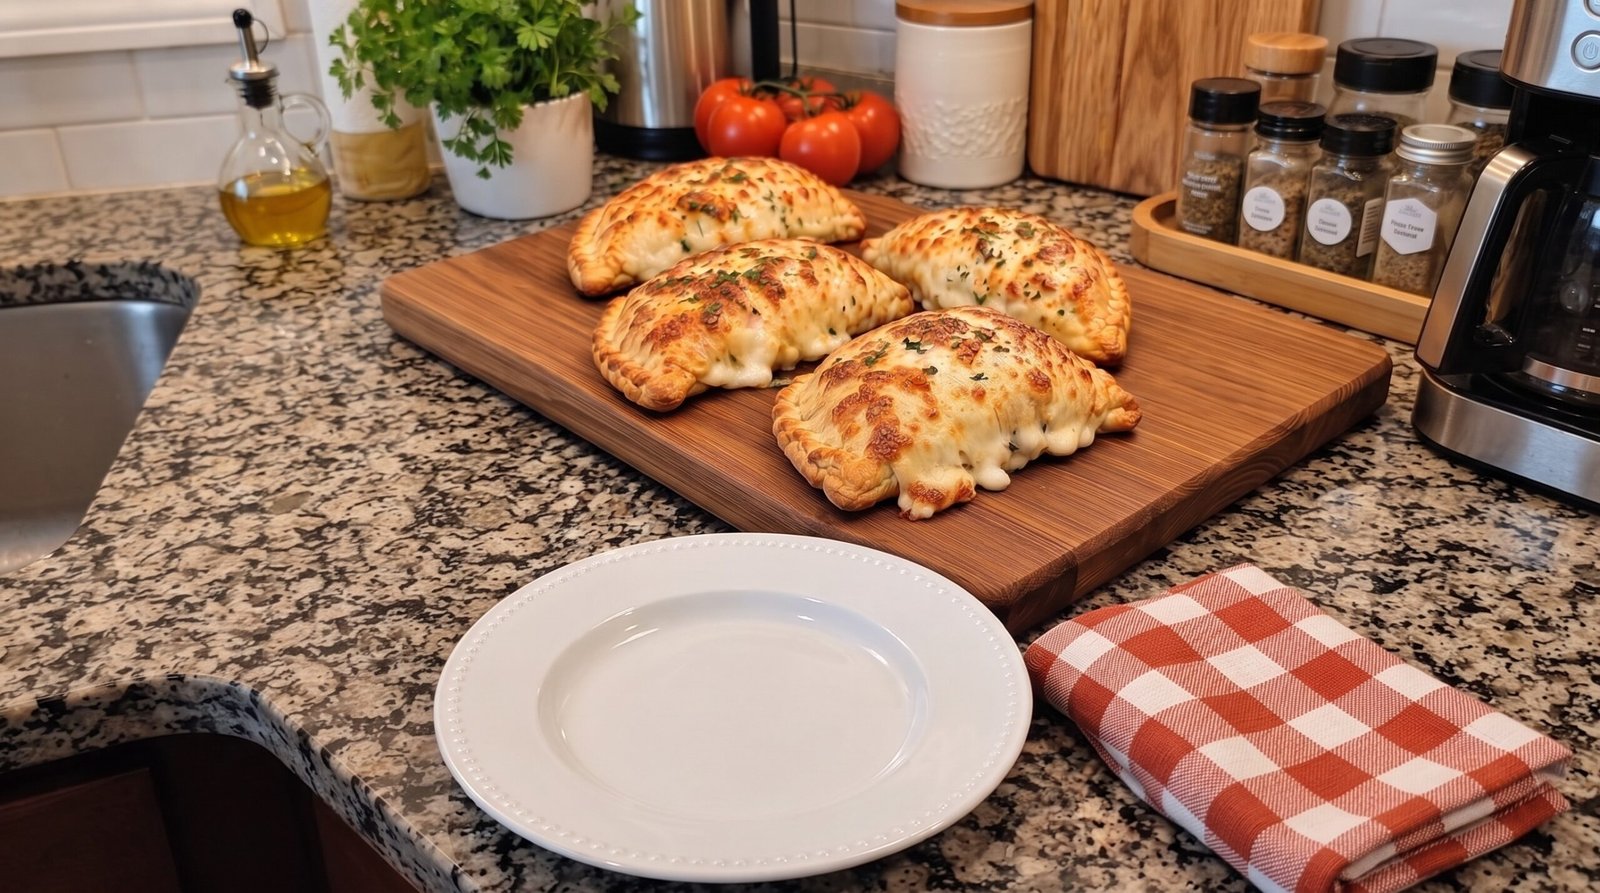
Sometimes my work week feels like a whirlwind, and by the time Thursday rolls around, I am honestly too tired to think about complicated dinners. I want something that feels like a treat but doesn't require me to stand over the stove for hours. That is exactly when I turn to making these homemade cheese calzones. They have that satisfying, bubbly golden crust and a center full of melted cheese that hits the spot every single time. It is a simple meal that feels much fancier than the effort it actually takes to put together. My kitchen usually ends up a bit messy with flour everywhere, but the result is always worth it when I pull a tray of these from the hot oven.
Why This Recipe Works
The main reason I reach for this recipe is the reliability of the dough. When you use a good quality store-bought pizza dough or make a simple batch yourself, the crust turns out sturdy enough to hold all that filling without turning into a soggy mess. The outside gets a nice, toasted color and a slight chew that contrasts with the softness inside. It is a balanced bite.
Another big plus is how customizable these are. If I have a little extra spinach in the fridge or a few stray mushrooms, they go right into the mix. Because the calzones are individual portions, I can make one with just cheese for the picky eaters in my house and add extra herbs or spices to the ones for the adults. There is no guesswork about how much someone will eat.
The cooking process is straightforward. By baking them at a high temperature, the crust cooks quickly and develops that golden color before the cheese inside completely leaks out. You get that dramatic pull of cheese when you cut into it, which is half the fun. It is honest, simple food that relies on good technique rather than expensive or rare ingredients.
Finally, they are incredibly practical for busy schedules. You can assemble them in advance and keep them in the fridge for a few hours before baking. If you have leftovers, they reheat well the next day, which makes my lunch planning much easier. It is a recipe that fits into a real life, where things might get a bit hectic, but you still want a hot and comforting meal waiting for you at the end of the day.
Ingredient Notes
The Dough Base
When it comes to the dough, you have two real options. You can pick up a standard pound of fresh pizza dough from the bakery section of your grocery store, which is what I do when I am short on time. If you want to make it from scratch, just use your favorite basic yeast, flour, water, and olive oil recipe. Whatever you choose, make sure it is at room temperature before you try to stretch it. If the dough is cold, it will snap back like a rubber band and make your life difficult.
The Cheese Filling
The center of these calzones relies on a mix of cheeses. I use a combination of low-moisture mozzarella and ricotta. The mozzarella gives you that long, stretchy melt that everyone expects, while the ricotta adds a creamy, mild texture that balances out the saltiness. If you only use mozzarella, the filling can sometimes become too rubbery as it cools. You should also add a bit of grated parmesan for a sharper flavor profile that cuts through the richness of the other two cheeses.
Seasonings and Herbs
To keep things tasting fresh, I always include a generous amount of dried oregano, a pinch of garlic powder, and some black pepper. You can use fresh basil if you have it on hand, but keep in mind that fresh herbs can release water as they cook. If you go with fresh, chop them finely and add them just before you seal the dough. I also like a little red pepper flake for a tiny bit of heat that wakes up the palate.
| Ingredient | Amount | Notes |
|---|---|---|
| Pizza dough | 1 pound | Room temperature |
| Mozzarella cheese | 2 cups | Shredded low-moisture |
| Ricotta cheese | 1 cup | Whole milk or part-skim |
| Parmesan cheese | 1/2 cup | Finely grated |
| Dried oregano | 1 tablespoon | Crushed |
| Garlic powder | 1/2 teaspoon | Adds depth |
| Egg | 1 large | For the wash |
| Olive oil | 1 tablespoon | For brushing |
The Recipe
- Prep Time: 20 minutes
- Cook Time: 18 minutes
- Total Time: 38 minutes
- Servings: 4 calzones
- Difficulty: Easy
Equipment Needed:
– Large baking sheet
– Parchment paper
– Mixing bowl
– Sharp knife or bench scraper
– Pastry brush
– Fork for crimping
Step-by-Step Instructions
Step 1: Prep the Oven and Dough
Start by preheating your oven to 425 degrees Fahrenheit. You need a high temperature to get that golden crust. Place your baking sheet inside or line it with parchment paper. Take your dough and divide it into four equal pieces. Use a sharp knife or a bench scraper to make sure the pieces are roughly the same size so they cook evenly.
Let the dough balls sit on the counter for about 10 minutes under a clean kitchen towel. This step is crucial because it lets the gluten relax. If you try to roll them out too soon, the dough will be tough to shape. Once they have rested, they should be soft and pliable to the touch.
Step 2: Mix the Filling
While the dough rests, grab a medium mixing bowl. Add the ricotta, the shredded mozzarella, and the parmesan cheese. Sprinkle in the dried oregano, garlic powder, and a few cracks of black pepper. Stir this with a spoon until the mixture is well combined. You want the ricotta to coat the mozzarella shreds so that everything stays together nicely when you fill the pockets.
Do not add salt at this stage. Most of the cheeses are already quite salty, and it is easy to overdo it. You can always serve a little marinara sauce on the side for dipping later, which will add all the extra seasoning you need. Keep the bowl of filling nearby on your workspace for assembly.
Step 3: Rolling and Filling
Lightly flour your surface and take one piece of dough. Using a rolling pin, roll it into a circle about 8 inches across. Don't worry if it's not a perfect circle; a rustic look is fine. Aim for the edges to be a little thinner than the middle so that when you fold it over, the seam isn't too thick and doughy.
Spoon about a quarter of your cheese mixture onto one half of the dough circle. Leave a one-inch border around the edge empty. If you put too much filling near the very edge, the seal will pop open in the oven, and you will have a cheesy mess on your tray. Fold the other half of the dough over the top of the filling to create a half-moon shape.
Step 4: Sealing the Calzones
Take your fingers and press the edges of the dough together firmly. Once you have a basic seal, use a fork to crimp the edge all the way around. Press down until you see the prongs of the fork leave a pattern in the dough. This does two things: it makes the calzone look professional, and it ensures that the cheese stays inside while baking.
If the dough feels sticky, just use a tiny dusting of flour on your fingers. Be careful not to tear the dough at the crimped edges. If you see any small holes or cracks, pinch them shut immediately. A tight seal is the secret to a high-quality finished product.
Step 5: Egg Wash and Bake
Transfer the shaped calzones to your parchment-lined baking sheet. In a small cup, whisk the egg with a tablespoon of water. Use a pastry brush to coat the tops of the calzones with this egg wash. This is what gives them that deep, golden-brown color. You can also sprinkle a tiny bit more dried oregano or parmesan on top for color.
Use a sharp knife to cut three small vents in the top of each calzone. This allows steam to escape so they don't burst open. Slide the tray into the center rack of your oven. Bake for 18 minutes. You are looking for a deep, golden brown crust that feels firm when you gently tap the top. If they are still pale, give them another 2 minutes, but watch them closely so they don't burn.
Mistakes I Made (So You Don't Have To)
Overstuffing the Dough
The first few times I made these, I tried to pack as much cheese inside as I could. I thought more was better, but every single one of them burst open while baking. All that lovely cheese leaked out onto the baking sheet, leaving me with empty pockets. The fix is simple: use only about 1/2 cup of filling per calzone. It feels like it isn't enough, but it is actually the perfect amount to fill the space without putting too much pressure on the seam.
Skipping the Rest Period
I used to be impatient and start rolling out the dough the second I bought it. It was a nightmare. The dough would shrink back the moment I lifted the rolling pin, and I ended up with these thick, lumpy circles that wouldn't fold properly. Now, I always give the dough at least 10 minutes to sit. That short rest makes the dough so much easier to work with, and you get a much better, thinner crust that bakes through evenly.
Ignoring the Vents
I once forgot to cut the vent holes in the top of the calzones. About halfway through the baking time, I heard a loud pop. The steam had nowhere to go, so the dough split open in the middle. It didn't taste bad, but it looked terrible. Now, I always make three quick diagonal slits with a paring knife right before they go into the oven. It is a quick step that saves the integrity of the crust.
Using Wet Fillings
I once tried adding fresh spinach that I had just washed and chopped without drying it. The water from the leaves seeped into the bottom of the dough during the baking process, turning it into a gummy, undercooked mess. Now, if I use any fresh greens, I sauté them briefly in a pan first to cook out the moisture and then let them cool completely before adding them to the cheese mix. If you must use them raw, make sure they are bone-dry.
Variations and Tips
Adding Proteins
If you want to add a bit more heartiness, try adding some diced pepperoni or cooked, crumbled sausage to the cheese mixture. Just make sure the meat is already cooked through before you add it, as the short baking time of the calzone isn't enough to safely cook raw meat. Drain any excess grease from the sausage before mixing it in, or your calzone will be greasy inside.
The Herb Twist
Instead of just using dried oregano, you can mix in some finely chopped fresh parsley or chives. These don't hold as much water as spinach, so they are safe to add without pre-cooking. If you like a kick, try adding a small amount of finely minced jalapeño or some red pepper flakes. It really changes the profile of the dish and makes it feel like something you would order at a specialized pizza shop.
Make-Ahead Strategy
These are perfect for planning ahead. You can assemble the calzones completely, place them on a tray, cover them with plastic wrap, and keep them in the fridge for up to 4 hours before you are ready to bake. When you are ready to eat, just remove the plastic, brush with the egg wash, and pop them in the oven. It saves you from having to do the prep work right when you are hungry.
Proper Surface Dusting
One tip that changed the way I work with dough is to use semolina flour for dusting the counter instead of standard all-purpose flour. It has a slightly grittier texture that stops the dough from sticking to the counter much better than regular flour. It also gives the outside of the crust a tiny bit of extra texture, which I find very pleasing when you take that first bite.
Storage and Reheating
If you have leftovers, they keep reasonably well. Once they have cooled to room temperature, wrap each calzone individually in plastic wrap or put them in an airtight container. Keep them in the refrigerator for up to 3 days. Anything longer than that and the texture of the crust starts to lose its appeal.
When you want to reheat them, do not use the microwave. The microwave will turn the crust soft and soggy, which is not what you want. Instead, preheat your oven to 350 degrees Fahrenheit. Place the leftover calzones on a baking sheet and bake them for 10 to 12 minutes until the cheese inside is hot and the crust has regained some of its crispiness. They should reach an internal temperature of 165 degrees Fahrenheit if you want to be sure they are heated through. I don't recommend freezing these, as the ricotta cheese tends to lose its texture and becomes grainy after thawing and reheating.
Frequently Asked Questions
Can I use store-bought pizza sauce inside the calzone?
I really advise against putting sauce inside the calzone while it bakes. The moisture from the sauce makes the dough soggy before it can crisp up. It is much better to serve the sauce in a small bowl on the side for dipping. This way, you get that sauce flavor without sacrificing the texture of your homemade crust.
Why is my crust getting dark but the inside is still cold?
This usually happens if your oven temperature is too high or if you are using a baking sheet that is too thin. Ensure your oven is calibrated correctly to 425 degrees Fahrenheit. If your oven tends to run hot, you might need to lower the temperature to 400 degrees and increase the time slightly. Also, check the thickness of your dough; if it is rolled too thick, it will take longer to bake the center.
Is there a way to tell if the cheese is fully melted?
You can tell if the cheese is ready by looking at the color of the crust and checking for any small amount of cheese bubbling out of the vents. Since you are using a mix of mozzarella and ricotta, it should be quite soft. If you want to be absolutely sure, you can gently insert a thin knife into the center and pull it out; if the knife comes out hot, the cheese is melted.
Can I brush the top with something other than egg?
Yes, you can brush the top with a little olive oil or even melted butter. The egg wash gives it the best color and a slight shine, but olive oil will give you a nice, crispy, golden-brown finish as well. If you use butter, brush it on right after the calzones come out of the oven for a rich, savory flavor.
My dough keeps tearing when I fold it, what can I do?
This usually means your dough was not rested long enough or it was rolled too thin. If it tears, just take a tiny piece of extra dough, patch the hole like a bandage, and press it firmly to seal. Since the calzone is rustic in style, no one will notice a small patch, and it will bake right into the crust.
Final Thoughts
Making these cheese calzones is one of those simple routines that makes me feel like a capable cook even on the busiest days. It takes very little time to pull together, but the satisfaction of eating a warm, cheesy meal right from my own oven is hard to beat. I hope you find this recipe as reliable as I do.
Once you master the folding and sealing, you can play around with different fillings to suit your taste. It is a forgiving and fun recipe that is always welcome on my kitchen table. Just remember to keep an eye on the oven, and you will have a meal worth sitting down to.