
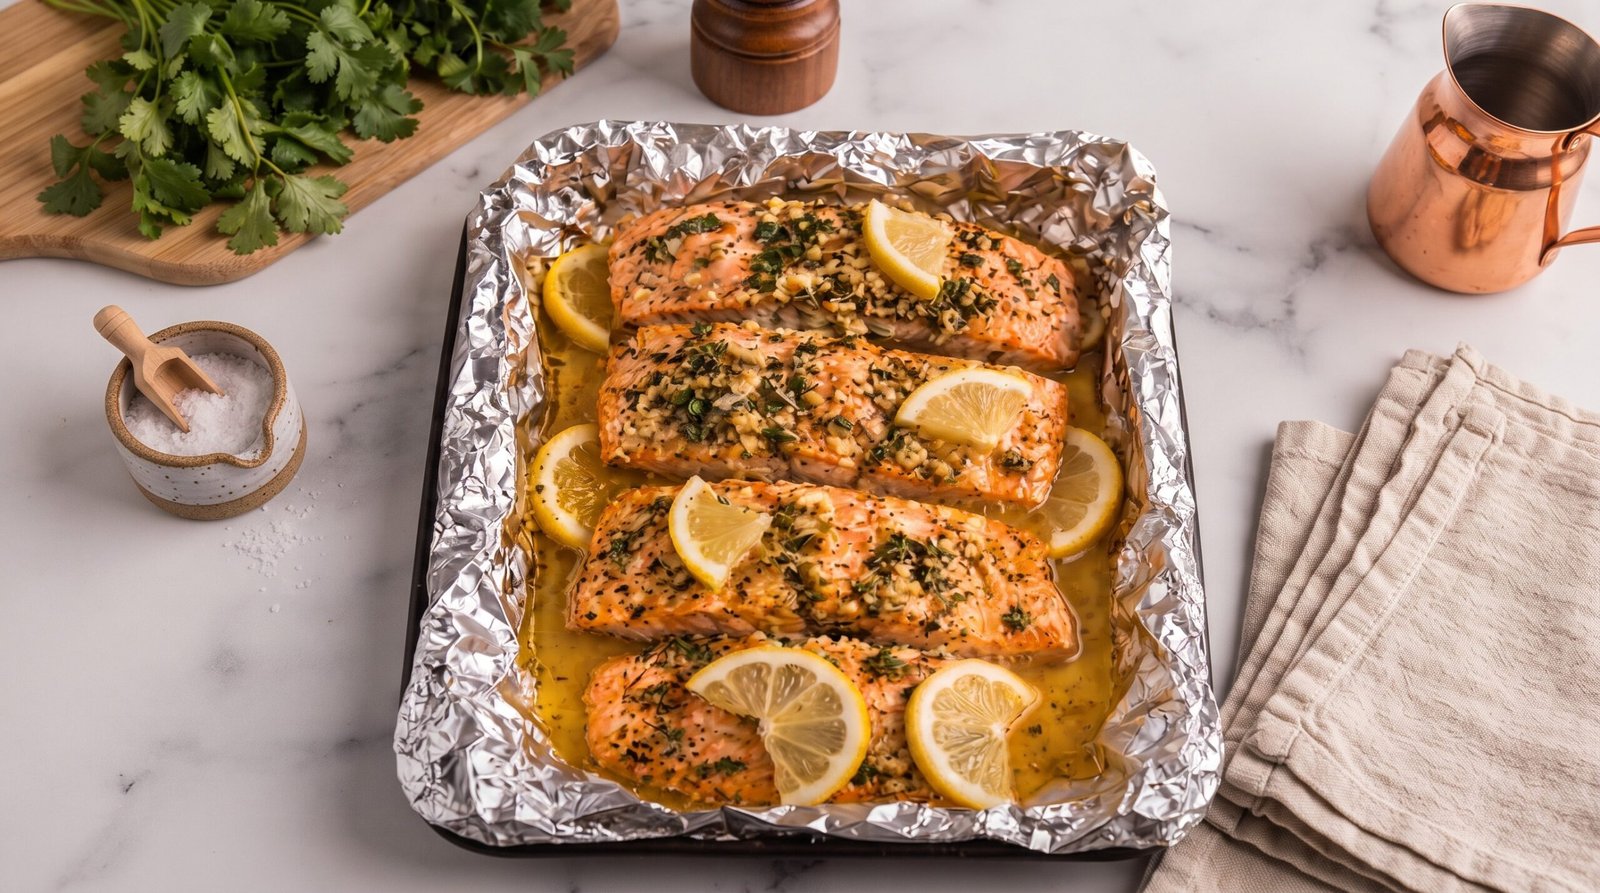
I often find myself standing in the kitchen at six o’clock on a Tuesday, staring at the refrigerator and wishing dinner would just appear. We have all been there, balancing long work days with the desire to put something decent on the table without spending an hour scrubbing pots. Salmon is one of my go-to solutions for these moments. It feels like a substantial meal, but it happens to be one of the fastest proteins to prepare. This lemon garlic baked salmon is something I rely on when I want fresh, vibrant flavors without any fuss. The method is incredibly simple, relying on a hot oven and a few basic pantry staples to turn fillets into a tender meal.
By the time you finish reading, you will know exactly how to handle salmon fillets to keep them moist and flavorful. You will see how the combination of citrus and aromatics works to brighten the richness of the fish, and you will learn the simple signs that indicate the salmon is cooked just right.
Why This Recipe Works
This dish succeeds because it treats the fish with respect through gentle oven heat. Many people are intimidated by cooking seafood because they worry about it becoming dry or tough. When you bake salmon in a foil packet, you are essentially creating a small steam chamber inside your oven. The moisture released from the fish and the lemon slices stays trapped with the garlic and herbs, ensuring that the salmon stays tender and succulent throughout the cooking process. You do not need to baste it or constantly check on it; the foil does the work for you.
The flavor profile is balanced by the acidity of fresh lemon and the pungent, savory notes of minced garlic. Salmon has a high fat content, which is a great asset for flavor but can sometimes feel heavy on the palate. By adding thin slices of lemon directly over the fish, the juice permeates the flesh as it cooks, cutting through the richness and providing a clean, bright finish. Fresh herbs like parsley add a slight earthiness that rounds out the garlic without overpowering the delicate sweetness of the fish.
Ease of cleanup is another major benefit of this preparation. Because the salmon is contained within a foil-lined pan, there is virtually no scrubbing required afterward. You simply fold up the edges of the foil to hold the juices, and when you are done, you discard the foil. It is a practical approach for a busy weeknight when the last thing you want to do is soak a heavy roasting pan. The consistent results make this a reliable choice for beginners and seasoned cooks alike, as the oven environment is far easier to control than a stovetop pan where splattering oil and high heat can lead to uneven cooking.
Ingredient Notes
The Fish
When shopping for salmon, try to look for fillets that have a vibrant, deep color. If you are buying at a fish counter, feel free to ask the person behind the desk to cut the fillets to a similar size and thickness. Uniformity is key here. If one piece is significantly thinner than the others, it will finish cooking long before the rest, leading to an uneven final product. I prefer fillets with the skin on because the skin acts as a protective barrier between the flesh and the hot bottom of the pan, helping to keep the bottom of the fish from drying out. If you buy skinless, just be aware that it cooks a bit faster and you should check for doneness a couple of minutes earlier.
Aromatics and Seasoning
Garlic is the heart of this dish. I recommend using fresh cloves that you mince yourself. The pre-jarred garlic often contains preservatives that change the flavor profile and it simply does not provide that same punchy, aromatic quality that you get from a freshly peeled clove. For the lemon, choose firm fruit that feels heavy for its size. That indicates it is full of juice. If you are worried about bitterness, make sure to slice the lemons thinly and remove any visible seeds before placing them on the fish. For the herbs, Italian flat-leaf parsley is my preference. It has a cleaner, more herbaceous flavor compared to curly parsley, which can sometimes taste a bit grassy or bitter. You could also use fresh dill if you prefer that specific anise-like note, but parsley is the most versatile option.
Fats and Liquids
You will need a good quality olive oil to coat the fish. You do not need the most expensive finishing oil, but something that tastes good to you on its own is best. The oil helps conduct the heat and keeps the surface of the salmon from sticking to the foil. If you want to change things up, you can substitute a small amount of melted salted butter, but olive oil is generally lighter and keeps the focus on the freshness of the fish. A pinch of kosher salt and freshly cracked black pepper are all the dry seasoning you need. Since salmon has a natural, distinct flavor, you do not want to drown it in too many competing spices.
| Ingredient | Amount | Notes |
|---|---|---|
| Salmon fillets | 4 pieces (6 oz each) | Uniform thickness is best |
| Fresh garlic | 4 cloves | Finely minced |
| Lemon | 2 whole fruits | Sliced thin, seeds removed |
| Olive oil | 3 tablespoons | Extra virgin works best |
| Fresh parsley | 1/4 cup | Chopped finely |
| Kosher salt | 1 teaspoon | Adjust to your preference |
| Black pepper | 1/2 teaspoon | Freshly cracked |
The Recipe
- Prep time: 10 minutes
- Cook time: 15 to 18 minutes
- Total time: 28 minutes
- Servings: 4
- Difficulty: Simple
Equipment needed:
– Baking sheet or large roasting pan
– Aluminum foil
– Chef’s knife
– Cutting board
– Small mixing bowl
– Instant-read meat thermometer
Step-by-Step Instructions
Step 1: Prep the Oven and Pan
Preheat your oven to 400 degrees Fahrenheit. It is important to let the oven reach its full temperature before you put the fish inside. A hot oven ensures that the salmon starts cooking immediately, which helps to maintain the texture of the flesh. While the oven is warming up, take a rimmed baking sheet and line it with a large piece of aluminum foil. Make sure the foil is long enough to cover the bottom and sides of the pan with plenty of excess. You want the sides of the foil to come up a bit to catch any juices that might escape during the cooking process.
Step 2: Season the Salmon
Pat the salmon fillets dry with paper towels. Removing the excess moisture from the surface of the fish is a crucial step because it helps the oil and seasonings adhere to the flesh. Once dried, place the fillets skin-side down on the prepared foil. In a small bowl, whisk together the olive oil, minced garlic, half of the chopped parsley, salt, and pepper. Use a brush or a spoon to coat the top of each salmon fillet with this mixture. Make sure to distribute the garlic evenly so each piece has a good amount of flavor.
Step 3: Add the Lemon
Take your lemon slices and arrange them neatly over the tops of the salmon fillets. You can overlap them slightly if you have large fillets, but the goal is to have the lemon juices drip down into the fish as it cooks. If you have extra lemon slices, you can place them in the spaces between the fillets on the foil. These extra slices will help release citrus aroma into the air inside the pan. There is no need to add extra water or liquid because the fish and the lemon will release enough moisture as they heat up.
Step 4: The Bake
Place the baking sheet on the center rack of your preheated oven. Bake the salmon for 15 to 18 minutes. The exact time depends on the thickness of your fillets. Salmon is done when the internal temperature reaches 145 degrees Fahrenheit when measured at the thickest part of the fillet. You can also look for visual cues; the flesh should turn from translucent to opaque and it should flake easily when you apply gentle pressure with a fork. If it still looks glossy or resists the fork, give it another two minutes.
Step 5: Finishing Touches
Remove the pan from the oven and carefully open the foil if you folded it over. Be mindful of the steam that will escape as soon as you open it. Sprinkle the remaining fresh parsley over the cooked fish for a pop of color and freshness. Let the fish rest for about three minutes before serving. This short rest allows the juices to redistribute throughout the meat, making each bite feel moist. Serve the salmon directly from the foil to keep cleanup easy, or use a wide spatula to transfer the fillets to individual plates, making sure to spoon some of the juices from the pan over the top.
Mistakes I Made (So You Don't Have To)
Mistake 1: Not checking for pin bones
In the past, I served salmon fillets that still had tiny pin bones hidden in the center of the meat. It is not dangerous, but it is certainly unpleasant for guests to find a bone while they are eating. Now, I always run my finger lightly along the centerline of the salmon fillet before I start seasoning. If I feel a bone, I use a pair of clean, dedicated kitchen tweezers to pull it out. It takes an extra minute, but it makes for a much more professional and enjoyable dining experience.
Mistake 2: Overcrowding the pan
I once tried to squeeze six large fillets onto a small tray, and they were touching each other. Because they were packed so tightly, the air could not circulate well, and the parts where the fish touched stayed soggy and undercooked while the exposed parts got too hot. Now, I make sure there is at least an inch of space between each fillet. If I am cooking for a larger group, I use two separate baking sheets rather than trying to cram everything onto one. Proper spacing ensures even heat distribution.
Mistake 3: Forgetting to pat the fish dry
Early on, I used to put the oil directly onto the fish while it was still damp from the packaging. The oil would just slide right off the surface, and the seasonings would not stick properly. It meant that a lot of the garlic and pepper ended up in the bottom of the pan rather than on the salmon. Now, I make sure to use paper towels to get the fish as dry as possible before the oil goes on. The oil stays on the fish, and the seasonings cling where they belong.
Mistake 4: Guessing the cook time
I used to rely solely on the clock, which led to some dry, overcooked salmon. Every oven is a little different, and the thickness of the fish varies wildy depending on the cut. I finally bought a reliable instant-read thermometer. Checking the temperature is the only way to be 100 percent sure that the fish is cooked through without turning into a tough, dry piece of meat. Aiming for 145 degrees Fahrenheit ensures safety and quality every single time. It is a small investment that saves every piece of fish I cook.
Variations and Tips
Using Different Herbs
While I love parsley, you can swap it out depending on what you have in your herb garden. Fresh thyme leaves, for instance, add a slightly woody, deep flavor that pairs wonderfully with the lemon. If you use a heartier herb like thyme, you can add it at the start of the bake. For more delicate herbs like cilantro or chives, it is best to add them only after the fish has come out of the oven. This preserves their bright, fresh flavor and prevents them from wilting too much in the heat.
A Kick of Heat
If your family enjoys a bit of spice, try adding a pinch of red pepper flakes to the oil and garlic mixture before spreading it on the fish. You do not need much, as the heat can become quite pronounced once it gets into the oven. Start with just a quarter-teaspoon for the whole batch. It adds a subtle warmth that contrasts well with the acidity of the lemon and the richness of the fish, making the entire dish feel more dynamic.
Time-Saving Prep
You can actually prep the foil-lined trays with the seasoned salmon earlier in the day. Get everything ready, place the prepared fish on the baking sheet, and cover it loosely with plastic wrap or another piece of foil. Keep it in the refrigerator until about 20 minutes before you are ready to eat. This takes the pressure off the actual mealtime. Just remember to take it out of the fridge a few minutes before putting it into the preheated oven so it is not ice-cold when it goes in.
The Importance of the Rest
Always give your fish those three minutes of rest after it comes out of the oven. It is tempting to dig in right away, especially when you are hungry, but the resting period is where the texture settles. The residual heat continues to gently finish the center of the fillet, and the juices that were bubbling under high heat have a moment to stabilize. If you cut into the fish immediately, you might find that it falls apart too easily or seems less moist than it would have been with just a little patience.
Storage and Reheating
If you have leftovers, do not let them sit out on the counter. Once you have finished eating, put any remaining salmon into an airtight container and store it in the refrigerator. It is best to eat the leftovers within 2 to 3 days. Seafood can lose its quality quickly, so it is better to prioritize eating it sooner rather than later. When you are ready to eat, you need to reheat it properly to ensure it remains safe to consume.
To reheat, the goal is to get the fish steaming hot, reaching an internal temperature of 165 degrees Fahrenheit. I find the best way to do this is to place the fillets in a small baking dish with a splash of water or broth to keep them from drying out. Cover the dish with foil and bake at 325 degrees Fahrenheit for about 8 to 10 minutes. Alternatively, you can use a skillet over low heat, adding a teaspoon of water and covering the pan with a lid. Steaming the leftovers gently prevents them from becoming tough or rubbery, which often happens in a microwave. I generally do not recommend freezing this cooked salmon, as the texture of the fish changes significantly once it has been frozen and thawed, often becoming mushy.
Frequently Asked Questions
Can I use frozen salmon for this recipe?
Yes, but you should thaw it completely in the refrigerator overnight before you plan to cook it. If you try to bake frozen salmon directly, the outside will cook and dry out long before the center is even close to being done. Once it is thawed, pat it very dry with paper towels to remove all the excess water that accumulated during the thawing process.
Is it necessary to leave the skin on the salmon?
It is not strictly necessary, but I highly recommend it. The skin acts as a protective layer between the delicate flesh and the hot surface of the baking pan. If you prefer skinless salmon, it will still cook, but you should keep a closer eye on it. You might want to place a piece of parchment paper under the skinless fillets to make them easier to move, as they are more likely to stick to the foil.
What should I serve with this lemon garlic salmon?
This dish is very versatile because it has a clean flavor. I usually serve it alongside steamed asparagus or a simple green salad with a light vinaigrette. If you want something more substantial, roasted baby potatoes or a side of fluffy quinoa work very well, as they can soak up the delicious lemon and garlic juices left on the plate.
How do I know if the salmon is fresh?
When buying fresh salmon, look for flesh that is firm to the touch and has a bright color. It should have a clean, neutral scent. If the fish has a strong, fishy odor, or if the flesh looks dull or feels slimy, it is not fresh. A good fishmonger will always be happy to let you look at the product closely before you buy it.
Can I use dried herbs instead of fresh?
You can, but the flavor will be much more concentrated and earthy. If you are substituting, use about one-third of the amount of dried herbs compared to the fresh ones listed in the recipe. Rub the dried herbs between your fingers before adding them to the oil mixture to help release their essential oils, which helps them bloom during the baking process.
Final Thoughts
Cooking a great dinner does not have to be a complicated production. This lemon garlic baked salmon has become a standard in my house because it relies on good ingredients and a reliable, simple technique. By keeping the steps straightforward and focusing on the quality of the fish and aromatics, you can have a restaurant-quality meal without any of the stress.
I hope this becomes a regular part of your rotation, just as it has in mine. It is one of those meals that reminds me that sometimes the simplest way to prepare food is the most effective. Take your time with the prep, keep an eye on the temperature, and enjoy the result.