
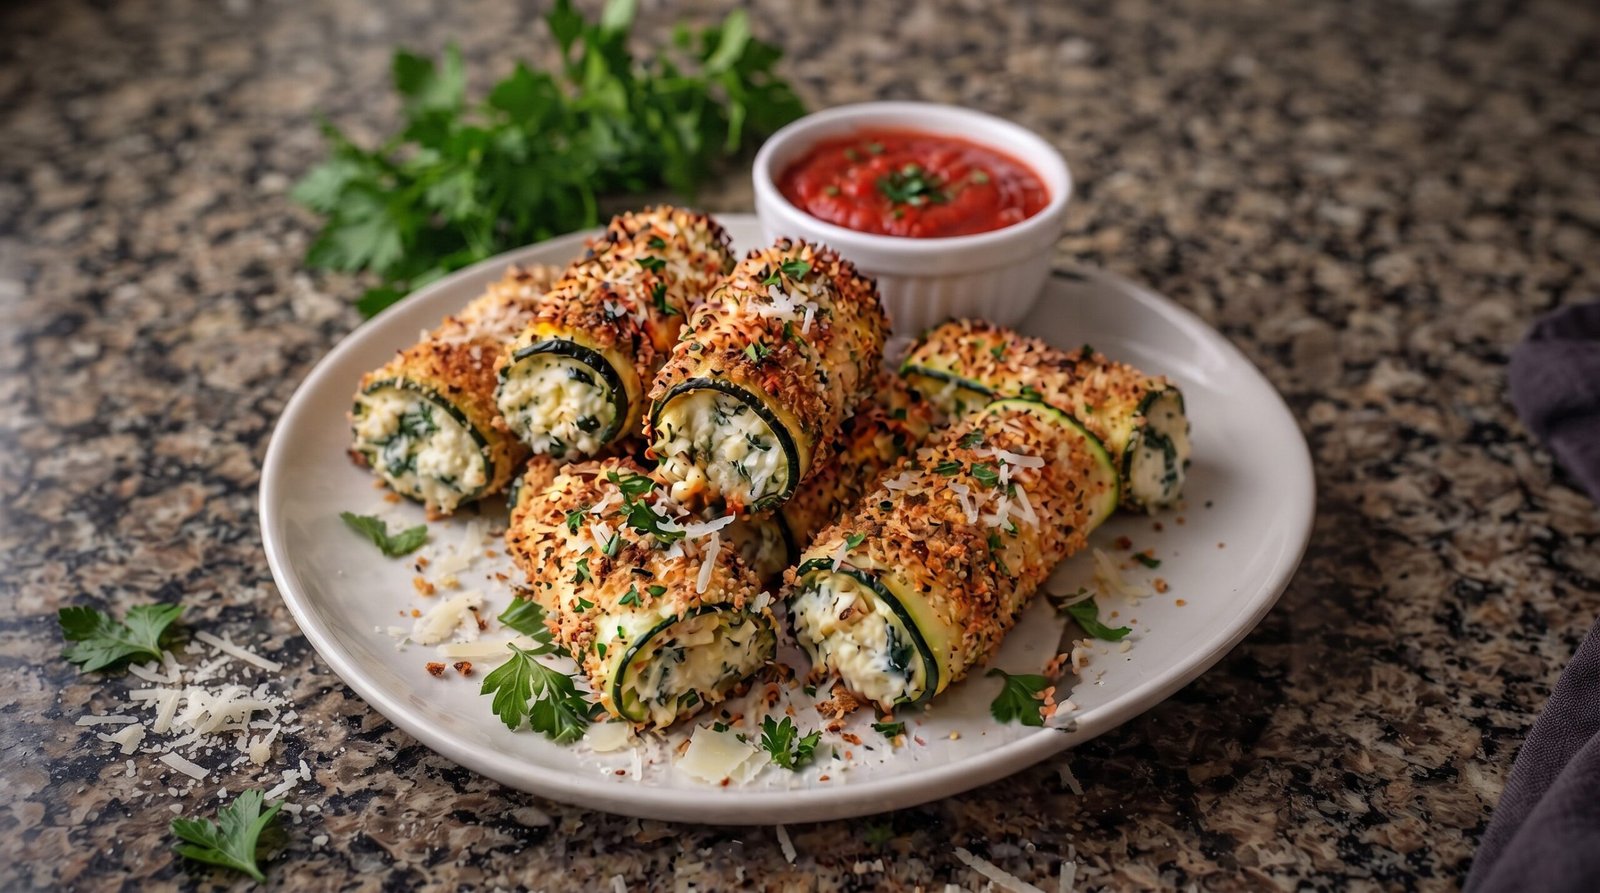
Sometimes I stare at a couple of zucchinis sitting in my vegetable crisper and wonder how to make them feel special. It is easy to fall into the habit of just sautéing them or throwing them into a pasta sauce, but that gets boring. I wanted something that felt more like a proper meal or an interesting party snack, something that kept the freshness of the summer squash but added a bit of texture and warmth. That is how I started making these Zucchini Ricotta Roll Ups. They are simple to put together, but they look like you spent hours rolling and stuffing each piece by hand.
When you bring these out, the combination of the tender, thin zucchini strips wrapped around that creamy cheese filling is a real treat. It is one of those dishes that somehow pleases everyone, whether they usually love vegetables or just want something cheesy and satisfying. You end up with a plate of rolls that have just the right balance of a light vegetable base and a savory, herb-filled center. It is a great way to use up those extra zucchinis from the garden or the grocery store, and you will find yourself making them over and over again once you see how easy they are.
Why This Recipe Works
The main reason I reach for this recipe so often is the contrast in textures. Zucchini can be watery if you do not handle it right, but here we prep it by drawing out that extra liquid first. This ensures that the rolls stay firm enough to hold their shape in the oven and do not end up as a soggy mess on your plate. By slicing the zucchini into long, thin ribbons and giving them a quick salting session, you get a clean, vegetable-forward foundation that acts as a wrapper for the rich, creamy interior.
The filling is the star of the show. It is a blend of ricotta, parmesan, and fresh herbs that gets nice and warm without splitting or turning oily. Because we bake these at a steady 400 degrees Fahrenheit, the edges of the zucchini soften up just enough to become tender while the outer breadcrumb coating gets a light golden crust. This crust provides a tiny bit of texture that contrasts with the softness of the cheese. It is a satisfying bite that does not feel heavy, making it a great option for a side dish or even a main meal when paired with a side salad.
Another reason this recipe is a staple in my house is how flexible it is. You are not locked into one specific set of herbs or one type of cheese. While I prefer a classic mix of parsley and basil, you could easily swap in oregano, thyme, or even a bit of fresh mint if you want to experiment. It is also a very forgiving dish. Even if your rolling skills are not precise the first few times, the cheese keeps everything together once it hits the heat of the oven. You will find that these disappear from the tray faster than you can explain how you made them.
Ingredient Notes
The Produce
For the zucchini, look for long, straight squashes that feel firm to the touch. Avoid ones that have soft spots or look wrinkled, as those will be mushy when you try to slice them. You want a medium-to-large size because it makes it much easier to get long, even ribbons using a vegetable peeler or a mandoline. For the herbs, I always use fresh flat-leaf parsley and basil. Dried herbs just do not have the same brightness here, and since the filling is mostly dairy, you need those fresh aromatics to cut through the richness.
The Dairy
Whole milk ricotta is the gold standard for this dish. It has a creaminess that part-skim versions just cannot match. When you buy it, take a look at the ingredient list and try to find a brand that does not have too many fillers or gums, as those can make the filling feel gummy. The parmesan cheese should be grated finely so it melts evenly into the ricotta. I prefer buying a block and grating it myself because it does not have the anti-caking agents that pre-grated bags use, which helps the cheese melt more naturally into the filling.
The Coating
To get that nice finish on the outside of the rolls, you need high-quality breadcrumbs. I usually make my own by pulsing stale sourdough or crusty bread in a food processor, but store-bought panko works too. Panko is lighter and creates a bit more of a lift on the outside of the roll compared to standard, fine breadcrumbs. You will also need a bit of olive oil or cooking spray to help the breadcrumbs adhere to the zucchini ribbons and turn golden in the oven.
| Ingredient | Amount | Notes |
|---|---|---|
| Large Zucchini | 3 pieces | Sliced into 1/8-inch ribbons |
| Whole Milk Ricotta | 15 ounces | Drained of any excess liquid |
| Parmesan Cheese | 1/2 cup | Finely grated |
| Fresh Parsley | 1/4 cup | Finely chopped |
| Fresh Basil | 1/4 cup | Finely chopped |
| Breadcrumbs | 1 cup | Panko or homemade coarse crumbs |
| Olive Oil | 2 tablespoons | For brushing |
| Salt and Pepper | To taste | Adjust based on your preference |
The Recipe
- Prep Time: 20 minutes
- Cook Time: 25 minutes
- Total Time: 45 minutes
- Servings: 4 to 6
- Difficulty: Simple
Equipment Needed:
– Vegetable peeler or mandoline
– Baking sheet
– Paper towels
– Mixing bowl
– Pastry brush
– Baking dish or tray
Step-by-Step Instructions
Step 1: Prepare the Zucchini Ribbons
Start by washing the zucchinis and trimming off the ends. Using your mandoline or a steady vegetable peeler, slice the zucchini into long, thin ribbons, aiming for about 1/8-inch thickness. You want them thin enough to bend without snapping, but thick enough that they hold their structure. Lay these ribbons flat on a baking sheet lined with paper towels.
Sprinkle a light dusting of salt over all the ribbons and let them sit for about 15 minutes. This is a very important step because it draws out excess water that would otherwise make your rolls soggy. You will see little beads of moisture form on the surface. After the time is up, use clean paper towels to gently pat the ribbons dry. Getting them as dry as possible is the key to preventing a watery outcome.
Step 2: Mix the Ricotta Filling
In a medium mixing bowl, combine the ricotta, half of the parmesan, the fresh parsley, and the fresh basil. Season the mixture with a little black pepper and a pinch of salt. Taste the mixture and adjust the seasoning if you think it needs more punch. The cheese provides a nice base, but the herbs are really what make the filling shine, so do not be shy with them.
Stir everything together until the ingredients are well incorporated and the mixture is uniform. You want it to be thick enough to stay inside the zucchini while you roll, but not so dry that it crumbles. If you feel it is a bit too stiff, you can add a small teaspoon of olive oil to loosen it up, but usually, the texture of good ricotta is just right on its own.
Step 3: Roll and Assemble
Take a dried zucchini ribbon and lay it flat on your work surface. Spoon about a tablespoon of the ricotta mixture onto one end of the ribbon. Use the back of the spoon to spread it out slightly. Starting from the end with the cheese, gently roll the zucchini up until you have a neat, cylindrical shape.
Place the roll, seam side down, on a lightly oiled baking sheet or baking dish. Repeat this process with the remaining zucchini ribbons. If you have any filling left over, you can dollop it into the gaps between the rolls or just save it to spread on crusty bread later. The rolls should be snug against each other so they do not tip over during the baking process.
Step 4: Top and Bake
Once all your rolls are arranged on the baking sheet, lightly brush the tops with a little olive oil. Sprinkle the remaining parmesan and the breadcrumbs over the top of the rolls. This gives them a nice crust that turns golden brown in the oven. You do not need to drown them in oil, just a light coating is enough to help the crumbs toast up.
Preheat your oven to 400 degrees Fahrenheit. Place the tray in the center rack and bake for 25 minutes. You are looking for the zucchini to be tender all the way through and the cheese filling to be heated through. The tops should look lightly browned and the cheese might start to bubble slightly at the edges.
Step 5: Final Check and Serve
Remove the tray from the oven carefully. Let the rolls sit for about 5 minutes before you try to move them to a serving platter. This resting time is important because it allows the cheese filling to set just a little bit, making it easier to lift each roll without it falling apart.
When you are ready to serve, garnish with a little extra fresh parsley if you like. You can serve these with a side of warm marinara sauce for dipping, which adds a nice acidic contrast to the rich, creamy cheese. These are best served warm, as the texture of the zucchini and the melted cheese is most enjoyable right out of the oven.
Mistakes I Made (So You Don't Have To)
Forgetting to Salt the Zucchini
The biggest mistake I made when I first tried this was skipping the salting step. Zucchini is naturally full of water, and if you do not draw that out with salt, the oven heat just turns that water into steam. The result was a tray of soggy, flat rolls sitting in a pool of liquid. Always take that extra 15 minutes to salt the ribbons. It transforms the final texture from mushy to tender-firm.
Slicing the Zucchini Too Thick
I once tried using a knife to hand-cut the ribbons, and I made them way too thick. Because they were thick, they did not bend well and cracked whenever I tried to roll them. The fix here is to use a sharp mandoline or a high-quality vegetable peeler. If you do not have those, just take your time with a knife to get them consistently thin. If they are too thick, they will never be flexible enough to roll.
Overstuffing the Rolls
It is tempting to put as much cheese as possible into each roll, but I learned the hard way that too much filling just spills out into the pan the moment it starts to warm up. You want enough to taste the filling in every bite, but not so much that the roll cannot close properly. Use about a tablespoon per ribbon, and leave a little bit of space at the edges so the cheese stays contained as it expands slightly in the heat.
Rushing the Resting Time
I used to be so excited to eat these that I would pull them from the oven and try to plate them immediately. They were so soft and delicate that they would just collapse on the plate. Giving them that 5-minute rest allows the ricotta to cool just enough to hold its shape. It sounds like a small detail, but it really makes a difference in how the rolls look when you bring them to the table.
Variations and Tips
Try Different Cheeses
If you find that ricotta is a bit too mild for your taste, try mixing in some goat cheese or even some crumbled feta. Goat cheese adds a nice tang that pairs well with the neutral flavor of the zucchini. Just keep in mind that these cheeses melt differently than ricotta, so don't overdo it, or the rolls might lose their shape. A 75/25 ratio of ricotta to your chosen secondary cheese usually works well.
Add Some Heat
For those who like a little spice, add a pinch of red pepper flakes into your ricotta mixture. It cuts through the creaminess of the dairy and adds a nice warmth that lingers on the palate. I also like to add a tiny bit of lemon zest to the filling; the brightness of the lemon really wakes up the flavor of the fresh basil and parsley.
Make Ahead Tip
These are actually great for meal prepping if you assemble them ahead of time. You can prep the zucchini and the filling, roll them up, and place them on your baking sheet in the fridge for up to a few hours before you need to cook them. Just remember to add the breadcrumb topping right before you put them in the oven so the crumbs don't get damp from the zucchini while they sit.
Serving Ideas
While these are great on their own, they make a fantastic side to a roast chicken or a piece of grilled white fish. If you want to make them a main dish, serve them alongside a crisp arugula salad with a lemon vinaigrette. The peppery greens of the arugula contrast beautifully with the creamy, savory nature of the zucchini rolls, providing a balanced meal that doesn't feel heavy.
Storage and Reheating
If you happen to have leftovers, they keep well in the refrigerator for up to 3 days. Make sure to store them in an airtight container once they have cooled completely to room temperature. Do not let them sit out on the counter for more than 2 hours, as the dairy in the ricotta filling can spoil.
To reheat, the best way is to put them in the oven or a toaster oven at 350 degrees Fahrenheit until they are heated through. Microwaving them is possible, but it often makes the zucchini a bit soggy and the cheese too soft. If you are in a rush and must use the microwave, do it in short 30-second bursts. You want to make sure the center of the roll reaches 165 degrees Fahrenheit to be safe, especially since this dish contains dairy. I do not recommend freezing this dish, as the high water content of the zucchini leads to a very poor texture once it thaws.
Frequently Asked Questions
Can I use yellow squash instead of zucchini?
Yes, you can absolutely use yellow summer squash. They have a very similar texture and moisture content to zucchini, so the process remains the same. The only real difference is the color. Some people even like to mix both green zucchini and yellow squash to create a more colorful platter. The flavors are nearly identical, so it really just comes down to what you have available or what you prefer for presentation.
My ricotta is very wet. Should I drain it?
If your ricotta looks watery when you open the container, it is a good idea to drain it. You can place the ricotta in a fine-mesh sieve lined with a piece of cheesecloth or a clean paper towel and let it sit over a bowl for about 15 minutes. This gets rid of that extra whey that can make your filling loose and watery. Drier ricotta makes for much more stable rolls, so it is a worth-while step if your cheese seems thin.
Do I have to use a mandoline?
You do not have to use a mandoline. While it makes the job faster and ensures the slices are perfectly even, a sharp vegetable peeler works wonders. You just have to be a bit more careful as you get toward the center of the zucchini. If you use a knife, just take your time to ensure your ribbons are thin enough to roll. It might take a bit more practice to get them all the same size, but it is definitely doable.
Why did my breadcrumbs burn?
If your breadcrumbs burned, it is likely because they were exposed to the heat for too long or your oven rack was too high. Try keeping the tray on the middle or lower-middle rack to ensure even cooking. Also, if you find they are browning too fast, you can cover the tray loosely with a piece of aluminum foil for the first 15 minutes, then remove it for the final 10 minutes to allow the tops to crisp up without burning.
Can I add meat to the filling?
You can add cooked meat to the filling, but it needs to be finely minced so it doesn't poke through the zucchini ribbons. Finely cooked, crumbled sausage or ground turkey can work, but make sure the meat is fully cooked and drained of excess fat before adding it to the ricotta. Because you are adding extra moisture and weight, keep the meat portion small, maybe just a couple of tablespoons per batch of filling.
Final Thoughts
Making these Zucchini Ricotta Roll Ups has become one of my favorite ways to spend time in the kitchen. There is something really satisfying about the repetitive, calming process of rolling each piece and seeing the tray fill up. It is a dish that feels elegant enough for guests but is simple enough to put together on a busy Tuesday evening when you want something fresh.
I hope you enjoy making these as much as I do. Experiment with the herbs, play around with the cheese ratios, and find the combination that makes you happy. Cooking should be an enjoyable, low-pressure experience, and this dish is the perfect example of how a few simple ingredients can turn into something truly enjoyable. Enjoy every single bite.