
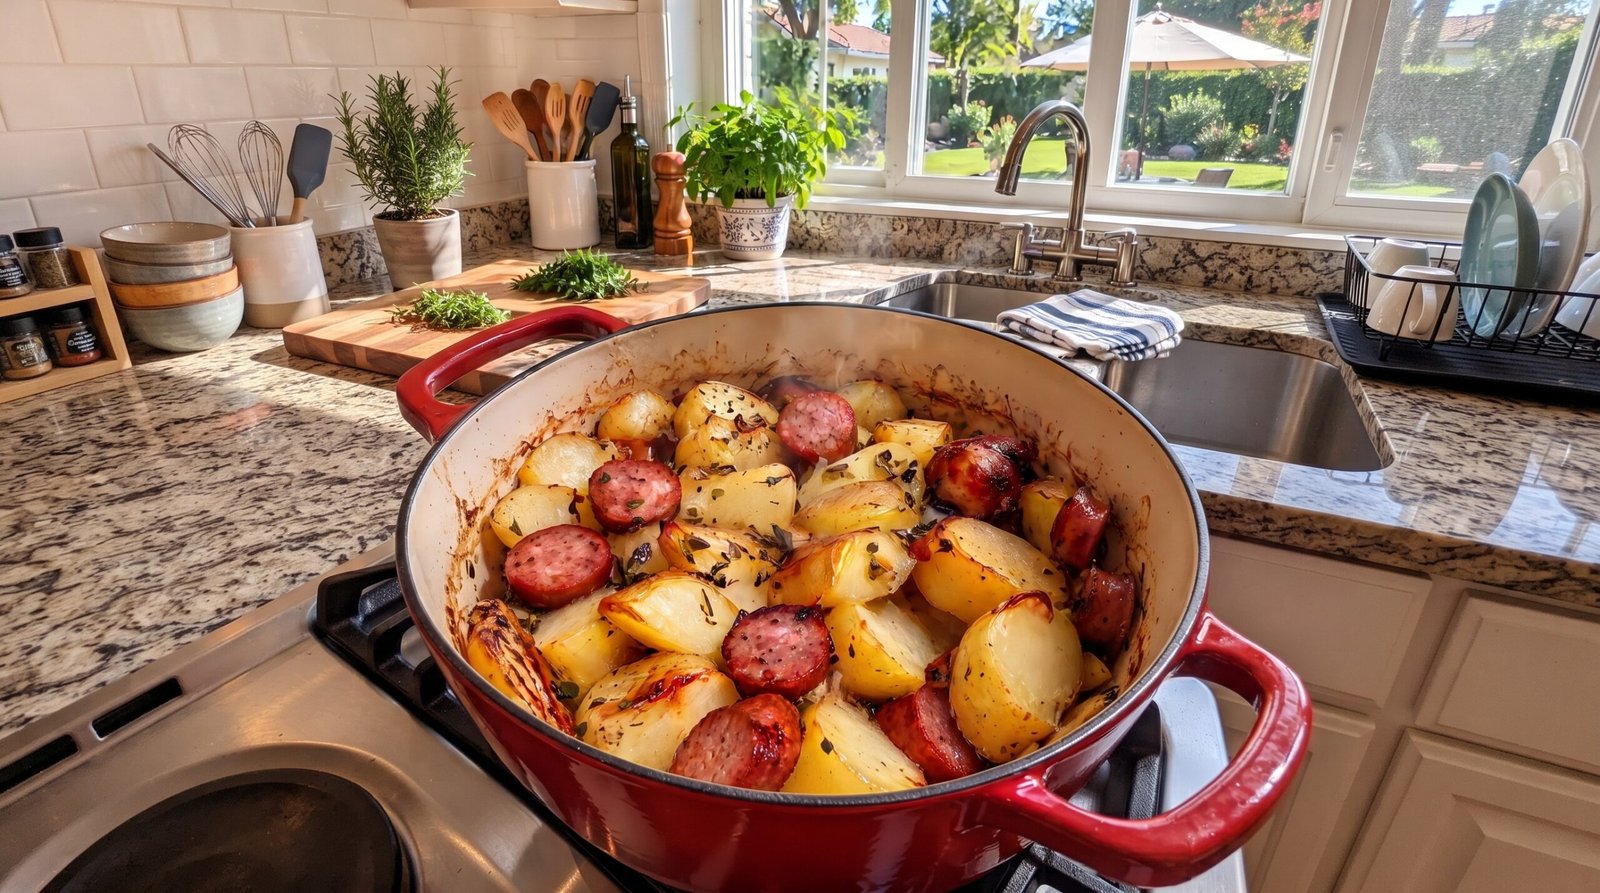
I remember the first time I realized how much effort I was putting into weeknight dinners that simply did not require it. I was spending an hour chopping individual sides, washing multiple pans, and trying to keep the stove top clean, all while running back and forth to check on the main course in the oven. That was back when I thought more components meant a better meal. Eventually, I hit a wall where I just wanted something hearty and satisfying without the sink full of dishes. That is when I landed on this simple combination of savory sausage and golden potatoes. It is the kind of meal that relies on the quality of its components rather than a complicated technique. I have made this dozens of times since, usually on a Tuesday when the energy levels are low but the appetite for something warm and comforting is high. You get a one-pot roasted sausage and potatoes meal that provides a complete dinner with very little cleanup.
Why This Recipe Works
The primary reason I turn to this recipe so often is the way the sausage fat renders into the potatoes as they bake. When you cut the potatoes into uniform, bite-sized pieces and toss them with the sliced sausages, the fat from the meat coats the starch in the potatoes. This creates a flavor profile that you simply cannot replicate with butter or oil alone. The exterior of the sausage develops a firm texture while the potatoes soften through, soaking up all those savory juices in the bottom of the pot.
Another factor is the heat distribution in a heavy pot. By using a cast iron or enameled Dutch oven, you get consistent radiant heat that helps the potatoes gain some color on the bottom. You are not just steaming the ingredients; you are letting them roast in their own environment. Because everything is contained in a single vessel, the moisture stays inside, keeping the potatoes tender while the edges catch enough heat to become slightly firm.
Finally, the ease of cleanup makes this a winner. You are looking at a single pot that goes from the prep area to the oven and then directly to the table. There is no guesswork about timing multiple sides, because the potatoes and the sausage reach their point of being ready at the same time. It removes the stress of timing the meal so that everything arrives at the table hot, which is a common hurdle with more complex recipes. It is honest, straightforward cooking that rewards patience and quality ingredients.
Ingredient Notes
The Sausage
For this dish, you want a high-quality smoked sausage. I find that a traditional kielbasa or a smoked pork link works best because it has enough fat content to flavor the potatoes as it releases during the roasting process. Avoid sausages that are labeled as pre-cooked breakfast links, as they tend to be too small and will dry out before the potatoes are finished. If you can find a local link with garlic or herbs already mixed in, it adds a great depth to the finished dish. Just be sure to check your product labels if you are avoiding specific additives.
The Potatoes
I have experimented with almost every potato variety out there, and I always come back to Yukon Golds. They have a thin, light skin that you do not need to peel, which saves time, and their texture is creamy enough that they do not turn mealy in the oven. If you prefer a starchier potato like a Russet, keep in mind that they will break down more and absorb more moisture, leading to a softer, less defined cube. Whatever you choose, aim for uniform sizes so they finish at the same time.
Seasoning and Aromatics
The beauty of this dish is that the sausage provides most of the seasoning. However, a little help goes a long way. I use a few sprigs of fresh thyme or rosemary to add an earthy note that cuts through the richness of the meat. A touch of salt is necessary for the potatoes, but go easy on it, as the sausage is often quite salty on its own. For the fat, a high-quality olive oil helps get the process started before the sausage fat begins to melt.
| Ingredient | Amount | Notes |
|---|---|---|
| Smoked Sausage | 1 pound | Cut into 1-inch rounds |
| Yukon Gold Potatoes | 2 pounds | Cut into 1.5-inch chunks |
| Olive Oil | 2 tablespoons | Extra virgin is fine |
| Fresh Thyme | 1 tablespoon | Finely chopped |
| Kosher Salt | 1/2 teaspoon | Adjust based on sausage saltiness |
| Black Pepper | 1/2 teaspoon | Freshly cracked |
| Fresh Garlic | 3 cloves | Minced or smashed |
The Recipe
- Prep Time: 15 minutes
- Cook Time: 45 minutes
- Total Time: 1 hour
- Servings: 4
- Difficulty: Easy
- Equipment: Heavy-duty Dutch oven or cast-iron pot, sharp chef knife, cutting board, measuring spoons.
Step-by-Step Instructions
Step 1: Prep the Oven and Ingredients
Start by preheating your oven to 400 degrees Fahrenheit. While the oven heats, wash your potatoes thoroughly to remove any grit. Since I use Yukon Golds, I leave the skins on for that rustic feel, but use a vegetable peeler if you prefer them smooth. Cut the potatoes into even pieces about 1.5 inches in size. Consistent sizing is the secret to making sure everything is finished at the same moment.
Slice your sausage into 1-inch thick rounds. If the links are very thick, you might want to slice them on a bias to keep the pieces a bit smaller, which helps them cook through and mingle better with the potato chunks. Take your garlic cloves and mince them finely, or just smash them if you like a more subtle, dispersed flavor throughout the dish.
Step 2: Combine and Season
In your Dutch oven, add the chopped potatoes and the sliced sausage. Drizzle the two tablespoons of olive oil over the mixture. Use a sturdy spoon to toss everything together so that every piece of potato is coated in a thin layer of oil. This ensures they don't stick to the bottom of the pot and helps the seasoning adhere to the surface.
Sprinkle the salt, black pepper, chopped thyme, and garlic over the mixture. Give it another thorough toss. You want to make sure the garlic and herbs are distributed throughout, rather than stuck in one corner. Since the sausage is already cooked, you are really just looking to flavor the potatoes and get everything hot and happy together.
Step 3: Initial Roast
Place the Dutch oven into the center rack of your preheated oven. You do not need to cover it for this stage, as you want the air to circulate and the surface of the ingredients to reach a nice, firm texture. Let it roast for about 25 minutes. You will hear a steady sizzle coming from the pot, which is a good sign that the fats are rendering and the potatoes are starting to take on some color.
Step 4: Stir and Rotate
After 25 minutes, pull the pot out carefully. Use a flat spatula to stir the contents. You want to flip the potatoes from the bottom to the top so they cook evenly. Check the sausages; they should be looking slightly darker and perhaps a bit shriveled at the edges. This is exactly what you want, as it concentrates the flavor.
If you notice any of the herbs look like they are getting too dark or burnt, try to move them closer to the center of the pile. Return the pot to the oven for another 20 minutes. Keep an eye on it during the last few minutes; the potatoes should be fork-tender and the edges of the sausage should have a nice, firm bite.
Step 5: Check and Serve
Once the timer goes off, pull the pot out and test a larger piece of potato with a fork. It should slide through without any resistance. If it feels hard in the middle, give it another 5 to 10 minutes. The internal temperature of the sausage should be well over 165 degrees Fahrenheit, which is standard for pre-cooked links that are being reheated.
Let the dish sit on the counter for about 5 minutes before serving. This allows the juices to settle and prevents you from burning your mouth. I like to serve it directly from the Dutch oven, as it keeps everything hot while everyone is grabbing their first scoop. It makes for a very relaxed dining experience.
Mistakes I Made (So You Don't Have To)
Overcrowding the Pot
Early on, I tried to double the batch in a single pot. The result was that the potatoes on the bottom became mushy because they were sitting in a pool of trapped moisture, while the ones on top were barely cooked. Now, I stick to a single layer or a slightly loose pile. If you have a massive group to feed, use two separate baking dishes instead of trying to cram everything into one vessel.
Skipping the Stir
I used to think that letting the dish sit undisturbed in the oven was better because I was afraid of breaking the potatoes. What I found was that the bottom half would get quite dark while the top half stayed pale and bland. You really do need that mid-point stir to ensure the flavors and the heat get to every single piece. It is a quick thirty-second task that changes the entire outcome of the meal.
Using Salted Sausage Without Tasting
I once added the full amount of salt listed in my recipe without considering that the specific brand of kielbasa I bought was already quite intense. It made the dish almost inedible. Now, I always taste a tiny piece of the sausage before I decide how much salt to add to the potatoes. The sausage should do the heavy lifting for the seasoning, so you are really only seasoning the potatoes themselves.
Cutting Potatoes Too Small
I got impatient once and chopped the potatoes into half-inch cubes. They were so small that by the time the sausage was heated through, the potatoes had completely disintegrated into a mashed potato consistency. It didn't taste bad, but it lacked the texture I wanted. Stick to the 1.5-inch size; it provides the right amount of mass to hold up to the heat of the oven for the full 45 minutes.
Variations and Tips
Add Some Heat
If you like a bit of spice, add a teaspoon of red pepper flakes or some smoked paprika when you are tossing the ingredients. A little bit of heat really wakes up the flavors of the sausage and makes the potatoes taste more interesting. Just be careful not to overdo it; you want it to be a gentle warmth, not something that masks the savory flavor of the meat and the potatoes.
Vegetables for Variety
Sometimes I throw in a few chunks of red bell pepper or even some sliced carrots if I have them in the fridge. These add a nice contrast in both color and texture. Just keep in mind that vegetables like peppers cook faster than potatoes, so you might want to add them during the second half of the roasting process, right when you stir the pot, so they don't turn into mush.
The Make-Ahead Strategy
You can chop your potatoes and slice your sausage ahead of time. Store them in separate airtight containers in the fridge for up to a day. When you are ready to eat, just combine everything with the oil and seasonings and pop it in the oven. It saves you from the cutting board mess on a busy evening. I would not recommend tossing them in oil and salt before storing, as the salt will draw moisture out of the potatoes and make them soggy.
Herb Swaps
If you don't have fresh thyme, dried thyme works, but use about half the amount. Rosemary is also a fantastic substitute. If you have some fresh parsley, chop it up and sprinkle it over the top right before you serve. It adds a pop of bright green color and a fresh, clean flavor that balances out the richness of the roasted dish beautifully.
Storage and Reheating
If you have leftovers, let the dish cool down to room temperature for no more than two hours before moving it to a storage container. Keep it in the refrigerator in an airtight container for up to three days. I have found that this dish does not freeze particularly well; the potatoes tend to lose their texture and become grainy once they are thawed and reheated.
To reheat, the best method is the oven. Spread the leftovers on a baking sheet and heat at 350 degrees Fahrenheit until they are steaming hot throughout, aiming for an internal temperature of at least 165 degrees Fahrenheit for food safety. You can also use a skillet on the stove top over medium heat, adding a tiny splash of water or broth to create a little steam. This helps revive the potatoes without drying them out. Do not try to reheat in the microwave if you want to keep the texture, as it will make the potatoes quite soft and the sausage rubbery.
Frequently Asked Questions
Do I need to peel the potatoes?
You do not need to peel them, provided you scrub the dirt off the skins well. Yukon Gold potatoes have very thin, delicate skins that soften right up during the roasting process. Leaving the skins on saves you time and adds a nice bit of structure to the pieces, which helps them hold their shape.
Can I use a different type of sausage?
Yes, any firm, smoked sausage will work well here. You could use an Andouille for a bit of a kick, or a classic bratwurst, though keep in mind that some varieties release more fat than others. Just avoid raw, loose sausage meat, as it will fall apart and become lost among the potatoes. You want a sausage that holds its shape when sliced into rounds.
My potatoes are still hard after 45 minutes, what happened?
This usually happens if the potato chunks are cut too large or if your oven temperature is slightly lower than indicated. Use your thermometer to check that your oven is actually reaching 400 degrees Fahrenheit. If they are still hard, simply give them another 10 to 15 minutes. It is better to wait for them to soften than to serve them undercooked.
Can I add onions to this?
You can add onions, but cut them into large wedges rather than thin slices. Thinly sliced onions will burn long before the potatoes are finished. Quartered yellow onions work perfectly because they caramelize slowly and stand up to the heat of the oven. Add them at the beginning along with the potatoes for the best result.
How do I know when the sausage is ready?
Since you are using pre-cooked smoked sausage, the primary goal is to ensure it is heated through and the edges have developed a firm texture. You should check that the internal temperature has reached at least 165 degrees Fahrenheit. Visually, the sausage should look slightly darker than when you started, with a bit of a sheen from the rendered fat.
Final Thoughts
This one-pot roasted sausage and potatoes recipe is a reliable staple that I find myself turning to whenever the week gets busy. It proves that you do not need fancy equipment or hours of preparation to put a satisfying, warm meal on the table. The simple combination of ingredients transforms into something much greater than the sum of its parts.
Once you master this basic method, you will find it easy to adapt based on what you have in your pantry. It is a flexible, forgiving dish that consistently delivers on comfort. I hope it becomes a regular part of your rotation when you need something simple and nourishing.