
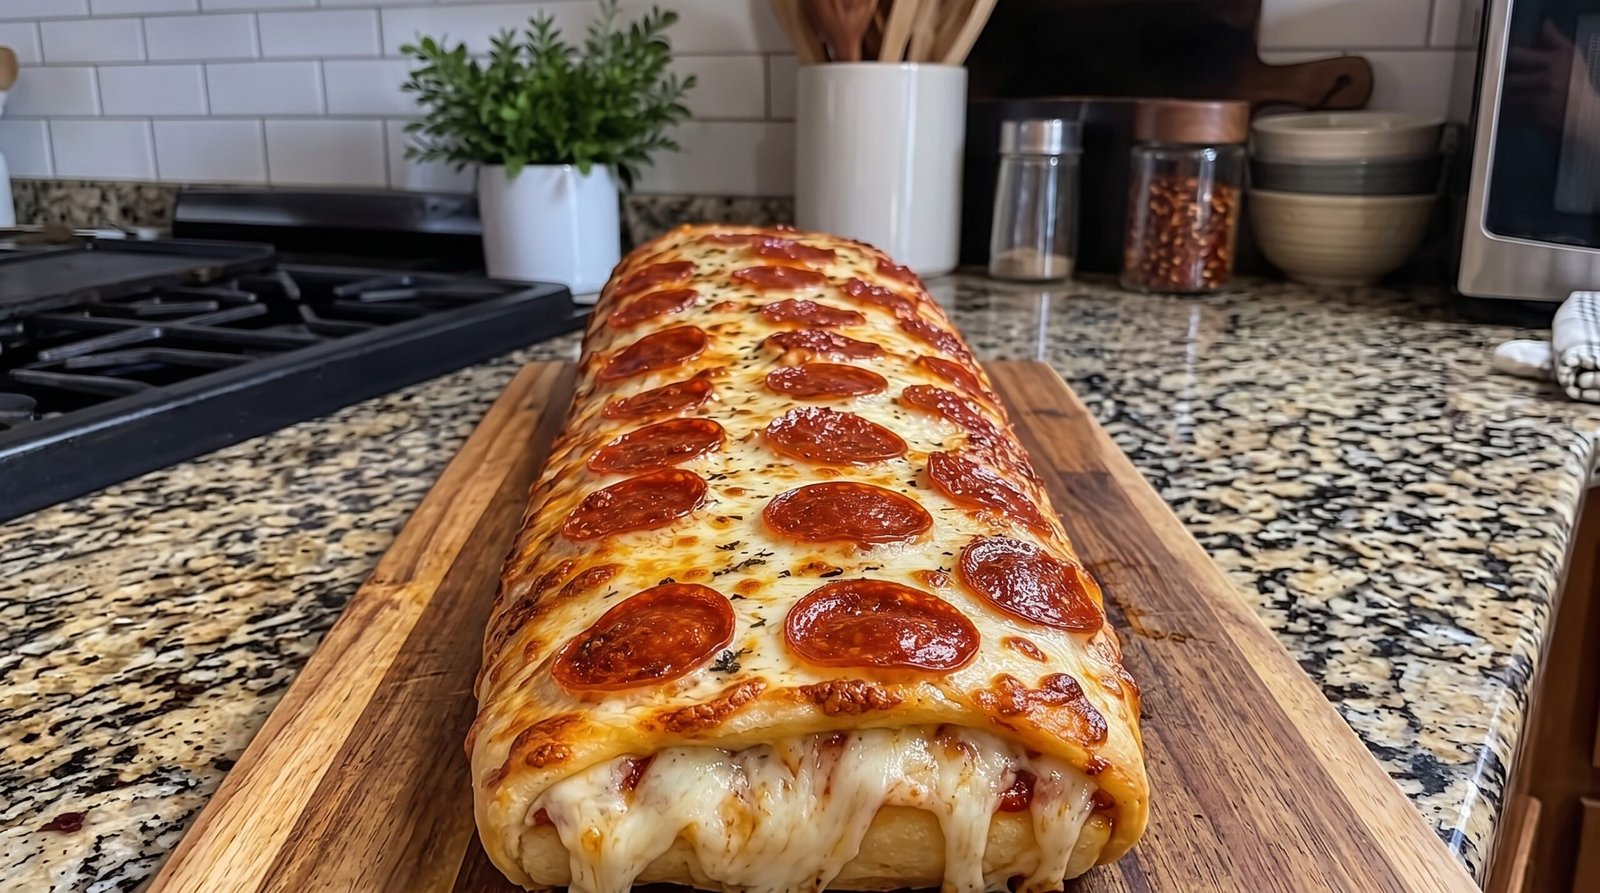
There are days when a full pizza feels like too much work, or you just want something you can easily pick up and eat without making a mess. I found myself in that exact situation last week after a long day of errands. I had some dough in the fridge and a bag of pepperoni, and I decided to experiment with rolling it all together into a log rather than making a traditional flat pie. The result was this stuffed bread, which has become a staple in my kitchen because it is simple to assemble and disappears within minutes of coming out of the oven.
If you enjoy the combination of melted cheese, tangy tomato sauce, and savory meat, you will appreciate how this recipe brings those components into a portable, handheld format. It is a hearty choice for a game day, a quick dinner, or a snack that keeps everyone satisfied. You do not need fancy equipment to pull this off, just a clean surface for rolling and a standard baking sheet.
Why This Recipe Works
This recipe works because it relies on the classic balance of fat, salt, and acidity, while providing a texture that is much more substantial than a thin crust pizza. When you roll the dough tightly around the filling, the cheese melts into the dough as it bakes, creating a rich, soft interior that contrasts with the golden, slightly firmer exterior of the crust. Because the filling is contained inside, the cheese stays gooey longer than it would on an open-faced pizza, which tends to dry out once it starts cooling down.
From a practical standpoint, this approach is forgiving. If you have ever struggled with sliding a pizza onto a stone without losing your toppings, you will find this process refreshing. You do not need a pizza stone, a peel, or a high-heat oven setting that turns your kitchen into a furnace. Everything is wrapped up securely, so the juices from the pepperoni and the sauce remain inside the bread, keeping the crust flavorful rather than soggy. It is a reliable method that yields consistent results every time you make it, whether you are using a store-bought dough or a homemade version. The flavor profile is straightforward, and it is a crowd-pleaser that works for both kids and adults who want a quick meal without unnecessary fuss.
Ingredient Notes
The Dough Base
The foundation of this dish is the dough. I prefer using a standard store-bought refrigerated pizza dough for the sake of speed, but any basic yeast dough recipe will work. If you choose a store-bought version, let it sit on the counter for about 15 minutes before you try to stretch it. This allows the gluten to relax, making it much easier to roll out into a rectangle without it constantly snapping back. If you have the time to make your own dough, that is great, but ensure it is not too sticky, or it will be hard to roll into a tight log.
The Fillings
For the interior, the quality of your ingredients makes a big difference. I use a thicker pizza sauce rather than a watery marinara because moisture is the enemy of a sturdy crust. If your sauce is thin, you can simmer it on the stove for a few minutes to reduce it. For the cheese, a low-moisture mozzarella is essential. I always shred it myself from a block because the pre-shredded bags are coated in cellulose, which keeps the cheese from melting together into that long, stretchy consistency we look for in good pizza bread. The pepperoni should be the classic round variety, sliced thin enough to lay flat, which makes rolling much easier.
| Ingredient | Amount | Notes |
|---|---|---|
| Pizza dough | 1 pound | Store-bought or homemade |
| Pizza sauce | 1/2 cup | Use a thick variety |
| Mozzarella cheese | 2 cups | Shredded from a block |
| Pepperoni slices | 30-40 pieces | Standard round slices |
| Olive oil | 1 tablespoon | For brushing the top |
| Italian seasoning | 1 teaspoon | Dried herbs for the crust |
| Garlic powder | 1/2 teaspoon | Adds savory depth |
The Recipe
- Prep Time: 15 minutes
- Cook Time: 25 minutes
- Total Time: 40 minutes
- Servings: 6 to 8 slices
- Difficulty: Easy
Equipment you will need:
– Large cutting board or clean counter space
– Rolling pin
– Baking sheet
– Parchment paper
– Pastry brush
– Knife for slicing
Step-by-Step Instructions
Step 1: Prep the Oven and Pan
Before you do anything else, preheat your oven to 400 degrees Fahrenheit. If you have an oven thermometer, verify the temperature, as standard home ovens can sometimes be off by a few degrees. Line your baking sheet with a piece of parchment paper to prevent the cheese from sticking to the metal if it leaks out during baking. Having a clean, prepared workspace is the best way to keep this process moving smoothly without stress.
Step 2: Roll Out the Dough
Lightly flour your surface and place the dough in the center. Use a rolling pin to stretch the dough into a rectangle that is roughly 10 inches by 14 inches. You do not need to be perfectly precise, but try to keep the thickness even across the entire surface. If the dough resists, cover it with a towel and wait five minutes for the gluten to relax further. Once it is rolled, you are ready to add your layers.
Step 3: Layer the Fillings
Spread your sauce across the dough, leaving about a one-inch border around all the edges. This border is crucial because it allows you to seal the bread properly. Scatter the shredded mozzarella evenly over the sauce, followed by the pepperoni slices in an even layer. Do not overfill the center, as this can make the roll unstable when you try to transfer it to the pan. A light, even layer of toppings is better than a giant heap that will make the roll break.
Step 4: Roll and Seal
Start from the long edge closest to you and begin rolling the dough into a tight log. As you roll, tuck the sides in slightly to ensure the filling stays inside. Once you reach the end, pinch the seam of the dough tightly to seal it shut. Carefully lift the roll and place it on your prepared baking sheet, seam-side down. Tuck the two ends under the roll to make sure everything is enclosed, which prevents the cheese from melting out and burning on the pan.
Step 5: Bake the Bread
Brush the top and sides of the log with olive oil. This is the secret to getting a nice color on the crust. Sprinkle your Italian seasoning and garlic powder over the oil. Place the sheet in the center of the oven and bake for 25 minutes. You are looking for a deep golden brown color on the surface. Because the interior is filled with cheese, you want to ensure the dough is cooked through. The crust should feel firm when gently tapped.
Step 6: Cool and Slice
Once you pull the tray from the oven, let the bread sit on the pan for about 5 to 7 minutes before attempting to slice it. This short resting period allows the cheese to set slightly so that it does not immediately run out the moment you cut through the dough. Use a serrated knife to cut it into thick slices. If you cut it while it is piping hot, the filling will just slide out. Patience at this final stage is the difference between a neat slice and a messy pile of ingredients.
Mistakes I Made (So You Don't Have To)
Mistake 1: Leaving the Sauce Too Wet
Early on, I used a watery sauce, and it made the bottom of my dough completely gummy. The bread never really crisped up because it was essentially steaming from the inside out. Now, I always strain my sauce through a fine-mesh sieve or simmer it down to a thick paste. If you notice your sauce looks like soup, take five minutes to reduce it in a small saucepan before you start. It changes everything about the final structure of the crust.
Mistake 2: Forgetting to Seal the Ends
I once left the ends of the log open, and the cheese melted out and scorched on the bottom of the pan. It smelled like burning smoke throughout the house, and I lost half of my filling. Now, I make it a point to pinch the dough shut at the ends and fold them underneath the roll. This creates a secure package that keeps all the goodness trapped inside where it belongs.
Mistake 3: Overstuffing the Log
It is tempting to pack as much pepperoni and cheese as possible into the roll, but that just creates a structural failure. I learned that the hard way when the log split open in the oven because there was too much pressure inside. Keep your layers light. You can always serve extra sauce on the side for dipping if you find you want more flavor intensity. A moderate amount of filling results in a better bake.
Mistake 4: Cutting Too Soon
I used to be so excited to eat that I would slice into the bread the second it came out of the oven. The internal temperature of the filling is very high, and the cheese acts like molten lava. If you cut it immediately, the bread collapses, and the cheese just leaks everywhere. Letting it rest for 7 minutes on the baking sheet makes it much easier to handle and ensures your slices stay intact.
Variations and Tips
Variation 1: Add Veggies
If you want to add vegetables like mushrooms or bell peppers, make sure you sauté them first to remove their excess water content. Raw vegetables will release moisture as they cook inside the dough, which will ruin the texture of your crust. I like to add thinly sliced olives or banana peppers, but again, I pat them dry with a paper towel before adding them to the dough.
Variation 2: A Shortcut for Busy Nights
If you are really short on time, you can skip the scratch-made assembly entirely. Just buy the pre-made pizza dough tubes from the supermarket. They work perfectly well for this recipe. Just make sure to follow the rolling instructions carefully so the dough doesn't get stretched too thin. This is my go-to move when I need to feed a crowd quickly without spending all evening in the kitchen.
Variation 3: Finishing Salt
After I brush the top with olive oil, I sometimes sprinkle a tiny pinch of coarse sea salt or red pepper flakes over the top. It provides a nice pop of flavor that cuts through the richness of the mozzarella. If you like a little extra heat, the red pepper flakes are a great addition. Just be careful not to use too much salt, as the pepperoni is already quite salty.
Variation 4: Making It Ahead
You can assemble the log earlier in the day, cover it tightly with plastic wrap, and keep it in the refrigerator until you are ready to bake. Do not let it sit for more than a few hours, or the dough will start to get too soft and sticky. When you are ready, pull it out while the oven preheats, brush it with oil, and add the seasoning before putting it in the oven. It is a fantastic way to handle hosting without being stuck in the kitchen.
Storage and Reheating
If you happen to have leftovers, they keep surprisingly well. Store any remaining slices in an airtight container in the refrigerator. They will stay good for up to 3 days. When you are ready to eat them again, do not use the microwave, as it will turn the crust soft and chewy. Instead, preheat your oven to 350 degrees Fahrenheit and place the slices on a baking sheet for about 8 to 10 minutes until the crust is warm and the cheese inside is soft again. This method revives the texture significantly better than any other option. I do not recommend freezing this dish, as the dough tends to lose its structure and the cheese can separate when thawed and reheated. It is best eaten fresh or within a few days of making it. Always ensure you reheat leftovers until they reach an internal temperature of 165 degrees Fahrenheit to ensure they are safe to eat.
Frequently Asked Questions
Can I use a different type of cheese?
Yes, you can absolutely experiment with different cheeses. I sometimes use a mix of mozzarella and provolone for a sharper flavor profile. You could also add a bit of parmesan for a salty kick. Just make sure you are using a cheese that melts well. Stay away from fresh mozzarella packed in water, as it is much too wet and will ruin the texture of the bread.
Why is my dough tough after baking?
Tough dough usually happens because it was overworked or the oven temperature was too low. If the oven isn't hot enough, the dough has to bake for longer to get brown, which causes it to dry out and become chewy or tough. Always make sure your oven is fully preheated to 400 degrees Fahrenheit before putting the bread in. Also, handle the dough gently and try to roll it out in one go rather than pulling and stretching it repeatedly.
Can I bake this on a stone?
You can use a pizza stone, but it isn't strictly necessary. If you do use one, preheat it in the oven for at least 30 minutes before placing the bread on it. You will still need to use a piece of parchment paper to prevent the cheese from dripping onto the stone. The stone might speed up the bottom cooking process, so keep a close eye on it at the 20-minute mark to ensure it doesn't get too dark.
Can I make this with puff pastry?
Puff pastry is a completely different texture. It will be much flakier and lighter than pizza dough. While you can technically wrap ingredients in puff pastry, it will produce a very different result—more like a turnover or a sausage roll. If you want that specific pizza bread experience, stick with standard pizza dough or even a bread machine dough. Puff pastry also doesn't handle the weight of the cheese and sauce as well, so it is likely to break apart.
What should I serve with this?
I like to serve this with a side of marinara sauce for dipping and a crisp green salad to balance out the richness of the bread. Since this is quite heavy, a salad with a bright vinaigrette provides a nice contrast. Sometimes, if I am serving this as a full meal, I add a side of roasted vegetables like broccoli or zucchini. It is a very filling dish, so keep the sides relatively light to avoid feeling overwhelmed.
Final Thoughts
Making this stuffed bread has been a lifesaver for my weekly meal planning. It is one of those reliable recipes that requires very little active time but delivers a result that feels like it came from a shop. Once you master the technique of rolling and sealing, you can switch up the fillings to keep things interesting.
I hope this becomes a regular feature in your kitchen whenever you need something simple and satisfying. Just remember to use a thick sauce, seal your edges well, and give the bread that short resting time before slicing. It truly makes all the difference in the world.