
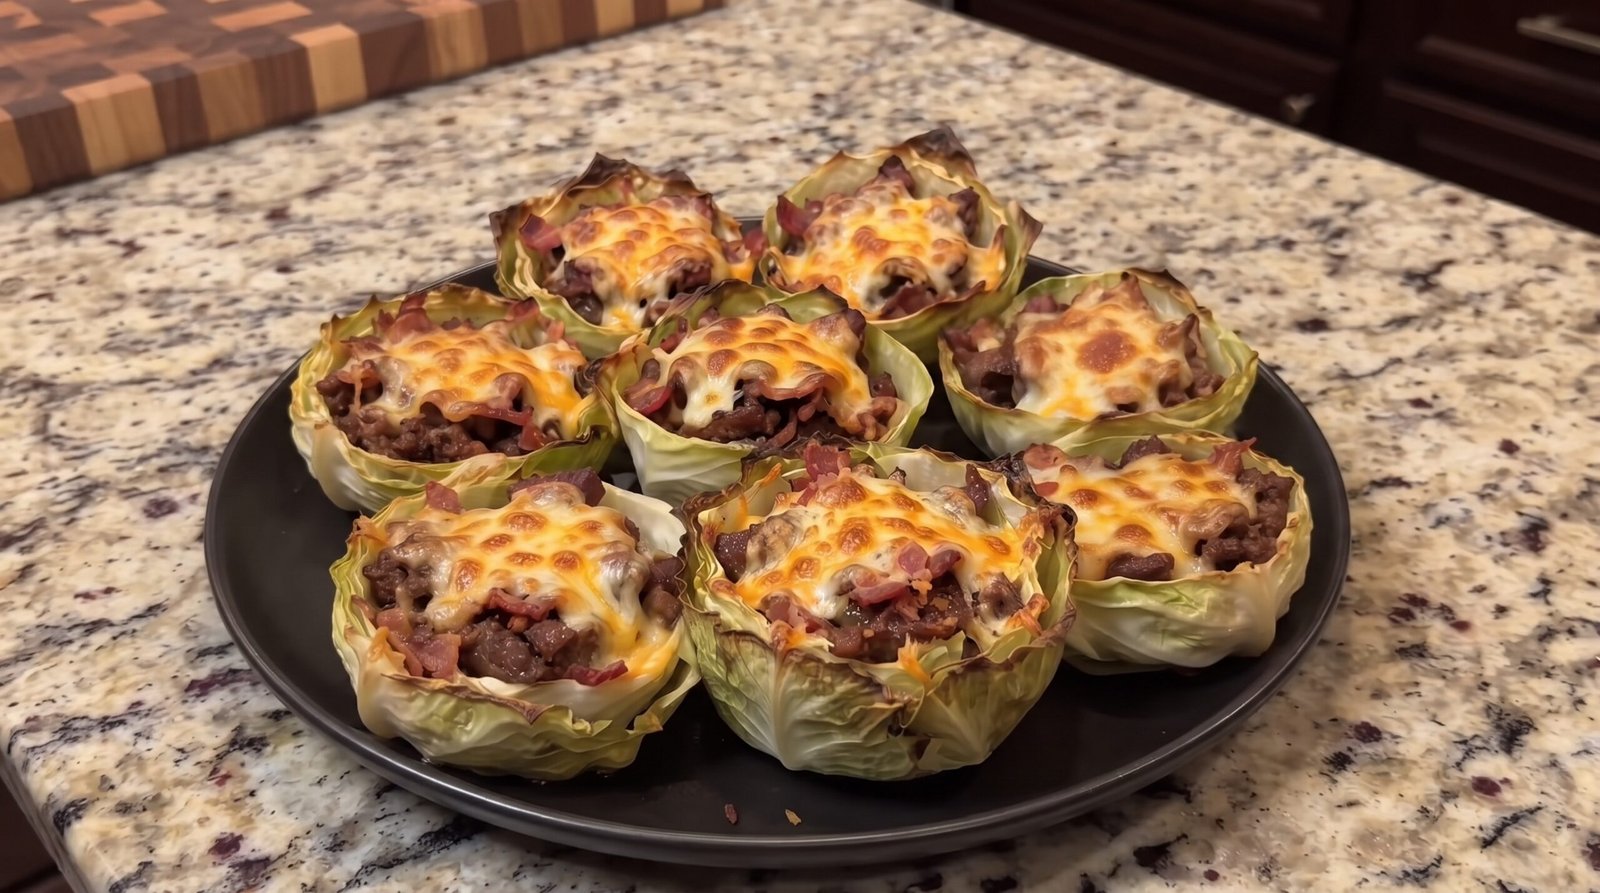
I remember the first time I stood in my kitchen staring at a head of cabbage, wondering how to make something other than plain slaw or boiled side dishes. It was one of those nights where the fridge felt empty and my motivation for complex cleanup was at an all-time low. I wanted something hearty and satisfying that felt like a comfort meal, but without the heavy refined carbs that usually weigh me down after a long day of chores. I started pulling ingredients together—some ground beef, a bit of bacon I had tucked away, and the remaining shredded cheese. By forming the cabbage leaves into little cups, I found a way to hold all that savory goodness together in a way that felt fun to eat and kept the meal light.
These Cheesy Bacon Beef Cabbage Bowls are now a staple in my rotation for those busy evenings. They are simple to put together, rely on basic ingredients you likely already have, and provide a depth of flavor that is hard to find in such a quick recipe. You get the crunch of the cabbage, the salty richness of the bacon, and the savory satisfaction of the beef all in one handheld portion. It is a straightforward meal that delivers on taste every single time.
Why This Recipe Works
The main reason I reach for this recipe so often is how effectively it balances texture and flavor. When you use cabbage leaves as a bowl, they undergo a transformation in the oven. The edges catch a bit of heat and turn slightly tender, while the base remains structurally sound enough to hold the weight of the filling. This contrast between the fresh, slightly snappy exterior and the soft, savory center is satisfying. It avoids that mushy texture you sometimes get with cabbage soups or long-simmered stews.
Another factor is the combination of fat and salt. Ground beef by itself can be a bit lean depending on the percentage you buy, but by incorporating chopped bacon, you introduce rendered fat that coats the meat. This fat acts as a flavor carrier, ensuring that the beef stays moist while it bakes. The cheese topping then adds a creamy layer that helps bind the meat and bacon together, creating a cohesive bite. You are not just eating a pile of food; you are eating a balanced portion that keeps everything together until the very last bite.
Convenience plays a big part in why this works. The prep time is minimal. You are basically browning the meat and bacon in one pan and then assembling the cups. There is no complex folding, rolling, or stuffing that requires delicate knife work. It is a rustic dish that looks impressive enough to serve to others but is easy enough to make when you are just cooking for yourself after work. It requires very little active time at the stove, leaving you free to do other things while the oven does the work.
Lastly, the flavor profile is incredibly versatile. Because the base is savory and salty, you can easily tweak it. If you want a bit of heat, you can add crushed red pepper flakes or diced jalapeños. If you prefer a more herbal flavor, you can stir in some dried oregano or thyme. The cabbage itself has a mild, earthy sweetness that works well with almost any savory herb or spice you choose to add. This flexibility means you can make it once a week and change the profile just enough so it never feels like you are eating the same thing over and over.
Ingredient Notes
The Main Components
| Ingredient | Amount | Notes |
|---|---|---|
| Ground beef | 1 pound | Use 80/20 for the best flavor |
| Bacon | 4 strips | Thick-cut works best for texture |
| Cabbage | 1 head | Green cabbage holds its shape well |
| Shredded cheese | 1.5 cups | Cheddar or mozzarella works best |
| Garlic | 2 cloves | Minced finely for even distribution |
| Salt | 0.5 teaspoon | Adjust to your personal taste |
| Black pepper | 0.5 teaspoon | Freshly cracked provides a nice bite |
Choosing Your Cabbage
For these bowls, you need a head of green cabbage that is firm and feels heavy for its size. When you peel the leaves, try to keep them as intact as possible. The outer, larger leaves make the best bowls. If the leaves are too tough, a quick blanch in boiling water for one minute can soften them up, but usually, the oven time is sufficient to make them pliable. Do not use red cabbage if you want that classic look, as it is often a bit tougher and takes longer to soften.
Meat and Bacon Selections
I prefer 80/20 ground beef because the extra fat helps keep the meat juicy while it bakes inside the cabbage leaf. If you only have lean ground beef, you may want to add a tablespoon of olive oil to the pan when you start cooking. The bacon should be chopped into small pieces before it hits the pan. This allows the fat to render out completely, giving you tiny, crisp morsels of bacon that distribute perfectly throughout the beef mixture.
Cheese Options
You want a cheese that melts well. Mild or sharp cheddar is my go-to because it adds a nice sharp contrast to the savory beef. Mozzarella is another great choice if you prefer a milder flavor and a more stringy texture. Avoid pre-shredded bags if you can, because they are often coated in starches that prevent the cheese from melting into that smooth, gooey texture you want on top of your beef cups. Shredding your own from a block makes a big difference in how well the cheese binds the filling.
The Recipe
- Prep Time: 15 minutes
- Cook Time: 25 minutes
- Total Time: 40 minutes
- Servings: 4 servings
- Difficulty: Easy
Equipment Needed
- Large skillet for browning meat
- Baking sheet or large casserole dish
- Cutting board and sharp knife
- Meat thermometer for checking beef doneness
- Spoon for mixing and scooping
Step-by-Step Instructions
Step 1: Prepare the Cabbage Leaves
Start by removing the tough outer leaves of your cabbage head. Gently peel off about 8 to 10 large leaves. Try to keep the bottom of the leaf intact, as this will be the bottom of your bowl. Trim any excessively thick stems at the base of the leaf so they sit flat on your baking sheet. If the leaves are extremely stiff, you can steam them for two minutes, but generally, raw leaves will soften nicely once placed in the oven.
Once you have your leaves prepped, arrange them on a large baking sheet. I like to overlap them slightly if the leaves are smaller so that they form a deeper cavity. Make sure they are arranged in a way that they can support the weight of the beef mixture without spilling over. If you find they are wobbly, you can prop them against each other on the baking sheet for extra support.
Step 2: Cook the Beef and Bacon
Place your skillet over medium-high heat. Add the chopped bacon pieces and cook until they are crispy and the fat has rendered out. This should take about 5 to 6 minutes. Once the bacon is crispy, add your ground beef to the skillet. Use a wooden spoon to break the beef into small crumbles.
Continue to cook the beef and bacon together over medium heat until the beef is fully browned and no longer pink. You are looking for an internal temperature of 160°F or 71°C for the beef. Once cooked, drain any excess grease from the pan, but leave about a tablespoon behind to keep the mixture flavorful. Stir in your minced garlic, salt, and pepper, and cook for just one more minute until the garlic is fragrant.
Step 3: Assemble the Bowls
Spoon the beef and bacon mixture evenly into the center of each prepared cabbage leaf. Use the back of your spoon to gently press the mixture into the center of the leaf, creating a rounded mound. Ensure that the filling is concentrated in the middle so it does not spill out over the edges of the cabbage.
If you have a lot of beef, do not overstuff the leaves. It is better to have perfectly filled cups than a tray full of loose meat. If you find you have extra cabbage, you can shred it and mix it into the beef before filling, which adds volume and extra nutrients to the dish.
Step 4: Add the Cheese and Bake
Sprinkle a generous amount of your shredded cheese over the top of each filled cabbage bowl. Make sure the cheese covers the meat mixture completely, as this helps prevent the meat from drying out in the oven. Preheat your oven to 400°F or 200°C while you are assembling.
Once the oven is ready, place your baking sheet on the center rack. Bake for 12 to 15 minutes. You are looking for the cheese to be melted and bubbly, with a few light golden-brown spots. The edges of the cabbage leaves should also be starting to soften and turn a bit golden.
Step 5: Check and Serve
Check the internal temperature of the beef once more if you are worried about doneness, though it should already be cooked through. Remove the tray from the oven carefully. Let the bowls sit for about 3 minutes before serving. This allows the cheese to set slightly, making them easier to pick up or scoop onto a plate.
Serve immediately while hot. These are best served with a side of extra bacon bits or a dollop of sour cream if you enjoy that kind of topping. The contrast between the hot, cheesy center and the crisp edges is best experienced immediately after they come out of the oven.
Mistakes I Made (So You Don't Have To)
Overstuffing the Leaves
The first time I made these, I tried to pack way too much meat into every single leaf. The result was a messy disaster. Because the cabbage leaf is not as rigid as a taco shell, if you put too much weight in the center, the sides will collapse and the meat will slide off onto the baking sheet. The fix is simple: use less filling than you think you need. Aim for about two to three tablespoons per leaf. You want the cabbage to act like a cradle, not a overflowing bowl.
Not Draining the Grease
I once forgot to drain the grease after browning the beef and bacon. It seemed like a good idea for flavor, but once it went into the oven, the grease pooled at the bottom of the cabbage and made the leaves soggy rather than tender. It also caused the cheese to slide off the top of the meat. Now, I always drain the majority of the fat, leaving just enough to keep the meat moist. If you are using a very lean beef, you might not need to drain as much, but always keep an eye on it.
Burning the Garlic
I used to add the garlic at the same time as the beef. Because the beef takes a while to brown, the garlic would burn and become bitter. A bitter taste ruins the whole dish. The mistake was timing. Now, I wait until the beef is almost entirely browned and the fat is drained before I toss in the garlic. Cooking it for just one minute at the end of the browning process allows it to become fragrant without turning dark and scorched.
Skipping the Rest Time
I used to pull these out of the oven and serve them immediately. The cheese would be like molten lava and would slide right off the meat, making it impossible to eat with your hands. Resting for 3 minutes is not just about temperature; it is about letting the cheese solidify just enough to act as a glue. By giving it that short rest, you get a much neater eating experience and you don't burn your tongue on the very first bite.
Variations and Tips
Adding Crunch
If you like extra texture, sprinkle some crushed toasted walnuts or pine nuts on top of the cheese right after you pull them out of the oven. The earthiness of the nuts complements the cabbage and bacon beautifully. Just make sure the nuts are toasted beforehand so they have that deep, nutty flavor that really stands out against the richness of the cheese.
Adding Heat
For those who enjoy a bit of spice, mix a half-teaspoon of crushed red pepper flakes into the beef mixture before filling the cabbage. Alternatively, you can add diced fresh jalapeño or serrano peppers. The heat from the peppers cuts through the richness of the bacon and the fat in the beef, making the entire dish feel a bit brighter and more complex.
Using Other Greens
While green cabbage is the classic choice, you can definitely use Savoy cabbage if you want a slightly softer texture and a more ruffled look. Savoy cabbage leaves are generally more tender and have a nice, crinkly appearance that looks great on the plate. Do not use iceberg or lettuce, as they will wilt and fall apart as soon as they hit the oven heat.
Make Ahead Tip
You can brown the beef and bacon ahead of time and store the mixture in the fridge for up to two days. When you are ready to eat, just peel the cabbage leaves, fill them with the cold meat mixture, add the cheese, and bake as directed. You might need to add an extra two minutes to the cook time if the meat is coming straight from the fridge, so keep an eye on the cheese to make sure it doesn't get too brown.
Storage and Reheating
If you have leftovers, they will keep well in the refrigerator for up to three days. I recommend storing the cabbage bowls in an airtight container to keep the cabbage from drying out too much. Do not try to freeze these. Cabbage has a high water content, and the texture will turn completely mushy once thawed.
To reheat, the oven is your best friend. Place the leftovers on a baking sheet and heat at 350°F or 175°C for about 10 minutes until they are steaming hot throughout. If you use a microwave, the cabbage will become very soft and the cheese may become rubbery. Ensure the internal temperature of the beef reaches 165°F or 74°C when reheating to be food-safe.
Frequently Asked Questions
Can I use turkey instead of beef?
Yes, you can absolutely use ground turkey. Keep in mind that turkey is leaner, so you might want to add a teaspoon of olive oil to the pan when you start cooking to ensure the filling stays moist. The cooking time for the turkey will be the same as the beef, just make sure it is fully cooked to 165°F or 74°C throughout before you start filling the cabbage leaves.
Do I need to blanch the cabbage?
You only need to blanch the cabbage if you are using particularly thick or tough leaves. Most of the time, the heat from the oven is plenty to soften the cabbage enough to eat. If you prefer your cabbage very soft, you can quickly steam the leaves for about one minute before filling. This will also make them more pliable and easier to shape into the bowl form on your baking sheet.
Can I add vegetables to the filling?
You can definitely add finely diced vegetables like bell peppers or mushrooms to the beef mixture. Just make sure to sauté them with the beef until all the liquid has evaporated. If you leave too much water in the filling, the cabbage bowls will become soggy in the oven. Everything should be relatively dry before you start filling the leaves.
What if I don't have an oven?
If you don't have an oven, you can make this in a large, deep skillet with a lid. After filling the cabbage leaves, place them in the skillet, add a tiny bit of water to the bottom, and cover with a lid. Steam over medium heat for about 10 minutes. Then, uncover, add the cheese, and put the lid back on for 2 more minutes until the cheese is melted. It won't have the same golden top as the oven version, but it still tastes great.
Can I make these bite-sized?
Yes, you can use smaller cabbage leaves to make mini bowls. The cooking time will decrease by about 5 minutes, so check them after 7 or 8 minutes in the oven. These make great appetizers for a casual gathering. Just be careful not to overstuff them, as smaller leaves have less structural integrity than the larger ones used for main course portions.
Final Thoughts
Making these Cheesy Bacon Beef Cabbage Bowls has become one of my favorite ways to get a simple, warm meal on the table without much stress. It is one of those recipes that relies on the quality of the ingredients rather than a long list of fancy additions. Every time I pull a tray out of the oven, the smell of the savory beef and bacon brings me right back to the first time I realized how well these flavors work together.
I hope you find this dish as useful and reliable as I do. It is a fantastic option when you want something satisfying that breaks the routine of standard weeknight cooking. Grab a head of cabbage and some bacon, and give it a try for your next dinner. It is a humble meal that never fails to hit the spot.