
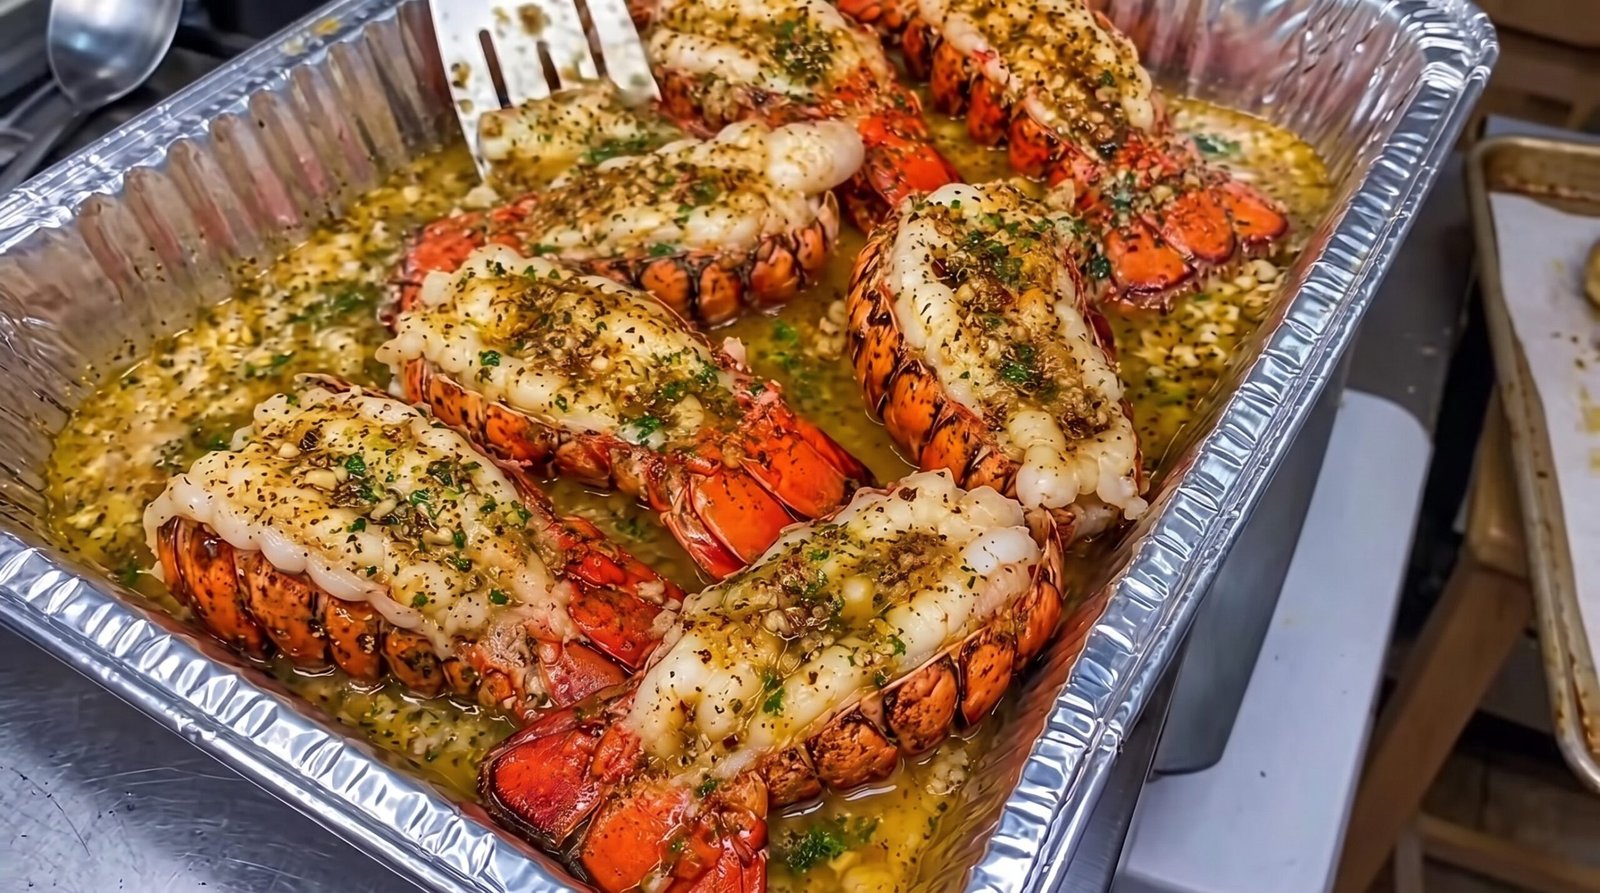
Sometimes I want a meal that feels special without needing to spend an entire afternoon in the kitchen. My go-to is always butter garlic broiled lobster tails. When I first started cooking seafood, I was intimidated by lobster. It felt like something that belonged strictly in high-end restaurants, and I worried about ruining expensive ingredients. The reality is that once you learn how to butterfly a tail, the actual cooking process takes under ten minutes. It is a straightforward dish that relies on quality ingredients and precise timing to get the texture just right. I have found that keeping the seasoning simple allows the natural sweetness of the lobster to come through. Whether I am celebrating a birthday or just want a treat after a long work week, this recipe never lets me down. You will get tender, juicy meat every single time if you stick to the high heat and short timing needed for this shellfish.
Why This Recipe Works
This recipe relies on the intense, direct heat of the broiler to cook the lobster quickly without letting the meat dry out. Broiling is essentially an upside-down grill, and it is the ideal method for lobster because it caramelizes the butter and garlic topping while gently heating the meat through. The technique of butterflying the tails is not just for looks; it provides a flat surface for the seasoning and butter to soak into the meat while it cooks. Because lobster tails are relatively lean, they can become tough if they stay in the oven too long. The high temperature ensures the exterior gets a nice, light sear from the butter and spices while the center stays opaque and tender.
Flavor-wise, the combination of melted butter, garlic, and fresh herbs is a classic for a reason. Lobster has a naturally clean, slightly sweet flavor that acts as a blank canvas for savory aromatics. By basting the tails before and during the process, you keep the meat moist. The garlic mellows during the broiling time, losing its sharp raw bite and becoming fragrant and nutty. Using a mix of dried and fresh herbs adds a layer of depth that keeps each bite interesting. This method is also predictable, which is vital when you are working with ingredients that can get pricey. You do not need to stand over a stove or manage multiple pans. Once the tails are prepped, they hit the broiler and you are done in a few minutes. It is efficient, flavorful, and keeps the kitchen relatively clean.
Ingredient Notes
The Main Seafood
The most important part of this dish is the quality of your lobster tails. I usually look for cold-water lobster tails because they tend to have firmer, sweeter meat compared to warm-water varieties. When shopping, check that the shells are intact and look firm. Avoid any tails that show dark spots or have a fishy, off-putting smell. You can buy them frozen or thawed, but if you buy them frozen, make sure to thaw them completely in the refrigerator overnight before you start working. If you are in a rush, you can place the vacuum-sealed tails in a bowl of cold water for about thirty minutes, but never use warm water as it will compromise the texture of the delicate meat.
The Butter and Aromatics
For the butter sauce, I always use unsalted butter. Since you are adding salt separately, using unsalted butter gives you total control over the seasoning level. If you only have salted butter on hand, just reduce the amount of added kosher salt in the recipe to avoid an overly salty outcome. The garlic should be fresh. Please do not use the jarred, pre-minced garlic for this recipe. It often has an acidic aftertaste that interferes with the sweetness of the lobster. Freshly minced garlic cloves provide the best aroma and flavor profile. I also use a dash of paprika for a bit of color and a light, peppery finish that complements the shellfish perfectly.
Herbs and Seasoning
Fresh parsley is the finish that makes the dish look professional and adds a clean, bright note that cuts through the richness of the butter. If you do not have fresh parsley, you can use dried, but I recommend using half the amount since dried herbs are more concentrated. A squeeze of fresh lemon juice is non-negotiable for me. The acidity of the lemon brightens the entire dish and highlights the natural flavor of the lobster. I generally avoid adding heavy spices like chili powder or cumin because they can overpower the subtle taste of the meat. Keep it simple and focus on the butter and the aromatics.
| Ingredient | Amount | Notes |
|---|---|---|
| Lobster tails | 4 large | Thawed if frozen |
| Unsalted butter | 4 tablespoons | Melted |
| Garlic cloves | 3 | Minced finely |
| Fresh parsley | 1 tablespoon | Chopped finely |
| Paprika | 1/2 teaspoon | Adds subtle color |
| Kosher salt | 1/2 teaspoon | Adjust to preference |
| Black pepper | 1/4 teaspoon | Freshly cracked |
| Lemon wedges | 2 | For serving |
The Recipe
- Prep Time: 15 minutes
- Cook Time: 8 minutes
- Total Time: 23 minutes
- Servings: 4
- Difficulty: Easy
Equipment needed:
– Sharp kitchen shears
– Small bowl
– Baking sheet
– Silicone pastry brush
– Instant-read thermometer
Step-by-Step Instructions
Step 1: Prepare the Lobster Tails
To begin, place each lobster tail on a cutting board. Take your sharp kitchen shears and cut down the center of the hard shell, starting from the thick end and working your way down toward the tail fin. Stop just before you reach the very end of the tail so you do not cut the meat at the base. You want to open the shell slightly like a book. Use your fingers to gently pry the shell sides apart and lift the meat out so it sits on top of the shell. This is called butterflying the tail.
The meat should stay attached at the base near the tail fin. If you find the meat is stuck to the shell, run your thumb underneath it to loosen it gently. Being gentle here prevents tearing, which helps the lobster cook evenly and look better when you plate it. Once the meat is lifted and resting on top of the shells, you are ready to prepare the butter mixture.
Step 2: Mix the Garlic Butter
In a small bowl, combine the four tablespoons of melted unsalted butter, the three cloves of finely minced garlic, the chopped fresh parsley, the paprika, the kosher salt, and the black pepper. Whisk everything together with a fork or a small spoon until it is well blended. The garlic and herbs should be distributed evenly throughout the melted butter.
I like to let this mixture sit for a few minutes while the broiler heats up. This allows the garlic flavor to infuse into the butter, making it more potent. You do not need to heat the butter mixture on the stove again. Just make sure the butter is fully liquid before you start adding the spices so that it brushes on smoothly.
Step 3: Set Up the Broiler
Turn your oven to the broil setting. Make sure your oven rack is set about six inches below the heating element. If the rack is too high, the butter will burn before the meat is cooked; if it is too low, the lobster will take too long to cook and might lose its juicy texture. Let the broiler preheat for at least five minutes.
While the oven is getting hot, place the butterflied lobster tails on a baking sheet. You do not need to grease the sheet since the butter will prevent sticking. Ensure the tails are not touching each other so the heat can circulate around each piece of meat.
Step 4: Season and Broil
Use your silicone pastry brush to coat the top of each lobster tail with the garlic butter mixture. Be generous. Make sure you brush the sides of the meat as well as the top. If there is any leftover butter in your bowl, you can pour it over the tails once they are on the tray.
Place the baking sheet into the oven on the middle rack. Broil the tails for approximately 8 minutes. You are looking for the meat to turn opaque and firm to the touch. The shells should turn a bright, vibrant red. The butter on top should be bubbling and the garlic should look lightly toasted, not burnt.
Step 5: Check for Doneness
After about 8 minutes, open the oven and check the internal temperature of the thickest part of the lobster meat using an instant-read thermometer. You are looking for an internal temperature of 140°F (60°C). At this temperature, the lobster is fully cooked, safe to eat, and perfectly tender.
If the meat is still translucent or the temperature is below 140°F, close the oven and continue broiling for another minute or two, checking frequently. Lobster cooks very fast, so stay close to the oven during these final minutes. Overcooking even by a minute can result in a rubbery texture that is hard to fix.
Step 6: Serve and Enjoy
Once the lobster has reached the correct temperature, carefully remove the tray from the oven. Let the tails rest for two minutes. This allows the juices to redistribute through the meat, ensuring each bite is succulent. Squeeze fresh lemon juice over the hot meat just before serving.
The residual heat from the broiler will continue to gently cook the meat for a moment, so do not let them sit for too long or they will cool down and the texture will change. Serve immediately alongside your favorite sides. The shells act as a natural bowl, making it a visually beautiful presentation for any occasion.
Mistakes I Made (So You Don't Have To)
Overcooking the Lobster
The biggest mistake I made when I started was assuming that lobster needed a long time to cook like a piece of steak or chicken. I used to leave the tails in for fifteen minutes, and the result was tough, rubbery meat that was impossible to chew. The fix is simple: use your timer and trust it. Once the meat turns from translucent to a solid white or opaque color and hits 140°F (60°C) inside, take it out immediately.
Failing to Butterfly Properly
In my early attempts, I would cut too deep, completely severing the tail from the shell. While it still tasted fine, it was messy to eat and did not look right on the plate. The key is to use sharp kitchen shears and go slowly. Once you reach the base of the tail, stop cutting. Use your fingers to gently pull the meat out rather than forcing it with a knife, which can cause the meat to break apart.
Burning the Garlic
I once put the rack too high, right under the broiler element, and the garlic in my butter mixture turned black within three minutes. Burnt garlic tastes bitter and ruins the sweet, delicate flavor of the shellfish. Always keep the oven rack at least six inches away from the heat source. If you see the garlic browning too fast, move the tray down a level immediately to finish the cooking process.
Using Old Butter
I once tried to use butter that had been sitting in the fridge for a long time, and it had picked up flavors from other things in the fridge. Because lobster is so delicate, the sauce needs to be clean. Always use fresh, high-quality butter. If you use a lower quality butter with a higher water content, your sauce might separate or taste watery. Stick to a good-quality, plain unsalted butter for the best results.
Variations and Tips
Adding a Touch of Heat
If you like your seafood with a bit of a kick, add a half-teaspoon of crushed red pepper flakes to your garlic butter mixture. It adds a subtle warmth that contrasts nicely with the sweetness of the lobster. Just be sure to stir it in well so the spice is distributed evenly across all the tails.
Herb Swap
While fresh parsley is my favorite for this recipe, you can experiment with other herbs. Fresh chives work beautifully and provide a mild onion flavor that does not overpower the garlic. You could also use a little bit of fresh tarragon if you want a slight anise flavor, though that is quite a distinct choice and not for everyone.
The Make-Ahead Strategy
You can butterfly the lobster tails and keep them in the refrigerator for up to two hours before cooking. However, do not add the garlic butter mixture until you are ready to put them in the oven. If you put the garlic and butter on too early, the acidity in the garlic can begin to affect the delicate texture of the raw meat, making it slightly mushy.
Using the Shell for Flavor
If you want to infuse a little extra flavor, keep the shells in the pan while you broil. When you serve, the shells keep the meat warm longer. You can also place a small slice of lemon inside the shell, underneath the meat, before adding the butter. As it broils, the lemon will steam the meat slightly from the bottom up, adding a subtle citrus scent.
Storage and Reheating
If you have leftovers, they should be refrigerated within two hours of cooking. Place the lobster meat in an airtight container or wrap the tails tightly in plastic wrap. It is best to eat leftovers within two days. Seafood does not have a long refrigerator life, so do not try to stretch it to three or four days.
When reheating, be very careful not to overcook the meat again. I find the best method is to gently warm the lobster in a skillet over low heat with a tiny splash of water or butter to provide steam. Cover the skillet for about one to two minutes until the meat is steaming hot, reaching an internal temperature of 165°F (74°C). Do not use the microwave, as it tends to make the meat tough and rubbery instantly. I do not recommend freezing this dish once it has been cooked, as the texture will suffer significantly upon thawing.
Frequently Asked Questions
Can I use frozen lobster tails if I forget to thaw them?
It is not recommended to cook frozen lobster tails directly. Because the exterior will cook so much faster than the icy center, the outer meat will become tough and rubbery while the middle stays raw. Always take the time to thaw your tails completely in the refrigerator before starting the recipe to ensure even cooking and the best texture.
How do I know if the lobster is definitely done?
The best way is to use an instant-read thermometer. Aim for an internal temperature of 140°F (60°C). Visually, the meat should turn opaque and white, and the shells should be a bright red color. If you do not have a thermometer, you can press the meat gently with a fork; it should feel firm and spring back slightly when poked, not mushy.
Is it necessary to use a broiler?
Broiling is the best method for this dish because it mimics the direct heat of a grill, which helps to lightly sear the top of the lobster while keeping it juicy. If you do not have a broiler or are uncomfortable using one, you can bake the tails at 400°F (200°C) for about 10 to 12 minutes, but you will not get that same lightly toasted garlic flavor on the surface.
Do I need to remove the digestive tract?
Yes, usually the digestive tract, or the dark vein running along the back of the meat, is removed when you prepare the tail. When you butterfly the tail, take a look at the top of the meat. If you see a dark line, you can simply lift it out with the tip of a knife or your fingers and discard it before you brush the meat with the butter mixture.
Why is my lobster meat rubbery?
Rubbery lobster is almost always the result of overcooking. Because lobster is a very lean protein, it does not take long for it to go from perfectly tender to tough. Even thirty seconds too long in a high-heat environment like a broiler can change the structure of the meat. Keep a close watch during the final minutes of cooking and remove the tails as soon as they reach the target temperature.
Final Thoughts
Making lobster at home is a rewarding experience that feels like a real treat. Once you get comfortable with the prep, it is quick enough to pull together even when you are short on time. I love how simple the process is and how much the fresh ingredients stand out.
Take your time with the butterflying step, keep a close watch on the broiler, and you will have a meal that feels like it came from a professional kitchen. Enjoy the process as much as the result, and do not hesitate to share this with friends or family.