
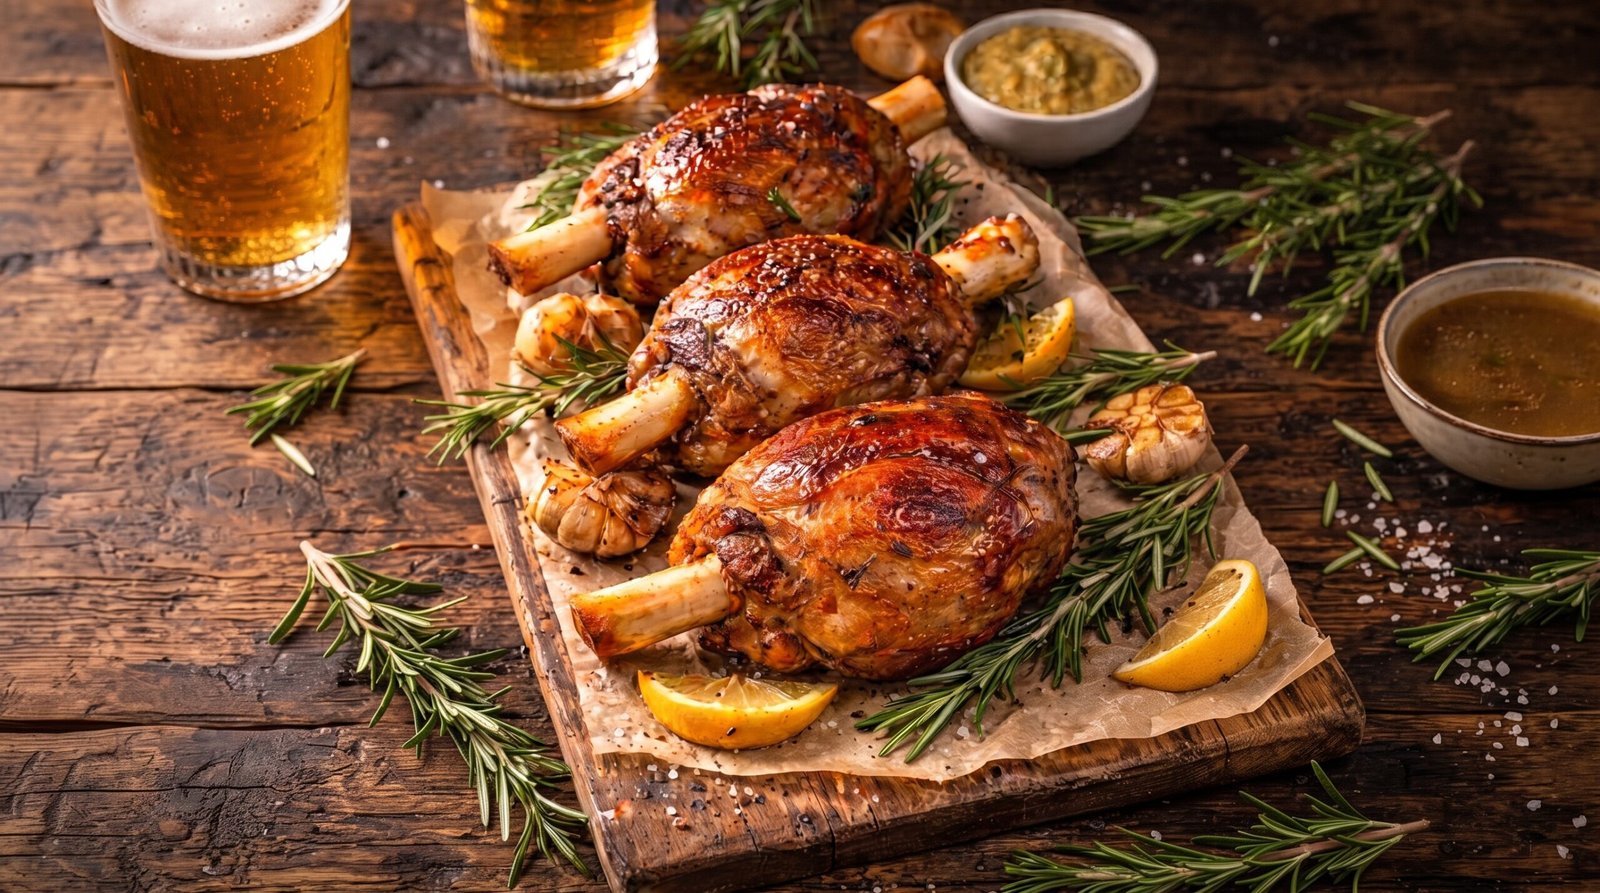
I remember the first time I walked past a butcher shop and saw these thick, meaty bones sitting there. I was looking for something that felt like a proper weekend project, the kind of meal that takes a little patience but pays off with something substantial. Pork shanks are an often overlooked cut, but when treated right, they become tender and rich in a way that few other cuts can match. It is not a quick meal to toss together, but it is one that requires very little active effort once you get everything in the hot box. Most people are intimidated by the size of the bone or the thickness of the meat, but there is really nothing to fear. If you have a decent roasting pan and a bit of time, you can turn these into a dinner that stands out on any table.
The process of making roasted pork shanks is straightforward because the meat does the hard work for you. You are essentially looking for a slow roast that allows the fat to render down and the muscle fibers to relax. While it roasts, the air in your kitchen fills with the scent of toasted rosemary and sweet, soft garlic. It is the kind of home cooking that feels genuine and satisfying, turning simple ingredients into a meal that feels like a reward after a long week.
Why This Recipe Works
This recipe relies on the natural structure of the pork shank. Because this part of the leg is worked hard by the animal, it is packed with connective tissue. When you subject that tissue to a long, low-temperature roast, it melts down into gelatin. This is why the meat feels so silky rather than stringy. You get a texture that holds together but falls away from the bone the moment you touch it with a fork. It is a forgiving cut of meat, which makes it an ideal starting point for anyone who usually sticks to quick steaks or chops.
The flavor profile here is grounded in aromatics. Rosemary is the star because its piney, woody notes cut through the richness of the pork fat. By layering whole cloves of garlic under and around the shanks, you end up with pockets of roasted garlic that turn into a savory spread once cooked. I find that this method of roasting creates a deep, concentrated taste without needing a heavy sauce or a complex marinade. You get the pure, savory essence of the meat, boosted by the heat and the herbs.
Ease of preparation is another huge benefit. Unlike braising where you have to monitor liquid levels or worry about the meat drying out if the lid is not tight, dry roasting these shanks is very hands-off. Once you have seasoned the surface and arranged the aromatics in the pan, the oven does all the heavy lifting. You can use that time to prepare a simple side, like roasted potatoes or a crisp green salad, or simply relax while the aroma fills the room. It is a reliable, repeatable result that produces consistently tender meat every time you make it, provided you give it the necessary time.
Ingredient Notes
The Pork
You want to look for fresh pork shanks that are cut from the middle of the leg. When you are at the butcher, ask for them to be tied if they are loose, though often they come secured. Look for meat that has a healthy pink color and a nice cap of fat on the exterior. This fat is essential because it bastes the meat as it roasts, keeping it moist throughout the long cooking time. Avoid shanks that look grey or have too much exposed, dry-looking muscle tissue on the ends. If you see a good marbling, that is a positive sign for flavor. You should plan on one shank per person for a generous serving. If you have smaller appetites, they can occasionally be split, but for the sake of presentation, keeping them whole is the way to go.
Aromatics and Seasoning
Fresh rosemary is non-negotiable for this dish. Dried rosemary tends to become sharp and brittle, whereas fresh springs release oils that permeate the fat of the pork. You will want several large bunches, as you need enough to act as a bed for the shanks. Garlic should be used generously. I prefer using whole, unpeeled cloves; when you roast them in their skins for this long, they turn into a sweet, creamy paste that is incredible to squeeze onto your plate. Use sea salt, preferably a coarser variety, to ensure it adheres to the meat during the initial browning phase. Black pepper should be freshly cracked if possible, as it provides a better bite than the pre-ground version. You can add a splash of olive oil to help the salt stick and to promote the browning process in the oven. If you want to experiment, a little bit of lemon zest added near the end of the cooking time can brighten the final result, but stick to the basics for your first attempt to understand the balance of the meat and herbs.
Ingredient Table
| Ingredient | Amount | Notes |
|---|---|---|
| Pork Shanks | 4 large | Approx 1-1.5 lbs each |
| Fresh Rosemary | 3 large bunches | Plus extra for garnish |
| Garlic | 2 whole heads | Separated into cloves, unpeeled |
| Sea Salt | 2 tablespoons | Coarse grain is best |
| Black Pepper | 1 tablespoon | Freshly cracked |
| Olive Oil | 3 tablespoons | Extra virgin for best flavor |
| Lemons | 1 large | Cut into thin wedges |
The Recipe
- Prep Time: 15 minutes
- Cook Time: 2 hours 45 minutes
- Total Time: 3 hours
- Servings: 4
- Difficulty: Simple
Equipment Needed:
– Large heavy-duty roasting pan
– Sharp chef knife
– Tongs
– Meat thermometer
Step-by-Step Instructions
Step 1: Prepping the Oven and Pan
Start by preheating your oven to 325°F. This lower temperature is key to breaking down the connective tissue in the shanks without drying out the exterior. While the oven heats up, take your large roasting pan and create a base using about two-thirds of your rosemary sprigs. Lay them down to cover the bottom of the pan like a bed. This layer keeps the meat from sticking and imparts flavor from the bottom up.
Scatter the unpeeled garlic cloves across the rosemary. You do not need to chop or mince anything here. The skin of the garlic acts as a shield, ensuring the interior flesh steams gently until it becomes soft and spreadable. Make sure your workspace is ready because we will be handling the raw pork next.
Step 2: Preparing the Pork Shanks
Pat the pork shanks dry with paper towels. This step is important because excess moisture on the surface will create steam rather than the rich color we want on the crust. Once the shanks are dry, drizzle them with the olive oil, using your hands or a brush to ensure they are coated on all sides.
Generously sprinkle the salt and pepper over every side of the shanks. Be thorough. Because these are thick cuts, they need more seasoning than you might think. Massage the salt into the meat slightly. The salt will draw out a tiny bit of moisture initially, but during the long roast, it will help create a flavorful, savory exterior that contrasts with the succulent meat inside.
Step 3: Arranging the Roast
Place the seasoned shanks on top of the rosemary and garlic bed in the roasting pan. Make sure they are not touching each other too closely, as you want the hot air to circulate around each piece of meat. Tucking the remaining rosemary sprigs around the sides of the shanks can help intensify the fragrance as the meat roasts.
If you have any extra garlic cloves, tuck them into the gaps between the shanks. This is the moment to verify your oven has reached the target temperature. Do not be tempted to turn the heat up to speed things along. High heat will toughen the outside before the center has a chance to render, resulting in a disappointing texture.
Step 4: The Slow Roast
Place the pan in the center rack of the oven. You will roast the shanks for 2 hours and 45 minutes. You do not need to cover the pan with foil. Leaving them uncovered allows the fat to crisp up and the surface to develop a deep, dark mahogany color. The rosemary will darken, but that is fine as it infuses the fat dripping into the pan.
Around the two-hour mark, you might notice the smell of roasting garlic becoming very prominent. This is a good sign. If you see the rosemary starting to get very dark, you can carefully move it to a cooler part of the pan or under the shanks, but generally, leaving it alone is perfectly acceptable.
Step 5: Testing for Doneness
At the 2-hour and 45-minute mark, check the internal temperature of the thickest part of the meat, avoiding the bone. You are looking for an internal temperature of 170°F. The meat should be visibly pulling away from the bone, and the exterior should be firm to the touch with a deep golden-brown appearance.
If the internal temperature is lower, give it another 15 minutes. Because shanks have so much collagen, they are quite forgiving if they stay in a little longer, but you do not want to go past the point where the meat begins to dry out. Once the temperature is reached, remove the pan from the oven and let it rest for 10 minutes before serving. This rest allows the juices to redistribute, ensuring every bite is moist.
Mistakes I Made (So You Don't Have To)
Overcrowding the Pan
My first attempt involved trying to jam six shanks into a medium-sized roasting pan because I wanted to feed a crowd. The result was uneven cooking. The shanks in the middle did not develop any color because they were essentially steaming each other with trapped moisture, while the ones on the edges were fine. Now, I always make sure there is at least an inch of space between each shank to ensure that hot air hits every surface. If you have more shanks than pan space, it is better to use two pans rather than forcing them into one.
Trimming Too Much Fat
Early on, I thought I was doing myself a favor by trimming away the white fat cap on the shanks before putting them in the oven. I quickly learned that this fat is a natural basting agent. Without it, the meat dried out significantly by the end of the long cooking process. Now, I leave the fat cap intact. It renders down during the long time in the oven, keeping the meat succulent. If you do not like eating the fat at the end, you can easily trim it off after it has been cooked, but do not remove it beforehand.
Skipping the Rest
When you take the pan out of the oven, the smell is so enticing that it is tempting to start carving immediately. I have burned my fingers and lost precious juices by cutting into the meat too soon. The heat within the meat needs time to settle down. Allowing the shanks to rest for at least 10 minutes is a simple step that makes a huge difference in the final texture. When I skip this, the meat feels slightly tougher and the cutting board ends up with all the flavor that should have stayed inside the shank.
Using Dried Rosemary
I once ran out of fresh rosemary and substituted the dried, crushed leaves from my pantry. It was a mistake. Dried rosemary does not release the same fragrant oils, and the texture of the hard, dried needles was unpleasant when eating the meat. Since then, I have made it a rule to only use fresh rosemary for this dish. It is a fresh, herbal preparation, and the fresh herb really is the anchor for the entire flavor profile. If you cannot find fresh rosemary, it is better to skip the herb entirely than to use the dried variety.
Variations and Tips
Adding Citrus for Balance
If you want to lighten the flavor, try adding thin slices of lemon directly to the pan during the final hour of roasting. The lemon juices mingle with the rendered pork fat and the rosemary, creating a bright, acidic pan sauce that cuts through the richness of the meat. Just place the slices on top of the shanks once you have reached the two-hour mark. It changes the profile from a deep, savory roast to something a bit more vibrant, which is a great option for a sunny weekend lunch.
The Garlic Spread Trick
The garlic cloves are one of the best parts of this dish. Once the shanks are done, take the soft, roasted cloves and squeeze them out of their skins. You can mash them into the pan juices to create a rustic, flavorful condiment. This roasted garlic paste is incredible spread over crusty bread or even served as a side dollop alongside the pork. Do not throw the garlic away once you have pulled the meat out of the pan; it is one of the most concentrated sources of flavor in the entire recipe.
Make-Ahead Strategy
You can prepare the shanks up to the point of putting them in the oven earlier in the day. Keep them in the refrigerator, covered with plastic wrap, until about an hour before you want to start roasting. Let them sit on the counter to take the chill off before they go into the hot oven. This does not change the cooking time, but it helps ensure that the heat penetrates the meat more evenly from the start, especially if the shanks were quite cold from the fridge.
Serving Suggestions
These shanks are hearty, so they pair well with simple sides that can soak up the juices from the pan. Creamy mashed potatoes, polenta, or even a simple roasted vegetable medley work perfectly. I usually spoon the drippings from the bottom of the roasting pan over the finished meat before bringing it to the table. The fat and the rosemary-infused oil are too good to waste, and they act as a natural, flavorful dressing for whichever side dish you decide to serve.
Storage and Reheating
If you have leftovers, they keep well for up to 3 days in the refrigerator. Store them in an airtight container to keep the meat from picking up other scents. It is best to keep the meat on the bone if possible, as this helps it stay moist. When you are ready to eat them again, do not use the microwave, as it tends to make the meat rubbery. Instead, put the shanks in a baking dish with a splash of water or broth, cover them with foil, and reheat them in a 300°F oven until they are steaming hot and reach an internal temperature of 165°F.
Freezing this dish is possible, but it is not my favorite way to enjoy it. If you choose to freeze, take the meat off the bone first and store it in a freezer-safe bag with as much air removed as possible. It will stay good for about a month. When reheating, make sure it is thawed completely in the refrigerator overnight before warming it in the oven. It will lose some of that initial texture, so it is better to use the leftover meat in a stew or a pasta sauce rather than expecting it to be like the original roast.
Frequently Asked Questions
Do I need to sear the pork shanks in a pan before roasting?
You do not need to sear them separately. Because these shanks spend nearly three hours in the oven, the surface will naturally brown and develop a crust without needing an extra step on the stovetop. This saves you the effort of cleaning an extra pan and keeps the process entirely contained to the roasting dish. The high fat content of the shank does the work for you, creating that rich color while the meat cooks through slowly.
Can I use a different type of herb?
While rosemary is the standard for this recipe because it holds up to the long cooking time, you can add a few sprigs of thyme if you enjoy a more complex herbal profile. Avoid soft, leafy herbs like parsley or cilantro, as they will simply burn and turn bitter in the long time required for roasting. Rosemary and thyme are the best options because they provide a sturdy, woodsy background that complements the pork without being overwhelmed by the high heat.
What if the bone is too large for my pan?
If the bone is sticking out and you cannot fit it comfortably without them touching, you can try placing them in a diagonal arrangement or, if necessary, using two pans. Do not be tempted to cut the bone, as the marrow inside adds significant flavor to the surrounding meat during the roasting process. If you really are restricted by space, you can ask your butcher to trim the bone down, but keep it as long as you can manage to maintain the integrity of the cut.
Is the garlic skin meant to be eaten?
No, the skin of the garlic is strictly to protect the clove while it roasts. When you are ready to serve, the garlic inside the skin will be soft and creamy. Simply squeeze the clove and the roasted pulp will come right out. The skin itself is dry and papery, so it is best to leave it on the plate or discard it as you prepare the portions for your guests. It is essentially a natural cooking vessel for the garlic.
How do I know if the meat is fully cooked without a thermometer?
While I strongly recommend using a thermometer to ensure you reach the 170°F mark, the visual sign is that the meat will be pulling away from the bone by at least an inch or more. When you gently press it with a fork, it should offer no resistance and feel tender. If it feels firm or bouncy, it needs more time in the oven. The combination of the meat receding from the bone and the texture feeling soft is the hallmark of a properly roasted shank.
Final Thoughts
Making roasted pork shanks is a process that rewards patience. There is something satisfying about putting a tray of simple, humble ingredients into the oven and watching them transform over the course of a few hours into a rich, tender meal. It is not about fancy techniques or complicated sauces, but rather about trusting the heat and the ingredients to do their job.
I hope this becomes a regular feature in your kitchen, especially when you have a bit of time to let the oven do its work. It is a dish that makes a simple evening feel a little more special. Once you master this method, you will see how easy it is to produce a restaurant-quality meal with just a few basic tools and a bit of fresh rosemary.