
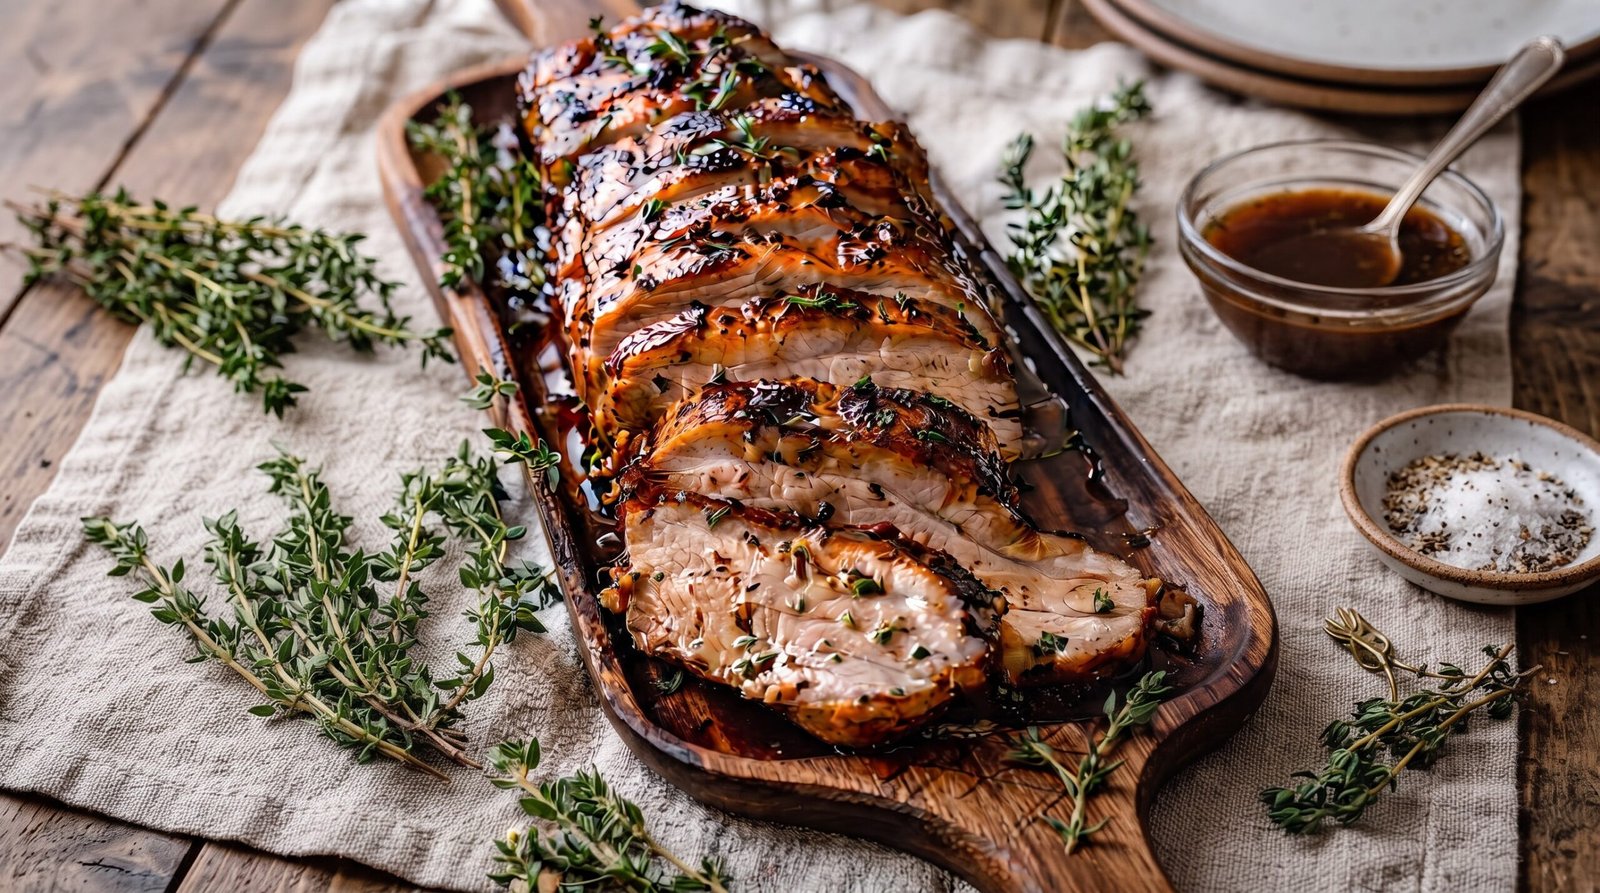
I remember the first time I tried to cook a pork tenderloin for my family on a Tuesday night. I was nervous because I had heard so many horror stories about it drying out and becoming tough. I kept checking the oven every few minutes, worried that I was either undercooking it or turning it into a piece of shoe leather. It took a few tries, but I eventually learned that the secret is treating this lean cut with a bit of patience and keeping a meat thermometer close by. Since then, it has become one of my go-to meals when I want something that feels special but does not require hours of standing at the stove.
This herb roasted pork tenderloin is a simple, straightforward dish that relies on fresh aromatics and a hot oven to create a flavorful crust. You get a nice exterior while keeping the inside tender and juicy. It is a reliable main course that works just as well for a casual weekend dinner as it does when you have a guest or two over.
Why This Recipe Works
This recipe focuses on the natural lean quality of the pork tenderloin. Because this cut of meat does not have much internal fat, it cooks very quickly. By roasting it at a higher temperature, we get a nice, browned exterior without waiting for the internal temperature to creep up too high and dry out the meat. This method saves you time and keeps the texture from becoming fibrous or chewy.
The herb rub is another reason this works well. Using fresh thyme and garlic creates a fragrance that fills the kitchen while the meat is in the oven. The herbs provide a bright, earthy flavor that balances the mild taste of the pork. Because we are applying these herbs directly to the surface of the meat before cooking, they infuse the exterior with flavor as the tenderloin heats through.
Ease of preparation is the biggest benefit here. You really only need a few basic tools: a roasting pan or a sturdy baking sheet, a sharp knife, and a meat thermometer. There is no complicated searing or long marinade required. You can season the meat, pop it in the oven, and walk away to prepare your sides while the kitchen does the work for you. It removes the stress of trying to manage multiple pots at the same time.
Finally, the flexibility of this approach is helpful for busy cooks. You can easily adjust the amount of herbs or garlic depending on what you have in your pantry. If you prefer a different profile, you can swap the fresh thyme for rosemary or sage, and the result will still be a tender, reliable dinner. It is a humble meal that teaches you the importance of temperature control and simple seasoning.
Ingredient Notes
The Meat
The star of the show is the pork tenderloin. Make sure you buy a tenderloin, not a pork loin. They are different cuts; the tenderloin is long, thin, and very tender. A loin is wider and thicker. You should look for one that is about one pound in weight. If you see a thin flap of meat running along the side, you can trim that off, or just tuck it under the main body of the meat so it cooks evenly.
The Aromatics
Fresh thyme is essential for this specific flavor. Do not use dried thyme if you can help it, as the fresh variety provides a much brighter taste. Garlic is the other primary aromatic. Use fresh cloves that you crush or mince yourself. Avoid the pre-minced jars from the store, as they often have a vinegary aftertaste that does not suit the pork.
The Fat and Seasoning
Use a good quality olive oil to coat the pork. This helps the herbs stick to the surface and encourages even browning. Kosher salt and freshly cracked black pepper are your main seasonings. I prefer using kosher salt because the coarser grains are easier to handle and spread evenly across the surface of the meat.
| Ingredient | Amount | Notes |
|---|---|---|
| Pork tenderloin | 1 lb | Trimmed of excess silver skin |
| Olive oil | 2 tablespoons | Extra virgin works best |
| Fresh thyme | 3 tablespoons | Chopped finely |
| Garlic | 3 cloves | Minced or pressed |
| Kosher salt | 1 teaspoon | Add more if desired |
| Black pepper | 1/2 teaspoon | Freshly cracked |
The Recipe
- Prep Time: 10 minutes
- Cook Time: 20 minutes
- Total Time: 30 minutes
- Servings: 3-4
- Difficulty: Easy
Equipment:
– Large roasting pan or baking sheet
– Meat thermometer
– Chef knife
– Cutting board
Step-by-Step Instructions
Step 1: Prep the Oven and Meat
Start by preheating your oven to 425 degrees Fahrenheit. A hot oven is necessary to get the surface of the pork to reach a good color before the center overcooks. While the oven heats up, take the pork tenderloin out of the refrigerator. You want it to sit at room temperature for about 15 minutes before cooking so the muscle fibers relax and it cooks more evenly.
Use a paper towel to pat the surface of the pork until it is completely dry. Moisture is the enemy of browning, so do not skip this part. If there is a tough, silvery membrane running along the length of the tenderloin, use a thin knife to slide under it and trim it away. This piece does not break down during cooking and can be quite chewy, so removing it makes for a much better eating experience.
Step 2: Season the Pork
In a small bowl, combine your olive oil, minced garlic, chopped fresh thyme, salt, and black pepper. Stir them together until you have a thick, fragrant paste. Pour this mixture over the pork tenderloin. Use your hands to rub the mixture into every part of the meat. You want the herbs and garlic to be distributed as evenly as possible.
Once it is coated, place the tenderloin on your roasting pan or baking sheet. If the tenderloin has a tapered end, fold that end under so the thickness of the meat is relatively uniform from end to start. This helps ensure that one end of the pork does not finish cooking long before the other, which is a common problem with this specific cut.
Step 3: The Initial Roast
Place the pan into the center rack of your oven. Set your timer for 15 minutes. At this point, the meat will begin to release some of its juices and the herbs will start to toast. You do not need to turn the meat during this time. The goal is to let the ambient heat build up on the surface.
After 15 minutes, take a peek. The surface of the meat should look slightly browned and the herbs should be fragrant. If it looks very pale, you can leave it for another 2 to 3 minutes, but keep a very close eye on it. This is when the meat transitions from raw to cooked, and since it is a lean cut, it can go from perfect to overdone in a very short window of time.
Step 4: Checking Temperature
Take your meat thermometer and insert the probe into the thickest part of the tenderloin. You are looking for an internal temperature of 145 degrees Fahrenheit. This is the safe internal temperature for pork, and it ensures that the meat stays juicy. Do not rely on color or the way the meat feels when pressed, as pork tenderloin is deceptive.
If your thermometer reads below 140 degrees, return it to the oven for 3 more minutes and check again. If it is already at 145, pull the pan out of the oven immediately. If the temperature is climbing rapidly toward 150, the meat will likely be dry, so take it out right away and let it rest on the counter.
Step 5: Resting and Slicing
This is the most important step of the entire process. Transfer the cooked pork to a cutting board and let it rest for at least 8 to 10 minutes. Resting allows the internal juices to redistribute throughout the meat instead of spilling out onto the board the moment you make the first cut. If you skip this, you will end up with dry meat no matter how perfectly you cooked it.
Once the time has passed, use a sharp chef knife to slice the pork into half-inch rounds. If you notice a pinkish center, that is perfectly fine and desired. It indicates the meat is cooked through but not dried out. Arrange the slices on a platter and spoon any remaining juices from the pan over the top of the meat before serving.
Mistakes I Made (So You Don't Have To)
Overcooking the Meat
My biggest mistake when I started was assuming that pork needed to be cooked well past medium to be safe. I used to aim for 160 degrees, and the meat was always tough and dry. Once I learned that 145 degrees is sufficient, the meat became much better. If you have been overcooking your pork, invest in a reliable digital meat thermometer and trust the reading. It changes everything.
Skipping the Dry Step
I once tried to skip drying the meat with paper towels because I was in a rush. The olive oil and herb paste just slid off the wet surface, and the meat ended up steaming in its own moisture rather than browning. Now, I always make sure the meat is completely dry before adding any oil or seasonings. It makes the herb crust much more effective and flavorful.
Not Resting the Pork
For years, I was guilty of taking the pork out of the oven and slicing it immediately because I wanted to eat while it was hot. Every single time, the plate ended up with a puddle of juice and the meat itself felt dry. I learned that letting it sit for 8 minutes is the difference between a sad, dry meal and something that is truly enjoyable. Now, I set a timer for the rest period just like I do for the roasting period.
Using the Wrong Cut
I once grabbed a pork loin instead of a tenderloin at the grocery store, thinking they were the same. The loin was much larger and thicker, so after 20 minutes, the center was still raw. I had to cut it into smaller chunks and finish it in a pan, which ruined the texture. Always check the label to make sure you have a tenderloin, which should be about the size of a large carrot or a baguette.
Variations and Tips
Swapping the Herbs
While I love the fresh thyme for this, you can easily use rosemary for a more intense, piney flavor. Just make sure to chop the rosemary very fine, as it is much tougher than thyme leaves. You can also mix in some fresh parsley for a lighter flavor, or add a pinch of dried red pepper flakes if you want a little bit of heat to come through the herbs.
Adding a Glaze
If you want something a bit different, you can add a simple glaze after the first 15 minutes of roasting. A quick mix of Dijon mustard and a little bit of honey works beautifully. Just brush it on for the final 5 minutes of cooking. The sugar in the honey will brown and create a slight sweetness that pairs well with the savory pork.
Using a Cast Iron Skillet
If you have a cast iron skillet, you can use it to roast the pork. Start by heating the skillet on the stovetop with a little oil, sear the tenderloin for 2 minutes on each side, and then move the entire pan into the oven to finish. This gives you a more pronounced crust on the exterior, though you will need to reduce the oven time by a few minutes since the pan is already hot.
Make Ahead Tip
You can prep the herb paste and rub it onto the pork up to 4 hours in advance. Keep the meat wrapped in plastic or in a sealed container in the refrigerator until you are ready to cook. This actually helps the flavors penetrate the outer layer of the meat slightly, making for a more flavorful dish. Just make sure to pull it out of the fridge at least 20 minutes before roasting.
Storage and Reheating
If you have leftovers, they should be refrigerated within 2 hours of cooking to keep them safe. Store the sliced pork in an airtight container in the refrigerator. It will stay good for up to 3 days. Because pork tenderloin is so lean, it can dry out quickly when reheated, so you want to be gentle.
To reheat, the best method is to use a small amount of liquid. Place the pork slices in a skillet with a tablespoon of water or chicken broth. Cover the pan and heat it over medium-low heat for just a few minutes until the meat is steaming hot, which means it should reach 165 degrees. Do not blast it in the microwave on high, as that will make the meat rubbery.
I do not recommend freezing this dish. Once thawed, the texture of the pork tenderloin becomes quite grainy and loses the moisture that makes it good in the first place. If you do have extra, it is better to eat it cold in a salad or a sandwich the next day rather than putting it in the freezer.
Frequently Asked Questions
Why is my pork tenderloin tough even though I followed the temperature?
Sometimes the issue is not the temperature, but how the meat is sliced. Always slice the tenderloin against the grain. If you look at the meat, you will see little lines running along the length of it. If you cut with those lines, the meat will be chewy. If you cut across those lines, you are shortening the muscle fibers, which makes every bite much more tender.
Can I use dried herbs instead of fresh ones?
You can, but you will need to use less. Dried herbs are more concentrated. For 3 tablespoons of fresh thyme, use about 1 tablespoon of dried thyme. Crush the dried leaves between your fingers as you add them to the oil to help release the remaining oils. Note that the flavor will be more intense and less bright than the fresh variety.
Does the garlic burn in the oven?
If your oven is calibrated correctly at 425 degrees, the garlic should not burn. It will toast and turn a light brown color, which adds a nice sweetness to the pork. If you find your oven runs hot, you can add the garlic during the final 10 minutes of cooking rather than at the start to ensure it does not become bitter.
What should I serve with this pork?
This dish is very versatile. Because it has a simple herb flavor, it goes well with roasted root vegetables like carrots or potatoes. A crisp green salad or some steamed asparagus also works well to cut through the richness of the pork. Since you are already using the oven for the meat, roasting some vegetables on the same sheet or a separate tray is a great way to save time.
How do I know if the thermometer is accurate?
If you are unsure about your thermometer, test it in boiling water. At sea level, it should read 212 degrees Fahrenheit. If it is off by more than a couple of degrees, you should account for that when checking your meat. Using a good tool is the best way to avoid the guessing game that leads to overcooked or undercooked food.
Final Thoughts
Cooking a pork tenderloin does not need to be a complex task that takes over your entire afternoon. Once you get a feel for how the meat reacts to the heat and remember to use your thermometer, it becomes a simple meal that you can rely on any day of the week.
Enjoy the process of getting that nice crust on the outside while keeping the center tender. It is a rewarding way to spend a short amount of time in the kitchen and always leads to a plate of food that everyone can appreciate.