
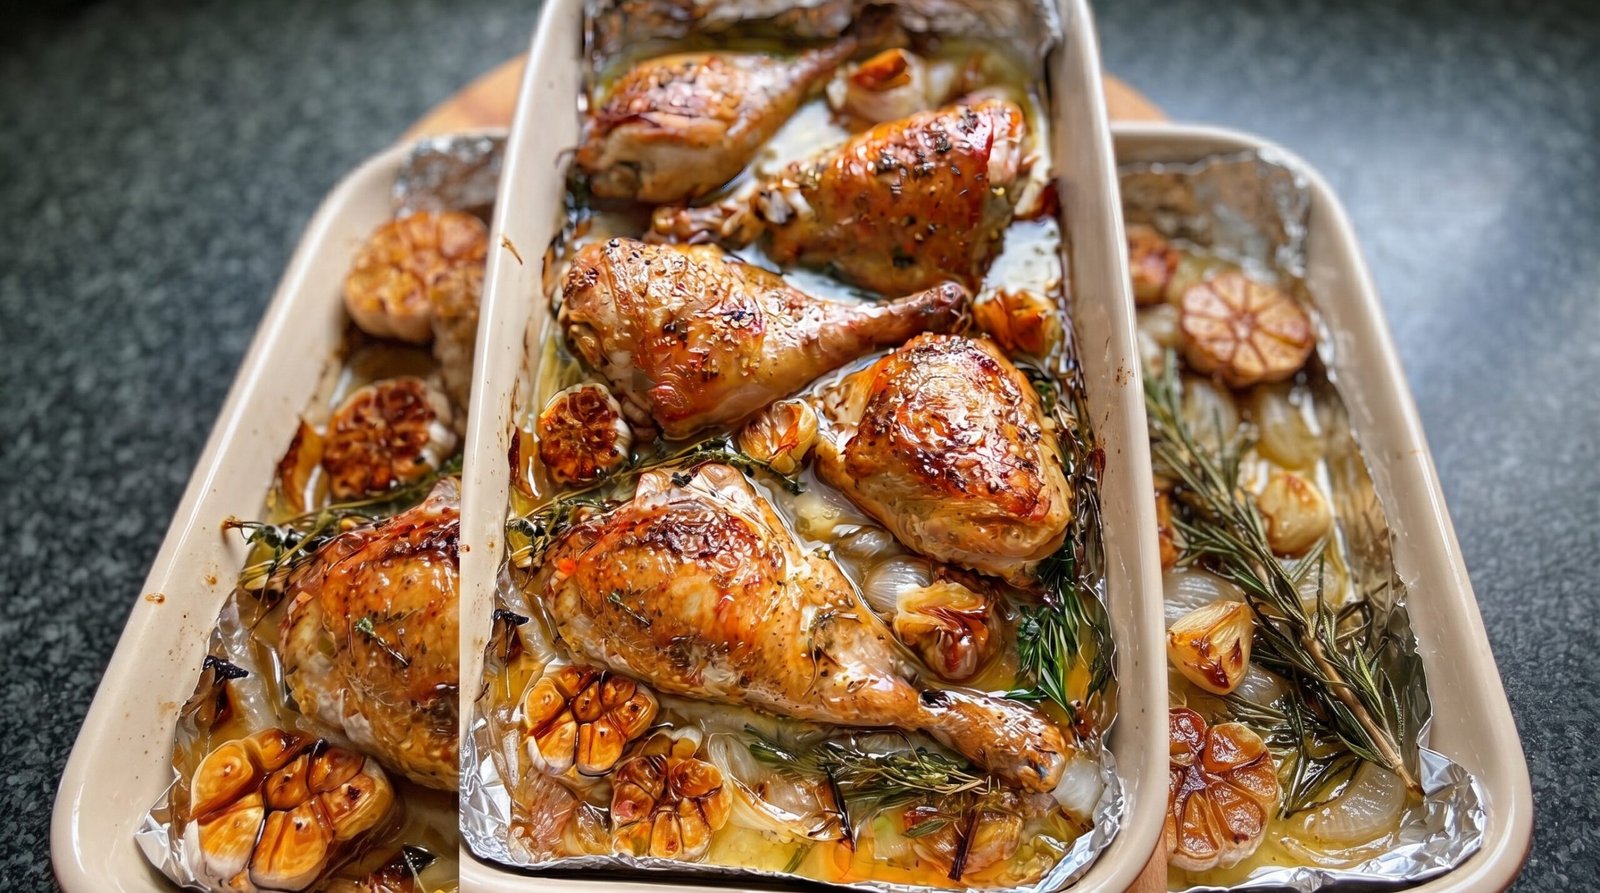
I remember the first time I realized that some of the best meals come from the simplest preparations. I had a busy week and needed something for dinner that did not require hovering over the stove. I had a pack of chicken drumsticks and a few heads of garlic sitting in my pantry. Instead of overthinking it, I tossed them into a baking dish with some fresh herbs and a drizzle of oil. That evening, my kitchen filled with a savory, earthy aroma that was better than any restaurant takeout. Ever since then, roasted chicken legs with garlic and herbs have become a regular staple in my rotation when I want a satisfying meal without the stress.
This dish is all about letting the ingredients speak for themselves. You do not need fancy techniques or expensive equipment to get a good result. When you roast chicken legs at the right temperature, the skin turns a rich, golden color and the meat stays moist. Using whole heads of garlic is one of my favorite tricks because they become soft, spreadable, and mild once they roast in the oven. It is a humble, reliable dinner that works just as well for a quiet evening alone as it is for a casual weekend get-together.
Why This Recipe Works
The primary reason this recipe succeeds is the way chicken drumsticks handle high heat. Unlike breast meat, which can dry out quickly, chicken legs are naturally forgiving. They contain enough fat and connective tissue to stay juicy even if you leave them in the oven for a few extra minutes. This makes the dish approachable for someone who might be nervous about overcooking their dinner. You get a consistent result every time because the dark meat is robust and flavorful.
Another factor is the combination of fat and aromatics. Using olive oil combined with the natural fat rendered from the chicken skin creates a base that coats the garlic and herbs. As the garlic cloves soften inside their skins, they release a sweet, mellow fragrance that permeates the entire dish. You are essentially basting the meat in its own juices and seasoned oil as it cooks, which builds flavor without needing a complicated marinade or a long preparation time.
The ease of cleanup is another benefit I appreciate. You can cook everything in one single vessel. Since the chicken, garlic, and onions all share the same pan, you have fewer dishes to scrub later in the evening. There is also no need for a rack or special pans. A simple ceramic or metal baking dish works well, provided it is large enough to hold the ingredients in a single layer.
Finally, the visual appeal is quite satisfying. Watching the skin turn a deep, burnished bronze while the garlic cloves soften into golden little gems is rewarding. It looks like you spent hours on the dish when, in reality, you spent about ten minutes prepping it. It feels honest and genuine, providing a meal that nourishes you without requiring a culinary degree to pull off. It really is a back-to-basics approach that highlights how good simple food can be.
Ingredient Notes
The Poultry
You will need about two to three pounds of chicken drumsticks. I prefer to keep the skin on, as it crisps up during the roasting process and helps protect the meat underneath. If your drumsticks are particularly large, you might need to adjust your cooking time by about five minutes. Always pat the chicken dry with paper towels before you start seasoning. If the skin is wet, it will steam rather than brown, and you will lose that nice texture you want. You can find these at any grocery store, and they are usually sold in convenient packs that are easy to prep.
The Aromatics
The star of this dish is the garlic. Use two or three whole heads of garlic. Do not peel the cloves individually. Instead, cut the top off the entire head so the cloves are exposed. This allows the heat to reach the inside while the skins keep the garlic from burning or drying out. I also include a couple of medium-sized onions, sliced into thick wedges. These provide a sweet, savory foundation that pairs perfectly with the roasted garlic. If you have shallots on hand, those are an excellent substitute, but onions are more than enough to get the job done.
The Seasoning and Fat
For the fat, use a good quality extra virgin olive oil. It adds a nice, fruity depth to the drippings in the pan. You will also need a generous amount of salt and freshly cracked black pepper. I like to use a mix of fresh herbs such as rosemary and thyme. They hold up well to the heat of the oven and infuse the oil with a woodsy, floral scent. If you only have dried herbs, use half the amount I recommend, as dried herbs are more concentrated. Just sprinkle them evenly over the top of the chicken before you put the dish into the oven.
| Ingredient | Amount | Notes |
|---|---|---|
| Chicken drumsticks | 8-10 pieces | Pat dry with paper towels |
| Garlic | 2-3 whole heads | Cut the tops off |
| Onion | 2 medium | Cut into thick wedges |
| Olive oil | 3 tablespoons | For drizzling over everything |
| Fresh rosemary | 3-4 sprigs | Leave on the stem |
| Fresh thyme | 5-6 sprigs | Leave on the stem |
| Salt | 1 tablespoon | Adjust to your taste |
| Black pepper | 1 teaspoon | Freshly cracked is best |
The Recipe
- Prep Time: 15 minutes
- Cook Time: 45 minutes
- Total Time: 60 minutes
- Servings: 4
- Difficulty: Easy
Equipment:
– One large ceramic or glass baking dish (about 9×13 inches)
– Paper towels
– A sharp chef knife
– A cutting board
Step-by-Step Instructions
Step 1: Prep the Ingredients
Start by preheating your oven to 400 degrees Fahrenheit. While the oven heats up, take your chicken drumsticks and pat them very dry using paper towels. Moisture is the enemy of crisp skin, so do not skip this part. Once dry, arrange the drumsticks in your baking dish in a single layer so they have enough room to cook evenly.
Take your onions and peel them, then cut them into thick, sturdy wedges. You want them thick so they do not turn into mush while in the oven. Nestle the onion wedges in between the chicken legs. They will soak up all the flavorful juices as they soften.
Step 2: Prepare the Garlic and Herbs
Take your heads of garlic and use a sharp knife to slice off the top quarter of the head, exposing the cloves inside. Place these garlic heads into the baking dish, cut side up, tucking them into empty spots. If a clove falls out, just put it in the pan too.
Scatter the fresh rosemary and thyme sprigs over the chicken and garlic. Don't worry about chopping the herbs; leaving them as whole sprigs makes them easier to remove later if you prefer, and they look nice in the pan. The oils from the herbs will release slowly as the dish roasts.
Step 3: Season and Drizzle
Drizzle the olive oil over the chicken, the garlic heads, and the onions. Use your hands to make sure every piece of chicken is lightly coated with oil. This helps the seasoning stick and encourages the skin to brown.
Sprinkle the salt and pepper evenly over everything. Be generous with the salt, as it helps pull out the moisture from the onions and softens the garlic. Shake the pan gently so the oil and seasonings settle into the bottom of the dish.
Step 4: Roast the Chicken
Place the dish into your preheated oven on the center rack. Let it roast for about 45 minutes. You will know it is getting close when the skin is a deep golden brown and the onions underneath are soft and translucent.
Around the 30-minute mark, check on the garlic. If the tops of the cloves look like they are getting too dark, you can loosely cover the garlic heads with a small piece of foil. Otherwise, let it continue to roast until the chicken is cooked through.
Step 5: Check for Doneness
To ensure the chicken is safe to eat, use a meat thermometer. Insert it into the thickest part of the drumstick, being careful not to hit the bone. You are looking for an internal temperature of 165 degrees Fahrenheit.
The meat should pull away from the bone slightly, and the juices should run clear when you pierce the skin with a fork. Once it hits this temperature, take the dish out of the oven and let it rest for five minutes before serving. This rest time allows the juices to redistribute through the meat.
Mistakes I Made (So You Don't Have To)
Washing the Chicken
Early on, I used to wash my chicken under the tap. I thought it was cleaner, but I realized it just splattered raw juices all over my sink and counters. It also made the skin wet, which meant I could never get it to brown properly in the oven. Now, I just pat it dry with paper towels. It is much safer and results in much better skin texture.
Crowding the Pan
I once tried to squeeze too many drumsticks into a small pan. Because the pieces were touching each other, they steamed in their own juices instead of roasting. The skin turned out soggy rather than brown. Now, I always use a large enough dish so that every piece has a bit of breathing room. It makes a world of difference in the final result.
Using Too Much Salt
In my early attempts, I would use store-bought seasoning blends that were already packed with salt. I ended up with a meal that was far too salty to enjoy. Now, I stick to plain salt and pepper. It gives me control over the flavor, and I can always add a pinch more at the table if I feel like the dish needs it.
Ignoring the Garlic
I used to throw individual peeled garlic cloves into the dish. They would often burn and become bitter by the time the chicken finished cooking. Using whole heads with the tops cut off is the fix. The skins protect the garlic, allowing them to turn into a sweet, creamy paste inside. It is much better than dealing with burnt, crunchy little bits of garlic.
Variations and Tips
Try a Zesty Twist
If you want to brighten up the flavors, add a lemon. Slice the lemon into thin rounds and tuck them between the chicken legs before putting the dish into the oven. The lemon juice adds a nice acidity that cuts through the richness of the chicken skin. It pairs well with the rosemary and thyme.
Use Other Vegetables
You can easily turn this into a full meal by adding root vegetables. Carrots or potatoes cut into one-inch chunks work great. Just make sure they are similar in size so they cook through by the time the chicken is ready. You might need to add an extra tablespoon of oil to keep the vegetables from drying out.
The Make-Ahead Tip
You can prep the entire pan up to four hours before you plan to cook. Just cover the dish with plastic wrap and keep it in the refrigerator. Take it out about 20 minutes before you are ready to roast so it can come closer to room temperature. This helps the chicken cook more evenly in the oven.
Serving Suggestion
This dish creates a wonderful, flavorful oil in the bottom of the pan. Do not waste it. Serve the chicken alongside some crusty bread. You can squeeze the roasted garlic out of the heads and spread it directly onto the bread, then dip it into the pan juices. It is the best part of the whole meal.
Storage and Reheating
If you have leftovers, let the chicken cool down completely before putting it away. You should move the chicken into a shallow airtight container within two hours of taking it out of the oven. Keeping it in the fridge helps it stay fresh for up to three days.
When you want to reheat the chicken, do not use the microwave if you want to keep the skin from becoming rubbery. Instead, put the chicken on a baking sheet and heat it in an oven set to 350 degrees Fahrenheit. Heat it until it reaches an internal temperature of 165 degrees Fahrenheit. It usually takes about 15 minutes. This way, the skin stays relatively crisp, and the meat remains moist. I do not recommend freezing this dish, as the texture of the roasted vegetables and the skin tends to change significantly once thawed.
Frequently Asked Questions
Can I use chicken breasts instead of drumsticks?
You can, but keep in mind that chicken breasts cook much faster than drumsticks. If you decide to use them, check the temperature after about 25 minutes of roasting. Since they have less fat, they are also more prone to drying out, so you have to be extra careful to pull them out as soon as they hit 165 degrees Fahrenheit.
Should I remove the skin before cooking?
I recommend leaving the skin on while you roast the chicken. The skin acts as a protective layer that keeps the meat underneath juicy and tender. If you prefer not to eat the skin, you can easily remove it after the cooking process is complete. It also provides extra flavor to the pan juices.
Why did my onions turn black?
This usually happens if the onions are cut too thin or if the oven temperature is a little too high. If you notice them getting dark before the chicken is done, you can move them to the center of the pan or under the chicken pieces. Thick wedges of onion are the best way to prevent them from burning.
What should I do if the chicken is brown but not cooked inside?
This happens if your oven runs hot or if the pieces are quite large. If the skin looks done but the meat is not quite there, loosely tent a piece of aluminum foil over the top of the dish. This stops the browning process while allowing the inside of the meat to continue cooking safely.
Is it necessary to use fresh herbs?
While fresh herbs offer a wonderful aroma and color, dried herbs will work in a pinch. If you use dried, use about half the amount suggested in the recipe, as they are more potent. Sprinkle them on just before you put the dish in the oven so they have time to rehydrate in the cooking juices.
Final Thoughts
There is something truly comforting about a dish that requires so little effort yet provides such a complete, satisfying meal. It reminds me that cooking does not always have to be a complicated production. Sometimes, all you need is a few good ingredients, a hot oven, and a bit of patience while the kitchen fills with that savory, herbaceous scent.
I hope this becomes a go-to meal in your own kitchen whenever you need something reliable and nourishing. It is the kind of recipe that makes you feel successful without the stress, and that is exactly what home cooking should be about. Enjoy every bite, especially that roasted, buttery garlic.