
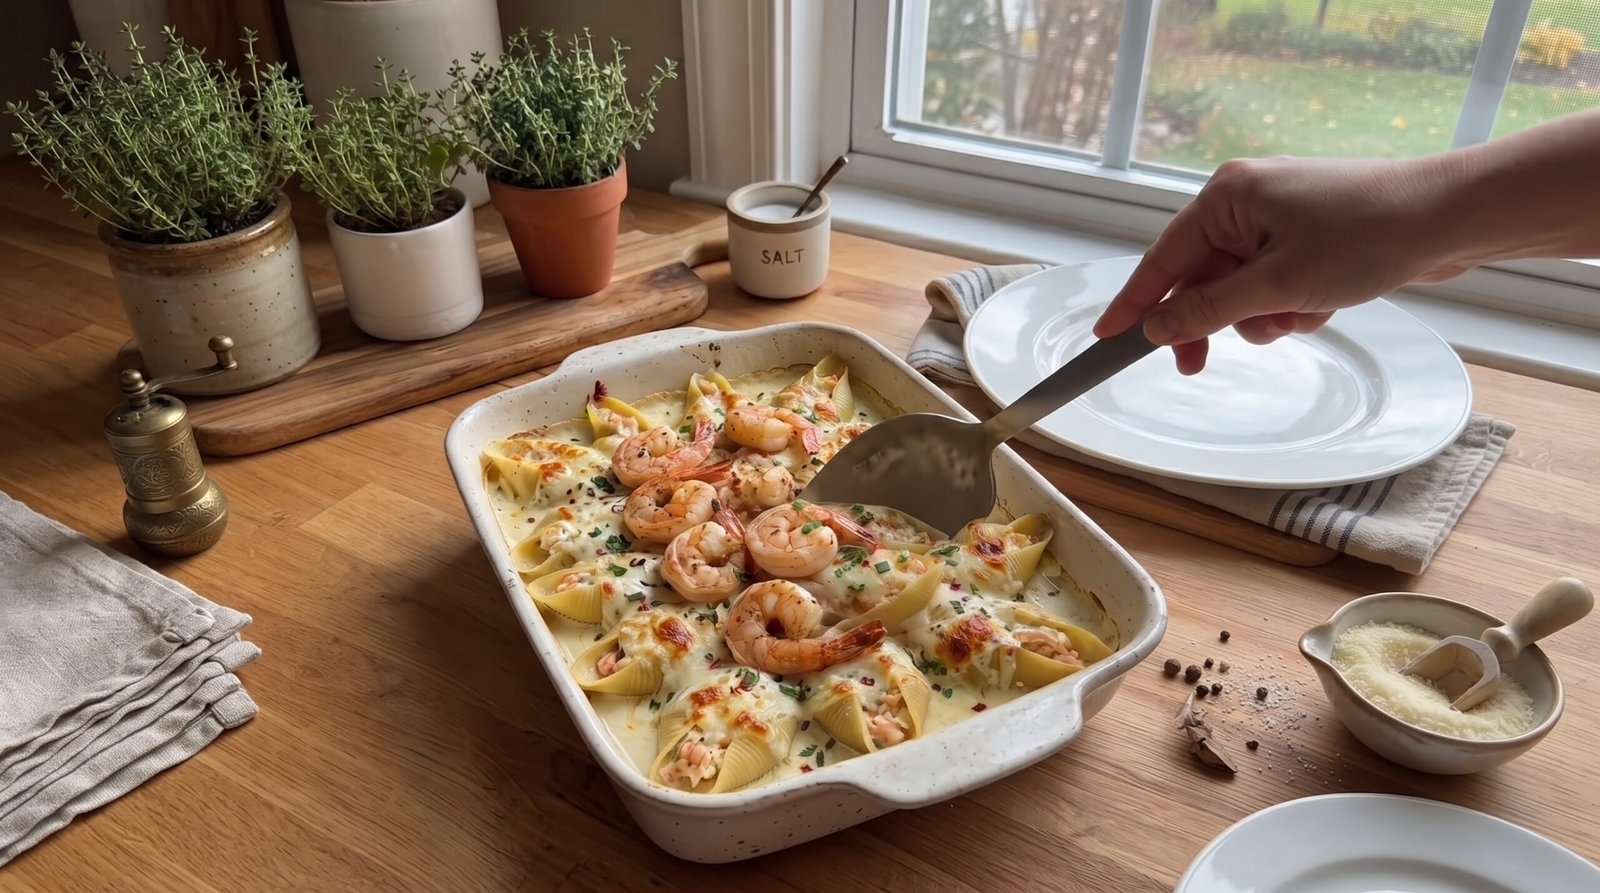
After a long Tuesday where everything seemed to go wrong, I often find myself standing in front of the pantry at 6 PM without a clear plan. On days like that, I tend to reach for pasta. It is predictable, filling, and usually comes together quickly enough to save me from ordering takeout. Lately, I have been making these creamy baked seafood stuffed shells whenever I want something that feels special but does not require me to spend hours standing at the stove. This recipe uses jumbo pasta shells as little bowls for a mixture of ricotta, parmesan, and plump shrimp. It is a hearty meal that bridges the gap between a weeknight staple and a weekend comfort dish. The sauce is a simple cream-based mixture that bubbles up in the oven, creating a rich coating for the pasta. If you have been looking for a way to use shrimp that feels a bit more interesting than just a quick stir-fry, this is a path worth taking.
Why This Recipe Works
The primary reason I turn to these seafood stuffed shells is the balance of textures. When you bake the pasta in a creamy sauce, the edges of the jumbo shells stay slightly firm while the tops get very soft and tender. The ricotta filling stays moist, and the shrimp, when placed on top during the final stages of cooking, provide a distinct pop that contrasts with the softness of the cheese-stuffed pasta. Using jumbo shells makes the assembly easier than filling something like manicotti, which often tears if you are not careful.
Flavor-wise, this dish relies on the sweetness of the shrimp and the sharpness of the cheese. I keep the seasoning straightforward with garlic, red pepper flakes, and dried herbs because I do not want to overpower the delicate flavor of the seafood. The cream sauce, which incorporates a bit of the pasta cooking water, binds everything together. It is not overly heavy, yet it feels satisfying because of the richness of the cheese.
Another aspect that makes this a regular in my house is how well it handles transitions. You can prep the shells in the morning, keep them in the fridge, and then bake them right before dinner. The actual active time is relatively low. Once the water is boiling and the pasta is cooked, the filling takes maybe ten minutes to mix together. You are looking at about thirty minutes of oven time, which gives you just enough room to tidy up the kitchen or toss together a quick side salad. It is an honest dish that delivers consistent results without needing complicated techniques or expensive ingredients that you only use once.
Ingredient Notes
The Pasta and Seafood
For the shells, you need the jumbo size. Anything smaller will be impossible to stuff, and you will lose your patience quickly. I usually look for a box labeled jumbo shells, which typically holds about twenty to twenty-five pieces. For the shrimp, buy raw, peeled, and deveined shrimp. If you buy cooked shrimp, they will become rubbery after being baked in the oven. Fresh is great, but frozen, thawed, and patted dry works perfectly fine. You want them to be around medium-size so they fit nicely on top of the shells.
The Filling Ingredients
Whole milk ricotta is my preference because it is creamier and has a better texture than the low-fat versions. If you have a brand you trust that is a bit drier, that is even better, as it won't water down your filling. You will also need freshly grated parmesan cheese. Please avoid the stuff in the green shaker can, as it does not melt properly and has a grainier texture that ruins the consistency of the filling. An egg is used as a binder to ensure the cheese stays inside the shells while they bake.
The Cream Sauce Components
For the base, you need heavy cream. Do not substitute this with milk, as the sauce will likely break or turn out thin and runny. You will also need minced garlic, salt, black pepper, and some dried parsley or basil. A small splash of lemon juice is a secret I use to cut through the richness of the heavy cream and cheese. It brightens the whole dish. You can add red pepper flakes if you enjoy a tiny bit of heat.
| Ingredient | Amount | Notes |
|---|---|---|
| Jumbo Pasta Shells | 1 box (12 oz) | About 20-25 shells |
| Raw Shrimp | 1 pound | Peeled and deveined |
| Whole Milk Ricotta | 15 ounces | Drain excess liquid |
| Parmesan Cheese | 1 cup | Freshly grated |
| Heavy Cream | 1.5 cups | Room temperature |
| Garlic | 3 cloves | Minced finely |
| Egg | 1 large | Beaten |
| Lemon Juice | 1 tablespoon | Freshly squeezed |
| Parsley | 1 tablespoon | Dried or fresh |
| Red Pepper Flakes | 1/2 teaspoon | Optional for heat |
| Salt and Pepper | To taste | Adjust as needed |
The Recipe
- Prep Time: 20 minutes
- Cook Time: 35 minutes
- Total Time: 55 minutes
- Servings: 4-6 servings
- Difficulty: Intermediate
- Equipment: Large pot for boiling pasta, 9×13 inch baking dish, mixing bowl, medium skillet for shrimp, spoon for stuffing, cheese grater.
Step-by-Step Instructions
Step 1: Prep the Pasta
Start by bringing a large pot of salted water to a rolling boil. Add your jumbo shells and cook them for about two minutes less than the package instructions suggest. You want them al dente, meaning they should still have a slight firmness in the center because they will finish cooking in the oven. If you overcook them now, they will fall apart when you try to stuff them. Drain the shells and lay them out individually on a baking sheet or a clean kitchen towel so they do not stick together.
Step 2: Prepare the Filling
In a medium bowl, combine the ricotta, half of your parmesan cheese, the egg, half of the minced garlic, and a pinch of salt and pepper. Stir this mixture until it is smooth and well combined. The egg acts as the glue that keeps the filling from turning into a runny mess inside the shells. Once mixed, set this aside. It is better if the ricotta is at room temperature so it is easier to work with.
Step 3: Sear the Shrimp
While the oven preheats to 375 degrees Fahrenheit, heat a small skillet over medium-high heat with a tiny drop of oil. Toss in your raw shrimp with the remaining garlic and a light dusting of red pepper flakes. Cook them for only about two minutes per side until they turn opaque and pink. They do not need to be cooked through completely because they will finish in the oven. Remove them from the heat immediately. If you overcook them now, they will get tough later.
Step 4: Assemble the Dish
Pour a thin layer of your heavy cream into the bottom of a 9×13 inch baking dish to prevent the pasta from sticking. Take each shell and scoop about a tablespoon or so of the ricotta mixture into the center. Place the filled shell into the baking dish, open side up. Repeat until the dish is full. Once all shells are in, arrange the seared shrimp on top of each shell or tuck them into the open spaces. Drizzle the remaining heavy cream over the shells and sprinkle the rest of the parmesan cheese over the top.
Step 5: Bake the Shells
Cover the dish tightly with aluminum foil and bake at 375 degrees Fahrenheit for twenty minutes. The foil is important because it keeps the moisture inside and allows the shells to finish cooking without drying out. After twenty minutes, remove the foil and bake for an additional ten to fifteen minutes. You want to see the sauce bubbling around the edges and the cheese on top looking lightly golden. Since the shrimp are already mostly cooked, they should be tender. Check that the shrimp are at least 145 degrees Fahrenheit if you want to be extra sure, though they will be fully cooked well before that point. Let the dish rest for five minutes before serving.
Mistakes I Made (So You Don't Have To)
Overcooking the Shells
The first time I made this, I boiled the shells for the full time listed on the box. They were limp and started tearing the moment I tried to stuff them. It was a disaster. Now, I always set a timer for two minutes less than the package says. You want them to have enough structure to hold the filling. The sauce and the heat in the oven will do the rest of the work. If you accidentally overcook them, be very gentle when handling them, but be aware that they might lose their shape in the baking dish.
Forgetting to Drain the Ricotta
Ricotta cheese can sometimes be quite watery. If you put it straight from the container into the shells without checking the moisture, your dish will end up sitting in a pool of liquid. I now take a few minutes to put the ricotta in a fine-mesh sieve or on paper towels for about ten minutes before mixing it. This removes the excess whey and leads to a much thicker, more stable filling that does not seep out everywhere.
Using Pre-Grated Cheese
I learned the hard way that pre-grated cheese is coated in potato starch to prevent clumping in the bag. That starch stops the cheese from melting into a smooth, creamy sauce. It makes the sauce gritty and weirdly separated. Now, I only use a block of parmesan and grate it myself. It melts so much better and adds a much richer depth to the dish. It only takes a minute to grate, and the difference in quality is honestly huge.
Not Searing the Shrimp
I once tried to put raw shrimp directly into the shells thinking they would poach in the cream sauce. They ended up releasing too much water, which thinned out the sauce, and they did not get that nice texture you want. Searing the shrimp for just a couple of minutes first solves both problems. It locks in flavor and ensures the shrimp stay firm rather than getting mushy. It adds one small step, but it is worth it.
Variations and Tips
Adding Fresh Herbs
If you have fresh basil or parsley in your garden or fridge, use it. Stir some chopped fresh basil into the ricotta mixture for a pop of brightness, or sprinkle fresh parsley over the top right before serving. The flavor is much cleaner and more vibrant than dried herbs. If you do not have fresh, dried is fine, but do not skip the lemon juice, as it provides that needed acidity that fresh herbs usually bring.
Incorporating Vegetables
If you want to add more to the shells, try finely chopped spinach. Make sure you sauté the spinach first and squeeze every drop of water out of it. If you put wet spinach into the ricotta, you will have the same watery problem I mentioned earlier. You can also mix in some finely diced roasted red peppers for a bit of sweetness, which pairs beautifully with the shrimp.
Make-Ahead Strategy
This dish is great for when you have company coming over later. You can stuff the shells, place them in the baking dish, and cover the dish tightly with plastic wrap in the fridge for up to four hours before baking. Just bring the dish to room temperature for about twenty minutes while the oven preheats, then proceed with the baking steps. This saves you from having to rush through the assembly right before dinner.
Scaling for Size
If you have a smaller group, you can easily use a smaller baking dish and halve the recipe. Just keep in mind that the cook time might be slightly shorter, so start checking the dish at the twenty-five-minute mark. If you are feeding a crowd, you can double the recipe, but use two separate baking dishes rather than trying to crowd them into one giant pan. They will cook more evenly that way.
Storage and Reheating
If you have leftovers, allow the dish to cool down to room temperature, but get it into the refrigerator within two hours. Cream-based dishes like this do not hold up well if they sit out on the counter. Keep them in an airtight container for up to two days. Because of the seafood, I recommend eating these as soon as possible. Seafood tends to change texture quickly when reheated, so two days is my limit for safety and quality.
When you are ready to eat the leftovers, reheat them in the oven or the microwave. If using the oven, cover with foil and heat at 350 degrees Fahrenheit until the center is steaming hot and reaches 165 degrees Fahrenheit. The microwave is faster, but you have to be careful not to overheat it, or the sauce might separate. Start with sixty-second intervals, stirring or moving the shells around to ensure even heating. If the sauce looks a bit too thick after reheating, add a tiny splash of water or milk to bring it back to a smooth consistency. I do not recommend freezing this dish, as the cream sauce and the pasta shells will likely become mushy and grainy once thawed.
Frequently Asked Questions
Can I use cooked shrimp instead of raw?
I would advise against it. Cooked shrimp have already lost a lot of their moisture. If you bake them for another twenty to thirty minutes, they will turn rubbery and tough. If you absolutely have to use pre-cooked shrimp, add them to the dish during the final five minutes of baking just to warm them through, but they will never have the same succulent texture as shrimp that were raw when you started.
Why is my sauce watery?
This usually happens because the ricotta was too wet or the pasta was still holding a lot of water. Always drain your ricotta properly, and make sure your pasta is well-drained after boiling. Also, ensure you are not using low-fat dairy. The higher fat content in whole milk ricotta and heavy cream is necessary to create a stable, thick sauce that sticks to the pasta instead of pooling at the bottom of the dish.
Can I substitute the heavy cream?
If you want a slightly lighter sauce, you can use half-and-half, but the result will be thinner. If you use regular milk, the sauce will likely break or remain very runny. If you go for a lighter option, you might want to add a tiny pinch of flour to the garlic when you are making the base to help thicken it up, though the texture will be quite different from the rich, velvety sauce that heavy cream produces.
Should I cover the dish while baking?
Yes, covering with foil is essential for the first twenty minutes. This traps the steam and ensures the shells finish cooking evenly without the cheese on top burning or the pasta drying out. Removing the foil for the final ten minutes is the trick to getting that nice color and making sure the sauce bubbles properly. If you never remove the foil, the top won't look as appetizing, and the sauce may remain too loose.
How do I know when the shells are done?
You are looking for the sauce to be bubbling actively around the edges of the dish and the cheese on top to be melted and starting to turn golden brown. The shells should be soft and tender, and the filling should be set. If you are concerned about the shrimp, you can use a kitchen thermometer to check that they have reached 145 degrees Fahrenheit, although if the pasta is cooked and the sauce is hot, the shrimp will definitely be done.
Final Thoughts
This creamy baked seafood pasta is one of those meals that proves you do not need complicated techniques to have a nice dinner at home. It is simple enough for a busy weeknight but feels elegant enough that I have served it when friends come over, too. The combination of tender shrimp and the cheese-filled pasta is always a hit in my house.
Take your time with the assembly, and do not stress if it does not look like a magazine cover. It is meant to be rustic and warm. Just focus on getting those shells stuffed and letting the oven do the hard work for you. It is a reliable dish that I think you will find yourself returning to whenever you need a little comfort on your plate.