
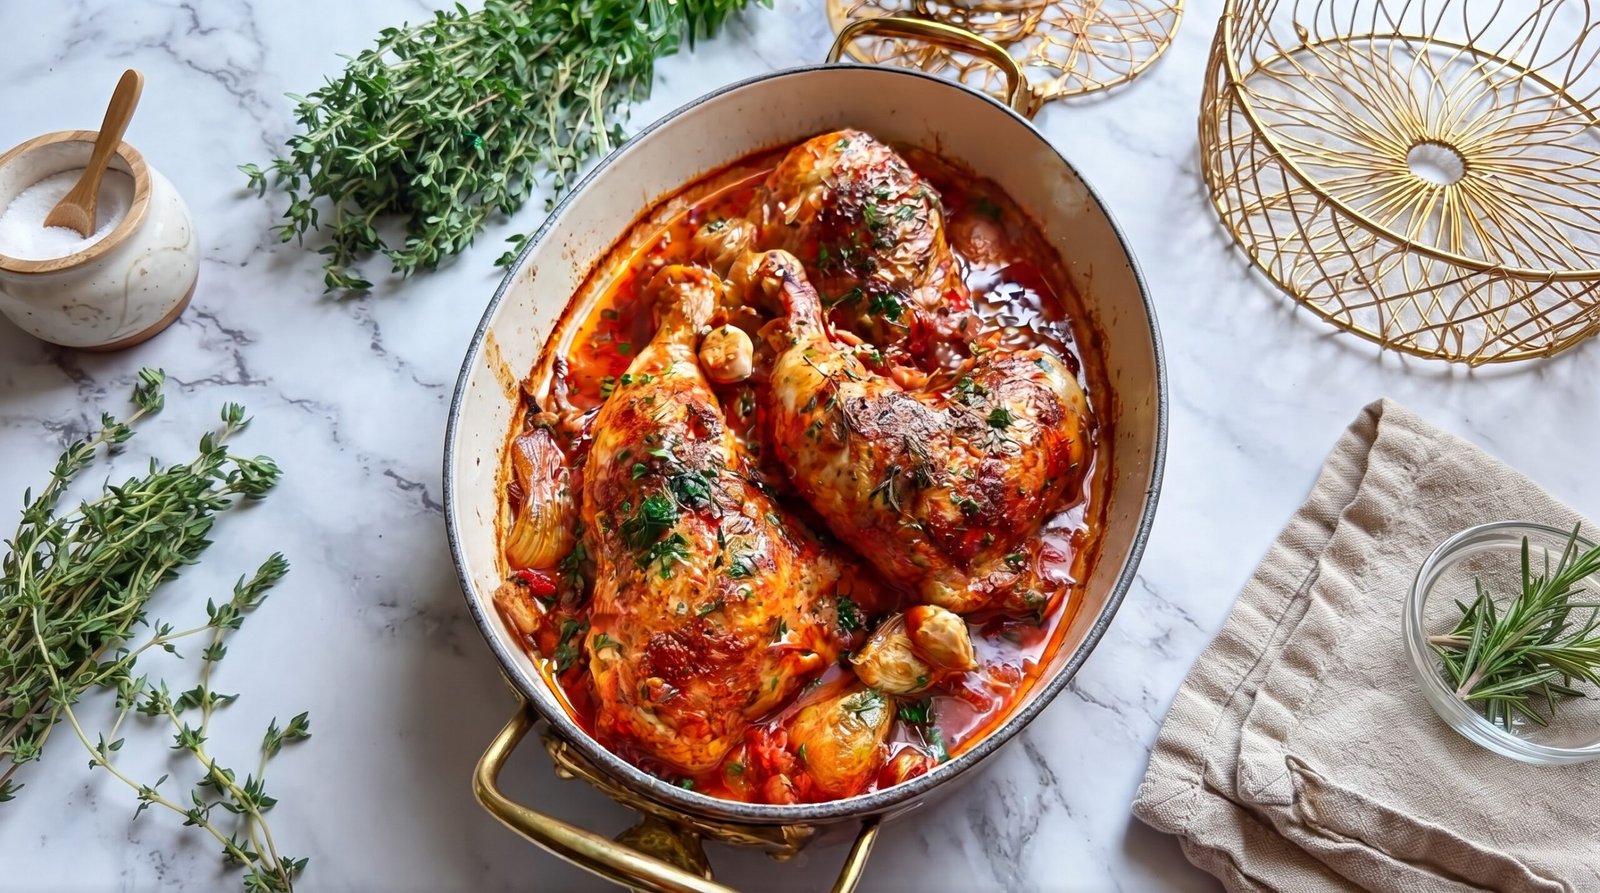
I often find myself standing in my kitchen at five in the evening, staring at the fridge with no idea what to make for dinner. We have all been there. You want something that tastes like it took hours of careful preparation, but your schedule just does not allow for a complex process. This roasted garlic and tomato braised chicken legs recipe has saved many of my weeknight dinners. It relies on the natural juices of the tomatoes and the mellow sweetness of whole garlic cloves to build a rich base. By using chicken legs, you get meat that stays moist and tender even with a longer cook time in the oven. It is a straightforward meal that hits the spot when you need something hearty. You will get a tray full of savory, aromatic chicken that pairs well with crusty bread or a simple side of grains.
Why This Recipe Works
This dish relies on a simple braising technique that transforms humble ingredients into a satisfying meal. When you roast chicken legs in a tomato and garlic sauce, the skin renders its fat while the meat absorbs the acidity and sweetness of the tomatoes. The choice of chicken legs is deliberate because they contain enough fat to keep the meat from drying out during the roasting period. This allows the sauce to thicken slightly and the garlic to become soft and buttery.
The balance of flavors here comes from the contrast between the tangy tomatoes and the earthy, sweet garlic. Because the garlic cloves are cooked whole in their skins, they do not turn bitter or burn. Instead, they steam inside their own papery shells, resulting in a creamy texture that you can spread on bread or mash into the sauce. The tomatoes, meanwhile, break down into the juices, creating a naturally thick gravy without needing any flour or cornstarch.
Simplicity is another major reason this works for a home cook. You spend very little time actually doing active work. Once the chicken is in the pan and the aromatics are added, the oven does the remaining work. This makes it a great option if you have other things to attend to, like cleaning up the kitchen or helping with homework. You do not need to stand over a hot stove watching a skillet. You just set a timer and let the heat do the heavy lifting for you.
The visual result is also quite pleasing. You get deep color on the chicken skin and a vibrant, bubbling sauce that looks impressive when you bring the heavy pan directly to the table. It is a rustic presentation that feels authentic and inviting. You are not dealing with delicate sauces that might break or complex spice blends that require precise measurement. Everything is forgiving and sturdy. It is the type of cooking that rewards patience rather than technique, making it a reliable staple for your rotation.
Ingredient Notes
The Poultry
Chicken legs are the star of the show. I prefer to keep the skin on because it adds flavor and helps protect the meat from drying out. When you shop for these, look for packages that have uniform sizes so they cook at the same rate. If you see very large legs, you might need to add a few minutes to the total time.
The Aromatics and Produce
Whole heads of garlic are essential. You want the kind where the cloves are still intact within the paper skin. Do not worry about peeling them. Just cut the top off the head to expose the cloves. Fresh tomatoes provide the liquid for the braise. I prefer plum or Roma tomatoes because they have a meatier texture and less water than beefsteak varieties. Fresh herbs like thyme or rosemary add a woody note that cuts through the richness of the chicken skin.
The Pantry Staples
Olive oil is the base for searing and helping the skin crisp up. I use a good quality extra virgin olive oil. You will also need a bit of salt and freshly cracked black pepper. While I sometimes add a dash of red pepper flakes for heat, it is completely optional. Check your labels on any seasoning blends if you use them to ensure they meet your specific needs.
| Ingredient | Amount | Notes |
|---|---|---|
| Chicken legs | 4-6 pieces | Keep skin on for better results |
| Fresh garlic | 2 whole heads | Remove the top of the skin to expose cloves |
| Fresh tomatoes | 1.5 pounds | Roughly chopped into large chunks |
| Olive oil | 3 tablespoons | For the pan and drizzling |
| Fresh thyme | 4-5 sprigs | Can use rosemary as a substitute |
| Kosher salt | 1 teaspoon | Adjust based on your preference |
| Black pepper | 0.5 teaspoon | Freshly cracked provides better flavor |
| Red pepper flakes | 0.25 teaspoon | Optional for a mild heat |
The Recipe
- Prep Time: 15 minutes
- Cook Time: 55 minutes
- Total Time: 1 hour 10 minutes
- Servings: 3-4 servings
- Difficulty: Easy
Equipment needed:
– Large heavy-bottomed roasting pan or Dutch oven
– Sharp knife
– Meat thermometer
Step-by-Step Instructions
Step 1: Prepare the Oven and Pan
Start by preheating your oven to 400 degrees Fahrenheit. This temperature is high enough to get the skin of the chicken browned while still allowing the tomatoes to break down into a sauce. Prepare your roasting pan by adding a tablespoon of olive oil to the bottom. Brush or swirl the oil so it coats the surface. This prevents the chicken from sticking as it cooks.
Make sure your pan is large enough to hold all the chicken pieces in a single layer. If you crowd the chicken, it will steam instead of roasting. You want the heat to circulate around each piece of meat to ensure the skin becomes dark and flavorful. If your pan is too small, use two smaller ones or cook in two batches if you are hosting a larger group.
Step 2: Season the Chicken
Take your chicken legs and pat them dry with a paper towel. Moisture on the skin prevents it from crisping properly. Once they are dry, place them in the pan. Season them generously with the kosher salt and black pepper on all sides. Use your hands to rub the seasoning into the skin. This ensures that the flavor penetrates the meat and the skin becomes seasoned throughout the roasting process.
Drizzle the remaining olive oil over the chicken legs. If you like, you can toss them gently in the pan to ensure an even coating of oil and seasoning. Arrange the legs skin-side up. This position is vital because it allows the fat to render and drip down into the tomato sauce, which adds a deep savory flavor that you cannot achieve otherwise.
Step 3: Add Garlic and Tomatoes
Cut the top third off each head of garlic to expose the cloves inside. Place these garlic heads into the pan nestled between the chicken legs. You do not need to peel them. As they roast, the garlic will soften into a paste inside the skins. Scatter your chopped tomatoes around the chicken pieces. Do not worry about perfect cuts; rustic, uneven chunks are fine because they will collapse as they heat up.
Tuck the fresh thyme sprigs into the gaps between the chicken and the tomato chunks. If you are using red pepper flakes, sprinkle them over the tomatoes now. The tomatoes will release their juices quickly in the heat, creating a poaching liquid for the chicken. Ensure the bottom of the pan is covered with tomato pieces so they do not dry out before they turn into a sauce.
Step 4: Roast the Chicken
Place the pan on the center rack of your preheated oven. Bake the dish for 55 minutes. You do not need to cover the pan. Leaving it uncovered allows the moisture to evaporate, which concentrates the flavor of the tomato sauce and keeps the chicken skin from becoming soggy. You should hear a light bubbling sound from the pan during the final twenty minutes of cooking.
After 55 minutes, check the doneness of the chicken. Insert a meat thermometer into the thickest part of the leg, making sure not to touch the bone. The internal temperature must reach 165 degrees Fahrenheit. The chicken skin should look browned and slightly crisped at the edges. If the chicken is not quite there, give it another 5 to 10 minutes.
Step 5: Serve and Rest
Remove the pan from the oven carefully as it will be very hot. Let the dish rest for at least 5 to 8 minutes before serving. This resting time allows the juices within the chicken to redistribute, keeping the meat moist when you cut into it. While it rests, you can use a spoon to press down on the roasted garlic cloves to squeeze the creamy, roasted garlic out of the skins if you choose to serve it that way.
Serve the chicken directly from the roasting pan. Spoon the thickened tomato juices and the soft, roasted garlic cloves over the top of the legs. This makes for a beautiful, rustic presentation. I find that serving this with a piece of toasted bread is the best way to enjoy the leftover sauce, as it is perfect for dipping.
Mistakes I Made (So You Don't Have To)
Washing the Chicken
Early on, I used to wash my chicken under the tap because I thought it was cleaner. I learned that this actually spreads juices around the sink and keeps the skin wet. If the skin is wet, it will never get that nice color in the oven. Now, I just pat it dry with a paper towel. It is faster, safer, and results in much better texture.
Overcrowding the Pan
I once tried to squeeze six large legs into a pan that was really meant for four. The chicken ended up boiling in its own juices because there was no airflow. The skin stayed rubbery and the tomatoes turned into a watery mess. Now, I make sure there is at least an inch of space between the pieces. If I am cooking for more people, I use a larger roasting tray.
Not Checking Internal Temperature
I used to rely purely on the clock, thinking 50 minutes was always the magic number. One time, the pieces were quite large and they were still pink near the bone. It was an awkward situation to fix once the dish was already out of the oven. Now, I always use a digital meat thermometer. It is the only way to be 100 percent sure the meat is done and safe to eat.
Peeling the Garlic
I used to spend ten minutes peeling individual garlic cloves, which was unnecessary and tedious. I realized that keeping the skin on during roasting keeps the garlic moist and prevents it from burning in the high heat of the oven. Now, I just slice the top off the whole head. It is much easier, and the garlic actually tastes better because it steams in its own skin.
Variations and Tips
Using Different Herbs
You can swap the thyme for rosemary if you prefer a stronger, pine-like flavor. If you have neither, a few dried bay leaves tucked into the tomato sauce work well to add depth. Just remember to remove the bay leaves before you start eating, as they are tough to chew.
Adding Olives or Capers
If you like a brinier, saltier flavor profile, try adding a handful of pitted Kalamata olives or a tablespoon of capers to the pan along with the tomatoes. They pair beautifully with the acidity of the tomatoes and the richness of the chicken fat. Be careful with adding extra salt if you use these, as they are already quite salty.
The Make-Ahead Strategy
You can prep the pan entirely with the chicken, tomatoes, and garlic earlier in the day. Keep it covered in the refrigerator until you are ready to cook. Just make sure to take it out of the fridge about 20 minutes before putting it into the oven so the pan and the chicken are not ice-cold. You might need to add 5 minutes to the total cook time.
Using Fresh Herbs for Garnish
While the thyme is great for the braising process, adding some fresh chopped parsley right before serving adds a bright, fresh flavor that cuts through the roasted richness. It also makes the dish look more vibrant. Just sprinkle it over the top after you take the pan out of the oven.
Storage and Reheating
If you have leftovers, they keep quite well. Transfer the chicken and the tomato juices into an airtight container within two hours of cooking. Do not leave the food out on the counter once it has cooled down. You can safely store it in the refrigerator for up to 3 days. I find the flavors actually deepen a bit by the second day.
To reheat, the best method is to use your oven or a toaster oven. Place the chicken and some of the sauce in a small baking dish and heat at 350 degrees Fahrenheit until the internal temperature reaches 165 degrees Fahrenheit and it is steaming hot. You can also use a skillet on the stovetop over low heat with a lid on, adding a splash of water if the sauce has become too thick. I do not recommend freezing this dish as the tomato texture changes significantly, becoming watery and grainy once thawed. It is definitely a meal meant to be enjoyed freshly made or within a few days of cooking.
Frequently Asked Questions
Can I use chicken breasts instead of legs?
While you can use chicken breasts, I would suggest being very careful with the cook time. Chicken breasts cook much faster than legs and will dry out quickly if roasted for the full 55 minutes. If you switch to breasts, reduce the cooking time to about 25 to 30 minutes and check the temperature with your thermometer frequently to ensure they do not exceed 165 degrees Fahrenheit.
My sauce is too thin, how do I thicken it?
If you find that your tomatoes have released a lot of liquid and the sauce is runny, you can remove the chicken once it is done and place the pan on the stovetop over medium-high heat. Let the sauce bubble and reduce for about 5 minutes. The natural pectin in the tomatoes will help it thicken into a rich, flavorful gravy as the excess water evaporates.
What should I serve with this?
This dish is very versatile. Because of the tomato sauce and the roasted garlic, it goes great with something that can soak up those juices. Crusty sourdough bread is my personal favorite. You can also serve it over creamy polenta, mashed potatoes, or even simple buttered pasta. A side of steamed green beans or a crisp green salad adds a nice fresh contrast to the roast.
Is it necessary to sear the chicken first?
For this specific recipe, no. The high heat of the oven and the position of the chicken skin-side up allows the skin to brown naturally during the roasting time. Searing in a separate pan just adds an extra step and more dishes to clean. You will get great results by roasting it all in one tray as instructed, provided your oven is properly preheated.
What if I don't have fresh tomatoes?
If you are in a pinch, you can use high-quality canned whole peeled tomatoes. Crush them roughly with your hands or a fork before adding them to the pan. Avoid using diced canned tomatoes if possible, as they are often treated with calcium chloride to help them hold their shape, which makes them resist breaking down into a proper sauce.
Final Thoughts
Making this roasted garlic and tomato braised chicken is one of the most reliable ways I know to produce a comforting meal with minimal effort. It is the kind of dish that teaches you to trust your ingredients rather than relying on complicated techniques or gadgets. Once you see how the garlic softens into a creamy paste and the tomatoes melt into a savory sauce, you will likely start making this on a regular basis.
Do not worry if your first attempt does not look exactly like a magazine spread. The beauty of this recipe is in its rustic, home-cooked charm. As long as you keep an eye on the temperature and ensure the chicken is cooked through, you are going to have a successful dinner that smells and tastes just as it should. Enjoy the process and the results.