
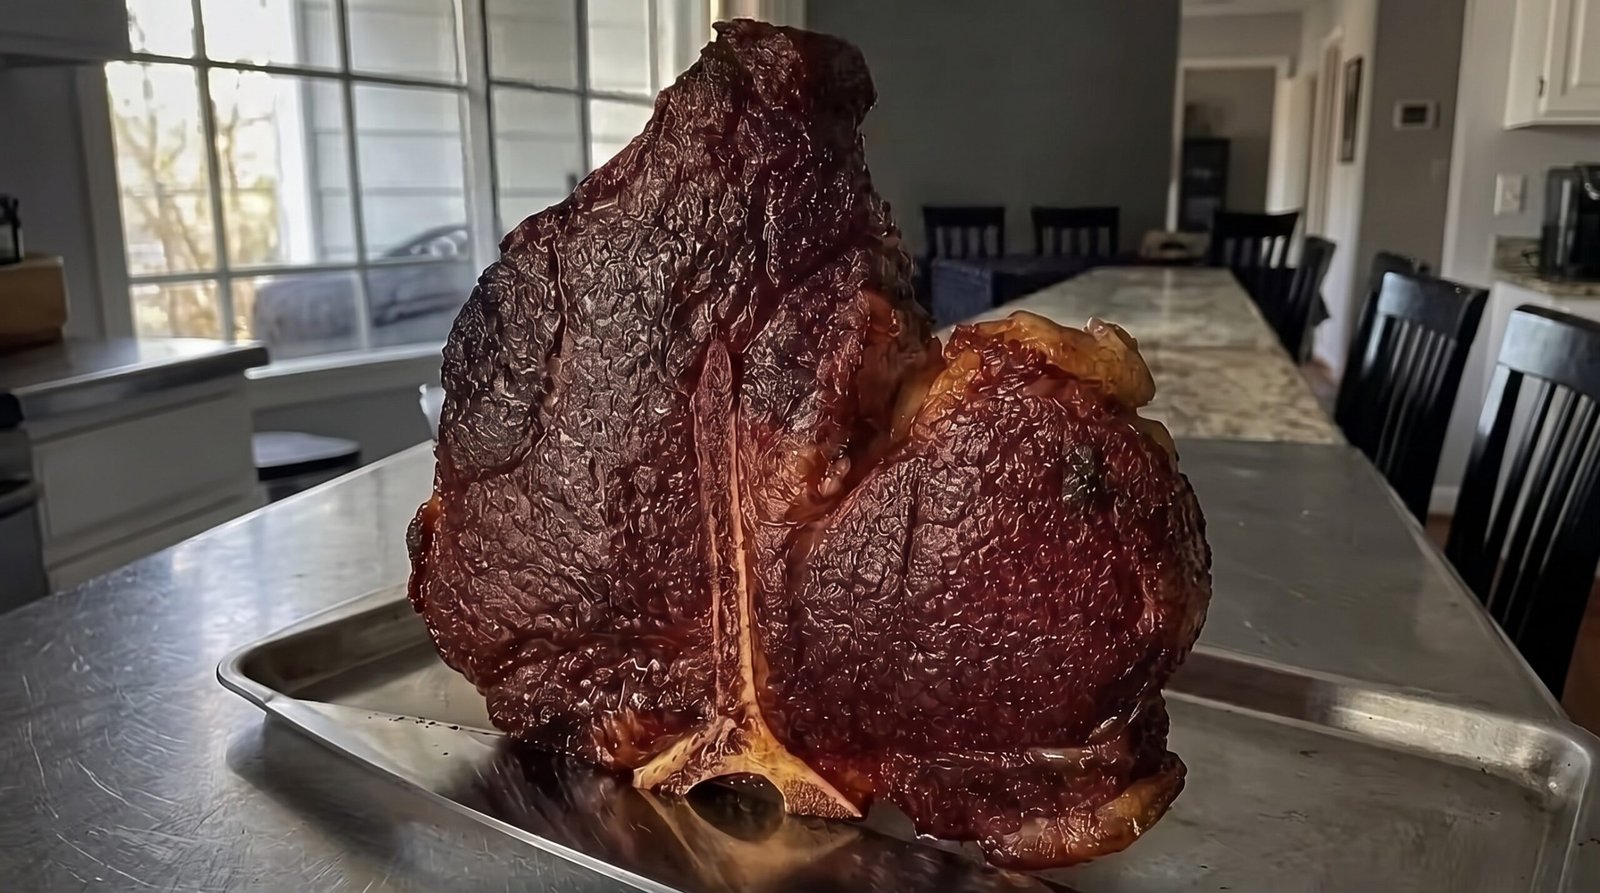
I remember the first time I brought a thick porterhouse home from the butcher shop. I was intimidated by the size and the weight of the bone, worrying I would ruin an expensive cut of meat. Standing in my kitchen, I stared at that massive piece of beef, wondering if I should try to roast it or just throw it on the grill. I decided to stick to a simple pan-searing method, which is how I have prepared it ever since. There is something deeply satisfying about hearing that initial hiss when the beef hits a hot cast iron pan and watching the edges turn dark and crisp.
Cooking a porterhouse is not just about the final meal, but the patience required to manage the heat. It is a substantial cut that combines two different types of meat, and learning to balance their cooking times is a skill that takes a few tries to master. If you are looking for a reliable way to get a steakhouse result in your own kitchen, this method will serve you well. You do not need fancy equipment or complex techniques, just a heavy pan, a bit of oil, and a meat thermometer to ensure you hit that level of doneness you prefer.
Why This Recipe Works
This approach works because it treats the steak with the respect it deserves. A porterhouse is a combination of a strip steak on one side and a tenderloin on the other, divided by a T-shaped bone. By using a cast iron skillet, you create a consistent surface area that retains heat well. This thermal mass ensures that when you place the cold meat into the pan, the temperature does not drop drastically, allowing for a steady, even crust to form on the surface.
The texture you achieve through pan-searing is distinct. Because the meat has a good amount of marbling, rendering that fat slowly over medium-high heat allows it to baste the steak from the inside out. You get a nice exterior crust that provides a slight contrast to the tender center. The bone acts as a heat conductor, which helps the area near the center cook slightly differently than the outer edges, providing a variety of textures within the same steak.
Simplicity is the biggest benefit of this method. You do not need to worry about complex dry rubs or long marination times that might mask the flavor of the beef itself. A simple layer of salt and freshly cracked pepper is all you need to draw out the natural savory profile of the meat. Because the cook time is controlled entirely on the stovetop, you have full visibility of the process. You can monitor the sear and adjust the heat as needed, preventing the common mistake of overcooking the thin spots while the thickest parts remain raw. It is a straightforward process that rewards you for paying attention to the details.
Ingredient Notes
The Main Component
The star of the show is the porterhouse steak. When you are shopping, look for a cut that is at least 1.5 inches thick. If the steak is too thin, it will overcook before you can get a decent sear on the outside. You want to see nice white marbling throughout the red meat, as this fat will melt during cooking and provide moisture. Ensure the color is a deep, healthy red, not a dull grey, and look for a clean bone that is not discolored.
The Seasoning
Keep your seasoning simple to let the meat shine. High-quality sea salt or kosher salt is essential. Avoid fine table salt if you can, as it is harder to control the distribution. Freshly cracked black pepper is a must. If you have the time, crack the peppercorns just before applying them to the meat to ensure the oils are fresh and pungent. You do not need fancy steak spice blends that often hide the quality of the beef.
The Cooking Fat
For searing, you need a fat with a high smoke point. Avocado oil, grapeseed oil, or a refined light olive oil work best. Avoid extra virgin olive oil or butter for the initial sear, as they will burn and turn acrid long before the steak develops a deep color. You can add a tablespoon of unsalted butter toward the end of the cooking process to baste the meat, which adds a creamy finish and a subtle richness that complements the beef fat perfectly.
| Ingredient | Amount | Notes |
|---|---|---|
| Porterhouse Steak | 1.5 to 2 pounds | Must be 1.5 inches thick |
| High-heat Oil | 2 tablespoons | Avocado or grapeseed oil |
| Kosher Salt | 1 tablespoon | Coarse grain preferred |
| Black Pepper | 1 teaspoon | Freshly cracked |
| Unsalted Butter | 2 tablespoons | Added in the final minute |
The Recipe
- Prep Time: 10 minutes
- Cook Time: 12 to 15 minutes
- Total Time: 25 minutes
- Servings: 2 people
- Difficulty: Intermediate
Equipment Needed
- Large cast iron skillet
- Meat thermometer
- Tongs
- Cutting board
- Sharp chef knife
Step-by-Step Instructions
Step 1: Tempering the Steak
Before you even think about turning on the stove, take the porterhouse out of the refrigerator and let it sit on the counter for about 30 to 45 minutes. This brings the meat closer to room temperature, which helps it cook more evenly. If the center of the steak is icy cold, the outside will burn before the middle reaches your target temperature. While it rests, pat the entire surface of the steak very dry with paper towels. Moisture is the enemy of a good sear, so make sure there is no surface liquid left.
Step 2: Preparing the Seasoning
Once the steak is dry, generously season both sides and the edges with kosher salt and black pepper. Do not be shy with the salt, as the thickness of this cut requires a fair amount to penetrate properly. Press the seasoning into the meat with your hands to make sure it adheres. Avoid adding the pepper too early if you are prone to burning it; wait until just before it goes into the pan.
Step 3: Heating the Skillet
Place your cast iron skillet over medium-high heat. Let the pan get hot for about 3 to 5 minutes. You will know it is ready when a drop of water flickers and dances on the surface before evaporating. Add the oil and tilt the pan to coat the bottom evenly. The oil should shimmer, but it should not be smoking excessively. If it starts to smoke immediately, pull the pan off the heat for a moment to let it stabilize.
Step 4: The Initial Sear
Carefully lay the steak into the skillet. You should hear a vigorous sizzle immediately. If you do not, the pan is not hot enough, and you should pull the steak out and wait another minute. Let the steak sear undisturbed for about 3 to 4 minutes. You are looking for a deep, dark brown crust. Do not move it around or press it down, just let the heat do the work. Flip the steak with your tongs. It should have a robust, crusty texture that releases easily from the metal.
Step 5: Cooking to Doneness
Continue cooking the other side for another 3 to 4 minutes. After this time, start monitoring the internal temperature with your thermometer. Insert the probe into the thickest part of the meat, avoiding the bone. For a medium-rare result, pull the steak from the pan when it hits 125 degrees Fahrenheit. The temperature will continue to rise as it rests. Add the butter to the pan in the final minute, tilting the pan and spooning the foaming liquid over the steak to finish.
Step 6: Resting
Move the steak to a cutting board or a warm plate. This step is non-negotiable. Let the porterhouse rest for at least 8 to 10 minutes before slicing. Resting allows the juices to redistribute throughout the meat, keeping it moist. If you cut into it too soon, the juices will run out onto the board and you will end up with a dry piece of beef. Slice the strip side and the tenderloin side away from the bone, then slice against the grain into thin pieces.
Mistakes I Made (So You Don't Have To)
Mistake 1: Crowding the Pan
Early on, I thought I could fit two steaks in one pan to save time. It was a disaster. The pan lost its heat, the steaks started to steam in their own juices, and I ended up with grey, limp meat instead of a nice sear. Always cook one porterhouse at a time, or use a larger pan if you must do two. The steak needs space to breathe so that the moisture can evaporate quickly, allowing the surface to crisp up rather than boil.
Mistake 2: Ignoring the Surface Moisture
I used to rush the prep and put the steak straight from the fridge into the pan. If the meat is wet, it cannot reach the temperatures needed for a crust. It spends the first few minutes just drying off. Spend the extra two minutes with paper towels until the meat is bone dry. You will see a immediate difference in the color of the crust and the depth of flavor.
Mistake 3: Overcooking the Tenderloin
The porterhouse contains two muscles that cook at different rates. The tenderloin is much more delicate and cooks faster than the strip side. If you are not careful, the tenderloin side can end up well-done while the strip side is medium-rare. I learned to position the steak in the pan so that the thickest part of the strip side gets more direct contact with the hottest part of the burner, while the tenderloin sits slightly away from the center of the flame.
Mistake 4: Guessing the Doneness
For the longest time, I tried to judge the doneness by poking the meat with my finger. This is incredibly unreliable, especially with a cut this thick. You might think it is ready, but the center could be completely raw, or worse, you let it go too long and ruin the texture. Always use a reliable digital thermometer. It takes the guesswork out of the process and ensures you get the exact result you want every single time.
Variations and Tips
Finishing with Herbs
If you want to add a bit of brightness, toss a few sprigs of fresh rosemary or thyme into the pan when you add the butter. The woody stems infuse the butter with an earthy scent that seeps into the crust of the steak. You can also add a smashed clove of garlic to the butter. Just be careful not to let the garlic burn, as it can turn bitter quickly.
The Oven Finish Option
If your steak is very thick, say over 2 inches, you might find that the outside crusts before the inside is ready. In this case, you can sear it on the stovetop as described, then transfer the whole skillet into a preheated oven set to 375 degrees Fahrenheit. Let it finish for 5 to 8 minutes until it hits your target temperature. This allows for a more gentle, indirect heat to cook the center without further scorching the exterior.
Time-Saving Prep
You can season your steak with salt a few hours before you plan to cook it. Place it uncovered on a wire rack in the refrigerator. This process, known as dry brining, helps the salt penetrate deeper into the meat and helps dry out the surface, leading to a much better crust. Just remember to take it out 45 minutes before cooking so it is not ice-cold when it hits the pan.
Checking for Safety
If you are cooking for guests and need to be extra cautious, ensure the meat reaches at least 135 degrees Fahrenheit for medium or 145 degrees Fahrenheit for medium-well. While most people prefer porterhouse around 130 degrees for medium-rare, there is no harm in going a bit higher if you prefer. Just keep in mind that the residual heat will carry it up another 5 degrees after you pull it off the heat.
Storage and Reheating
If you happen to have leftovers, they should be handled with care. Let the meat cool down for no more than two hours after cooking. Place it in an airtight container or wrap it tightly in foil to prevent it from drying out. You can keep it in the refrigerator for up to three days. Do not try to freeze cooked porterhouse, as the texture of the lean meat suffers greatly when thawed, and it is prone to becoming stringy.
When you are ready to reheat, do not put it in the microwave unless you want rubbery beef. The best way is to slice the cold steak and briefly flash it in a hot skillet with a tiny bit of oil for about 30 seconds per side. Alternatively, wrap the slices in foil and put them in an oven at 300 degrees Fahrenheit until they reach 165 degrees Fahrenheit. This method is slower, but it prevents the meat from drying out further and keeps the flavor intact.
Frequently Asked Questions
Why does my steak stick to the pan?
Sticking usually happens for two reasons: the pan was not hot enough when the meat hit the surface, or you tried to move the meat before the crust had a chance to form. When the surface develops a proper crust, the meat naturally releases from the metal. If it feels like it is stuck, just leave it alone for another minute. It will eventually release on its own as the sear finishes.
Should I marinate a porterhouse?
I generally avoid marinating a porterhouse. The quality of a good porterhouse is usually high, and the meat has enough flavor on its own that a marinade can actually overpower the taste of the beef. If you really want extra flavor, a simple rub of herbs or a pat of seasoned butter after cooking is much more effective than soaking the meat in liquid, which can make it soggy.
Can I use a stainless steel pan instead of cast iron?
You can use stainless steel, but you need to be much more careful with your heat control. Stainless steel does not hold heat as well as cast iron, so it will lose temperature faster when the meat is added. You might find that the meat sticks more easily if you do not have enough oil. If you do use stainless steel, ensure it is a high-quality pan with a heavy bottom to distribute the heat as evenly as possible.
What should I serve with this steak?
Keep the sides simple so they do not compete with the beef. A crisp green salad with a sharp vinaigrette helps cut through the richness of the steak. Roasted vegetables like asparagus or green beans are also excellent. If you want something heartier, mashed potatoes or a baked potato are classic pairings. Because the steak is rich, you want sides that provide a bit of contrast in texture and flavor.
How do I know if the meat is bad?
When buying, look for a vibrant, bright red color. If the meat looks grey, brown, or has a dull, slimy appearance, skip it. Trust your nose as well. Fresh beef should have a clean, neutral scent. If it smells sour or off in any way, do not cook it. Always buy from a source you trust, and make sure the packaging is tightly sealed without any tears.
Final Thoughts
Making a porterhouse at home is a skill that makes a Friday night dinner feel like a special occasion. By sticking to the basics of high heat and careful temperature management, you get a reliable, high-quality result that is hard to beat. It is a dish that highlights how good simple food can be when you focus on the quality of your ingredients and the patience required to cook them properly.
Do not worry if your first attempt is not exactly what you see at a fancy steakhouse. Every pan and every stove is slightly different, and it takes a bit of practice to learn how yours behaves. Once you get the timing down, you will find yourself reaching for this method whenever you want a truly satisfying meal. Enjoy the process and the result.