
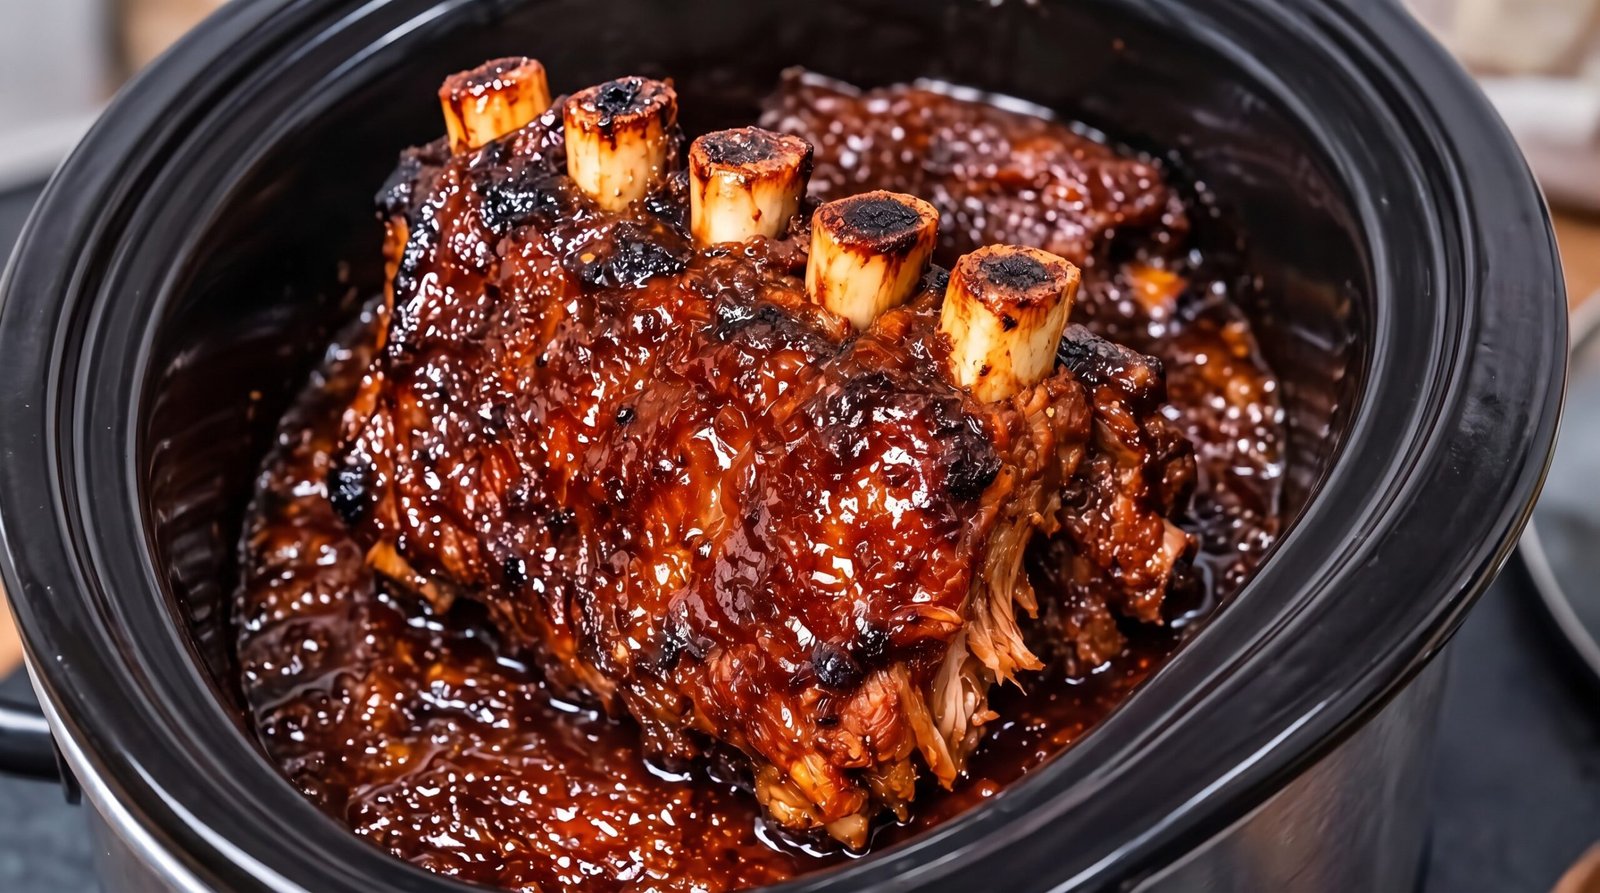
I remember the first time I tried making beef short ribs at home. I was worried they would end up tough or that the sauce would turn into a watery mess. I had invited a few friends over for dinner on a Tuesday night, and I was frantic about having a main dish that required too much attention while I was trying to finish my work day. I decided to use my slow cooker to get those deep, rich flavors without standing over the stove for hours. The result was a set of ribs that pulled away from the bone with just a fork, coated in a thick, dark glaze that tasted like it had been simmering all day long. It was the kind of dinner that makes you feel like you really know what you are doing in the kitchen, even when the machine does most of the heavy lifting.
These slow cooker sticky beef short ribs are a fantastic choice for when you want a meal that feels special but is actually quite simple to put together. You will get tender, melt-in-your-mouth meat that carries a savory and slightly sweet flavor profile. This guide will walk you through everything you need to know to get these results in your own kitchen using your reliable slow cooker, ensuring that you end up with a dinner your family or friends will talk about long after the plates are clear.
Why This Recipe Works
This recipe relies on the low and slow cooking environment of a slow cooker to transform a tough, flavorful cut of meat into something incredibly tender. Short ribs have a lot of connective tissue, and the long, consistent heat allows this tissue to break down slowly over several hours. Unlike cooking on the stovetop where you have to monitor the heat constantly, the slow cooker maintains a steady temperature that ensures the meat does not boil too rapidly, which can make it chewy.
The sauce is another reason this works well. By using a blend of aromatics, soy sauce, and a touch of sweetness, the glaze reduces and thickens while the ribs cook. Because the lid stays closed for the entire duration, the moisture stays inside, keeping the ribs succulent rather than drying them out. The fat from the ribs also renders out into the sauce, which adds a layer of richness that you just cannot get from leaner cuts. This creates a glossy, sticky coating that clings to the meat when you serve it.
Another reason for the success of this method is the simplicity of the preparation. You do not need to spend an hour prepping complex ingredients. You are essentially adding everything to the crock, setting the time, and letting it be. This is a very forgiving process. Even if you get distracted by other chores or errands, the meal remains safe and continues to develop its flavor. The consistency of the results is what keeps me coming back to this specific way of preparing ribs. It is reliable, takes very little active effort, and gives you a professional result that looks like you spent much more time in the kitchen than you actually did.
Ingredient Notes
The Beef
The star of the show is the bone-in beef short rib. You want to look for ribs that have a good balance of meat and fat. If the meat is too lean, it will become dry during the long cook time, so do not shy away from a bit of marbling. The bone adds flavor to the liquid as it cooks and helps the meat stay moist. I usually plan for about three to four ribs per person depending on their size. If you cannot find bone-in ribs, you can use boneless, but you should reduce the cooking time by about an hour to avoid overcooking.
The Braising Liquid
The liquid is a mixture of flavor agents that work together to glaze the meat. Soy sauce provides the salty, savory base. You should use a standard soy sauce rather than low-sodium to ensure the flavor is bold enough. If you only have low-sodium, you might need to add a pinch of salt later. Brown sugar is the key to that sticky texture you want. It dissolves into the liquid and creates a caramel-like consistency as it reduces. I use garlic and ginger to add a bit of heat and depth. You should always use fresh garlic and ginger if possible, as the powdered versions just do not provide the same aromatic pop. A small splash of rice vinegar helps cut through the richness of the beef fat and balances out the sweetness.
Aromatics and Thickener
I like to add a bit of cornstarch at the end to turn the cooking liquid into a syrupy glaze. Do not add this at the beginning. If you add cornstarch to the raw ingredients, it can burn or clump at the bottom of the slow cooker. You need to mix it with a tiny bit of cold water before whisking it into the hot sauce during the final stage of cooking. This ensures the sauce gets that nice, clingy texture that makes the ribs look so appealing when you plate them.
| Ingredient | Amount | Notes |
|---|---|---|
| Beef short ribs | 4 pounds | Bone-in, well-marbled |
| Soy sauce | 1 cup | Regular, not low-sodium |
| Brown sugar | 3/4 cup | Packed firmly |
| Garlic | 6 cloves | Minced fresh |
| Ginger | 2 tablespoons | Freshly grated |
| Rice vinegar | 1/4 cup | Unseasoned |
| Sesame oil | 1 tablespoon | For toasted aroma |
| Cornstarch | 2 tablespoons | Mixed with 2 tablespoons cold water |
The Recipe
- Prep time: 20 minutes
- Cook time: 7 hours on low
- Total time: 7 hours 20 minutes
- Servings: 4 to 6 people
- Difficulty: Easy
Equipment needed:
– Slow cooker (5 to 6 quart capacity)
– Large mixing bowl
– Whisk
– Tongs
– Small bowl for slurry
Step-by-Step Instructions
Step 1: Prepare the Ribs
Start by patting your beef short ribs dry with paper towels. This helps ensure they do not steam in the pot and allows for a better texture during the long cook. You do not need to trim all the fat off, as some of it will render out and add flavor to the sauce. If there are large, tough pieces of silver skin, you can trim those with a sharp knife.
Step 2: Mix the Sauce
In a large bowl, whisk together the soy sauce, brown sugar, minced garlic, grated ginger, rice vinegar, and sesame oil. You want to make sure the brown sugar is completely dissolved into the soy sauce. If you see crystals at the bottom of the bowl, keep whisking until they are gone. This base will form the liquid that keeps the meat tender and creates the flavor profile of the dish.
Step 3: Combine and Slow Cook
Place your short ribs into the slow cooker. I like to arrange them so they are mostly in a single layer, or at least not packed too tightly on top of each other. Pour the sauce mixture evenly over the ribs. Cover the slow cooker with the lid. Set the heat to low and the timer for 7 hours. Do not lift the lid during this time, as it lets heat escape and increases the total cooking time.
Step 4: Check for Doneness
After 7 hours, use a pair of tongs to test the tenderness. The meat should pull away from the bone very easily. If it still feels firm or holds tightly to the bone, give it another 30 to 45 minutes on low. The internal temperature should read 195 degrees Fahrenheit for the most tender result. Be careful when checking, as the meat will be fragile and might fall apart before you get it to the plate.
Step 5: Thicken the Sauce
Carefully remove the ribs from the slow cooker and place them on a platter. Keep them warm by covering them loosely with foil. In a small bowl, whisk your cornstarch and cold water together to create a smooth slurry. Pour this into the liquid remaining in the slow cooker. Turn the setting to high and leave the lid off for about 15 minutes. The sauce will bubble and thicken into a glossy glaze.
Step 6: Final Glazing
Once the sauce has thickened to the consistency of maple syrup, place the ribs back into the slow cooker for just a few minutes, turning them gently with tongs to coat every side in the glaze. Serve them immediately while the sauce is still hot and sticky. I like to garnish them with a few green onions or toasted sesame seeds if I have them on hand for a bit of extra color.
Mistakes I Made (So You Don't Have To)
Using a slow cooker that was too large
I once used an 8-quart slow cooker for this recipe, and the sauce spread out so thin that it evaporated too quickly. The ribs ended up being okay, but the sauce scorched on the bottom because there was not enough liquid volume relative to the surface area. Now I stick to my 6-quart cooker, which holds the ingredients in a tight enough space that the moisture stays concentrated.
Overcrowding the cooker
I used to try and stack way too many ribs in the pot because I was feeding a large group. The meat in the middle did not cook at the same rate as the meat on the edges. The middle ribs stayed tough, while the outside ones were falling off the bone. I learned that having a bit of space around the ribs allows the heat and the sauce to circulate properly, leading to much more even results.
Adding the sugar too early in a different recipe
I once added a very sweet glaze with honey at the very start of a long cooking process, and the sugars burned onto the bottom of the ceramic insert. It made a terrible mess to clean up. In this recipe, the soy sauce and brown sugar are stable enough for the slow cook time, but I make sure to avoid adding extra sweeteners or thickeners until the very end to prevent burning.
Lifting the lid to peek
I have a bad habit of wanting to check on my food to see how it is progressing. Every time I lifted the lid, I added at least 20 minutes to my total cooking time because the slow cooker had to reheat all that air again. I finally bought a slow cooker with a glass lid so I can see what is happening without losing any heat. If you do not have a glass lid, just keep it closed until the 7-hour mark.
Variations and Tips
Adding heat with red pepper flakes
If you like your ribs with a little kick, add a teaspoon of crushed red pepper flakes into the sauce mixture before pouring it over the beef. It adds a nice, subtle heat that builds as you eat. You can also finish the dish with a drizzle of sriracha or chili oil if you want to dial the heat up even further for your guests.
Using a different sugar
If you do not have brown sugar, you can use coconut sugar or even dark maple syrup. These options provide a similar depth of flavor. Do not use white sugar, as it lacks the molasses content that gives the glaze its rich, dark color and complex taste. If you use maple syrup, start with a little less, as it is sweeter than brown sugar.
The make-ahead trick
These ribs actually taste even better the next day after the flavors have had time to meld in the refrigerator. If you are planning a dinner, you can cook them the day before, let them cool, and keep them in the fridge. When you are ready to serve, reheat them in a pan over medium heat with a splash of water. The sauce will re-emulsify and become sticky and glossy again.
Adding root vegetables
You can place a layer of large-cut carrots or potatoes at the bottom of the slow cooker before adding the ribs. They will soak up all that savory beef and soy sauce flavor. Just make sure the vegetables are cut into thick chunks so they do not turn into mush after 7 hours. It is a great way to turn this into a one-pot meal.
Storage and Reheating
If you have leftovers, let the ribs cool down to room temperature before placing them in an airtight container. Do not leave them out on the counter for more than two hours. You can keep them in the refrigerator for up to three days. When you are ready to eat, the best way to reheat them is in a skillet on the stove over medium-low heat. Add a tablespoon of water to the pan to help the sauce turn back into a glaze. Heat them until the center of the meat is steaming hot, which is about 165 degrees Fahrenheit.
I do not recommend freezing these ribs. The texture of the meat and the quality of the sauce can change once they thaw. The slow-cooked meat tends to get a bit grainy if it goes through the freezer, and the sauce may lose its glossy shine. It is much better to eat these fresh or within a few days of cooking. If you must freeze them, keep them in their sauce in a freezer-safe bag for up to two weeks, but be prepared for a slightly different texture when you thaw and reheat them.
Frequently Asked Questions
Can I use boneless short ribs instead?
Yes, you can certainly use boneless beef short ribs. The flavor will be the same, but the cooking time will be shorter because there is no bone to act as an insulator. Check them for tenderness after about 6 hours on low. The sign of doneness is the same, where the meat should easily pull apart with a fork.
Why does my sauce look thin at the end?
If your sauce is thin after 7 hours, it means there was too much moisture released from the meat and not enough evaporation. This happens sometimes depending on the specific cut of beef. Simply move the liquid to a small saucepan on the stove and simmer it over medium heat until it reduces to your desired thickness, then toss the ribs back in.
Is it safe to leave the slow cooker on while I am at work?
Yes, it is perfectly safe to leave your slow cooker on low for 7 hours while you are away. Modern slow cookers are designed for unattended use. Just make sure the device is on a flat, heat-resistant surface away from curtains or other items that could catch fire. It is one of the most reliable ways to come home to a hot dinner.
Can I double this recipe?
You can double the recipe only if you have a large enough slow cooker. You need to ensure the ribs are not packed too tightly. If you double the recipe but use the same size pot, the meat will not cook evenly and the sauce will not thicken well. If your slow cooker is small, it is better to cook in two separate batches.
What should I serve with these ribs?
These ribs are quite rich and savory, so I like to serve them with something that balances that out. Steamed jasmine rice is a classic choice, as it soaks up all the extra sauce. You could also serve them with some quick-blanched bok choy or a simple cucumber salad to provide a crisp, cool contrast to the hot, sticky beef.
Final Thoughts
Making these slow cooker sticky beef short ribs is one of my favorite ways to spend a little time in the kitchen. It brings me a lot of joy to know that such a simple method can produce a meal that feels like a real treat. I hope you find the process as relaxing and rewarding as I do every time I set the timer on my own cooker.
Take your time with the final step of thickening the sauce, as that is really what gives you that beautiful, professional finish. Whether you serve this for a weekend gathering or just for a quiet family dinner, enjoy every bite of the tender, flavorful meat you have crafted. Happy cooking.