
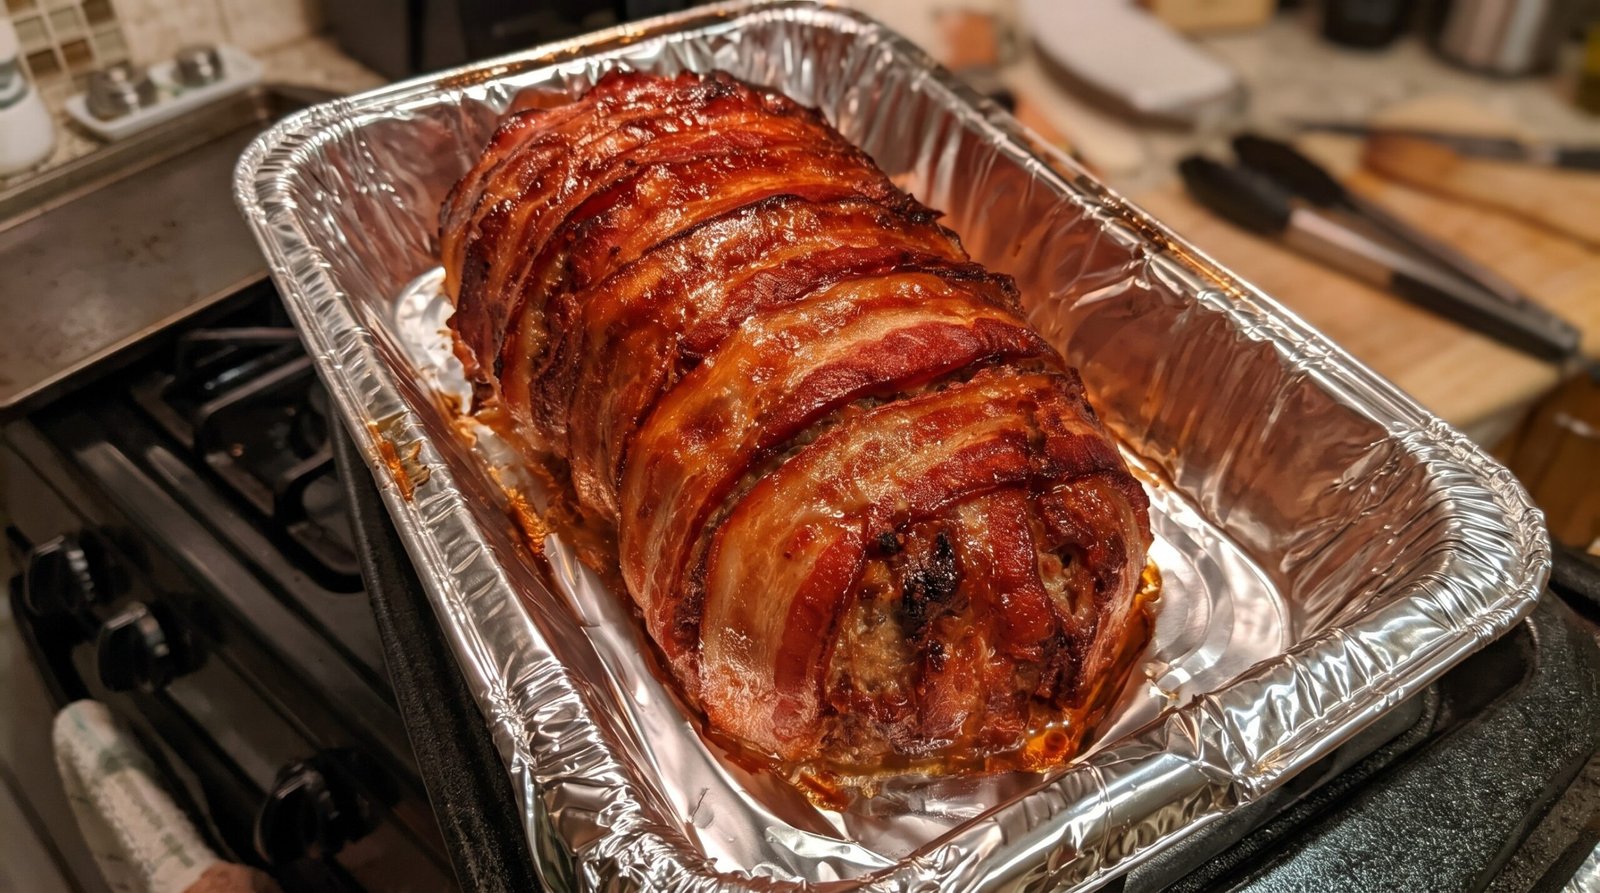
I remember the first time I decided to make a meatloaf for a casual Tuesday night dinner. I wanted something that felt a bit more special than the standard version I grew up with, which often ended up dry or lacking in character. I looked in my pantry and realized I had some extra bacon left over from Sunday brunch. That small realization changed how I approach ground meat dishes forever. By wrapping the loaf in bacon, the fat renders down and keeps the center moist while adding a smoky flavor that soaks right into the crust. It is a hearty comfort food that feels like a treat but is simple enough to put together after a long day. You do not need a lot of fancy equipment, just a bowl, a baking pan, and a little patience while it sits in the oven.
This guide will show you how to build a loaf that holds its shape, stays tender on the inside, and features a deep, salty exterior. You will learn the importance of using the right ratio of meat and how to get that bacon to wrap snugly around the edges. By the time you pull this out of the oven, the house will smell like a diner kitchen, and you will have a main course that pairs well with mashed potatoes or roasted vegetables.
Why This Recipe Works
This recipe relies on a few fundamental cooking principles that turn basic ingredients into a substantial meal. The most important factor here is the bacon. When you wrap a meatloaf in bacon, you create a self-basting system. As the oven heats up, the fat from the bacon melts and drips over the meat mixture. This basting action prevents the surface of the loaf from drying out, which is the most common problem people face when baking ground beef. Since meatloaf is a dense preparation, this extra moisture infusion is essential for maintaining a pleasant texture throughout.
Another reason this works is the structure of the meat blend. I prefer using a mix of beef and pork. Beef provides the main savory backbone, while pork adds extra fat and a softer texture. If you use only lean ground beef, the finished product often turns out grainy or tough. The inclusion of breadcrumbs and eggs helps bind the mixture together so that it does not crumble when you go to slice it. You want a firm structure that holds together on your plate but is still tender enough to cut with just a fork.
Flavor development is also handled carefully here. By keeping the seasoning balanced—not too much salt since the bacon is quite salty—you allow the natural taste of the meat to shine. The slow roasting process ensures that the spices have time to integrate with the meat and fat. You do not need to overwork the meat when mixing, as that can lead to a chewy result. Simply folding everything together until it is just combined is the best technique. This approach keeps the loaf light and airy enough for a satisfying texture.
The final element is the cook time and temperature. Baking at 375 degrees Fahrenheit is the sweet spot. It is hot enough to render the bacon fat and get the edges browned, but not so hot that the outside burns before the center is cooked through. This temperature ensures that the bacon finishes at the same time as the meat, resulting in a consistent appearance and flavor profile from the first slice to the last.
Ingredient Notes
The Meat Blend
For the best results, use a combination of 80/20 ground beef and ground pork. The higher fat content in 80/20 beef is necessary for flavor and moisture, as a leaner mix will dry out in the oven. The pork adds a slightly sweet, fatty component that softens the texture of the beef. If you cannot find pre-ground pork, you can sometimes use ground sausage, though you should adjust the added salt since sausage is already seasoned. Ensure the meat is cold when you start mixing it to keep the fat from melting prematurely, which helps maintain a better structure for the loaf.
The Binding Agents
Breadcrumbs are essential for holding the loaf together and soaking up the juices that release during cooking. I prefer plain breadcrumbs so I can control the seasoning level. If you have stale bread at home, you can pulse it in a processor to make your own fresh crumbs, which often have a better texture than the dry, powdery stuff from a store. The eggs act as the glue. They bind the meat and breadcrumbs into a single, cohesive unit. Without eggs, the meatloaf will likely fall apart as soon as you try to lift it from the pan.
Aromatics and Flavor
Finely diced onions and minced garlic are standard additions that provide depth. You want to dice the onions quite small so they disappear into the mixture. If the pieces are too large, they can cause the loaf to crack when you slice it. I also use a splash of Worcestershire sauce for a salty, savory kick, and a bit of tomato paste for a slightly tangy base. These ingredients provide a complex flavor profile without needing a long list of spices.
The Bacon Wrapper
Look for a package of standard-cut bacon. Avoid thick-cut bacon for the exterior because it takes much longer to render and will not crisp up in the time it takes for the meatloaf to reach a safe internal temperature. You want the bacon to shrink slightly and hug the meat, not sit on top like heavy, chewy slabs. Regular, thin-sliced bacon is the secret to a professional-looking and tasting finish.
| Ingredient | Amount | Notes |
|---|---|---|
| Ground Beef (80/20) | 1 pound | Cold from the fridge |
| Ground Pork | 1 pound | Gives a tender texture |
| Breadcrumbs | 1 cup | Plain or panko |
| Eggs | 2 large | Lightly beaten |
| Onion | 1 medium | Finely diced |
| Garlic | 3 cloves | Minced |
| Worcestershire sauce | 2 tablespoons | Adds depth |
| Tomato paste | 2 tablespoons | For color and tang |
| Salt | 1 teaspoon | Adjust if bacon is very salty |
| Black pepper | 1/2 teaspoon | Freshly ground |
| Bacon | 8-10 slices | Standard cut, not thick |
The Recipe
- Prep Time: 20 minutes
- Cook Time: 60 minutes
- Total Time: 80 minutes
- Servings: 6 to 8
- Difficulty: Easy
Equipment needed:
– Large mixing bowl
– Baking sheet or metal loaf pan
– Foil or parchment paper
– Meat thermometer
– Chef knife and cutting board
Step-by-Step Instructions
Step 1: Prep and Preheat
Start by preheating your oven to 375 degrees Fahrenheit. It is important to let the oven come fully to temperature before you put the meat inside. If you put the loaf into a cold oven, the bacon will start to sweat and soak into the meat before the heat can properly render the fat, leading to a greasy, soft texture rather than a crisp exterior. While the oven heats up, line your baking pan with a piece of aluminum foil to make cleanup easier later.
Step 2: Combine the Base
In a large mixing bowl, combine the ground beef, ground pork, breadcrumbs, eggs, diced onion, minced garlic, Worcestershire sauce, tomato paste, salt, and black pepper. Use your hands to gently mix everything together. Do not squeeze the meat or press it into a hard ball. Instead, use a folding motion, bringing the meat from the bottom of the bowl to the top until the ingredients are just incorporated. Overworking the mixture at this stage will make the final result dense and tough once it is cooked.
Step 3: Shape the Loaf
Once the mixture is combined, turn it out onto your prepared baking pan. Using your hands, shape the meat into a smooth, even loaf. It should be about four inches wide and eight to ten inches long. Try to keep the thickness consistent across the entire length of the loaf so it cooks evenly. If one side is significantly thicker than the other, the thin side will be dry by the time the middle is finished. Smooth out the sides and the top with the palm of your hand to create a clean surface for the bacon.
Step 4: Wrap with Bacon
Lay the bacon slices across the top of the meatloaf, overlapping them slightly so that they cover the entire surface. Tuck the ends of the bacon underneath the loaf. This keeps the strips in place while they cook and prevents them from curling up. Make sure the bacon is snug but not stretched too tightly. As the fat renders, the bacon will shrink, and a proper fit ensures that the bacon stays wrapped around the meat rather than pulling away. If you have extra bacon, you can trim the slices to size so they don't overlap too heavily at the base.
Step 5: Bake the Loaf
Place the pan into the center of the preheated oven. Bake for approximately 60 minutes. After about 45 minutes, check the bacon. It should be starting to turn golden brown. If it looks like it is getting too dark, you can loosely tent a piece of foil over the top. At the 60-minute mark, use a meat thermometer to check the center of the loaf. You are looking for an internal temperature of 160 degrees Fahrenheit. This is the safe temperature for a mixture of beef and pork.
Step 6: Rest and Serve
Remove the pan from the oven and let the meatloaf rest on the counter for at least 10 minutes before slicing. This resting period is critical because it allows the juices to redistribute throughout the meat. If you cut into it immediately, all those flavorful juices will run out onto the board, and the meat will be noticeably drier. After resting, carefully transfer the loaf to a cutting board, slice it into one-inch thick pieces, and serve while it is hot.
Mistakes I Made (So You Don't Have To)
Overworking the Meat
In my early attempts, I used to knead the meat mixture like dough to ensure the seasonings were spread evenly. This was a mistake because it breaks down the structure of the meat, resulting in a dense, rubbery texture that feels more like a sausage than a tender loaf. The fix is simple: use your hands to gently toss and combine the ingredients. Stop as soon as you stop seeing streaks of individual ingredients. You want the loaf to have a loose, airy quality inside.
Using Thick-Cut Bacon
I once thought that using thick-cut bacon would provide more flavor. However, it takes so long to render that the bacon ends up being chewy and tough by the time the meatloaf is fully cooked. You end up with a layer of meat that is well-done and a layer of bacon that is difficult to cut. Always stick to standard-cut bacon for this application. It provides enough fat to keep the meat moist but cooks fast enough to get crispy while the loaf is in the oven.
Not Resting the Loaf
I was always too hungry to wait and would slice into the loaf the second it came out of the oven. Every time I did this, the juices poured out, and I ended up with a pool of liquid on my plate rather than inside the meat. The loaf also tended to fall apart when I sliced it hot. Now, I set a timer for 10 minutes and force myself to wait. Resting allows the protein to firm up and the moisture to set, which means you get clean, beautiful slices every single time.
Ignoring the Internal Temperature
For a long time, I judged the doneness of my meatloaf by how the outside looked. This led to a few occasions where the center was still undercooked or, more often, a dry mess because I left it in too long just to be sure. Never guess when it comes to ground meat. Using a digital thermometer is the only way to know for sure that your meal is ready. Pulling the loaf out exactly when it hits 160 degrees Fahrenheit ensures a safe, succulent outcome every single time.
Variations and Tips
Add Vegetables
You can easily incorporate finely grated carrots or celery into the mix. These add a nice sweetness and extra moisture to the meat. Just make sure to grate them finely or use a food processor to pulse them into small bits. If the pieces are too big, they will release too much water during baking and prevent the loaf from holding its shape.
Smoky Flavor Twist
If you enjoy a bit of extra smoke, add a teaspoon of smoked paprika or a dash of liquid smoke to the meat mixture. This gives it a flavor profile similar to barbecue. Be careful with liquid smoke, though, as a little goes a long way. Just half a teaspoon is enough to make a difference without overpowering the natural taste of the beef and pork.
Make-Ahead Strategy
You can assemble the meatloaf up to 24 hours in advance. Shape it, wrap it in bacon, place it in the baking pan, and cover it tightly with plastic wrap. Store it in the refrigerator until you are ready to cook. When you are ready to eat, just remove the plastic wrap and pop it straight into the oven. You might need to add 5 to 10 minutes to the total cook time since you are starting from a cold state.
Using an Air Fryer
If you want to cook a smaller portion, an air fryer works well. You will need to shape the loaf to fit your air fryer basket. Cook it at 350 degrees Fahrenheit for about 40 to 45 minutes, or until the internal temperature reaches 160 degrees Fahrenheit. The air circulation in an air fryer helps the bacon get crispier than a standard oven, which is a nice bonus if you love that extra crunch.
Storage and Reheating
If you have leftovers, they are perfectly safe to keep for up to three days. Make sure you store the meatloaf in an airtight container in the refrigerator within two hours of cooking. To reheat, you have a few options. I prefer using the oven for the best texture. Place slices on a baking sheet and cover them with a small piece of foil to keep them from drying out. Reheat at 350 degrees Fahrenheit until they are steaming hot and reach an internal temperature of 165 degrees Fahrenheit.
You can also use the microwave, though the bacon will lose its crispness. If you go this route, use a microwave-safe dish and cover it with a paper towel. Heat in 30-second bursts until it is hot throughout. I generally do not recommend freezing this dish once it is cooked, as the bacon tends to lose its texture and the meat can become a bit grainy when thawed. It is best eaten fresh or from the fridge within that three-day window.
Frequently Asked Questions
Why is my meatloaf falling apart when I slice it?
The most likely culprit is not enough binding agent or mixing the meat too much. Eggs and breadcrumbs are necessary to hold the protein fibers together. If you notice your loaf crumbling, try adding one more egg or a few extra tablespoons of breadcrumbs. Also, make sure you let the loaf rest for the full 10 minutes before you slice it. The resting time allows the fats and proteins to settle, which makes the loaf much easier to cut into clean, sturdy slices.
Can I leave out the pork and just use beef?
You certainly can, but be aware that the final product will be slightly firmer and less juicy. If you choose to use only ground beef, try to use a slightly higher fat ratio, such as 80/20, to ensure it doesn't dry out. You might also want to add an extra splash of Worcestershire sauce or a little more tomato paste to compensate for the richness that the pork usually brings to the table.
What should I serve with this?
This dish is very versatile. Because it has a rich, savory flavor, it pairs wonderfully with something slightly acidic or creamy. Mashed potatoes are a classic for a reason—the creaminess balances the hearty meat. Steamed green beans or roasted asparagus also work well, as the fresh, light flavor of the vegetables cuts through the density of the meat. A simple green salad with a vinaigrette dressing is another excellent option to provide contrast.
Why do I need to cover the bacon if it gets too dark?
Standard-cut bacon can brown quite quickly at 375 degrees Fahrenheit. If your oven runs hot, the bacon might reach a dark brown color before the center of the loaf hits the required 160 degrees Fahrenheit. Tent a piece of foil over the top to slow down the browning process. This protects the bacon while still allowing the meat underneath to continue cooking safely.
Is it necessary to use a loaf pan?
Using a traditional metal loaf pan is not required. You can bake this directly on a rimmed baking sheet. If you use a loaf pan, the meat tends to steam a bit more in its own juices, which can lead to a softer exterior. Baking on a sheet allows the heat to circulate around the sides, resulting in better browning all over. Either method is fine, but the baking sheet usually yields a slightly crispier result.
Final Thoughts
Making a bacon-wrapped meatloaf is one of those simple pleasures that brings a lot of satisfaction. There is something comforting about the combination of the savory meat and the crisp, salty bacon that just feels right. It is a straightforward meal, but with the right technique, it becomes something you will look forward to making again and again.
Take your time with the preparation, keep an eye on that thermometer, and do not rush the resting period. Once you master the basics of this recipe, you will find it is a reliable staple for busy weeks. I hope you enjoy the process as much as the final result on your plate.