
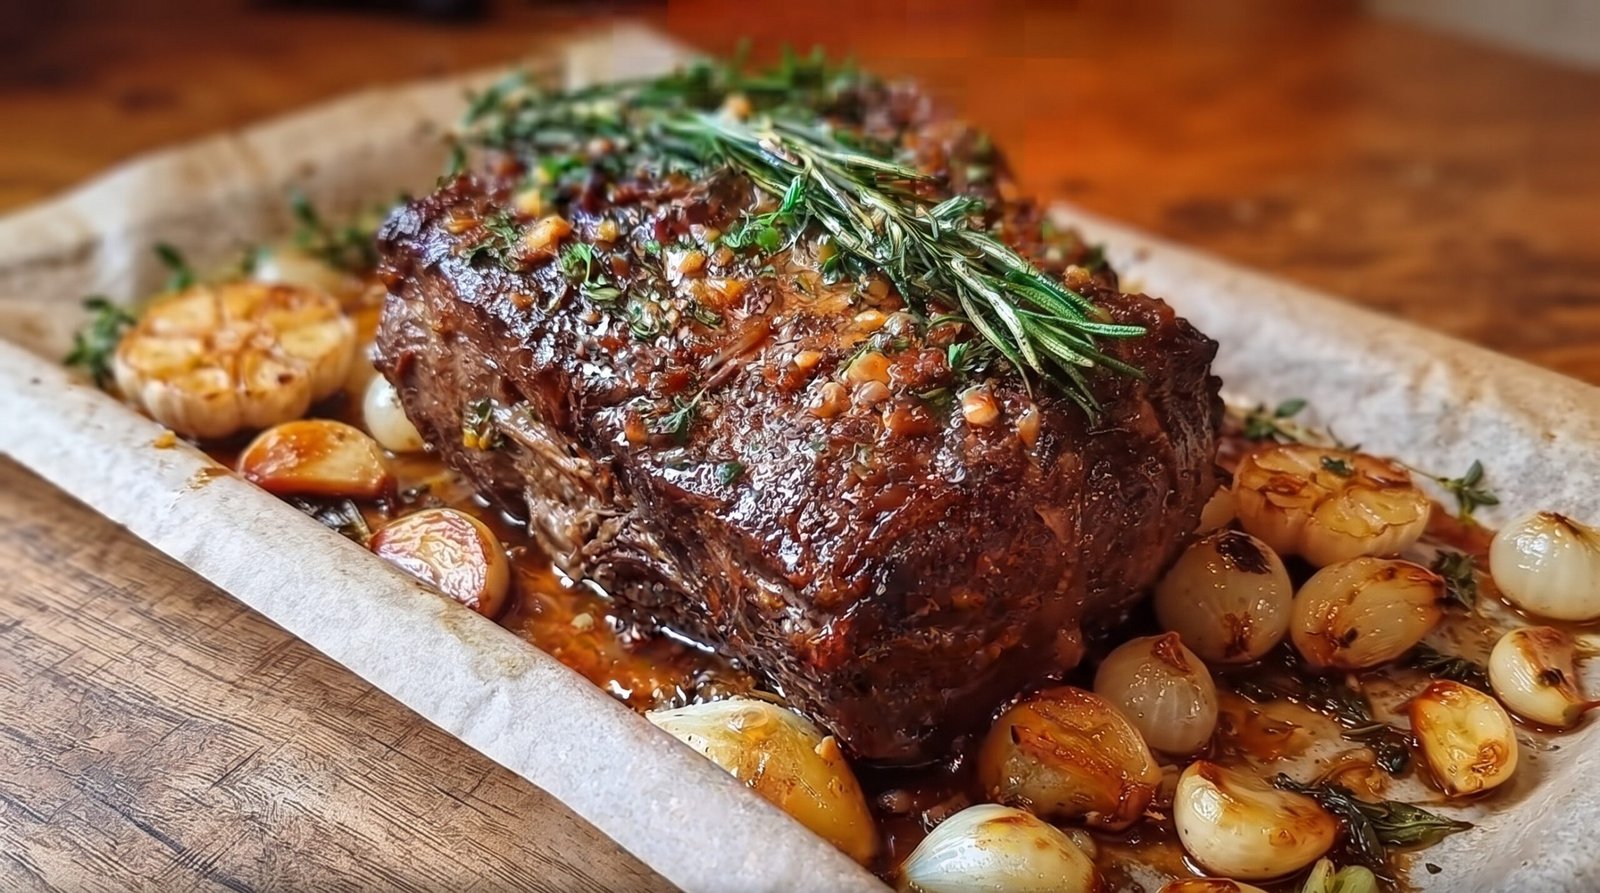
I remember the first time I tried to make a pot roast for a Sunday dinner. I was rushing around the kitchen, trying to get everything in the pot while the kids were running wild and the phone kept ringing. I ended up cranking the heat too high because I wanted it done faster, and instead of a tender meal, I was left with a piece of meat that felt more like a shoe leather. It took me a while to learn that good things really do take patience. Over time, I discovered that the secret to a great beef roast is not in fancy equipment or expensive spices, but in treating the meat with respect and giving it enough time to cook through properly in the oven. This roasted rosemary garlic beef roast is the result of those long afternoons spent testing different temperatures and cuts until I found a rhythm that works every single time. It is a reliable, comforting dish that makes the whole house smell inviting, and it has become my go-to whenever I have guests or just want a solid meal to get us through the week.
Why This Recipe Works
The primary reason this roasted rosemary garlic beef roast works is the balance between the high heat needed for initial searing and the lower, steady temperature required for the center to become tender. When you sear the meat first, you develop a layer of flavor on the surface that adds depth to the entire dish. This is not about locking in juices, but rather about creating a savory crust that contrasts with the softer, slow-cooked meat inside. Using fresh herbs like rosemary is essential because the oils from the herb infuse the fat of the beef as it melts.
Another reason this recipe is a staple in my home is the inclusion of aromatics like garlic and small onions. When these ingredients roast alongside the beef, they soften and release their natural sweetness. The onions soak up the juices released by the beef, turning into small flavor bombs that are a joy to eat. The garlic, when roasted whole or in large pieces, loses its sharp, raw bite and becomes buttery and mild. This is a forgiving dish, which is why I prefer it for busy weekends. Once it is in the oven, you can step away to do other things without needing to stir or watch it every few minutes. The roasting pan handles all the work, slowly combining the juices and herbs into a natural sauce that gathers at the bottom of the pan. It is a simple, honest way to cook that relies on time rather than complicated techniques.
Ingredient Notes
The Beef
When picking a cut, you want something that has enough fat and connective tissue to break down during the roasting process. A chuck roast or a rump roast is what I reach for most often. These cuts are marbled with fat, which ensures the meat stays moist while it cooks for hours. If the meat is too lean, it will dry out before it becomes tender. Look for a roast that is about three to four pounds. This size fits well in most standard roasting pans and allows for even heat distribution. You want the piece to be thick rather than flat so that you can get a good sear on the outside without overcooking the inside. Always pat the meat dry with paper towels before you start, because moisture on the surface will create steam instead of the crust you want.
Aromatics and Herbs
Fresh rosemary is the backbone of this flavor profile. Dried herbs just do not have the same punch here. You want woody, fresh stems that you can tuck into the pan so the heat releases their oils. Garlic is the other main player. I use several whole cloves, smashed slightly to release their flavor, and scattered around the beef. Do not worry about mincing the garlic, as it will roast for a long time and might burn if it is too fine. For the onions, I prefer small pearl onions or shallots, peeled and left whole. They hold their shape well throughout the long roasting time.
Liquid and Fat
You do not need a lot of liquid, but a splash of beef stock or even red wine helps deglaze the bottom of the pan once the meat is finished. For the fat used at the start, stick to a high-smoke point oil like grapeseed or avocado oil. Olive oil is fine, but if you have the heat up to get that initial sear, it can sometimes smoke too much. You want just enough oil to coat the bottom of the pan and the meat, allowing the exterior to brown evenly.
| Ingredient | Amount | Notes |
|---|---|---|
| Beef roast | 3-4 pounds | Chuck or rump, room temperature |
| Fresh rosemary | 4-5 sprigs | Woody stems work best |
| Garlic cloves | 8-10 pieces | Smashed and peeled |
| Pearl onions | 10-12 pieces | Peeled and left whole |
| Grapeseed oil | 3 tablespoons | For searing the roast |
| Kosher salt | 2 teaspoons | Adjust to your taste |
| Black pepper | 1 teaspoon | Freshly cracked |
| Beef stock | 1/2 cup | To add moisture during roasting |
The Recipe
- Prep Time: 15 minutes
- Cook Time: 2 hours 30 minutes
- Total Time: 2 hours 45 minutes
- Servings: 6 to 8
- Difficulty: Simple
Equipment Needed: Large heavy-duty roasting pan or a thick-bottomed Dutch oven, kitchen tongs, instant-read meat thermometer, paper towels.
Step-by-Step Instructions
Step 1: Prep the Meat
Take the beef out of the refrigerator about 45 minutes before you plan to cook. This allows the meat to reach room temperature, which is crucial for even cooking. If you put a cold piece of meat into a hot pan, the outside will sear quickly while the center remains icy, leading to uneven results. Pat the surface of the roast thoroughly with paper towels until it is completely dry. Any surface moisture will cause the meat to steam, preventing that beautiful brown crust from forming. Once dry, rub the salt and pepper all over the roast, pressing it into the surface with your hands.
Step 2: Sear the Beef
Place your roasting pan or Dutch oven on the stove over medium-high heat. Add the oil and let it heat up for a minute or two until it shimmers. Carefully place the beef into the pan. Do not crowd it or move it around too much. Let it sit undisturbed for 4 to 5 minutes until a deep, dark brown crust develops on the bottom. Use your tongs to flip the roast, searing each side until the entire surface is browned. This process should take about 15 minutes total. Once done, remove the meat from the pan and set it aside on a plate for a moment.
Step 3: Arrange the Aromatics
With the pan still hot, add your smashed garlic cloves and peeled onions to the rendered beef fat left in the bottom. Stir them gently for about 2 minutes just until they start to smell fragrant and take on a light golden color. Place the sprigs of fresh rosemary right on top of the vegetables. You want the rosemary to be in contact with the heat so the scent fills the kitchen. Place the seared beef roast directly on top of the bed of onions, garlic, and herbs. Pour the beef stock into the bottom of the pan, making sure not to pour it directly over the meat, as you want to keep that crust dry.
Step 4: Roast the Beef
Transfer the pan into a preheated oven set to 325°F. Let the roast cook uncovered. The goal is to cook the beef until it reaches an internal temperature of 145°F for medium-rare or 160°F for medium. This usually takes about 2 hours to 2 hours and 15 minutes depending on the shape of your roast. The low temperature allows the fat and connective tissue to melt slowly, making the meat tender. Halfway through the cooking time, check the pan; if the liquid has completely evaporated, add another splash of beef stock.
Step 5: Check for Doneness
Once you think the time is up, insert your meat thermometer into the thickest part of the roast. Avoid touching the bone if there is one, as that will give you a false reading. If you see the temperature hit 145°F for medium-rare or 160°F for medium, it is time to remove it from the oven. Do not rush this step. If the temperature is lower than you want, put it back in for another 15 minutes. Once it hits your desired internal temp, take the pan out of the oven.
Step 6: Rest and Serve
This is the most important step. Move the roast to a cutting board and cover it loosely with a piece of foil. Let it rest for at least 20 minutes before you slice it. If you cut into the roast immediately, all those juices will run out onto the board, leaving you with dry meat. Resting allows the juices to redistribute throughout the fibers of the beef. After the 20 minutes, slice against the grain into thick pieces. Arrange the roasted onions and garlic alongside the beef and drizzle some of the pan juices over the top before serving.
Mistakes I Made (So You Don't Have To)
Washing the Meat
Early on, I thought washing the meat under the tap was a good idea, but it is actually a mistake. It does not clean the meat better, and it only adds surface moisture that is impossible to get off completely. When that wet meat hits the hot pan, it creates a lot of steam, which ruins your chances of getting a nice brown sear. The high heat of the oven and the searing process are plenty to make the meat safe, so skip the rinse and just use paper towels to pat it dry.
Skipping the Resting Time
I used to be so hungry that I would carve the roast the moment it came out of the oven. Every time I did this, I was disappointed because the meat felt dry and stringy. I finally realized that the meat needs time to settle. During cooking, the juices are pushed to the center of the roast. If you cut it too soon, they just leak out. By waiting that 20 minutes, the juices move back through the meat, making every bite tender and juicy.
Using the Wrong Pan Size
I once tried to use a tiny pan that was barely bigger than the roast itself. It made it difficult to stir the onions and garlic, and they ended up steaming rather than roasting properly. You want a pan that is large enough to hold the roast and the aromatics with some space between them. This allows the heat to circulate around the roast properly. If the pan is too crowded, the temperature drops too quickly when you add the cold vegetables, and you lose that intense flavor development.
Overcrowding the Garlic
I once threw in a whole head of garlic that wasn't broken down, and it didn't cook through. It ended up being raw and sharp in some spots and mushy in others. Now, I always smash the cloves slightly to break the skin and expose the inside. This ensures the flavor spreads into the cooking juices and the roast itself. Don't worry about them falling apart; they become a delicious side dish that you can serve alongside the beef.
Variations and Tips
Add Some Root Vegetables
If you want to turn this into a one-pan meal, add some hearty root vegetables like carrots or potatoes. Cut them into two-inch chunks so they don't turn to mush while the meat roasts. Add them to the pan at the same time you add the onions and garlic. They will soak up the beef juices and the rosemary flavor, becoming very soft and rich. Just make sure they are not stacked on top of each other so everything cooks through at the same speed.
Adjusting the Herbs
While rosemary is the classic pairing for this dish, you can definitely mix in other woody herbs. Fresh thyme goes very well with rosemary. If you have some sage, a few leaves added in the last hour of roasting add a nice earthy note. Just avoid delicate herbs like parsley or cilantro, as they will burn and turn bitter in the oven after a long roast.
The Make-Ahead Strategy
This dish is great for when you are expecting guests because you can do the prep work in advance. You can salt and pepper the meat a few hours ahead and keep it in the fridge. The onions can be peeled and stored in a container the night before. This saves you a lot of time on the actual day of cooking. Just remember to take the meat out of the fridge early enough so it isn't cold when it goes into the pan.
Using Leftovers
If you have leftover beef, do not throw it away. It makes the best base for a quick soup or a sandwich. Slice the cold meat very thin and heat it up in a pan with a little bit of the leftover juices. The flavor only gets better the next day. You can also shred the cold meat and toss it into a pan with some sautéed peppers for a quick hash.
Storage and Reheating
If you have leftovers, they should be refrigerated within two hours of cooking. Place the meat and any remaining vegetables in an airtight container. The beef will stay good in the refrigerator for up to three days. When you are ready to reheat it, do not use the microwave if you can avoid it, as it tends to make the meat rubbery. Instead, put the slices in a small baking dish with a tablespoon of water or beef stock, cover it with foil, and warm it in the oven at 300°F until it is steaming hot, which should reach an internal temperature of 165°F. This method helps keep the moisture in the meat. This dish does not freeze particularly well because the texture of the meat changes too much after being thawed, so I recommend eating it fresh or using leftovers within that three-day window.
Frequently Asked Questions
Do I have to use beef stock?
You don't have to, but it adds a lot of flavor. If you don't have beef stock, you can use a dry red wine, which deglazes the pan beautifully and adds a nice acidity that cuts through the fat of the beef. If you don't have either, a little bit of water is fine, but you might want to add a pinch of salt to the liquid to make sure the vegetables have enough seasoning.
Can I use a different cut of meat?
Yes, you can use other cuts that are meant for slow roasting, like a bottom round or a blade roast. Any cut that has a bit of fat marbling will work well. Just avoid very lean cuts like a sirloin roast, as they will become tough and dry when cooked for this length of time. The key is to look for cuts that are labeled for pot roast or roasting.
What if I don't have a thermometer?
While I highly suggest using one, you can get a rough idea by pressing the meat. A medium-rare roast will feel soft and have a little give, similar to the fleshy part of your palm. However, every piece of meat is different, so a thermometer is the only way to be sure it is safe and cooked to your liking. It takes the guesswork out of the process and ensures you don't overcook your meal.
Why did my meat turn out tough?
Tough meat usually happens for one of two reasons: either the oven temperature was too high, or you didn't give the connective tissues enough time to break down. If you crank the heat, the outside cooks too fast while the inside stays tight. If the meat is still tough after the recommended time, it might need another 20 minutes in the oven. It is always better to cook low and slow.
Can I cover the pan while roasting?
I prefer to leave it uncovered for the majority of the time so that the top of the roast keeps its texture. If you cover the pan with a lid or foil, the meat will steam in its own juices. This will give you a very tender result, but you won't get that nice, browned surface. If you find the top is getting too dark before the center is done, you can loosely tent it with foil for the last 30 minutes.
Final Thoughts
Making a roast like this is one of those simple pleasures that brings a bit of calm to a busy life. There is something really satisfying about the slow process and the way it transforms basic ingredients into a hearty, comforting meal. I hope this becomes a regular part of your own kitchen rotation, whether you are cooking for your family or just enjoying the process of making a good dinner.
Remember that cooking is a skill that gets better with time. Don't worry if your first try isn't exactly how you imagined it. Each time you make this, you will learn a little more about your oven and how to adjust for the specific piece of meat you have. Just keep it simple, focus on the basics, and enjoy the result.