
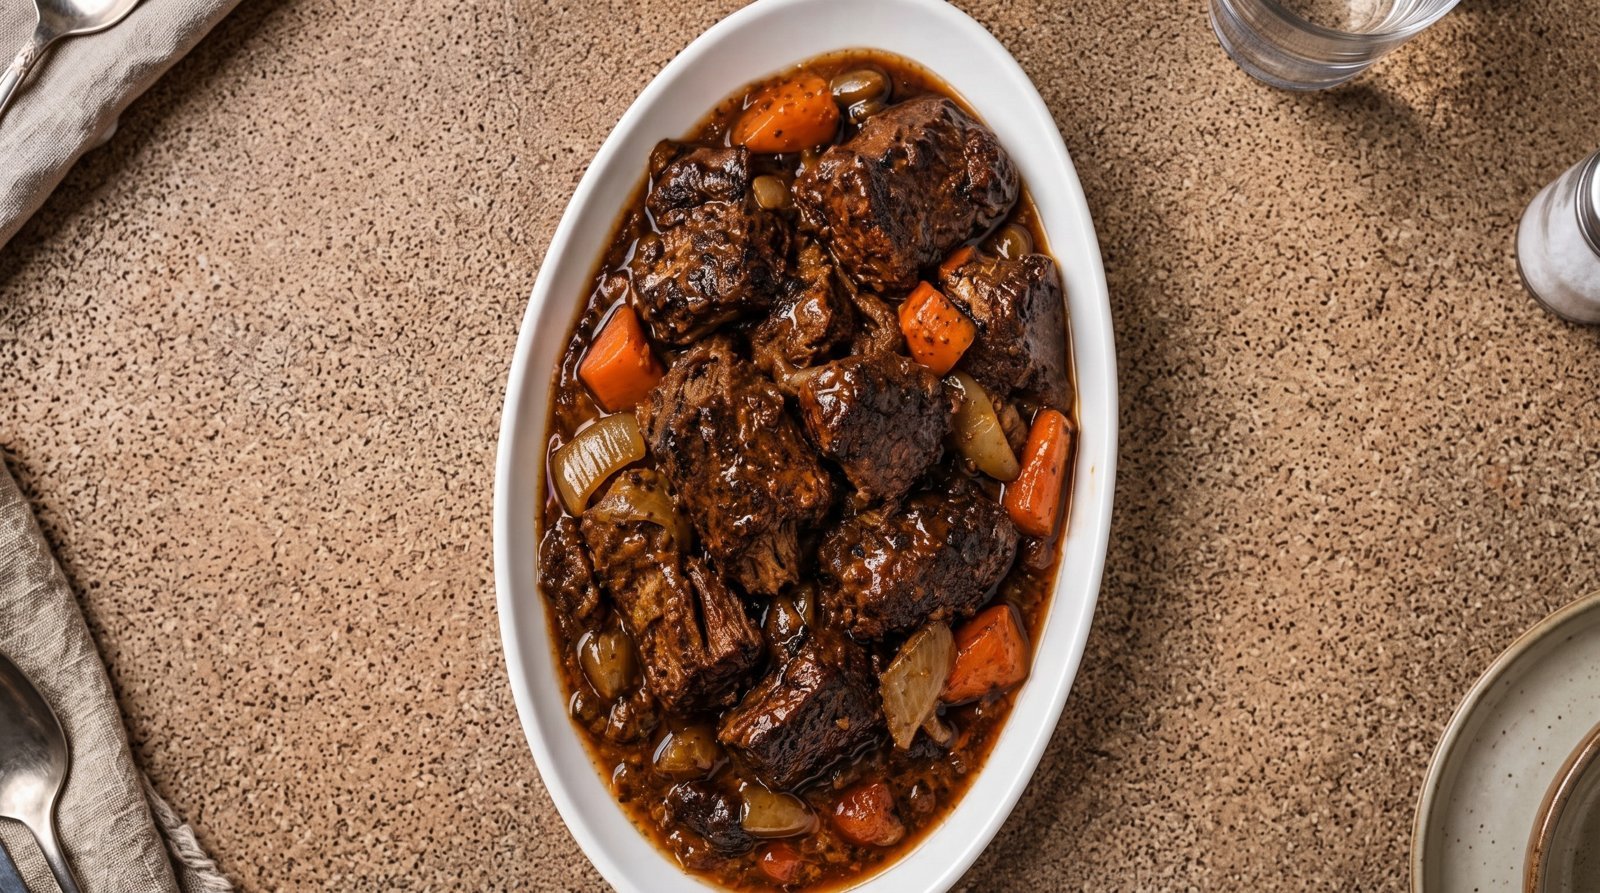
I remember the first time I attempted to make red wine braised beef short ribs. I had invited some friends over for a weekend dinner and completely underestimated how much time the meat needed to become truly tender. I ended up keeping my guests waiting for an extra hour because the beef was still tough and chewy. It taught me that this is a meal that demands patience, not just in the cooking process but in the preparation as well. Over the years, I have refined this recipe to ensure the beef reaches that point where it almost falls off the bone with just the touch of a fork. This is a hearty, comforting dish that transforms tougher, well-marbled cuts of meat into something quite elegant and satisfying. When you get the balance of the red wine, the aromatics, and the long, slow heat right, you end up with a deep, complex sauce that pairs wonderfully with something like mashed potatoes or crusty bread. This is the kind of cooking that fills the whole house with a warm, savory scent that makes the wait worth it.
Why This Recipe Works
This recipe is built on the foundation of patience and the science of collagen breakdown. Beef short ribs contain a good amount of connective tissue and fat. When you cook them at a high temperature, the muscle fibers tighten up and become rubbery, which is why a quick sear followed by a long, low-temperature braise is the only way to go. By keeping the oven at 300 degrees Fahrenheit, we allow the collagen to dissolve into gelatin over several hours. This process creates that signature texture where the meat remains intact but yields effortlessly to the fork. It also thickens the sauce naturally without needing a lot of flour or cornstarch.
The flavor profile is developed in layers. We start by browning the meat on the stovetop. This is not just about color; it is about creating a deep, complex flavor through the Maillard reaction. Every browned bit left in the bottom of the pot is essentially a concentrated dose of beef flavor that will eventually incorporate into the wine and broth. When you deglaze the pan with red wine, you pick up all those bits, ensuring that none of that flavor is lost. The aromatics like onions, carrots, and garlic are added later in the process so they provide sweetness and depth without breaking down into complete mush. The wine also provides a vital acidity that cuts through the richness of the fat. Without that acid, the dish would feel heavy and one-note. By using a dry, full-bodied red wine, we ensure the sauce has enough backbone to stand up to the intensity of the beef. This combination of slow rendering of fat and the reduction of the braising liquid makes for a balanced, sophisticated meal that feels like a lot of work but actually requires very little active time once it is in the oven.
Ingredient Notes
The Beef and Aromatics
The most important part of this dish is the meat. You want bone-in beef short ribs. When you look at them at the store, try to find pieces that have a good distribution of fat throughout the muscle. Lean meat will dry out during the long cooking process, and you will lose that succulent quality. You should plan on one or two ribs per person depending on the size of the ribs and your appetite. For the vegetables, fresh carrots and yellow onions are essential. Cut them into larger chunks. If you chop them too small, they will lose their shape and texture during the three-hour braise. I like to cut my onions into wedges and my carrots into thick rounds or batons.
The Braising Liquid and Seasonings
For the liquid, you need a dry red wine. I usually use a Cabernet Sauvignon or a Merlot. Avoid anything labeled as cooking wine because it is often loaded with salt and has a harsh, metallic flavor that does not mellow out during cooking. Most of the alcohol will cook off, leaving behind the complex notes of the grape. You will also need beef stock. Use a low-sodium version so you can control the saltiness yourself. If you use a high-sodium stock, the long reduction time can make the sauce taste overly salty by the time it is finished. For seasoning, keep it simple. Kosher salt, freshly cracked black pepper, and fresh thyme are really all you need. The thyme adds an earthy aroma that pairs beautifully with the wine.
| Ingredient | Amount | Notes |
|---|---|---|
| Beef short ribs | 4 pounds | Bone-in, well-marbled |
| Kosher salt | 1 tablespoon | For seasoning the meat |
| Black pepper | 1 teaspoon | Freshly cracked |
| All-purpose flour | 2 tablespoons | For dusting the meat |
| Olive oil | 2 tablespoons | For searing |
| Yellow onions | 2 medium | Cut into 1-inch wedges |
| Carrots | 3 large | Cut into 1-inch chunks |
| Garlic cloves | 4 cloves | Smashed |
| Tomato paste | 2 tablespoons | For depth |
| Dry red wine | 2 cups | Cabernet or Merlot |
| Beef stock | 3 cups | Low-sodium |
| Fresh thyme | 4 sprigs | Tied together |
The Recipe
- Prep Time: 20 minutes
- Cook Time: 3 hours
- Total Time: 3 hours 20 minutes
- Servings: 4 to 6 servings
- Difficulty: Intermediate
Equipment needed:
– Large heavy-bottomed Dutch oven with a lid
– Tongs
– Small bowl for mixing flour
– Paper towels
– Measuring cups and spoons
Step-by-Step Instructions
Step 1: Prep the Meat
Before you start cooking, take the short ribs out of the refrigerator about 20 minutes before you plan to sear them. Pat the ribs very dry with paper towels. If the meat is wet, it will steam instead of brown when you put it in the hot pan. Season all sides of the ribs generously with the kosher salt and black pepper.
Next, lightly dredge the ribs in the flour. You do not want a thick coating, just a very light dusting. This helps with the browning process and will eventually help thicken your sauce. Shake off any excess flour before you move to the stovetop. This prep work is crucial for building the flavor base of your dish.
Step 2: Sear the Beef
Place your Dutch oven over medium-high heat and add the olive oil. Once the oil is shimmering and just about to smoke, place the ribs in the pot. Do not overcrowd the pot; do it in two batches if needed. Let the ribs sear undisturbed for about 3 to 4 minutes per side. You are looking for a deep, dark brown crust on every side.
If you rush this step, you will not get the depth of flavor you need. The goal is to develop that brown color on the surface of the meat. Once the ribs are seared, remove them from the pot and set them on a plate. Do not worry if the bottom of the pot looks like it has some burnt bits; that is flavor.
Step 3: Cook the Aromatics
Reduce the heat to medium. Add the onions and carrots to the same pot that you used for the beef. The fat rendered from the ribs should be enough to cook them, but you can add a tiny splash of oil if the pot looks too dry. Sauté the vegetables for about 6 to 8 minutes, stirring occasionally, until the onions are translucent and the carrots are starting to soften.
Add the smashed garlic and the tomato paste. Stir this into the vegetables and cook for another 2 minutes. The tomato paste will darken slightly and the garlic will become fragrant. This step ensures that the raw taste of the tomato paste is cooked out, leaving behind a rich, savory sweetness that will balance the wine.
Step 4: Deglaze and Combine
Pour in the red wine to deglaze the pot. Use a wooden spoon to scrape up all those browned bits from the bottom of the Dutch oven. This is where the magic happens. Let the wine simmer for about 5 minutes until it has reduced by half. This reduces the harsh acidity and concentrates the wine flavor.
Return the short ribs to the pot, nestling them into the vegetables. Pour in the beef stock until the ribs are mostly submerged but not completely covered. Add the thyme sprigs. Bring the liquid to a gentle simmer on the stovetop. Once it is simmering, cover the pot with the lid.
Step 5: Braise in the Oven
Preheat your oven to 300 degrees Fahrenheit. Once the oven is up to temperature, carefully transfer the covered Dutch oven into the middle rack. Let the ribs cook for 3 hours. Resist the urge to check on them too frequently, as you want to keep the temperature steady inside the pot.
After 3 hours, check for doneness. The beef should be tender enough to pull apart easily with a fork. The internal temperature of the meat should be well above 190 degrees Fahrenheit for that fork-tender texture. If it still feels resistant, give it another 20 minutes in the oven.
Mistakes I Made (So You Don't Have To)
Overcrowding the Pot
Early on, I used to try to sear all the ribs at once. Because the pan was crowded, the temperature dropped and the meat steamed instead of getting that deep, brown crust. This led to a pale, bland sauce. Now, I always sear in batches. Even if it takes longer, the result is much better. Give each piece of meat enough space to actually hit the bottom of the pan and develop color.
Not Reducing the Wine
I once poured the wine in and immediately added the stock and meat. The final sauce tasted far too much like raw alcohol, and it was quite thin. I learned that you must let the wine simmer until it reduces by about half. This concentrates the flavor and cooks off the sharp bite, allowing the wine to become a smooth, rich part of the sauce rather than a harsh, overpowering element.
Using Too Much Salt Early
Because I was worried about seasoning such a big piece of meat, I used to be very heavy-handed with the salt at the start. Since the sauce reduces significantly in the oven, that salt becomes much more concentrated. By the time the meal was done, it was often too salty to eat. Now, I use a moderate amount of salt at the start and wait until the very end to taste and adjust the seasoning.
Skipping the Rest
When the timer went off, I used to immediately serve the ribs. The meat is so tender at that point that it falls apart completely, and the sauce is often quite thin because the juices haven't settled. Letting the pot sit for 15 minutes off the heat allows the sauce to thicken slightly and the flavors to settle. It also makes it much easier to handle the meat without it falling to pieces.
Variations and Tips
Adding Root Vegetables
If you want a one-pot meal, you can add chunks of potatoes along with the carrots. Potatoes absorb the braising liquid beautifully and become very flavorful. Just make sure to cut them into large, uniform chunks so they hold their shape during the long cooking time. You can also add parsnips or celery root for a more earthy flavor profile that works well with beef.
The Make-Ahead Advantage
This dish is actually better the next day. The flavors continue to meld in the refrigerator, and it is much easier to skim the excess fat off the top once it has solidified overnight. If you are planning a dinner party, I highly recommend making these a day ahead. Just store them in the braising liquid in the fridge and reheat them slowly in the oven at 300 degrees Fahrenheit until they are steaming hot throughout.
Getting a Thicker Sauce
If you prefer a thicker sauce, you can remove the ribs once they are cooked and set them aside. Place the pot on the stovetop and simmer the remaining liquid over medium-high heat until it reduces to your desired consistency. You can also whisk in a teaspoon of cornstarch mixed with a tablespoon of cold water, then let it bubble for a minute to thicken.
Using Different Aromatics
While onions, carrots, and garlic are the standard, you can add shallots or even a leek for a slightly sweeter, milder flavor. Some people like to include a bay leaf or a sprig of rosemary in the bundle of herbs. Just be careful with rosemary, as it is quite potent and can easily overwhelm the flavor of the beef if you use too much.
Storage and Reheating
If you have leftovers, they store very well in the refrigerator for up to 3 days. Place the meat and the sauce in an airtight container as soon as it cools down, making sure it goes into the fridge within 2 hours. I find that the flavor is often even better after sitting in the fridge for a day, as the sauce deepens as it cools and rests.
To reheat, the best method is the oven. Place the ribs and the sauce in a covered baking dish and heat them in a 300 degree Fahrenheit oven until they reach an internal temperature of at least 165 degrees Fahrenheit. You can also use a saucepan on the stove over low heat. Be careful when reheating, as the meat is very tender and can easily break apart if you stir it too aggressively. Avoid reheating in the microwave if you can, as it tends to cook the meat unevenly and can make it tough. This dish does not freeze well, because the long-cooked meat tends to become slightly mushy and the vegetables lose all their structure after being thawed. It is best to plan on eating it fresh or within a few days of cooking.
Frequently Asked Questions
Can I use a different cut of meat?
While beef short ribs are the best choice for this dish due to their high fat content and bone-in structure, you can use beef chuck roast cut into large, uniform pieces. It will not have the same presentation or the richness from the bone, but it will still be very tender. You will need to adjust the cooking time slightly, as smaller pieces of chuck might cook faster than large, thick short ribs.
Do I have to use alcohol in this dish?
The red wine provides acidity and depth that is difficult to replicate, but you can substitute it with a mix of high-quality beef stock and a tablespoon of balsamic or red wine vinegar. The vinegar provides the necessary acidity to cut through the fat of the beef. It will change the flavor profile slightly, but the dish will still be rich and savory.
Why is my meat still tough after 3 hours?
If the meat is still tough, it means the collagen has not fully broken down into gelatin. This happens if the temperature was too low or the meat was just particularly tough to begin with. The simple fix is to put it back in the oven for another 30 to 45 minutes. Always check the tenderness with a fork; if it doesn't yield, it needs more time.
Can I cook this on the stovetop instead of the oven?
You can, but it is much harder to maintain a gentle, even heat. If you choose the stovetop, keep the heat on the lowest possible setting and make sure you have a heavy lid that seals tightly. You will need to check it every 30 minutes to ensure it is barely simmering and that there is enough liquid. The oven is much more reliable for this kind of braise.
What should I serve with this?
This dish is incredibly rich, so it needs something to soak up the sauce. Mashed potatoes, creamy polenta, or even a simple herb-roasted root vegetable medley are great choices. I also always like to serve it with something crusty, like a baguette, to mop up the last of that sauce. A side of bitter greens like sautéed kale or arugula can also help balance the richness of the beef.
Final Thoughts
Making these braised short ribs has become one of my favorite ways to spend a slow afternoon. The process is simple, but it demands that you let go of the need for speed. Once you get that first bite of tender, flavorful beef, you will understand why this method is worth every minute of the wait. It is a reliable dish that always impresses and leaves everyone feeling satisfied.
I hope you find as much joy in preparing this as I do. Just remember to be patient with the browning, keep the heat low, and give the meat the time it needs to transform. Grab a glass of whatever wine you used for the sauce, pull up a chair, and enjoy the process of making something truly special in your own kitchen.