
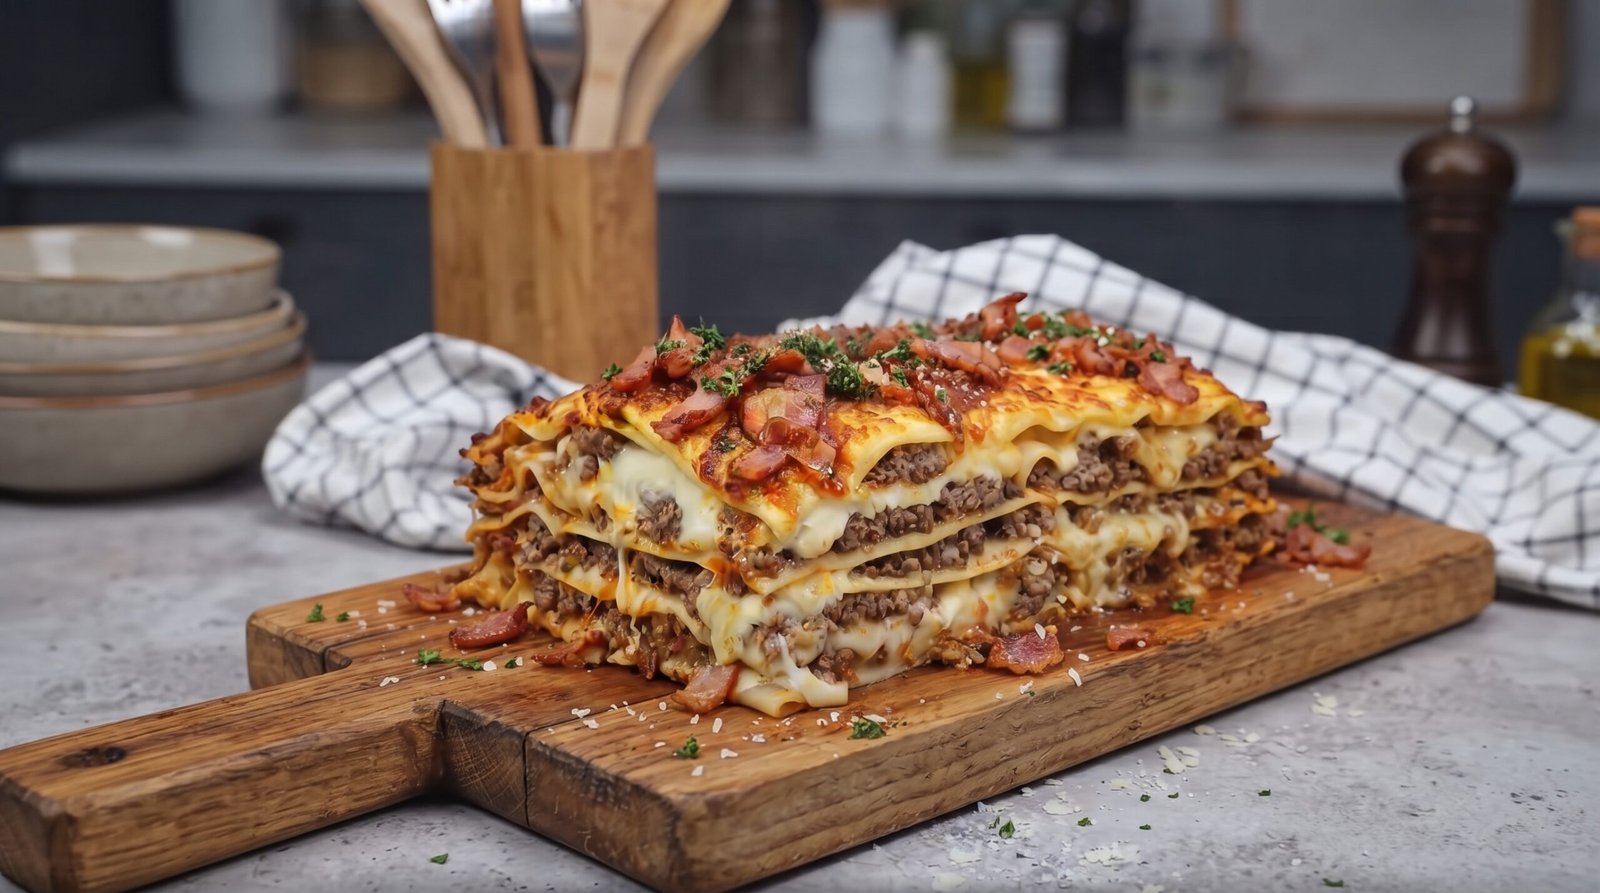
I used to think that making a traditional lasagna was a task reserved for lazy Sundays when I had absolutely nowhere to be. The idea of simmering sauce for hours and layering pasta while trying to keep everything from sliding around felt like too much for a regular Tuesday. Then, I realized that by simplifying the components and adding a smoky twist, I could get a hearty, comforting dinner on the table without feeling completely drained by the end of it.
This beef lasagna with crispy bacon is the answer to those days when you need something substantial but do not want to spend an eternity in the kitchen. It brings together the savory depth of ground beef with the salty crunch of bacon, creating a combination that my household has come to love. You do not need to be a professional chef to get those clean, distinct layers; you just need to follow a few simple steps and give the dish enough time to rest before you slice into it.
Why This Recipe Works
The main reason I reach for this recipe is the balance of flavors. Ground beef is a classic filling, but on its own, it can sometimes feel a bit one-note. Adding bacon to the mix introduces a level of saltiness and a slight smokiness that cuts through the richness of the cheese and the acidity of the tomato base. It makes the flavor profile feel more complex than a standard meat lasagna, even though it is just as easy to assemble.
Texture is another factor that makes this version stand out. You get the soft, yielding texture of the pasta sheets and the molten, gooey melted cheese, but every few bites, you encounter the crispness of the bacon baked into the top layer. This contrast keeps each bite interesting. It is not just a soft, mushy casserole; the bits of bacon provide a necessary crunch that lifts the entire dish.
I also appreciate how predictable this method is. Because I am using a simple meat sauce and standard cheese layering, there are fewer variables that could go wrong. You do not have to worry about complex emulsions or finicky techniques. It is a straightforward assembly of ingredients that relies on the oven to do the heavy lifting. Once you understand the order of the layers, you can put this together in your sleep. It is a reliable dish that consistently delivers a warm, satisfying meal that holds its shape well enough to serve as a beautiful centerpiece.
Ingredient Notes
Meat and Protein
- Ground beef: Use an 80/20 lean-to-fat ratio. This gives you enough fat for flavor without the sauce becoming too greasy.
- Bacon: Thick-cut bacon is best because it retains a bit of chew even after being baked in the lasagna. Thin slices might get lost or turn too brittle.
- Salt and pepper: Use these to season your beef while it browns to ensure the flavor is built from the bottom up.
Pasta and Dairy
- Lasagna noodles: Use no-boil sheets if you are in a rush, but standard boiled sheets have a better texture. If using dry sheets, make sure your sauce has enough liquid.
- Mozzarella cheese: Use a block of low-moisture, whole-milk mozzarella and grate it yourself. The pre-shredded bags are coated in starch that prevents them from melting smoothly.
- Ricotta cheese: A whole-milk ricotta provides a creamy, rich texture that binds the layers together. Ensure it is drained well so the lasagna does not become watery.
- Parmesan: Freshly grated is always better. It adds a salty, nutty finish that rounds out the heavy dairy flavors.
Sauce and Herbs
- Marinara sauce: Pick a quality store-bought brand or a simple homemade tomato base. Since there are so many ingredients, a good base sauce is important.
- Fresh parsley: I like adding this at the very end to provide a pop of color and a fresh, herbal note that cuts through the fat.
- Dried oregano: A small amount added to the meat during browning infuses the whole sauce with a classic savory scent.
| Ingredient | Amount | Notes |
|---|---|---|
| Ground beef | 1 pound | 80/20 fat content |
| Thick-cut bacon | 8 slices | Chopped into small pieces |
| Lasagna noodles | 12 sheets | Pre-boiled or no-boil |
| Marinara sauce | 24 ounces | Standard jarred sauce |
| Ricotta cheese | 15 ounces | Whole milk variety |
| Mozzarella | 16 ounces | Freshly grated |
| Parmesan cheese | 1 cup | Freshly grated |
| Dried oregano | 1 teaspoon | For the meat sauce |
| Fresh parsley | 2 tablespoons | Chopped for garnish |
The Recipe
- Prep Time: 20 minutes
- Cook Time: 45 minutes
- Total Time: 1 hour 5 minutes
- Servings: 8 slices
- Difficulty: Intermediate
Equipment Needed: Large skillet, 9×13 inch baking dish, grater, spatula, aluminum foil.
Step-by-Step Instructions
Step 1: Cook the Bacon and Beef
Start by placing your chopped bacon in a large skillet over medium-high heat. You want to cook it until it reaches a medium-crisp state. It does not need to be shattered, as it will continue cooking in the oven. Remove the bacon with a slotted spoon and let it drain on a paper towel, but keep about two tablespoons of the bacon fat in the skillet for the beef.
Add the ground beef to the same skillet. Brown it over medium heat, breaking it up with a wooden spoon. Make sure it is cooked through until no pink remains. The internal temperature should reach 160 degrees Fahrenheit. Drain off any excess fat, then return the bacon pieces to the pan. Add your marinara sauce and the dried oregano, stirring everything together. Let this mixture simmer for about 5 minutes to combine the flavors.
Step 2: Prepare the Cheeses
While the sauce is simmering, grab a medium mixing bowl. Combine the ricotta cheese with half of the parmesan cheese. Stir it until it is well combined. I like to add a pinch of black pepper here as well. This creates a creamy, savory layer that keeps the pasta from drying out.
Take your mozzarella block and shred it using the large holes of your grater. Having all your cheese ready to go makes the layering process go much faster. Keep the remaining parmesan on the side to sprinkle on top right before you put the dish into the oven.
Step 3: Initial Layering
Preheat your oven to 375 degrees Fahrenheit. Take your 9×13 inch baking dish and spread a thin layer of the meat sauce across the bottom. This prevents the bottom layer of noodles from sticking to the pan. Place three or four noodles side-by-side to cover the bottom of the dish.
Spread a layer of the ricotta mixture over the noodles. Use the back of a spoon to ensure an even spread. Next, add a generous layer of the meat and bacon sauce. Sprinkle a handful of the shredded mozzarella over the meat sauce. Repeat this process for two or three more layers until you reach the top of the dish.
Step 4: Finishing the Top
For the final layer, lay down the last of your noodles. Spread the remaining meat sauce over the top, making sure it covers the edges of the pasta so they do not curl up and dry out in the heat. Cover the entire surface with the rest of your shredded mozzarella.
Sprinkle the remaining parmesan cheese over the top of the mozzarella. If you have any extra bacon pieces, you can scatter a few on top, though most of it should be inside the layers. Cover the baking dish tightly with aluminum foil.
Step 5: Baking
Place the dish in the center of your preheated oven. Bake for 25 minutes with the foil covering the top. This steams the pasta and ensures the cheese inside melts without the top burning. After 25 minutes, carefully remove the foil.
Continue baking for another 15 to 20 minutes, uncovered. You are looking for the cheese on top to become bubbly and slightly golden. The sauce should be bubbling around the edges of the pan. The internal temperature should be around 165 degrees Fahrenheit in the center when tested with a food thermometer.
Step 6: Resting and Serving
This is the most important step that people often skip. Remove the lasagna from the oven and let it sit on the counter for at least 15 to 20 minutes before cutting. If you slice it while it is piping hot, the layers will slide apart and you will end up with a mess on your plate.
The resting time allows the cheese and sauce to set, giving you those beautiful, clean slices. Once it has rested, sprinkle the fresh chopped parsley over the top. Cut it into squares and serve immediately. The internal structure should be firm enough that each slice stands up on its own.
Mistakes I Made (So You Don't Have To)
Using Too Much Liquid
Early on, I used to add a splash of water to my meat sauce because I thought it would keep the noodles hydrated. This backfired because it made the entire dish soupy. The juices from the meat and the moisture from the cheese are enough to soften the noodles. If you feel like your sauce is too thick, just add a tiny bit more marinara instead of water.
Not Draining the Ricotta
Sometimes ricotta comes with a little bit of excess liquid in the container. If you spoon that directly into the lasagna, it turns the center into a pool of whey. I learned to use a fine-mesh strainer to drain the ricotta for about 15 minutes before mixing it with the parmesan. This ensures the layer stays creamy rather than watery.
Cutting Too Early
I cannot stress this enough: cutting into a hot lasagna is a recipe for disaster. One time, I was in such a hurry to feed guests that I sliced it after five minutes of resting. The whole thing collapsed into a pile of pasta, meat, and cheese. It tasted fine, but it looked like a kitchen accident. Now, I set a timer for the resting period so I am not tempted to cut it too soon.
Overcrowding the Pan
I once tried to squeeze four layers into a dish that was too shallow. The sauce bubbled over the sides, creating a burnt, crusty mess on the bottom of my oven that took hours to clean. Always leave about an inch of space at the top of your baking dish to account for bubbling sauce and the cheese topping.
Variations and Tips
Vegetable Additions
If you want to add some color, try finely diced bell peppers or spinach. If using spinach, make sure it is completely thawed and squeezed of all water before mixing it into the ricotta layer. If you add raw vegetables, they will release too much moisture during the bake, which will ruin the texture of your pasta sheets.
Cheese Customization
While mozzarella is the standard, you can swap it for provolone if you want a sharper flavor. Smoked provolone is excellent in this recipe, as it plays off the bacon flavor perfectly. Just be careful with salt levels, as provolone can be saltier than mozzarella. Taste your cheese before you add extra salt to your sauce.
Prep Ahead
You can assemble the entire lasagna a day in advance and keep it in the refrigerator. Cover it tightly with plastic wrap and then foil. When you are ready to bake, take it out about 30 minutes before putting it in the oven so it does not go from a cold fridge to a hot oven too rapidly. You may need to add 5-10 minutes to the total baking time since the dish is cold.
The Foil Trick
Always spray the underside of your aluminum foil with a little bit of cooking oil. This stops the cheese from sticking to the foil while it bakes. There is nothing more frustrating than pulling off the foil and having all your beautiful top cheese stuck to it instead of the lasagna.
Storage and Reheating
If you have leftovers, let them cool to room temperature before covering. You can store them in an airtight container in the refrigerator for up to three days. Beyond that, the pasta starts to lose its texture and becomes a bit mushy. Make sure to get it into the fridge within two hours of baking to maintain food safety.
When reheating, individual slices work best. You can pop a slice in the microwave for a minute or two, but the oven is better for keeping the texture right. Place the slice on a baking sheet and heat at 350 degrees Fahrenheit until it is steaming hot. The internal temperature of the leftovers should reach 165 degrees Fahrenheit to ensure it is thoroughly heated. I do not recommend freezing this specific recipe, as the ricotta and mozzarella can separate and turn grainy when thawed and reheated. It is best enjoyed fresh or within those few days of refrigeration.
Frequently Asked Questions
Do I really need to boil the noodles?
You do not have to, but it depends on the type of noodle you buy. If the box says no-boil, you can use them straight. If you have standard noodles, they need to be boiled. If you try to bake dry standard noodles, they will absorb too much liquid and turn out chewy or brittle. Always check the package instructions for the specific type of pasta you choose to use in your baking dish.
Why is my lasagna watery after baking?
This usually happens because of excess liquid from the sauce or the ricotta cheese. Ensure your meat sauce is thick and not too runny before you start layering. Also, drain your ricotta and make sure you are not using too much sauce between the layers. The pasta will absorb some moisture, but you do not want it swimming in it.
Can I use turkey instead of beef?
Yes, ground turkey or even ground chicken works as a substitute. Just keep in mind that these meats have less natural fat, so you might need to add a tablespoon of olive oil to the pan when browning them. You will also need to be careful not to overcook the meat, as it can dry out much faster than beef does.
How do I know when it is fully cooked?
The best way to be sure is by using a food thermometer. Stick it into the center of the dish; you are aiming for 165 degrees Fahrenheit. Visually, the cheese should be bubbling and golden, and the sauce around the sides should also be actively bubbling. The edges of the noodles should be soft when tested with a knife.
Can I leave the bacon out?
You certainly can. If you decide to skip the bacon, you will lose that smoky saltiness, so you might want to add a tiny bit more salt to the meat sauce or use a pinch of smoked paprika to compensate for the missing flavor profile. The lasagna will still be a great, hearty meal without the meat modification.
Final Thoughts
Making this lasagna has taught me that the best meals are often the ones that are simple but done with care. By focusing on the quality of your ingredients and respecting the resting time at the end, you can create something truly satisfying that feels like a lot of work even when it is not. It is one of those dishes that always feels like a celebration.
I hope you find this recipe as comforting as I do. It is the kind of dinner that brings people to the table and keeps them there a little longer than usual. Just remember to give yourself that extra bit of time at the end to let it set. Enjoy every bite of that crispy bacon and cheesy goodness.