
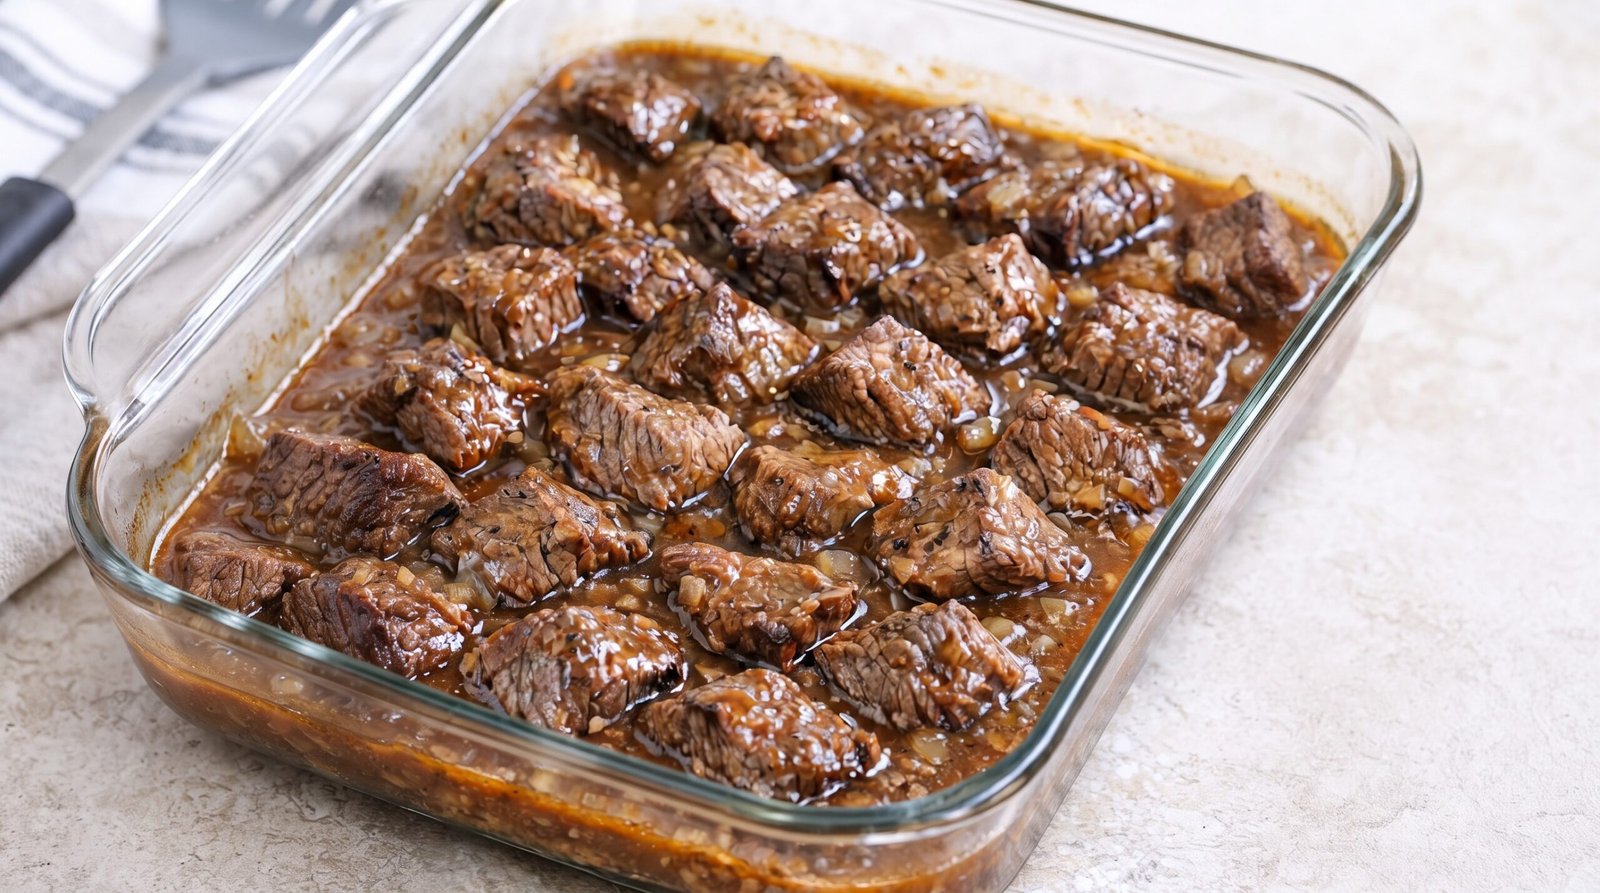
I remember the first time I tried to make beef tips at home. I wanted that deep, rich flavor that reminds me of Sunday dinners, but I ended up with chewy meat and a thin sauce that tasted like raw flour. Over the years, I have tinkered with the process, adjusting the searing time and learning how to get the gravy to the right consistency without it turning into a paste. These beef tips and gravy have become a staple in my kitchen because they turn a more affordable cut of meat into something substantial and comforting.
This dish is about patience. You are not just throwing things in a pot; you are building flavor through browning the meat and letting the sauce develop slowly. If you follow the steps, you end up with tender, bite-sized pieces of beef smothered in a savory, onion-rich sauce that clings to every forkful. Whether you are serving this over mashed potatoes or buttered noodles, it is a meal that makes the whole house smell cozy.
Why This Recipe Works
The primary reason this recipe hits the mark is the method of searing the meat. By cutting the beef into uniform cubes, you get more surface area, which means more spots for browning. That brown color on the meat is not just for looks; it is where the flavor lives. I make sure to sear the beef in batches so the pan stays hot. If you crowd the pan, the meat releases its juices too quickly and starts to steam instead of developing that deep crust. That crust is the foundation for the entire gravy.
Another factor is the way the sauce is built. I use a small amount of flour to thicken the pan drippings, which is a classic technique. By cooking the flour with the fat from the pan, you remove that raw, pasty taste. Then, when you add the broth, you get a silky, rich sauce that has real body. It is not just colored water; it is a concentrated reduction that brings out the savory notes of the beef.
Using onions is a simple but essential step. As they cook down in the same pan used for the beef, they turn sweet and soft. They melt into the gravy, adding texture and a subtle sweetness that balances the saltiness of the beef broth. I have found that letting the meat cook low and slow ensures that even cuts that might usually be tough become tender and soft. The time spent simmering is really what transforms the texture of the dish into something that is easy to chew and very satisfying. It is a straightforward process that relies on heat management and time rather than complicated techniques or expensive equipment.
Ingredient Notes
The Beef
For this dish, you want a cut that benefits from a long cook. I almost always use chuck roast. It has enough fat and connective tissue that when it breaks down, it makes the meat tender and the sauce rich. If you buy a whole roast, you will need to trim the large chunks of fat and cut the meat into uniform, one-inch cubes. If you buy pre-cut stew meat, just make sure to look for pieces that are roughly the same size so they cook evenly. If you pick pieces that are too small, they will dry out before the sauce is ready.
The Gravy Base
I use a mix of beef broth and a little bit of flour for the gravy. For the best flavor, use a low-sodium beef broth so you can control the salt level yourself. If you are in a rush, a high-quality store-bought carton is fine, but if you have homemade stock, it will definitely shine here. The flour is what gives the sauce its thickness. You only need a small amount, and it is important to whisk it into the pan drippings while they are hot to prevent lumps.
Aromatics and Seasoning
Onions are the backbone of the flavor profile. I prefer yellow onions because they turn sweet when they cook down. You should dice them relatively small so they soften completely. Besides onions, I keep the seasonings simple: garlic, salt, black pepper, and sometimes a splash of Worcestershire sauce to add depth. Do not go overboard with herbs; a bay leaf is usually enough to add an earthy note without overpowering the flavor of the beef.
| Ingredient | Amount | Notes |
|---|---|---|
| Beef Chuck Roast | 2.5 pounds | Cut into 1-inch cubes |
| All-Purpose Flour | 3 tablespoons | For dusting and thickening |
| Vegetable Oil | 3 tablespoons | Divided for searing |
| Yellow Onions | 2 large | Finely diced |
| Garlic Cloves | 3 pieces | Minced |
| Beef Broth | 3 cups | Low-sodium preferred |
| Worcestershire Sauce | 1 tablespoon | Adds savory depth |
| Salt | 1 teaspoon | Plus more to taste |
| Black Pepper | 0.5 teaspoon | Freshly cracked |
| Bay Leaf | 1 piece | Remove before serving |
The Recipe
- Prep Time: 20 minutes
- Cook Time: 2 hours 30 minutes
- Total Time: 2 hours 50 minutes
- Servings: 4-6 servings
- Difficulty: Intermediate
Equipment Needed
- Large heavy-bottomed pot or Dutch oven
- Sharp chef knife
- Cutting board
- Tongs
- Whisk
- Measuring cups and spoons
Step-by-Step Instructions
Step 1: Prep the Beef
Start by trimming any large, hard pieces of fat off your chuck roast. Cut the meat into uniform one-inch cubes. If the pieces are too large, they will take too long to get tender. If they are too small, they will dry out. Once cut, pat the beef dry with paper towels. This is a small but important step because damp meat will steam instead of searing when it hits the hot oil. Toss the cubes lightly in two tablespoons of flour and a half-teaspoon of salt until they are just coated.
Step 2: Sear the Beef
Heat two tablespoons of oil in your heavy-bottomed pot or Dutch oven over medium-high heat. Once the oil shimmers, add the beef in a single layer. Do not crowd the pot. You want space around each piece so they can brown. Let them sit undisturbed for about three to four minutes until a dark brown crust forms on one side. Turn the pieces and brown the other sides for another three minutes. Work in batches if you need to, removing the browned meat to a plate.
Step 3: Sauté the Aromatics
Lower the heat to medium. Add the remaining tablespoon of oil if the pot looks dry. Toss in your diced onions. Cook them for about eight to ten minutes, stirring occasionally. You want them to become translucent and start to turn golden brown. Scrape the bottom of the pot with a wooden spoon as you stir; those brown bits left behind by the beef are full of flavor and need to be incorporated into the onions. Add the minced garlic during the last minute of cooking to avoid burning it.
Step 4: Create the Gravy Base
Sprinkle the remaining tablespoon of flour over the onions and garlic. Stir it constantly for two minutes. This cooks the raw flour taste out of the base. Slowly pour in the beef broth while whisking steadily to prevent any lumps from forming. Add the Worcestershire sauce and the bay leaf. Bring the liquid to a gentle simmer, making sure to scrape up any remaining brown bits from the bottom of the pot.
Step 5: Simmer the Beef
Return the seared beef and any juices that accumulated on the plate back into the pot. The liquid should just barely cover the meat. Reduce the heat to low, cover the pot with a tight-fitting lid, and let it simmer for about two hours and fifteen minutes. You are looking for the meat to be fork-tender. It should pull apart easily when pressed with a fork. Check the internal temperature of a larger piece; it should be well above 165 degrees Fahrenheit to ensure the connective tissues have broken down.
Step 6: Final Seasoning
Once the meat is tender, remove the lid and let the gravy bubble away for another five minutes if it looks too thin. Taste the gravy. This is the moment to adjust your salt and black pepper. Remove the bay leaf before serving. The sauce should be thick enough to coat the back of a spoon. Serve the beef tips immediately while they are hot.
Mistakes I Made (So You Don't Have To)
Crowding the Pan
When I first started, I used to dump all the meat into the pot at once because I wanted to save time. This was a mistake. When you crowd the pan, the temperature drops rapidly and the meat releases a lot of liquid. Instead of a nice, deep brown crust, the meat turns gray and boiled-looking. The fix is simple: brown in two or three smaller batches. Give each piece enough room to breathe and you will get much better flavor.
Skipping the Flour Sift
I once tried to dump the flour directly into the hot liquid and ended up with pockets of raw, pasty flour in my gravy. It was unappealing and ruined the texture. Now, I always make sure to cook the flour with the onions and fat for a full two minutes before adding any liquid. This creates a roux, which ensures the flour is fully integrated and toasted, resulting in a smooth, thick sauce every single time.
Rushing the Simmer
In my early days, I would try to bump up the heat to get the meat tender faster. This just toughens the fibers of the chuck roast. If the liquid is boiling hard, the meat will never get that melt-in-your-mouth quality. The fix is to keep the heat at a very low, gentle simmer. If you see big bubbles, it is too hot. Keep it at a steady, small bubble to allow the connective tissues to break down into gelatin.
Ignoring the Fond
I used to clean the pot too well between steps. I realized that the brown bits stuck to the bottom of the pot, known as fond, are the secret to a professional-tasting gravy. When I stopped trying to wash them away and started using a wooden spoon to scrape them into the broth, my sauce flavor improved immediately. If you have trouble getting them up, just add a tiny splash of water or broth to help loosen them before you add the onions.
Variations and Tips
Add Some Color
If you want to add some depth to the plate, toss in some sliced carrots or mushrooms during the last thirty minutes of the simmer. Mushrooms work exceptionally well because they soak up the gravy. Just make sure to slice them evenly so they soften without falling apart into the sauce. This adds a little variety to the texture and makes for a more well-rounded meal.
Time-Saving Tip
If you are crunched for time on a weekday, you can sear the beef and prep the base the night before. Store the browned beef and the sautéed onion base separately in the fridge. When you are ready to cook, just combine them in the pot with the broth and start the long simmer. This lets you get the prep work done when you are not rushed, leaving only the cooking time for when you need dinner.
Checking for Doneness
Because chuck roast can vary in toughness, do not rely strictly on the clock. At the two-hour mark, take a piece of meat out and press it with a fork. If it resists, give it another fifteen or thirty minutes. The meat should feel soft and give way with almost no pressure. It is better to go an extra thirty minutes than to serve meat that is still chewy.
Thicker Gravy
If you find your sauce is still a little thin after the full cooking time, you can remove the beef with a slotted spoon and increase the heat to a medium-high simmer for a few minutes. Reducing the liquid will concentrate the flavor and thicken the sauce naturally. Alternatively, you can mix a teaspoon of cornstarch with a tablespoon of cold water and whisk it into the bubbling sauce for a quick fix.
Storage and Reheating
If you have leftovers, let the dish cool down on the counter for no more than an hour before putting it in an airtight container. This helps it cool quickly so it can go into the fridge within two hours. You can keep the leftovers in the refrigerator for up to three days. When you are ready to reheat, use a saucepan on the stove over medium-low heat. Add a splash of water if the gravy has thickened too much in the fridge. Heat until the internal temperature reaches at least 165 degrees Fahrenheit. I do not recommend freezing this dish, as the texture of the meat and the consistency of the gravy can change significantly once thawed. It is always better to enjoy it fresh.
Frequently Asked Questions
Can I use a different cut of beef?
I really recommend sticking with chuck roast. It has the perfect ratio of fat and muscle for this kind of long, slow cooking. Leaner cuts like sirloin or round will dry out and turn tough if you simmer them for two hours. If you absolutely cannot find chuck, look for another fatty cut that is intended for stewing, as these will stand up best to the heat.
What should I serve with this?
Mashed potatoes are a classic for a reason because they soak up that rich onion gravy perfectly. Buttered egg noodles or a piece of crusty bread are also excellent choices. If you want something lighter, a side of roasted green beans or a simple green salad can help balance the richness of the beef and the heavy sauce.
Why is my gravy lumpy?
Lumpy gravy usually happens if you add the cold broth all at once to the flour without whisking enough, or if the flour was not cooked properly with the fat. If you notice lumps, you can strain the sauce through a fine-mesh sieve or give it a quick spin with an immersion blender. In the future, pour the liquid in a very slow stream while whisking the whole time.
How do I know if the beef is done?
The best way is to use a fork to test the resistance of the meat. A properly cooked piece of chuck roast will fall apart into shreds with just a gentle push. If it still feels firm or rubbery, it needs more time. Do not be afraid to let it simmer for another twenty minutes. Cooking it until it is truly tender is the key to this dish.
Can I add wine to the gravy?
A splash of red wine can add a nice acidity to cut through the richness. If you decide to add some, pour it into the pot after you sauté the onions and before you add the flour. Let it simmer for a few minutes until most of the alcohol cooks off and the liquid has reduced by half. It will add a deeper, more complex flavor to the final sauce.
Final Thoughts
Making beef tips at home is a simple process once you understand the rhythm of the pan. It is about patience and letting the ingredients develop their flavor over time. When you pull that pot off the stove and see the rich, dark gravy and the tender meat, you will know the wait was worth it.
Take your time with the browning and the simmering, and do not rush the process. This dish is meant to be a comfort, so let it be a calm part of your cooking routine. I hope you enjoy the process as much as the meal itself.