
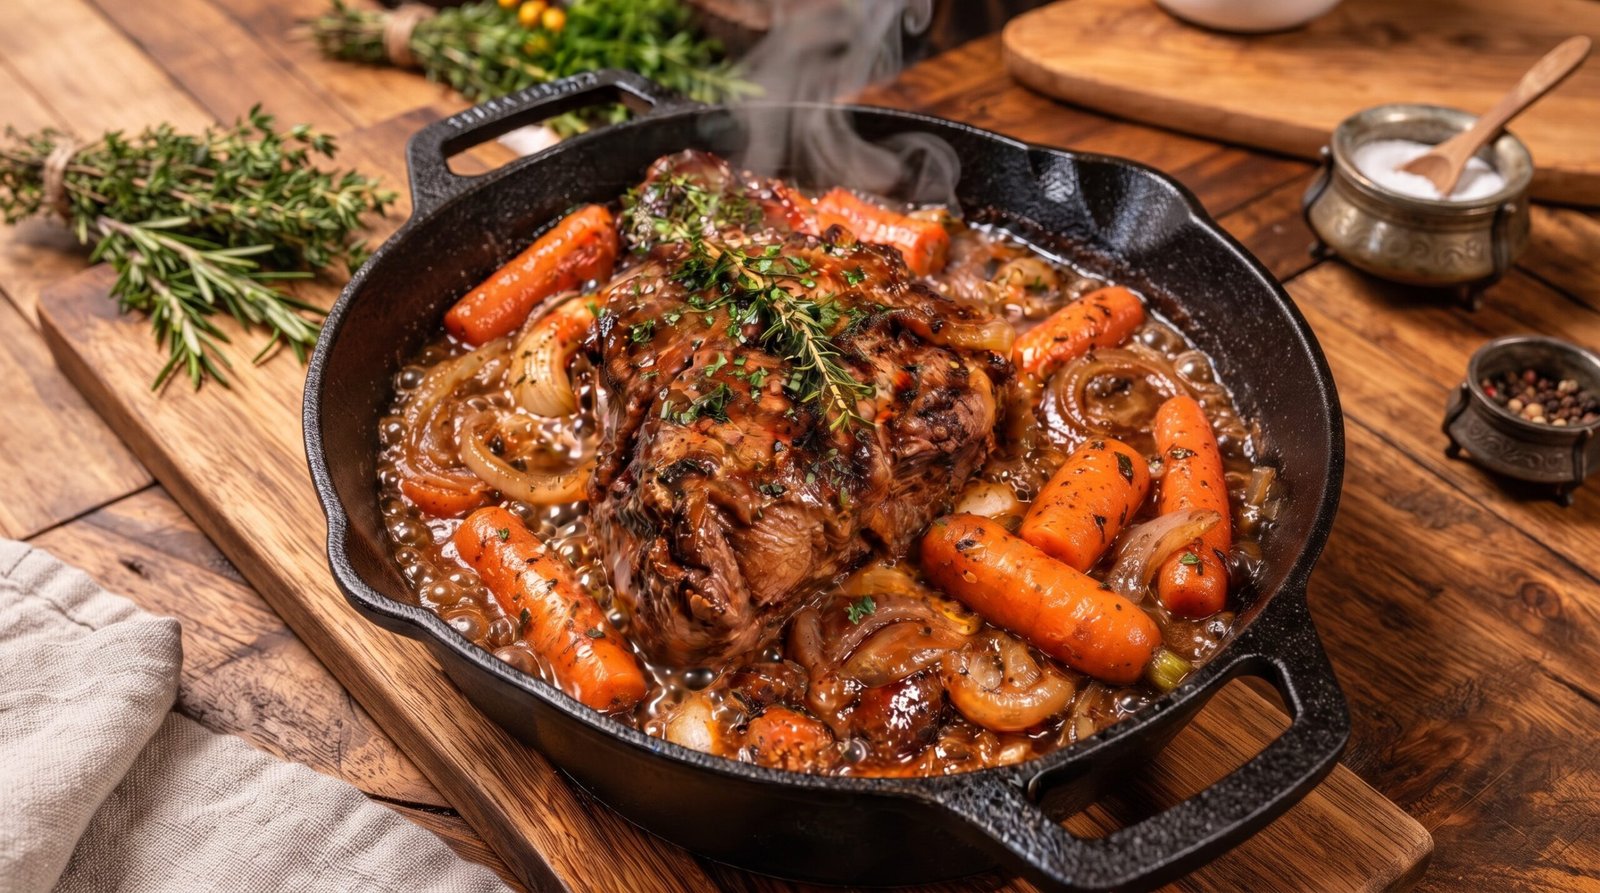
I remember the first time I tried to make a pot roast in my cast iron skillet. I was trying to rush through a Sunday afternoon, hoping to get dinner on the table before my house guests arrived. I grabbed the first cut of meat I saw at the store and tried to cook it at a high heat, thinking that would save me time. The result was a tough, chewy piece of beef that left me feeling pretty discouraged. It took me quite a few attempts to realize that the key to a good braised roast isn't speed, but patience and the right choice of pan. When you treat the beef with care, let it develop a deep color in the heavy skillet, and allow it to simmer low and slow with vegetables, you end up with a meal that feels like a real accomplishment.
This recipe for Cast Iron Skillet Braised Beef Roast with Carrots and Onions is one I go back to whenever I want something satisfying. It works well because the cast iron retains heat so steadily, creating the environment needed for the meat to break down properly. By the time it is finished, you have a tender roast and vegetables that are soft and infused with the pan juices. It is a straightforward meal that requires minimal effort once it is in the oven, leaving you with plenty of time to catch up on chores or relax with a book.
Why This Recipe Works
The success of this dish really comes down to the thermal mass of the cast iron. Unlike thinner pots that might have hot spots, a heavy cast iron skillet keeps the temperature consistent throughout the entire braising process. This is vital for a roast because you want to maintain a low simmer without the liquid boiling away too rapidly. When you sear the meat first, you create a layer of flavor on the bottom of the skillet that incorporates into the liquid. This base adds a depth that you simply cannot get if you skip the browning stage. The fat from the roast renders down slowly as it cooks, enriching the sauce that forms around the onions and carrots.
Another reason this recipe works is the simplicity of the ingredient list. You are relying on the natural flavors of the beef, the sweetness of the carrots, and the savory bite of the onions. There is no need for complicated seasonings or expensive additives. Because you are cooking everything together, the vegetables soak up the juices from the meat as they soften. The onions basically melt into the braising liquid, creating a natural thickener. It is a hearty dish that feels substantial without being greasy. It is very forgiving as well, provided you keep the heat at a steady, low level. If you happen to be a few minutes late checking on it, the worst that usually happens is the vegetables get a little softer, which is honestly how I prefer them anyway. It is a reliable method that gives me consistent results every time I put it on the stove and finish it in the oven.
Ingredient Notes
The Beef
For this dish, you want a cut that has enough connective tissue to break down during the long cooking time. A chuck roast is my go-to choice. It has the right amount of marbling and fat to keep the meat moist while it braises. Avoid lean cuts like sirloin because they will dry out before they become tender. You want to look for a roast that is about 3 to 4 pounds. If the piece is too thin, it will cook too fast and might fall apart into stringy pieces, whereas a block-shaped roast holds its form better.
The Vegetables
The carrots and onions provide the base flavor. I prefer using whole carrots that I peel and cut into large, thick chunks. If you use baby carrots, they tend to get mushy too quickly. The onions should be white or yellow, cut into thick wedges. If you cut them too thin, they will disintegrate completely into the liquid. You want them to stay mostly intact so you can serve them alongside the meat.
The Braising Liquid
I use a mix of beef stock and a small amount of liquid to help deglaze the skillet. You can use a dry red wine, but a splash of balsamic vinegar or just extra stock works if you want to skip the alcohol. If you use wine, let it reduce for a minute or two after pouring it in, ensuring that the sharpness mellows out. Most of the alcohol cooks off during the long simmer, leaving behind just the depth of flavor.
| Ingredient | Amount | Notes |
|---|---|---|
| Chuck Roast | 3-4 pounds | Trim excess surface fat |
| Carrots | 1 pound | Peeled and cut into 2-inch pieces |
| Yellow Onions | 2 large | Cut into thick wedges |
| Beef Stock | 2 cups | Low sodium preferred |
| Fresh Thyme | 4 sprigs | For aromatics |
| Olive Oil | 2 tablespoons | For searing the meat |
| Salt | 1 teaspoon | To season the roast |
| Black Pepper | 1 teaspoon | Freshly ground |
The Recipe
- Prep Time: 15 minutes
- Cook Time: 3 hours
- Total Time: 3 hours 15 minutes
- Servings: 6
- Difficulty: Intermediate
Equipment needed: 12-inch cast iron skillet, tongs, meat thermometer, aluminum foil.
Step-by-Step Instructions
Step 1: Prep the Meat and Vegetables
Start by taking the roast out of the refrigerator about 30 minutes before you plan to cook. This takes the chill off the meat, which helps it cook more evenly. Pat the surface of the roast dry with paper towels. If the meat is wet, it will steam instead of searing when it hits the hot oil. Season all sides generously with salt and pepper. While the meat rests, peel your carrots and cut them into large, uniform chunks. Peel the onions and slice them into thick wedges. Having everything chopped and ready makes the actual cooking process much smoother.
Step 2: Sear the Roast
Place your cast iron skillet over medium-high heat. Add the olive oil and wait until it shimmers. Carefully place the roast into the hot skillet. Let it sear for about 4 to 5 minutes on each side without moving it until a deep brown crust develops. You want that color on all surfaces, including the ends if you can manage it. Once the meat is browned, remove it from the skillet and set it aside on a plate for a moment. Don't worry about the dark bits stuck to the bottom of the pan, as those are full of flavor.
Step 3: Deglaze and Build the Base
Pour about half a cup of the beef stock into the hot skillet. Using a wooden spoon, scrape the bottom of the pan to release the brown bits from the searing step. This is called deglazing, and it is essential for the final sauce. Once the bits are loosened, add the onions and carrots into the liquid. Arrange them in the pan so they form a bed for the roast. Place the roast back into the skillet, resting it right on top of the vegetables. Add the remaining beef stock and the thyme sprigs. The liquid should come about a third of the way up the side of the meat.
Step 4: Braise in the Oven
Preheat your oven to 300 degrees Fahrenheit. Cover the skillet tightly with a piece of aluminum foil, folding it over the edges of the pan to seal it. Place the skillet in the oven. Let it cook for approximately 2.5 to 3 hours. You are looking for the meat to be fork-tender, meaning a fork slides into the center with absolutely no resistance. If the meat still feels firm or rubbery, give it another 30 minutes. Check the internal temperature if you are unsure; it should be around 195 to 205 degrees Fahrenheit for the best texture.
Step 5: Serve and Rest
Remove the skillet from the oven carefully, as it will be very hot. Take off the foil and let the meat rest in the pan for at least 15 minutes before carving. This resting period allows the juices to redistribute through the meat, ensuring it stays moist when you slice it. Serve the roast directly from the skillet, using a large spoon to scoop up the tender vegetables and the flavorful cooking liquid alongside each portion. If the liquid seems too thin, you can place the skillet back on the stovetop over high heat for 5 minutes to reduce it slightly while the meat rests.
Mistakes I Made (So You Don't Have To)
Rushing the Sear
The biggest mistake I made when I first started was not letting the meat sear long enough. I wanted to move on to the simmering part quickly. The problem is that if you don't build that crust, the final result lacks color and deep flavor. If the meat sticks to the pan, just wait a minute. It will naturally release once a good crust has formed. Be patient, as this is the foundation for the entire meal.
Using Too Much Liquid
Early on, I would pour in enough stock to almost cover the roast. The result was more of a boiled beef than a braised roast. A braise should only be partially submerged. If you use too much liquid, the surface of the meat won't get that concentrated flavor from the reduction. Keep the liquid at about one-third the height of the roast. You can always add a splash more if it evaporates too quickly, but you cannot take it out once it is in there.
Skipping the Rest
I used to slice the roast immediately after taking it out of the oven because I was hungry. I quickly learned that this is a mistake. The juices run out onto the board rather than staying inside the meat, which leaves the roast feeling dry. Letting it sit for at least 15 minutes is non-negotiable. It transforms the texture of the beef significantly and makes for a much more pleasant eating experience.
Cutting Vegetables Too Small
I once chopped my onions and carrots into small dice, thinking they would cook faster. By the time the three hours were up, the vegetables were completely mushy and had turned into a dark puree. They need to be cut into large, chunky pieces so they can hold their own over the long cooking time. Keep your carrot chunks at least 2 inches long and your onion wedges quite thick for the best results.
Variations and Tips
Adding Root Vegetables
You can easily add other root vegetables to the pan. Parsnips and potatoes work wonders here. If you use potatoes, make sure they are a waxy variety like Yukon Gold, as they hold their shape better than starchy Russet potatoes during the long braise. Add them at the same time as the carrots and onions.
Fresh Herb Swaps
While I usually stick with thyme, you can experiment with rosemary or bay leaves. Rosemary is quite strong, so just use one small sprig. Bay leaves add a subtle background note that works well with beef. Just remember to remove any woody herb stems or bay leaves before you serve the dish, as they don't have a pleasant texture to chew on.
The Make-Ahead Advantage
This is actually a fantastic meal to make a day in advance. The flavors tend to meld even better after sitting in the refrigerator overnight. When you are ready to eat, just reheat the whole skillet in a 300 degree Fahrenheit oven until the center of the roast is steaming hot. It is a great way to handle a busy weeknight when you don't have time to do the prep work right before dinner.
Checking Doneness
A meat thermometer is your best tool. You want to see an internal temperature between 195 and 205 degrees Fahrenheit. This range ensures that the collagen in the chuck roast has broken down into gelatin, which is what gives the meat that melt-in-your-mouth feel. If it is only at 170 degrees, it will still be tough and stringy. Don't be afraid to leave it in the oven a little longer if it isn't at the right temperature yet.
Storage and Reheating
If you have leftovers, store them in an airtight container in the refrigerator within 2 hours of cooking. This keeps the food safe and prevents the vegetables from soaking up too much of the liquid and breaking down further. You can safely keep this in the refrigerator for up to 3 days. I do not recommend freezing this dish, as the texture of the vegetables suffers greatly when thawed, and the meat can become quite dry.
To reheat, put the slices of meat and the vegetables in a small pan with a splash of beef stock to keep everything moist. Heat it over medium-low heat on the stove, stirring occasionally, until the meat is steaming hot all the way through. It should reach an internal temperature of 165 degrees Fahrenheit. Avoid microwaving the roast, as it tends to heat unevenly and can turn the edges of the meat rubbery.
Frequently Asked Questions
Can I use a different cut of meat if I cannot find a chuck roast?
You can use a brisket or a bottom round roast, but keep in mind that these cuts are leaner than a chuck roast. You might need to add an extra tablespoon of oil to the pan during searing, and you should be extra careful not to overcook them, as they don't have quite as much fat to keep them moist.
Why does my beef still feel tough after three hours?
If the meat is still tough, it usually means it hasn't reached the temperature where the connective tissues break down. Every oven runs slightly differently, so it might just need another 30 to 45 minutes. Continue checking it every 15 minutes with your thermometer until it reaches that 195-205 degree Fahrenheit range.
Do I have to use a cast iron skillet?
The cast iron skillet is the best tool for this because of how well it retains heat, but you can use a heavy-bottomed Dutch oven if that is what you have. Avoid using lightweight stainless steel or aluminum pans for this, as they don't hold the heat well enough to provide a consistent braise.
Can I add mushrooms to this recipe?
Mushrooms are a great addition. If you want to include them, I recommend adding them during the last hour of cooking. If you add them at the beginning, they will release too much water and might disintegrate completely. Adding them later ensures they have a nice texture while still absorbing the savory pan juices.
How do I know if the beef is safe to eat?
By cooking the roast to an internal temperature of 195 to 205 degrees Fahrenheit, you are well beyond the food-safe standard for beef, which is 145 degrees. At this higher temperature, the connective tissues break down, which is exactly what you want for a tender roast. Always verify the temperature with a probe thermometer to be sure.
Final Thoughts
Making a braised roast has become one of my favorite ways to spend a quiet evening. There is something very satisfying about the process of searing the meat and then letting the oven do the rest of the work. The house starts to smell wonderful, and by the time you are ready to eat, you have a complete meal in one pan.
This recipe is simple, but it relies on treating the ingredients with respect. Don't rush the sear, give the meat time to cook, and always let it rest before slicing. When you get those steps right, the result is a hearty dinner that I think you will want to make over and over again.