
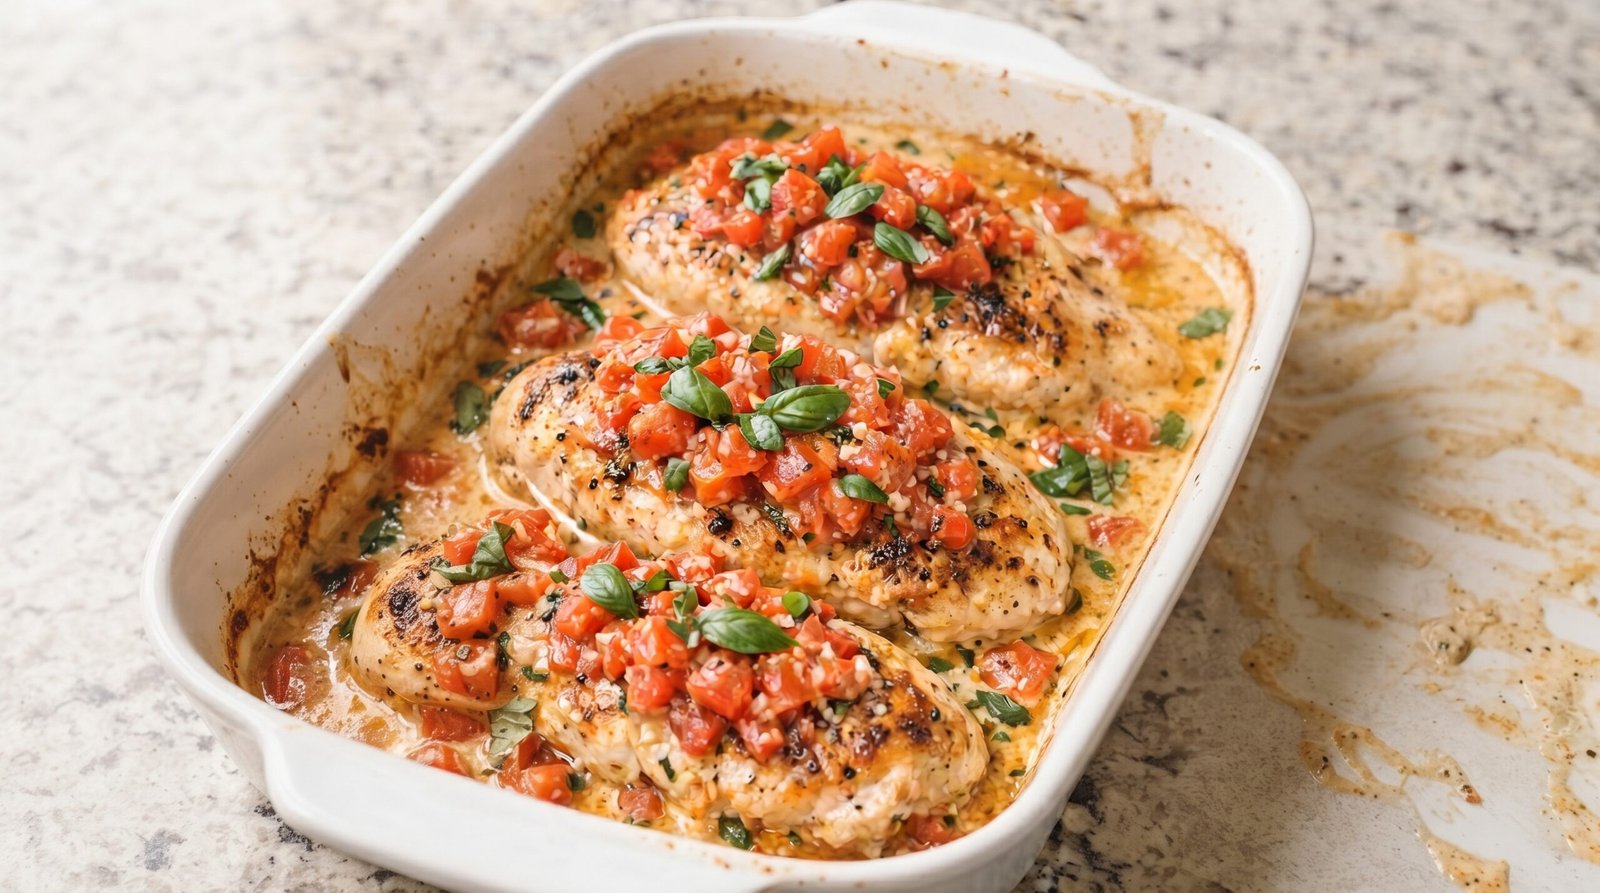
I used to struggle with dry chicken breasts that tasted like cardboard. It seemed like no matter what I did, by the time the center was cooked, the outside was tough and rubbery. This frustration led me to experiment with baking chicken in a creamy sauce, which keeps the meat moist from start to finish. When you pair that juicy chicken with a topping of fresh, acidic tomatoes and fragrant basil, you get a balanced meal that feels like it took hours to put together, even when you are rushing through a busy Tuesday evening.
This Creamy Tomato Basil Baked Chicken has become my go-to when I want something satisfying that does not require standing over a hot stove for long. You prepare the sauce, sear the meat, and let the oven take care of the rest. It is a reliable way to make sure dinner hits the table on time without any stress. In this guide, I will share the exact process I use to get the best texture and flavor every single time you prepare it.
Why This Recipe Works
The primary reason this method succeeds is the combination of fat and acidity. Cream-based sauces are excellent for insulating poultry during the baking process. When you submerge or coat the chicken in a mixture involving cream, you create a barrier that slows down moisture loss. The chicken remains tender throughout the cooking process. The fat in the heavy cream also carries flavor, ensuring every bite feels substantial.
The acidic profile provided by the tomatoes is crucial. Without the brightness of fresh tomatoes, a cream sauce can feel heavy or one-note. The tomatoes break down slightly in the heat, releasing their juices into the cream, which creates a complex flavor profile that balances the richness. The fresh basil added at the very end provides a peppery, herbal finish that lifts the entire dish.
Ease of preparation is another benefit. You use one skillet for searing and then move everything to a baking dish, or you can use an oven-safe skillet to keep cleanup even simpler. The actual hands-on time is low. Once the chicken is in the oven, you have twenty minutes to clean up, prepare a side dish, or simply sit down for a moment before serving. The technique is forgiving enough that you do not need to be a professional to achieve great results.
Consistency is a key factor here. By searing the chicken breasts first, you create a golden-brown surface that adds depth to the overall dish. The oven does the rest of the work at a steady temperature. Because the chicken is cooked in a bath of sauce, the margin for error is wider than if you were roasting the chicken dry. You get a consistent outcome every time you decide to make this meal for yourself or your family.
Ingredient Notes
The Poultry
You want to use boneless, skinless chicken breasts for this recipe. If your chicken breasts are very thick on one side and thin on the other, take a moment to pound them to an even thickness. This ensures that the entire piece cooks through at the same rate. You do not want one end of the chicken to be dry while the other end is still raw.
The Creamy Sauce
For the sauce, I recommend using heavy cream. It has the right amount of fat content to remain stable at high temperatures without curdling. If you try to use milk or half-and-half, the sauce might break or appear watery rather than thick and luscious. You will also need a bit of garlic and seasoning to ensure the base of the sauce has character before it even touches the oven.
The Topping
Fresh tomatoes are essential. Avoid using canned diced tomatoes here, as they often come with added salt and citric acid that can clash with the fresh basil. Use a firm, ripe tomato that you chop into uniform pieces. Roma tomatoes work particularly well because they have less water content and a more concentrated flavor. The basil should be added fresh, preferably torn by hand right before serving, to keep its aroma sharp.
| Ingredient | Amount | Notes |
|---|---|---|
| Chicken Breasts | 4 pieces | Boneless and skinless |
| Heavy Cream | 1.5 cups | Full fat is best |
| Roma Tomatoes | 4 medium | Finely diced |
| Fresh Garlic | 3 cloves | Minced finely |
| Fresh Basil | 0.5 cup | Torn leaves |
| Olive Oil | 2 tablespoons | For searing |
| Salt and Pepper | To taste | Use kosher salt |
| Parmesan Cheese | 0.5 cup | Freshly grated |
The Recipe
- Prep Time: 15 minutes
- Cook Time: 25 minutes
- Total Time: 40 minutes
- Servings: 4
- Difficulty: Easy
Equipment:
– Large oven-safe skillet or a 9×13 inch baking dish
– Meat thermometer
– Chef knife
– Cutting board
– Whisk
Step-by-Step Instructions
Step 1: Prepare the Chicken and Seasoning
Start by preheating your oven to 375 degrees Fahrenheit. While the oven heats up, take your chicken breasts and pat them dry with paper towels. Removing the surface moisture is important because it allows the chicken to develop a better color in the skillet. If the chicken is wet, it will steam instead of brown.
Season both sides of the chicken generously with salt and pepper. I prefer using freshly cracked black pepper for a better bite. Once seasoned, let the chicken sit for about five minutes while you gather the rest of your ingredients. This allows the salt to penetrate the surface of the meat slightly, which helps with overall seasoning.
Step 2: Sear the Chicken Breasts
Heat two tablespoons of olive oil in a large skillet over medium-high heat. You want the oil to be shimmering, which indicates it is ready for the meat. Place the chicken breasts in the skillet. Do not crowd the pan; if your skillet is too small, work in two batches. You are not trying to cook the chicken all the way through right now.
Cook the chicken for three to four minutes on each side until it develops a nice golden-brown color. You will notice the edges starting to firm up. Once the surface looks browned, remove the chicken from the skillet and set it aside on a plate for a moment. It should look appealing and lightly toasted, but it will still be raw in the middle.
Step 3: Create the Creamy Base
In the same skillet that you used to sear the chicken, reduce the heat to medium. You will see some browned bits stuck to the bottom of the pan. Leave those there, as they are packed with flavor. Add the minced garlic and sauté it for about sixty seconds until it becomes fragrant. Be careful not to let the garlic brown too much, as it can turn bitter.
Pour in the heavy cream and use a whisk or a wooden spoon to scrape up the bits from the bottom of the pan. Bring the cream to a gentle simmer. Do not let it boil vigorously, as that can make the cream separate. Once it is simmering, stir in half of your Parmesan cheese until it melts and the sauce thickens slightly. Remove the pan from the heat.
Step 4: Assemble the Dish
If you are using an oven-safe skillet, simply nestle the browned chicken back into the cream sauce. If you are using a separate baking dish, pour the cream sauce into the dish first, then place the chicken breasts on top of the sauce. The sauce should come up about halfway on the sides of the chicken.
Take your diced tomatoes and spread them evenly over the top of each chicken breast. Sprinkle the remaining Parmesan cheese over the tomatoes. This creates a crust that will brown slightly in the oven while locking in the moisture of the tomatoes.
Step 5: Bake to Perfection
Place your dish into the center rack of your preheated oven. Bake for 18 to 20 minutes. You want the sauce to be bubbling and the chicken to reach an internal temperature of 165 degrees Fahrenheit. Use a meat thermometer inserted into the thickest part of the largest breast to verify this.
When you take the dish out of the oven, the tomatoes should look soft and wilted, and the cream sauce should have thickened around the chicken. If the sauce is still too thin, you can let it rest for five minutes, and it will naturally set a bit more.
Step 6: Final Touch and Serve
Immediately after taking the dish out of the oven, scatter the fresh, torn basil leaves over the top. The residual heat from the dish will release the oils in the basil, creating a wonderful scent. Do not add the basil before baking, as the leaves will turn black and lose their flavor in the high heat of the oven. Serve the chicken while it is hot, spooning extra cream sauce from the pan over each piece.
Mistakes I Made (So You Don't Have To)
Overcrowding the Skillet
Early on, I tried to fit all four chicken breasts into a small pan at once to save time. The result was that the chicken boiled in its own juices instead of browning. The surface remained pale and soft, which ruined the texture of the finished dish. The fix is simple: use a large enough skillet to give the chicken room to breathe, or cook in batches.
Adding Basil Too Early
I used to chop the basil and add it to the sauce before baking, thinking it would infuse the flavor better. However, the oven heat completely destroys the delicate volatile oils in the basil. It ended up tasting like cooked grass rather than fresh herbs. Now, I always wait until the very last second, right before serving, to toss the fresh basil on top.
Using Cold Chicken
Putting cold chicken straight from the refrigerator into a hot skillet is a common mistake. The sudden temperature drop prevents the surface from browning properly. I now take the chicken out of the fridge at least fifteen minutes before I start cooking to let the chill dissipate. This small habit makes a big difference in the final color of the meat.
Overcooking the Chicken
For years, I thought I had to cook chicken until it felt firm to the touch to ensure it was safe. This led to dry, stringy meat that was hard to swallow. Once I started using a meat thermometer, my chicken results improved significantly. Pulling the meat at exactly 165 degrees Fahrenheit is the only way to ensure it remains juicy and tender.
Variations and Tips
Adding a Splash of White Wine
If you want a deeper flavor profile, deglaze the skillet with a splash of dry white wine after you sauté the garlic but before you add the cream. Let the wine simmer for two minutes until it reduces by half. This adds a subtle acidity that cuts through the richness of the heavy cream beautifully.
Make-Ahead Strategy
You can prepare the sauce and sear the chicken in the morning. Keep them in separate containers in the refrigerator. When it is time to eat, assemble the dish in your baking pan and bake it for about 25 minutes. Since the ingredients will be starting from a cold temperature, the bake time will be slightly longer than if you had prepared it fresh, so always check with your thermometer.
Customizing the Topping
While tomatoes are the star, you can add thin slices of bell peppers or even some chopped sun-dried tomatoes to the topping for a more intense flavor. Just ensure whatever you add is cut small enough to cook through in the twenty minutes the chicken spends in the oven.
Serving Suggestions
This dish is rich, so I usually pair it with something simple to soak up the sauce. A side of roasted asparagus or a light green salad with a sharp vinaigrette helps balance the creamy nature of the chicken. If you want something more substantial, a side of crusty bread or pasta works perfectly to ensure none of that sauce goes to waste.
Storage and Reheating
If you have leftovers, they can be stored safely in the refrigerator for up to three days. Place the chicken and the sauce in an airtight container as soon as it has cooled down to room temperature. Do not leave the dish sitting on the counter for more than two hours after cooking, as the cream in the sauce makes it prone to bacterial growth.
When you are ready to reheat, the best method is to use a pan on the stove over low heat. Add a tiny splash of water or milk to loosen the sauce, as it will have thickened significantly in the fridge. Stir gently until the sauce is smooth and the chicken is heated through to 165 degrees Fahrenheit. I do not recommend freezing this dish. The texture of the heavy cream tends to become grainy and separates when frozen and thawed, and the tomatoes release too much water, making the sauce watery and unappealing.
Frequently Asked Questions
Can I use chicken thighs instead of breasts?
Yes, chicken thighs work very well and are often more forgiving because they have a higher fat content. They take slightly longer to cook, usually closer to 25 to 30 minutes in the oven. Just make sure to use a thermometer to ensure they are fully cooked through, as bone-in thighs will require a longer time than boneless ones.
What if I do not have an oven-safe skillet?
That is not a problem at all. You can do all your searing and sauce preparation in a regular frying pan, and then transfer the contents into a standard glass or ceramic baking dish for the oven stage. Just ensure you scrape every bit of the sauce into the baking dish so you do not lose any of that flavor.
Is it necessary to use heavy cream?
Heavy cream provides the best texture and stability. If you must substitute, full-fat coconut milk can work, though it will change the flavor profile significantly. Avoid low-fat milk or half-and-half, as they will likely curdle when exposed to the heat of the oven, leaving you with a grainy, separated sauce that looks unappealing.
How do I know if my tomatoes are ripe enough?
Look for tomatoes that have a slight give when you press on them gently. They should smell slightly sweet and aromatic near the stem. If the tomatoes feel rock-hard or have no scent, they are likely under-ripe and will be bland when baked. If you can only find under-ripe tomatoes, sprinkle them with a pinch of sugar to help draw out their natural sweetness.
Why did my sauce break or look oily?
This usually happens if the heat was too high when adding the cream or if the pan was too hot when you put the chicken into the oven. Ensure you maintain a gentle simmer and do not let the cream boil rapidly. If the sauce does look slightly oily, a quick whisk before serving can often bring it back together before you pour it over the chicken.
Final Thoughts
Making this Creamy Tomato Basil Baked Chicken is a simple way to bring a restaurant-quality meal into your own kitchen. The process is straightforward, focusing on basic techniques like searing and controlled baking to get the best out of your ingredients. By paying attention to the temperature of your chicken and using fresh basil at the end, you ensure a meal that tastes vibrant and fresh.
I hope you find this recipe as reliable as I do for those times when you need a dependable dinner option. It is a dish that does not require fancy equipment or long hours of preparation, yet it delivers a level of comfort that is hard to beat. Once you get the hang of the timing, you can easily adapt it with your own favorite seasonings to make it your own.