
Introduction: When a Big Family Dinner Goes Completely Sideways
Let me take you back to a chaotic Saturday evening a few months ago. My extended family decided to drop by unexpectedly—about six adults and a couple of teenagers with bottomless appetites. I wanted to look like a culinary superstar without spending three hours sweating over a stove.
So, what did I do? I panicked, grabbed a giant side of salmon and a bag of frozen shrimp from the freezer, dumped them into a disposable aluminum roasting pan, and threw a mountain of cold butter and minced garlic on top. I figured, Hey, butter and seafood always work together, right?
Forty minutes later, my kitchen smelled like a burning seafood shack.
When I pulled that pan out of the oven, the disaster was complete. The salmon was completely dried out and chalky on the edges, the shrimp were shriveled up into tiny, rubbery question marks, and the butter had completely separated into an ugly, greasy yellow puddle that pooled at the bottom of the pan without actually flavoring anything.
My brother took one polite bite, chewed slowly, and asked if we had any frozen pizza in the garage. Talk about humbling!
That kitchen catastrophe bruised my ego, but it also sparked an obsession. I spent the next few weeks testing, tweaking, and completely redesigning how to bake salmon and shrimp together in a single pan without ruining either one.
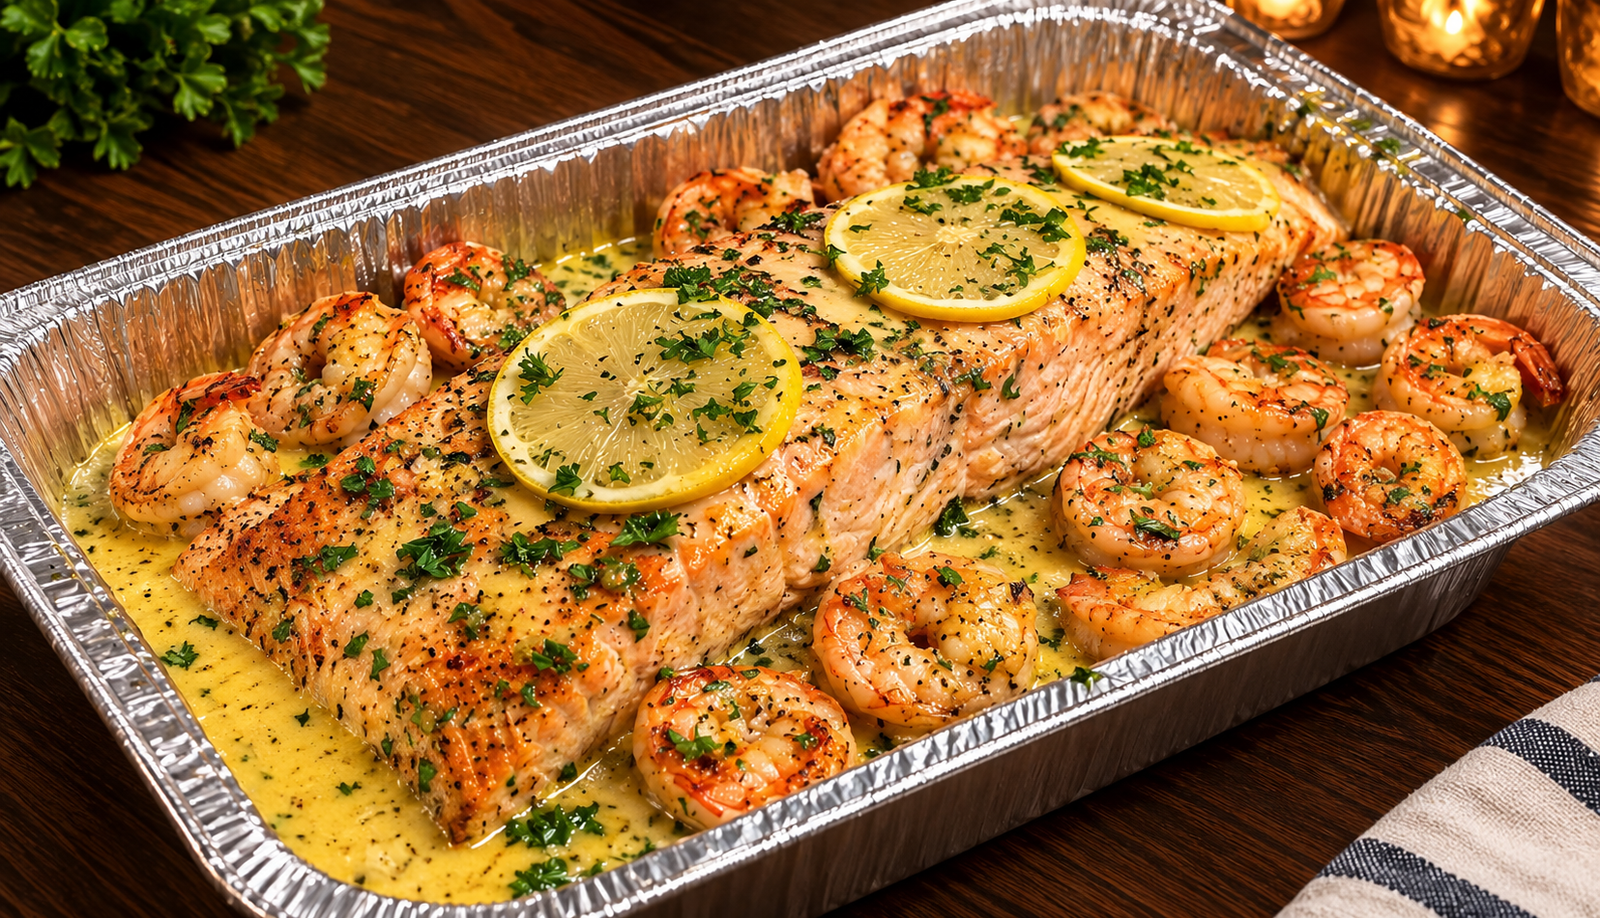
Today, I’m sharing the glorious result of that journey: my absolute favorite Garlic Butter Baked Salmon and Shrimp with Lemon Cream Sauce. It looks like a high-end restaurant feast, it comes together in one pan, and once you know the secret steps, it is completely foolproof. Grab an apron and a wooden spoon—let’s dive in.
The Reality Check: Why Cooking Fish and Shellfish Together is a Trap
Before we get to the fun part of cooking, we need to talk about why combining salmon and shrimp in a single baking dish can easily turn into a culinary minefield.
Have you ever tried baking different seafoods at the same time, only to discover that by the time the thick center of your salmon is cooked through, your shrimp have turned into rubber? Or worse, did your garlic burn into a bitter, black paste while the fish was still raw in the middle?
I made every single one of those mistakes so you don’t have to repeat them. Here are the three golden rules I learned the hard way:
- Size matters tremendously. A massive side of salmon takes anywhere from 15 to 20 minutes to bake properly, while medium shrimp can cook through in as little as 6 to 8 minutes. If you throw them in at the exact same second, your shrimp will overcook and turn chewy long before the salmon is done.
- Never use raw, minced jarred garlic on high heat. Jarred garlic is packed with preservatives and liquid that causes it to scorch and turn bitter in a hot oven. Fresh cloves, roughly chopped or minced just before cooking, make all the difference in a rich butter sauce.
- Control your fats. If you just dump cold butter over raw fish, it separates as it melts, leaving you with an oily slick rather than a smooth, emulsified pan sauce. We want a rich, velvety sauce that coats every single bite.
With those hard-earned lessons tucked under our aprons, let’s look at what you need to stock your kitchen counter with.
The Ingredient List
For a meal that looks like an expensive coastal restaurant dinner, the ingredient list is surprisingly straightforward. You can find everything easily at your local grocery store or fish market.
| Category | Item | Quantity / Notes |
| The Seafood | Salmon Side (or large fillets) | 1 large side of salmon (about 2 to 2.5 lbs), skin-on. Look for a thick, even cut. |
| Large Shrimp | 1 lb, peeled and deveined (tails on look nicer for presentation). Fresh or fully thawed. | |
| The Garlic Butter Sauce | Unsalted Butter | 1/2 cup (1 stick), melted. Unsalted lets you control the sodium balance. |
| Olive Oil | 2 tablespoons. Helps balance the butter and raises the smoke point slightly. | |
| Fresh Garlic | 5 cloves, minced fresh. (Do not skip fresh garlic here!) | |
| Fresh Lemons | 2 whole lemons. One sliced into rounds to lay across the fish, and one juiced. | |
| Herbs & Seasoning | Fresh Parsley | 3 tablespoons, finely chopped, for a bright pop of green and fresh flavor at the end. |
| Old Bay Seasoning (or Cajun seasoning) | 1 teaspoon. Adds a subtle, savory kick that elevates the seafood. | |
| Italian Seasoning & Smoked Paprika | 1 tsp Italian seasoning + 1/2 tsp smoked paprika for that gorgeous golden color. | |
| Kosher Salt & Black Pepper | To taste. |
Step-by-Step Guidance: Building Your Masterpiece
Ready to get to work? Make sure you have a large baking dish or a sturdy aluminum roasting pan ready (similar to the one in our reference image). Let’s walk through the process step by step.
Step 1: Prep the Salmon and Pan
- Bring to Room Temp: Take your salmon side out of the fridge about 15 minutes before cooking. Ice-cold fish hitting a hot oven will seize up and cook unevenly.
- Pat Dry: Grab a roll of paper towels and pat every inch of the salmon and your shrimp until they are completely dry. Moisture is the enemy of a good sear and clean flavor.
- Position the Salmon: Lightly grease your baking dish with a splash of olive oil or butter. Place your large side of salmon right down the center of the pan, skin-side down.
Step 2: Mix the Garlic Butter Elixir
- In a medium glass bowl, combine your melted unsalted butter and 2 tablespoons of olive oil.
- Whisk in your freshly minced garlic, the juice of one whole lemon, Old Bay seasoning, Italian seasoning, smoked paprika, kosher salt, and black pepper.
- Whisk vigorously until the mixture emulsifies slightly into a fragrant, golden sauce.
Step 3: Staggered Baking for Perfect Seafood
- Preheat your oven to 400°F (200°C).
- Pour about two-thirds of your garlic butter mixture evenly all over the top of the large salmon side, making sure it coats the flesh nicely. Arrange your fresh lemon slices in a neat row down the center of the salmon.
- The Timing Trick: Because shrimp cooks much faster than a large side of salmon, do not put the shrimp in at the very beginning! Bake the salmon by itself for about 8 minutes first.
- After 8 minutes, open the oven, pull the rack out slightly, and arrange your raw, peeled shrimp all around the outer edges of the baking pan in the pooling butter sauce. Pour the remaining garlic butter sauce directly over the shrimp.
- Return the pan to the oven and bake for an additional 7 to 9 minutes, or until the salmon flakes easily with a fork and the shrimp have turned completely pink, opaque, and curl into tight “C” shapes.
Step 4: The Broil and Final Flourish
- If you want that gorgeous, golden-brown caramelized top on your salmon and shrimp, switch your oven to Broil on high for the final 1 to 2 minutes. Watch it closely so it doesn’t burn!
- Pull the pan out of the oven. Immediately scatter your freshly chopped parsley all over the salmon, shrimp, and bubbling pan sauce.
- Let it rest for 3 to 5 minutes before serving so the juices redistribute through the fish.
Real Examples, Use Cases, and Life Lessons
Even seasoned home cooks run into roadblocks. Here are a few practical scenarios and common traps to keep in mind so your dinner goes off without a hitch:
- The Overcooked Shrimp Trap: The biggest mistake people make when cooking seafood platters is leaving the shrimp in the oven for the entire duration of the salmon’s cook time. If shrimp bakes for 20 minutes, it turns into rubber bands. Staggering the cooking time—adding the shrimp halfway through—guarantees that both the salmon and the shrimp reach perfection at the exact same moment.
- Choosing the Right Pan: A sturdy metal baking pan or a large glass casserole dish works wonderfully. If you use a disposable aluminum pan like the one in our reference photo, make sure you place it on top of a solid baking sheet for stability when carrying it in and out of a hot oven. There is nothing worse than spilling hot garlic butter all over your kitchen floor!
- Leftovers and Reheating: Seafood is best eaten fresh, but if you have leftovers, do not microwave them on high power. Microwaving seafood on high will make the shrimp tough and release a harsh fishy odor. Instead, place the leftovers in a small skillet over low heat with a splash of chicken broth or water, cover with a lid, and warm gently for 3 to 4 minutes.
As for serving suggestions? Serve this stunning dish right out of the pan family-style, or slice the salmon into gorgeous portions and plate them alongside the garlic butter shrimp. Spoon that rich lemon-garlic pan sauce generously over the top. It pairs brilliantly with a bed of garlic butter pasta, roasted baby potatoes, or steamed asparagus.
Common Mistakes to Avoid Summary
To ensure your Garlic Butter Baked Salmon and Shrimp turns out tender, flavorful, and stunning on your very first try, keep these quick checkpoints handy:
- Don’t crowd the shrimp: Give the shrimp enough space around the edges of the pan so they roast in the butter rather than steaming on top of each other.
- Don’t skip the pat-down: Always dry your salmon and shrimp thoroughly with paper towels before adding butter and seasonings.
- Don’t over-bake: Keep a close eye on the clock. Seafood cooks rapidly, and pulling it out just a minute early ensures it stays juicy and tender.
Final Thoughts
That chaotic family dinner disaster feels like a lifetime ago now. Making an incredible, restaurant-quality seafood feast at home isn’t about being a professional chef; it’s about respecting your ingredients, managing your cooking times, and learning how flavors and fats interact in the oven.
Next time you have guests over, or you just want to treat your family to something special on a weekend, skip the crowded restaurant waitlists and spend 25 minutes making this Garlic Butter Baked Salmon and Shrimp.
Take your time, stagger your cooking times for the shrimp, and enjoy every single flaky, buttery bite. Happy cooking!