
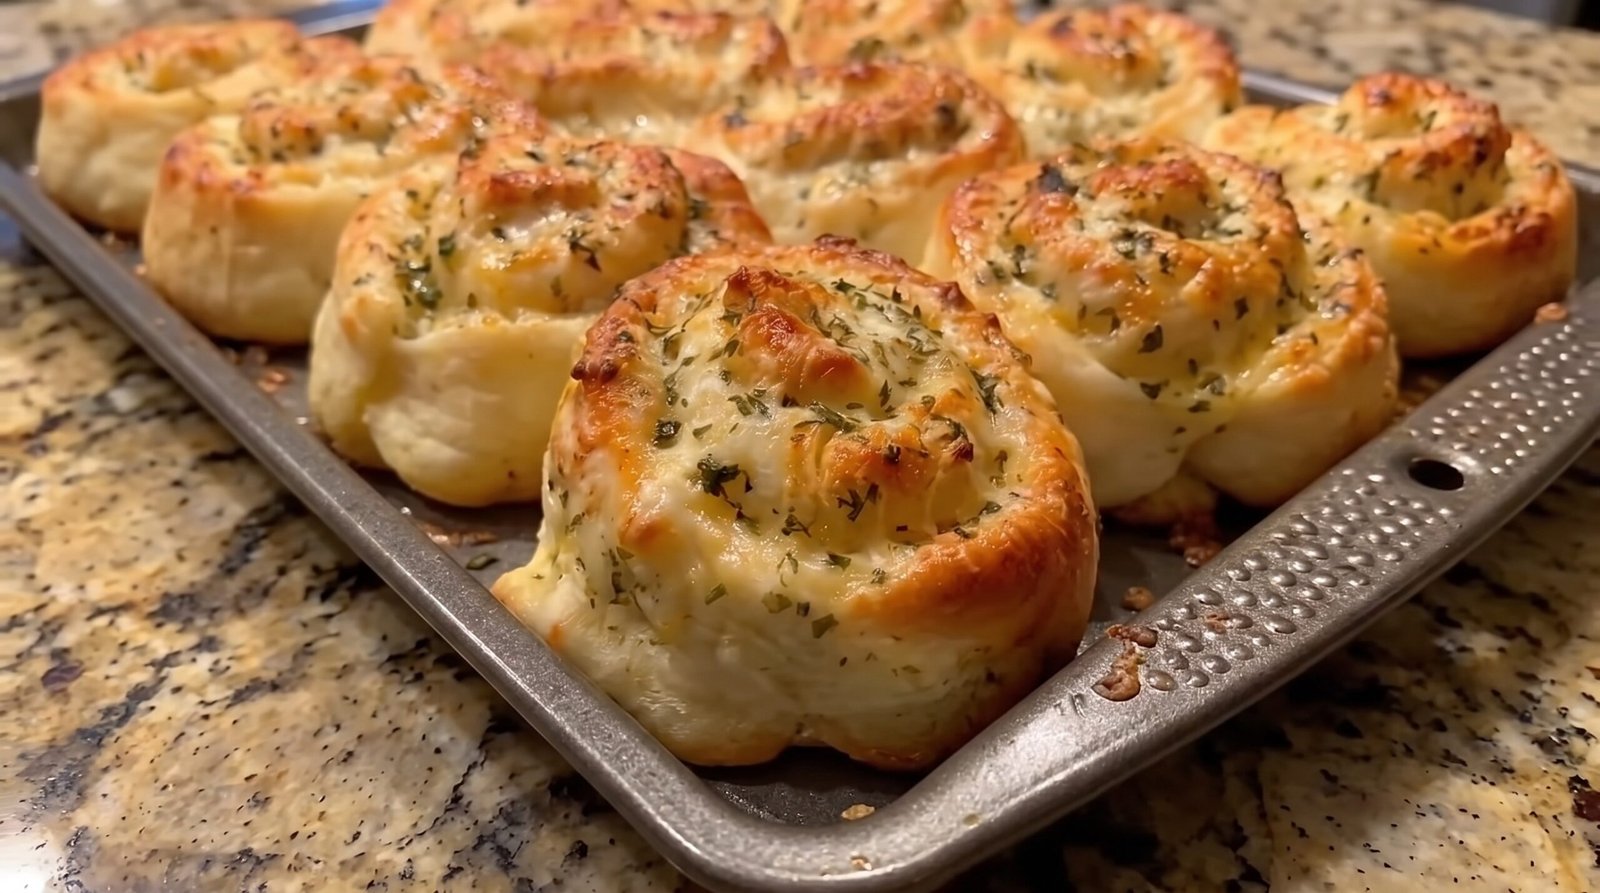
It is five o’clock on a Friday evening, and I have absolutely nothing planned for the guests arriving in an hour. The fridge is looking a bit sparse, aside from a block of cheese and a stray tube of crescent dough I bought for a different project last week. We have all been there, pacing the kitchen floor, trying to figure out how to put something warm and savory on the table without spending three hours prepping. I find that when I am in a bind, reaching for simple pantry and fridge staples is the most reliable way to get a crowd-pleasing snack onto a plate. These garlic herb cheese pinwheels are my go-to solution for these moments because they rely on flavors everyone already loves.
When I first started playing around with this recipe, I realized that the secret is all in the ratio of the garlic butter to the cheese. You want enough to make the dough rich and flavorful, but not so much that it leaks out into the pan and turns into a greasy mess. By layering, rolling, and slicing, you end up with individual bites that have a soft, pull-apart texture. These pinwheels are something you can throw together while you are chatting with friends or helping the kids with homework. You will find that these become a permanent fixture in your rotation for busy weekends or last-minute hangouts, especially when you need something savory to tide everyone over until dinner.
Why This Recipe Works
The beauty of these pinwheels lies in the contrast between the tender dough and the gooey, melted cheese filling. Because the crescent dough is pre-leavened, it puffs up in the heat, creating soft layers that hold onto the garlic butter. It is a straightforward process that does not require fancy equipment or hours of waiting for dough to rise. The combination of garlic and herbs is a classic pairing that provides a strong savory profile without needing complex spices or exotic ingredients.
The texture is another reason I keep coming back to these. The bottom edges of the pinwheels crisp up slightly against the metal baking pan, giving you a tiny bit of chew that contrasts well with the soft, molten center. Since you are using a base that is naturally buttery, the dough stays moist even if it gets a little bit darker in the oven. It is a very forgiving dish. If you miss an edge or the roll is not perfectly tight, the cheese and herbs still do their work, filling in the gaps and making everything taste like it took a lot more effort than it actually did.
Ease of preparation is perhaps the biggest factor. I can prep the entire tray in under ten minutes, and the actual baking time is short. This means I am not tied to the kitchen for the whole afternoon. I can slide the pan in, set a timer, and go back to my guests. The visual appeal of the spiral pattern also makes them look like they came from a bakery, even though they are just simple ingredients combined in a standard pan. It is a win-win for someone who wants to serve something attractive without the stress of complicated baking techniques or time-consuming assembly.
Ingredient Notes
The Dough Base
The most important part of this recipe is the crescent roll dough. You can find this in the refrigerated section of almost any grocery store. I prefer the standard variety rather than the reduced-fat versions, as the higher fat content helps the dough stay soft and creates that signature buttery flavor. If you cannot find the tube dough, you can use store-bought pizza dough, but you will need to roll it out thinner to ensure it cooks through in the middle without burning the edges. Always check your product labels if you have specific dietary concerns, as these doughs often contain common allergens like wheat or milk.
The Filling
For the cheese, I stick to a mix of mozzarella and parmesan. Mozzarella is vital because it melts into those long, gooey strings that everyone expects in a warm appetizer. I always shred my own mozzarella from a block, as the pre-shredded bags are coated in cellulose to keep them from clumping, which prevents the cheese from melting together as nicely. The parmesan adds a punch of saltiness and a bit of a bite that cuts through the richness of the dough. You can swap in other cheeses, like provolone or gruyere, if you want a sharper profile, but keep the ratio similar to ensure everything melts at the same speed.
The Garlic Herb Butter
This is the heart of the flavor. I use high-quality salted butter, melted down with plenty of minced garlic. Since the garlic is going to be rolled inside the dough, it softens as it cooks, losing its sharp, raw edge and becoming sweet and aromatic. For the herbs, I prefer a mix of dried parsley and dried oregano. Dried herbs are easier to keep on hand and their flavor is more concentrated, which is perfect for this kind of quick baking. If you are using fresh herbs, double the amount, but make sure they are very finely chopped so they do not create pockets of moisture in your rolls.
| Ingredient | Amount | Notes |
|---|---|---|
| Crescent roll dough | 1 tube (8 oz) | Keep chilled until ready to use |
| Mozzarella cheese | 1.5 cups | Shredded from a block |
| Parmesan cheese | 0.5 cups | Grated fine |
| Salted butter | 3 tablespoons | Melted |
| Garlic | 3 cloves | Minced very fine |
| Dried parsley | 1 tablespoon | For flavor and color |
| Dried oregano | 0.5 teaspoons | For an earthy aroma |
The Recipe
- Prep Time: 10 minutes
- Cook Time: 15 minutes
- Total Time: 25 minutes
- Servings: 8 pinwheels
- Difficulty: Simple
Equipment:
– Baking sheet or rectangular baking pan
– Small bowl for mixing butter and herbs
– Serrated knife for clean cuts
– Pastry brush
– Grater for the cheese
Step-by-Step Instructions
Step 1: Prep the Oven and Pan
Start by preheating your oven to 375 degrees Fahrenheit. It is important to let the oven come fully up to temperature before you put the tray in, otherwise the dough will not puff up properly and the cheese will start to leak before the bread is done. While the oven is heating, lightly grease your baking pan with a tiny bit of butter or non-stick spray. You do not need much, just enough to ensure the bottoms of the pinwheels do not stick once the cheese starts to brown.
Step 2: Combine the Flavor Base
In a small bowl, whisk together the melted butter, minced garlic, dried parsley, and dried oregano. Make sure the garlic is minced very fine so it distributes evenly across the dough. You want a consistent flavor in every bite. If the butter starts to solidify while you are working, just pop the bowl in the microwave for five seconds to keep it liquid and easy to brush.
Step 3: Layering the Ingredients
Lay the crescent dough out on a flat surface. If your dough is perforated into triangles, press the seams together with your fingers to form one solid rectangle. You want a smooth, flat surface to work with. Brush the butter mixture all over the dough, making sure to get right up to the edges. Sprinkle the shredded mozzarella and grated parmesan evenly over the buttered surface. Do not overload the dough, or it will be impossible to roll up without the filling sliding out the sides.
Step 4: Rolling and Cutting
Starting from one of the long edges, roll the dough up tightly like a log. Take your time here to ensure the roll stays uniform. Once you have a nice log, use a serrated knife to cut the dough into eight even slices. Using a serrated knife is important because it cuts through the dough without squishing the layers. If the slices look a bit messy, just use your fingers to reshape them back into circles before placing them into the prepared pan.
Step 5: Baking to Perfection
Arrange the slices in the pan, making sure they are not touching each other too tightly so the air can circulate around them. Place the pan in the center rack of your oven and bake for 15 minutes. You are looking for a deep golden brown color on the edges of the dough and bubbling, slightly browned cheese on top. The kitchen should smell strongly of garlic and toasted herbs. Remove the pan from the oven and let them rest for at least five minutes before serving so the cheese can set.
Mistakes I Made (So You Don't Have To)
Overstuffing the Rolls
One of the first times I made these, I thought more cheese was better, so I piled it on. The result was a disaster because the cheese melted faster than the dough could cook, creating a massive puddle of grease at the bottom of the pan. The rolls did not hold their shape and were difficult to pull apart. Now, I keep the cheese to a thin, even layer. It provides enough flavor to satisfy, but keeps the structural integrity of the roll intact, giving you those clean pinwheel spirals we all want.
Forgetting to Seal the Seams
I once left the seams of the crescent dough open because I was in a rush. When I tried to roll the log, the dough kept separating, which made the rolls fall apart as I tried to slice them. It was very frustrating. Now, I make sure to firmly pinch those seams together before I even think about adding the butter. It creates a sturdy base that makes the rolling process go much smoother. A few extra seconds of pinching at the beginning saves a lot of time on cleanup later.
Cutting Before Resting
I used to pull these out of the oven and try to serve them immediately. Because the cheese is molten hot, it just ran out of the rolls and made a mess on the serving platter. I learned that letting them sit for five minutes is a mandatory step. The cheese needs a moment to stabilize as it cools slightly, which keeps the filling inside the bread where it belongs. It also makes them much easier to pick up without burning your fingers.
Using Pre-Shredded Cheese
I thought I was saving time by buying the pre-shredded bag, but the rolls came out with a chalky texture on the cheese. I realized later that the anti-caking agent they use prevents the cheese from melting into that smooth, gooey consistency. Now, I always buy a block of mozzarella and grate it myself. It takes an extra minute, but the difference in how the cheese stretches and tastes is well worth the minor effort. You will notice the difference immediately when you pull a piece away.
Variations and Tips
Adding Pepperoni or Spinach
If you want to add a bit of variety, throw in some finely chopped spinach or thin slices of pepperoni when you add the cheese. Just make sure the spinach is squeezed very dry if you use frozen, as any excess moisture will make the dough soggy. Adding a bit of extra flavor with meat or vegetables is a great way to turn this appetizer into something more substantial.
Using Different Herbs
While parsley and oregano are my favorites, you can experiment with other herbs depending on what you have in the pantry. Dried basil or a pinch of red pepper flakes adds a different character to the rolls. If you like heat, a little dash of cayenne in the butter mixture goes a long way. Just be careful not to overdo the seasonings, as the garlic and cheese already bring a lot of depth.
Make-Ahead Strategy
You can prepare the log, wrap it in plastic wrap, and keep it in the fridge for up to two hours before you need to bake. This is a life-saver when I have company coming over. I just prep everything early, keep it chilled, and then slice and bake right when the guests arrive. It makes the host experience much more relaxed because the kitchen is already clean before anyone even walks through the door.
Proper Reheating
If you have leftovers, store them in an airtight container in the fridge for up to three days. When you want to eat them again, do not use the microwave, as it will turn the dough soft and chewy. Instead, put them back into a warm oven or a toaster oven at 350 degrees Fahrenheit for about five to seven minutes. They will crisp up and the cheese will melt again, tasting almost as good as when they were fresh.
Storage and Reheating
If you find yourself with leftovers, do not let them go to waste. You should get them into the refrigerator within two hours of baking to keep everything food-safe. Place them in a container that seals tightly to keep them from drying out. They stay good for up to three days, though I find they are best within the first forty-eight hours. Beyond that, the dough starts to lose its texture.
When reheating, avoid the microwave at all costs. It ruins the dough and makes the cheese rubbery. A toaster oven is the best tool for the job. Set it to 350 degrees Fahrenheit and let them heat through for about five to seven minutes. If you are using a standard oven, the timing will be roughly the same. You want them to be heated through until they are soft again, and the cheese should look just barely melted. These do not freeze well because the dough gets mushy when it thaws, so I recommend only baking what you plan to eat.
Frequently Asked Questions
Can I use store-bought pizza dough instead of crescent roll dough?
Yes, you can use pizza dough, but it is much thicker and denser than crescent dough. You will need to roll it out quite thin with a rolling pin to make sure it cooks all the way through before the outside gets too dark. If you use pizza dough, you might also need to increase your baking time by two or three minutes to ensure the center is fully cooked.
Why do my pinwheels always lean to one side in the pan?
This usually happens because the rolls are placed too close to each other or the seams were not tight enough. If the dough is not rolled uniformly, one side will be heavier and it will tilt as it rises in the oven. Try to keep your log consistent in thickness from one end to the other, and give each pinwheel a bit of breathing room in the pan so they do not push against each other while baking.
Is it safe to leave these out on the counter during a party?
Dairy products like mozzarella should not be left out at room temperature for more than two hours. If you are hosting a long event, I recommend putting half the tray out and keeping the rest in a warm oven or in the fridge to be reheated later. If they have been sitting out for longer than two hours, it is safer to discard them rather than trying to save them.
What should I serve these with?
These are quite rich on their own, so I like to serve them with something acidic or fresh to balance the flavors. A simple marinara sauce on the side for dipping is a classic choice. A side salad with a light vinaigrette or some sliced cucumber also works well to cut through the garlic and cheese.
Can I add more garlic?
You can absolutely add more garlic if you love that flavor. However, keep in mind that since the garlic is inside the dough, it is concentrated. Three cloves is usually the sweet spot for me. If you go higher, just make sure you mince it very finely so you do not get large, pungent chunks in one bite.
Final Thoughts
Making these garlic herb cheese pinwheels is a simple way to bring a little bit of comfort into your kitchen without the stress. I hope you find that they become a staple in your home just as they have in mine. Whether you are serving them to a group of hungry friends or just having them as a side for a simple dinner, they always seem to disappear from the plate quite quickly.
Remember that the best part of cooking is being able to adapt to what you have on hand. Do not be afraid to tweak the spices or experiment with the cheese. As long as you keep an eye on the oven and let them rest before serving, you will end up with a reliable snack that hits the spot every single time.