
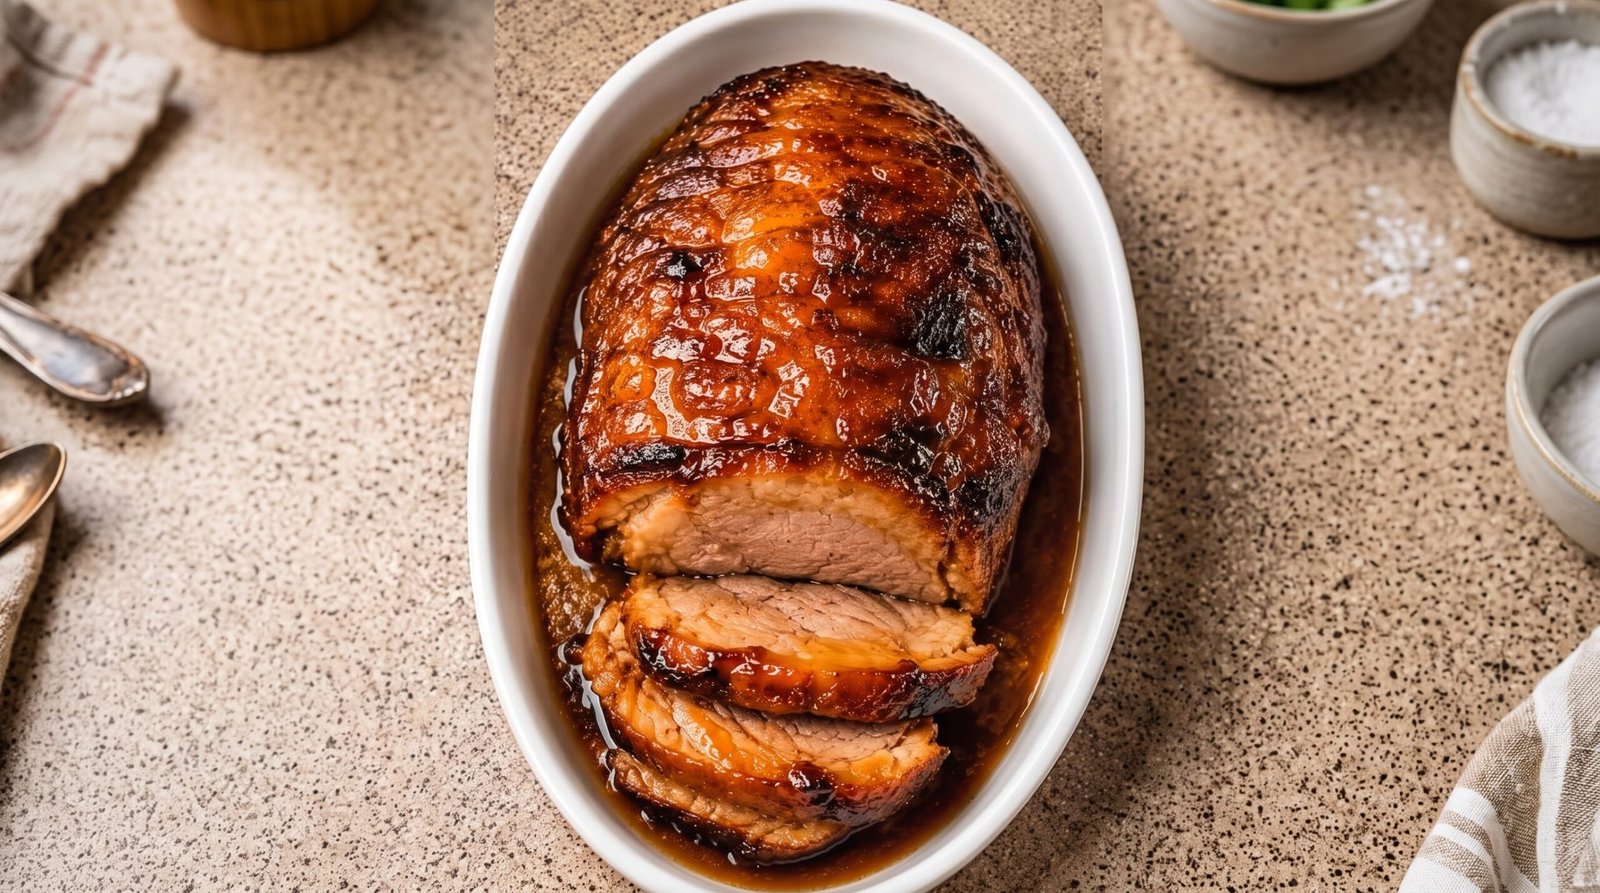
I remember the first time I tried to tackle a large cut of beef at home. I was nervous about ruining an expensive piece of meat, and frankly, my first few attempts were either overcooked and dry or under-seasoned and bland. There is something intimidating about standing in front of a raw roast, trying to guess how long it will take to get that center to the right shade of pink without turning the edges into leather. Over the years, I have learned that the key to a tender, flavorful beef roast is not in complex gadgets, but in simple technique: controlling the oven temperature and giving the meat time to rest.
This honey glazed oven roasted beef roast has become my go-to for Sunday dinners or when I want to feel like I have put a lot of effort into a meal without actually spending all day in the kitchen. The honey glaze creates a sticky, slightly charred exterior that contrasts beautifully with the tender meat inside. If you have been looking for a way to make a simple roast beef feel a bit more special, this approach will get you there. It is a straightforward method that focuses on quality ingredients and steady heat.
Why This Recipe Works
This recipe relies on a two-step process that ensures the meat reaches the desired internal temperature while developing a deep color on the outside. Many people try to cook a roast at high heat the entire time, which usually results in a ring of gray, tough meat around a center that might be raw. By starting with a lower oven temperature, we cook the beef evenly from edge to center. The honey glaze is added toward the end of the cooking process, which prevents the sugars from burning too quickly while still providing that nice, tacky coating that clings to every slice.
The flavor profile is simple but effective. Beef has a naturally deep, savory profile that needs salt and fat to shine. The honey adds a touch of sweetness that balances the saltiness of the soy sauce or beef stock base used in the glaze. Because we use a good amount of black pepper and aromatics like garlic or thyme in the rub, the crust ends up being quite bold. It is not just about the meat itself, but that concentrated outer layer that hits your tongue first.
Another reason this works is the resting period. I cannot emphasize this enough, as it is the most common place where home cooks go wrong. When you pull a roast out of the oven, the juices are pushed toward the center of the meat due to the intense heat. If you cut into it immediately, those juices spill out onto the cutting board, leaving you with dry slices. Giving the roast at least twenty minutes to rest allows the juices to redistribute throughout the muscle fibers, ensuring every bite is moist. It also makes the meat easier to slice cleanly, which helps with presentation.
Finally, the cleanup is manageable. Since this is an oven-roasted dish, you are mostly dealing with one roasting pan or a cast iron skillet. You do not need to juggle multiple pots on the stove or worry about oil splatter all over your kitchen. The combination of heat and controlled time means you have a reliable result every single time you make it, provided you use a meat thermometer to track the progress. It is a predictable way to get a centerpiece meal on the table.
Ingredient Notes
The Beef
For this roast, I recommend a sirloin tip roast or a top round roast. These are lean cuts that hold their shape well when sliced thin. You want something with enough marbling to provide moisture, but not so much fat that it shrinks excessively during the long cook time. Aim for a roast that is about three to four pounds. This size is large enough to stay juicy but small enough that it cooks relatively evenly within the two-hour window. Always look for a piece of meat that is bright red and firm to the touch. If you have a choice, pick a roast that is somewhat uniform in thickness, as this prevents one end from being well-done while the other is still rare.
The Glaze Ingredients
The glaze is where the flavor happens. You will need honey, which serves as the base for the sticky finish. A standard wildflower honey works perfectly fine here. You will also need a bit of soy sauce or tamari for the salt element, which balances the sweetness. I like to add a splash of balsamic vinegar to the glaze as well; the acidity helps cut through the richness of the beef and adds a nice depth. Freshly minced garlic is essential, as the sugars in the honey will carry that garlic flavor directly into the crust as it roasts. You can also add a pinch of dried thyme or rosemary if you like herbal notes.
Seasonings
Keep the initial rub simple. A generous coating of kosher salt and freshly cracked black pepper is the foundation. You do not need a complicated spice rub that might burn in the oven. The goal is to season the beef deeply so that the salt works its way into the interior while it roasts. Make sure to pat the meat dry with paper towels before you apply the salt and pepper; if the surface is wet, the meat will steam instead of getting that nice seared look we want before the glazing starts.
| Ingredient | Amount | Notes |
|---|---|---|
| Beef Roast | 3-4 lbs | Sirloin tip or top round |
| Honey | 1/2 cup | Standard wildflower honey |
| Soy Sauce | 3 tablespoons | Low sodium is fine |
| Balsamic Vinegar | 1 tablespoon | For a touch of acidity |
| Garlic | 3 cloves | Minced very fine |
| Kosher Salt | 1 tablespoon | Adjust to your preference |
| Black Pepper | 1 teaspoon | Freshly cracked is best |
| Olive Oil | 2 tablespoons | For searing |
The Recipe
- Prep Time: 15 minutes
- Cook Time: 1 hour 45 minutes to 2 hours
- Total Time: 2 hours 30 minutes (including rest)
- Servings: 6 to 8
- Difficulty: Moderate
Equipment Needed:
– Large roasting pan or heavy-bottomed cast iron skillet
– Meat thermometer
– Small bowl for the glaze
– Aluminum foil for resting
Step-by-Step Instructions
Step 1: Prep the Roast
Remove the beef from the refrigerator about 45 minutes before you plan to cook it. This allows the meat to reach room temperature, which helps it cook more evenly. Pat the entire roast dry with paper towels. If the meat is cold or wet, it will not brown well. Once it is dry, rub the olive oil over the surface. Generously season every side with the kosher salt and black pepper. Use your hands to press the seasonings into the meat so they stick. Preheat your oven to 325 degrees Fahrenheit.
Step 2: Sear the Exterior
Heat your roasting pan or skillet over medium-high heat on the stove. Once the pan is hot, place the roast in the center. Let it cook for about three to four minutes per side, turning it as you go. You are looking for a deep brown color on the surface. Do not rush this, as this step builds the primary flavor base. If the pan starts to smoke, lower the heat slightly. Once you have a nice sear on all sides, move the roast to the center of the roasting pan if you have been searing in a separate skillet.
Step 3: Initial Roast
Place the roast in the oven. Cook it at 325 degrees Fahrenheit for about one hour and fifteen minutes to one hour and thirty minutes. This initial phase is about bringing the internal temperature of the beef up slowly. At this stage, you are just letting the heat work its way into the center. Do not open the oven door too often, as this lets heat escape. After about an hour, start checking the temperature with your meat thermometer by inserting it into the thickest part of the roast.
Step 4: Add the Glaze
While the roast is cooking, mix the honey, soy sauce, balsamic vinegar, and minced garlic in a small bowl. When the internal temperature of the beef reaches about 115 degrees Fahrenheit, pull the pan out of the oven. Carefully brush the honey glaze all over the top and sides of the roast. Use a pastry brush or just a spoon. You want a thick, even layer. If the glaze is too thin, it might run off, so make sure it stays on the top surface.
Step 5: Final Roast and Finish
Return the roast to the oven. Continue cooking for another 15 to 20 minutes. Keep a close eye on it now. The honey contains natural sugars that can burn quickly, so check the color. You want the glaze to be bubbling and dark, but not black. The roast is ready when the internal temperature reaches 130 to 135 degrees Fahrenheit for medium-rare, or 140 to 145 degrees for medium. Use your thermometer to verify the temperature in the center of the thickest part.
Step 6: Rest and Slice
Once the roast hits your desired temperature, remove the pan from the oven. Carefully transfer the roast to a cutting board or a warm plate. Cover it loosely with a piece of aluminum foil. Let the beef rest for at least 20 minutes. This is non-negotiable, as it allows the juices to settle. After 20 minutes, slice the beef against the grain into thin strips. Pour any juices left in the roasting pan over the sliced meat before serving, as that liquid will have the concentrated flavor of the beef and the glaze.
Mistakes I Made (So You Don't Have To)
Mistake 1: Not Patting the Meat Dry
Early on, I would pull the beef straight from the package and toss it into the pan. Because of the moisture on the surface, the beef would steam in the pan instead of searing. This meant the crust was pale and lacked that deep, savory taste. Now, I always take an extra minute to use paper towels to get the surface as dry as possible before I touch it with any oil or seasoning. It makes a significant difference in the final texture.
Mistake 2: Cutting the Meat Too Soon
I used to be so hungry that I would carve the roast the second it came out of the oven. Every time I did this, the plate would be flooded with juice, and the beef itself would be dry and stringy. It took me a few disappointing dinners to realize that the resting period is part of the cooking process. Now, I set a timer for 20 minutes the moment it comes out of the oven, and I do not touch the knife until that timer goes off.
Mistake 3: Burning the Glaze
The first time I used a honey glaze, I applied it at the very beginning of the cooking process. By the time the center of the roast was cooked, the honey had turned into a bitter, black mess that had to be scraped off. I learned that honey is delicate. By waiting until the meat is almost finished, the glaze has just enough time to thicken and become sticky without turning into carbon. Adding it at 115 degrees internal temperature is the sweet spot.
Mistake 4: Overcrowding the Pan
I once tried to roast potatoes and carrots in the same pan as the beef, thinking it would save time. Because the pan was so crowded, the steam from the vegetables prevented the beef from browning properly, and the roast cooked unevenly. Now, I roast my vegetables in a separate tray. It keeps the environment for the beef stable and allows the heat to circulate properly, which is essential for a consistent cook throughout the entire piece of meat.
Variations and Tips
Use Different Aromatics
While garlic and thyme are standard, you can change the flavor profile by adding different ingredients to your glaze. A teaspoon of grated ginger adds a warm, spicy note that works very well with the soy sauce. If you prefer a citrus twist, add the zest of an orange or a tablespoon of orange juice to the honey mix. These small adjustments can make the dish feel fresh and different even if you use the same cut of beef every time.
The Importance of the Meat Thermometer
Do not try to guess the doneness by touch or by the "look" of the meat. Beef roasts can be deceptive, and the thickness of the cut changes how fast the center cooks. A digital meat thermometer is the only way to be sure. I prefer a probe thermometer that stays in the meat while it is in the oven, as it allows me to watch the temperature rise without having to open the door and lose heat.
Make-Ahead Strategy
If you have a busy day, you can season the beef with salt and pepper the night before and keep it in the refrigerator. Just take it out of the fridge an hour before you cook it to bring it back to room temperature. You can also mix the glaze ahead of time and keep it in a small jar. When you are ready to cook, just give the glaze a quick stir before applying it. This keeps the active prep time on the day of your dinner to just a few minutes.
Adjusting for Thinner Roasts
If your piece of beef is on the thinner side, it will cook much faster than a thick, uniform roast. Start checking your temperature about 45 minutes into the process. You might find that it reaches 130 degrees Fahrenheit much earlier than the suggested time. Don't worry if the timing is different; the goal is the internal temperature, not the clock. Adjust your glaze timing accordingly, applying it when the beef is about 15 degrees away from your target temperature.
Storage and Reheating
If you have leftovers, they can be stored in an airtight container in the refrigerator for up to three days. It is important to let the meat cool down before you put it away, but do not leave it on the counter for more than two hours. When you are ready to reheat, the best way to keep the meat moist is to slice it and warm it gently. You can put the slices in a pan with a splash of beef broth or water, cover it, and heat it over low heat on the stove until it is steaming hot. Reheating until it hits an internal temperature of 165 degrees Fahrenheit is the safest method.
I would not recommend freezing the beef after it has been cooked and sliced, as the texture of the meat changes and it tends to get dry once thawed. It is best enjoyed fresh or as leftovers within those first few days. If you find yourself with more than you can eat, think about using the leftovers for cold roast beef sandwiches or thin slices over a salad the next day. The honey glaze actually tastes quite nice when the meat is cold.
Frequently Asked Questions
What should I do if the roast is browning too fast?
If you notice the outside of the roast getting dark before the center is cooked, you can tent it with a piece of aluminum foil. Just lay the foil loosely over the top of the beef. This blocks the direct heat from the oven elements and allows the center to continue cooking while protecting the crust. This is a common trick for larger roasts that might take a bit longer to reach the right temperature.
Can I use a different type of liquid for the glaze?
Yes, you can swap the soy sauce for beef stock or even red wine if you want a different flavor profile. Just keep in mind that the soy sauce provides the salt, so if you use stock or wine, you may need to add a pinch more salt to your glaze mixture to keep the flavors balanced. Whatever you choose, make sure it is something that will reduce well and cling to the meat.
My glaze didn't get sticky enough, what happened?
This usually happens if the roast wasn't dry enough or if the glaze was applied too late. The glaze needs a few minutes of intense heat to reduce and become tacky. Ensure you have the full 15 to 20 minutes after applying the glaze before you pull the meat out. Also, make sure the oven is properly preheated; if the oven temperature is too low, the glaze will just melt off instead of caramelizing into a sticky layer.
Is it safe to eat the beef if it is still pink?
Yes, it is safe as long as the internal temperature has reached at least 130 to 135 degrees Fahrenheit for medium-rare. Many people actually prefer their roast beef with a bit of pink in the center, as it ensures the meat stays tender. Using a reliable meat thermometer is the only way to be sure you have reached a safe temperature while keeping that desired pink color.
Why is my roast tough even though I followed the temperature?
Toughness in a lean roast often comes from slicing the meat incorrectly. You must slice the beef against the grain. Look at the lines in the meat and cut perpendicular to those lines. This shortens the muscle fibers, making every bite feel much more tender in your mouth. If you slice with the grain, you are leaving the long, tough fibers intact, which makes the beef feel chewy even if it is cooked correctly.
Final Thoughts
Making a honey glazed beef roast is a rewarding way to spend an afternoon. While it requires patience, especially during that final rest, the result is a flavorful, reliable dish that is perfect for sharing. I find that keeping the ingredients simple allows the quality of the beef to really come through, while the glaze provides just enough sweetness to make it stand out.
I hope you give this recipe a try next time you are looking for a solid, classic meal. It has certainly become a staple in my rotation, and I think you will find it as dependable as I do. Just remember to take your time, trust your thermometer, and let that meat rest. Happy cooking.