
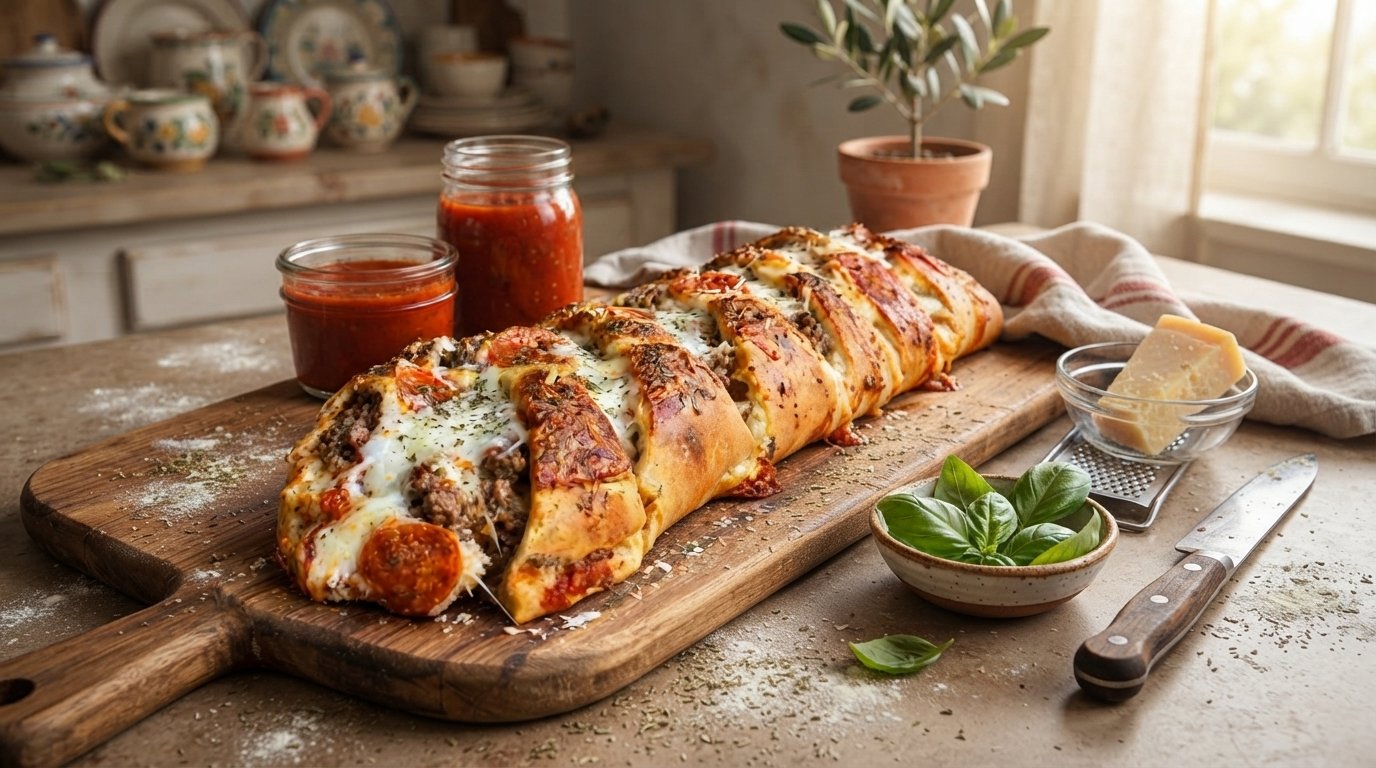
You know that feeling when you have half a package of pepperoni, a rogue container of ricotta, and a couple of bell peppers that are about to see better days? This is exactly where my braided pizza loaf was born. Honestly, I didn’t think it would work. I thought it would be a soggy, overflowing mess, but wow, was I wrong. It turned out to be the perfect casual weekend dinner, and my family completely devoured it. If you’re looking for a way to use up leftovers or just want a really fun (and easier than you think!) twist on pizza night, you have to try this.
Why This Braided Pizza Loaf is Your New Favorite Thing
Okay, let’s be real. Pizza is amazing. We all know that. But sometimes you just want something a little different, you know? This braided loaf offers a few things that your standard slice doesn’t:
- Maximum Stuffing Potential: This loaf can hold so many more toppings than a flat pizza. It’s truly a vessel for all your favorite pizza flavors, all bundled up in that golden-brown crust.
- Insanely Fun Presentation: I’m a big believer that you eat with your eyes first. This loaf looks impressive when you bring it to the table. It’s got that artisanal, rustic feel that makes everyone go “Ooh!” (Check out the image above to see what I mean!)
- Actually Easier Than It Looks: The braiding is surprisingly simple once you get the hang of it. It’s a fun technique that feels fancy but isn’t.
I’ve made my fair share of pizza mishaps over the years. We’ve had crusts that were simultaneously burnt and raw, and toppings that slid right off the slice. This recipe is a solid, forgiving one that I’ve refined through those trial-and-error sessions. Trust me, if I can make it look good, you can too!
The (Completely Adaptable!) Ingredient List
Here is what I used for my loaf, but please feel free to customize. This is truly an “everything-but-the-kitchen-sink” recipe. Use whatever you have on hand and love! This is your pizza destiny.
- 1 pound of your favorite pizza dough (Store-bought is completely fine! I often use the dough from Trader Joe’s, which is fantastic. But if you have a great homemade recipe, use it!)
- ½ cup pizza sauce (This is a rough estimate. You want enough to coat the bottom, but not so much that it makes the dough soggy. Again, store-bought or a simple homemade sauce works perfectly.)
- 1 ½ cups shredded mozzarella cheese (Or use a blend! Provolone and mozzarella work beautifully together.)
- 4 ounces fresh mozzarella cheese, roughly torn (For those little pockets of melted goodness)
- ½ cup ricotta cheese (Optional, but adds a creamy, dreamy element that is so good!)
- About 20 slices of pepperoni
- ¼ pound cooked Italian sausage, crumbled (This is one of my favorite toppings. Make sure it’s fully cooked and drained of fat!)
- ¼ cup cooked, crumbled bacon
- ¼ cup chopped red onion
- ¼ cup sliced black olives
- ¼ cup green bell pepper, diced
- 2 tablespoons grated Parmesan cheese (To sprinkle over the top for a little salty, savory finish)
- ½ teaspoon dried oregano (To give it that classic pizza parlor aroma)
- 1 egg, beaten (This is key! It creates a beautiful, glossy, golden-brown crust.)
- Simple Garlic Butter: 2 tablespoons melted butter mixed with ½ teaspoon garlic powder (Use for brushing after the loaf comes out of the oven, for that extra “oomph!”)
Step-by-Step Guidance: The Making of the Masterpiece
Let’s get down to the fun part. The first time I braided dough, I was nervous I’d create a tangled mess, but it’s really straightforward. Here’s exactly how I do it:
1. Prep is Everything: First, I get all my fillings ready. Cook and crumble the sausage, chop the veggies, measure out the cheese. You don’t want to be scrambling for toppings once you have your dough rolled out.
2. Roll and Form your Canvas: On a lightly floured surface, roll out your pizza dough into a large rectangle, about 12×16 inches. The dimensions don’t have to be perfect, but you want it large enough to hold all the fillings. Transfer the rolled-out dough onto a piece of parchment paper. (This is important! It makes moving the loaf to the baking sheet and cleaning up so much easier. Don’t skip this!)
3. The Crucial Cut (Creating the Braid Strips): Now, this is the “secret” to the braid. Gently make small indentations in the dough to visualize the rectangle as having three equal vertical strips. Your fillings will go down the middle strip.
With a sharp knife or pizza cutter, make horizontal cuts from the edge of the dough in towards the center strip, creating about 10-12 strips on each side. Try to make the cuts and the number of strips relatively even on both sides, but again, don’t sweat it if it’s not perfect. It adds character!
4. The Fun Part: Layering the Fillings! Down the middle strip, start layering your ingredients. Here was my layering strategy, which worked beautifully to prevent a soggy bottom and a dry top:
- Base Layer: Spread the pizza sauce first. (Again, not too thick!)
- Cheese Layer #1: Sprinkle about half of the shredded mozzarella. This helps bind the sauce to the toppings.
- Meat Layer: Dot with the ricotta, then evenly layer the pepperoni, cooked sausage, and bacon. (I love ricotta under the toppings; it stays creamiest that way.)
- Veggie Layer: Sprinkle the onions, olives, and bell peppers.
- Cheese Layer #2: Top with the remaining shredded mozzarella and the torn fresh mozzarella.
- Seasoning: A generous sprinkle of Parmesan cheese and dried oregano.
5. Time to Braid! Here is the step that makes everyone nervous, but I promise it’s okay.
- First, gently lift the top flap of the dough and fold it snugly over the top edge of the filling. Do the same with the bottom flap, folding it over the bottom edge. This seals the loaf.
- Now, it’s just a simple fold-and-overlap motion. Take the top strip from the left side and fold it diagonally over the filling. Then, take the top strip from the right side and overlap it diagonally over the first strip.
- Continue this pattern, alternating left and right strips and overlapping them slightly down the length of the loaf. Try to pull the strips gently so they create a tight braid. (It won’t look perfectly neat, and that is completely fine. The baking process makes it all look beautiful!)
- Tuck the final strips under the main body of the loaf.
6. Final Touches and Baking:
- The Egg Wash is Key! Gently brush the entire surface of the braided loaf with the beaten egg. This is what gives it that stunning, glossy, deep golden color. Don’t skip this! A small pinch of sea salt or more Parmesan on top is also a great addition.
- Slide the parchment paper with the loaf onto a large baking sheet.
- Bake in a pre-heated 400°F (200°C) oven for 25-35 minutes, or until the crust is a deep golden brown and you can see cheese happily bubbling through some of the gaps in the braid.
- My Little Secret: Immediately after you pull the loaf from the oven, brush it generously with the garlic butter. Oh my gosh, this takes it over the top. The warm crust drinks up that buttery garlic goodness. It is pure magic.
- Let the loaf cool for at least 10-15 minutes before you slice into it. This allows the cheeses to set slightly, making it much easier to cut into nice, clean slices without all the filling spilling out. Use a sharp serrated knife (like a bread knife) for the best results.
Lessons Learned: What Not To Do
Like I said, I’ve had my share of failures. Here are some of the biggest lessons I’ve learned along the way:
- Don’t Overload the Sauce: This is probably the number one mistake. Too much sauce will seep through the dough, especially on the bottom, making it a soggy, undercooked mess. Use a light hand and remember, you can always serve extra sauce on the side for dipping!
- Pre-Cook and Drain Your Meats: Make sure your sausage and bacon are fully cooked and well-drained. Raw or oily toppings will add too much moisture and grease to the center of the loaf, which will pool and prevent the dough from baking properly.
- Seal the Ends: The first time I made this, I didn’t fold the top and bottom flaps over before braiding. The fillings started to ooze out of the ends as it baked, which made for a messy pan. Make sure those ends are sealed!
- Use the Parchment Paper! I can’t stress this enough. Attempting to lift a fully stuffed and braided (but raw!) dough onto a pan is a recipe for disaster. Rolling and braiding directly on parchment paper is a complete game-changer.
- Don’t Rush the Cooling: Seriously, that 10-15 minute wait time is crucial. I know it smells incredible, but cutting it too soon will result in a messy slide of filling and cheese. Give it that minute to rest and set. It’s worth the wait.
Final Thoughts (A Natural Conclusion)
This braided pizza loaf has become a true staple in our house. It’s the perfect blend of casual comfort food and impressive presentation. Whether we’re having a cozy night in, hosting a casual game night, or just trying to use up some leftover ingredients, this is a recipe I know I can count on. The best part is that it’s completely your own. Mix up the cheeses, try different meats, or make it a fully veggie version! No matter how you choose to stuff it, you’re going to love it. Now, go make a loaf and see for yourself! I promise, you won’t be disappointed.