
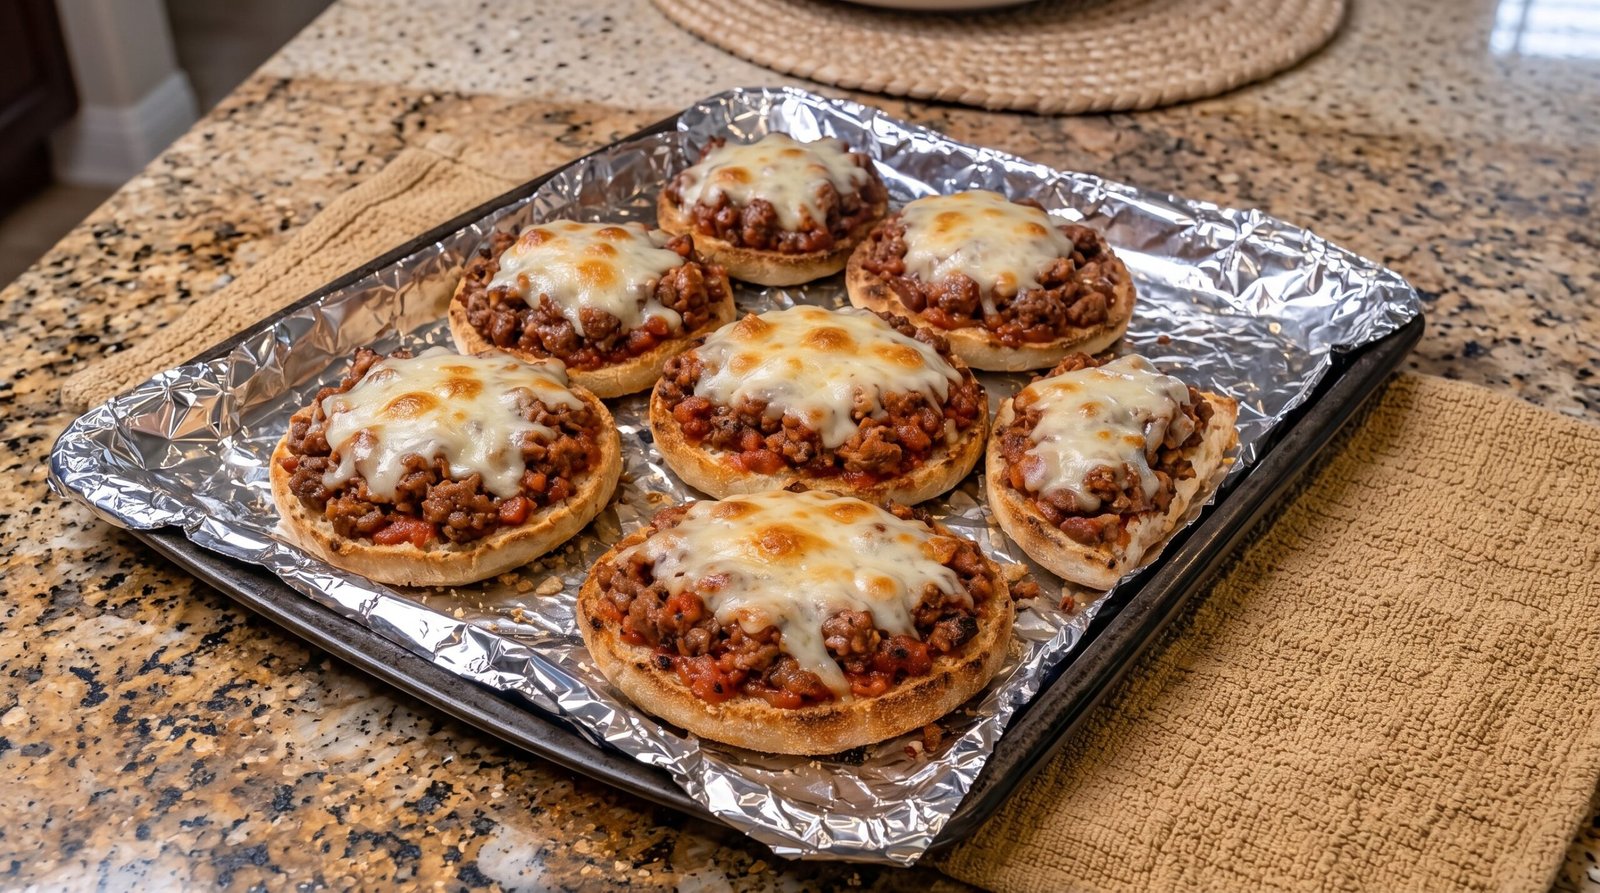
It happens to all of us. You get home after a long afternoon, the sun is starting to set, and the idea of standing at the stove for an hour to make a complex dinner feels impossible. My kids are hungry, I am tired, and the fridge is looking a bit sparse. This is the exact moment I reach for a jar of tomato sauce and a package of ground beef. I have been making these open face meatball pizza sandwiches for years because they rely on pantry staples that I almost always have on hand. They are hearty, warm, and satisfy that craving for something cheesy and savory without needing a delivery driver. When you need a meal that keeps everyone at the table happy, this is a straightforward choice.
By using split burger buns as the base, you get a shortcut to a crust that is sturdy enough to hold the sauce but still soft enough to bite through easily. The combination of seasoned ground beef, zesty tomato sauce, and a blanket of melted cheese mimics the best part of a classic pizza, but you get to eat it with two hands like a sandwich. It is a reliable comfort food that bridges the gap between a quick snack and a full dinner. In this guide, I will share the exact steps I take to ensure the bread stays crisp while the middle stays juicy, along with how to avoid some common pitfalls I learned the hard way.
Why This Recipe Works
The primary reason I turn to this recipe so often is how effectively it uses textures. You have the crunch of the toasted bun, the soft, savory layer of seasoned ground beef, and the gooey stretch of melted cheese on top. Many home cooks struggle with soggy bread when making open-faced sandwiches, but because we toast the buns before adding the wet ingredients, the bread acts as a solid foundation. The ground beef mixture is cooked down until it is thick, so the tomato sauce does not pool or drip off the sides. It is a very forgiving dish that does not require fancy knife work or complex heat management.
Flavor-wise, this dish is a winner because you can customize the beef mixture to suit whatever you have in your spice cabinet. If you like a kick, add red pepper flakes. If you prefer something earthy, a little extra oregano or basil goes a long way. Because the ingredients are simple, the quality of your sauce and the freshness of your cheese make a big difference. I find that using a medium-sharp cheese like mozzarella gives the best pull and flavor profile, but you could easily mix in some parmesan for a deeper, saltier kick. It is a balanced meal that manages to be substantial without leaving you feeling weighed down. It is my go-to choice for busy weeknights when flavor cannot be sacrificed for speed.
Ingredient Notes
Making these sandwiches well starts with choosing the right components. You do not need anything expensive, but a few small details regarding your shopping list will change how the final meal turns out.
The Meat and Sauce
The foundation of this sandwich is the ground beef. I recommend buying ground beef that is around 80 percent lean. You need that little bit of fat for flavor and moisture, as a totally lean grind can end up dry once it is baked in the oven. For the sauce, use your favorite jarred marinara. I prefer one that is on the thicker side; if you only have a watery sauce, you might want to simmer it for an extra few minutes in the pan to reduce the liquid before putting it on the bread.
The Bread and Cheese
The type of bun matters more than you might think. Standard soft hamburger buns work, but if you can find ciabatta rolls or higher quality brioche buns, they hold up much better under the weight of the meat. Whatever you use, make sure they are fresh enough to toast but sturdy enough to support the toppings. For the cheese, freshly shredded mozzarella is always better than the pre-shredded kind. The stuff in bags is coated in potato starch or cellulose to prevent clumping, which stops it from melting into that smooth, gooey blanket we want.
| Ingredient | Amount | Notes |
|---|---|---|
| Ground beef | 1 pound | 80/20 ratio is ideal |
| Marinara sauce | 1.5 cups | Choose a thick variety |
| Hamburger buns | 4 large | Split in half |
| Mozzarella cheese | 2 cups | Freshly shredded |
| Garlic powder | 1 teaspoon | Adds depth to the beef |
| Dried oregano | 1 teaspoon | Gives a classic pizza flavor |
| Salt and pepper | To taste | Adjust for your preference |
| Olive oil | 1 tablespoon | For browning the beef |
The Recipe
Prep Time: 10 minutes
Cook Time: 25 minutes
Total Time: 35 minutes
Servings: 4 servings
Difficulty: Easy
Equipment needed:
– Large skillet
– Wooden spoon
– Baking sheet
– Aluminum foil
– Box grater
– Spatula
Step-by-Step Instructions
Step 1: Prep the ingredients and heat the oven
Preheat your oven to 400 degrees Fahrenheit. While that warms up, gather your ingredients. Take your block of mozzarella cheese and shred it using the large holes of a box grater. Set the cheese aside. If your buns are not already sliced, cut them in half horizontally. Ensure you have your skillet and baking sheet ready to go, as the process moves quickly once you start the stove.
Step 2: Brown the ground beef
Place your large skillet over medium-high heat and add the tablespoon of olive oil. Once the oil shimmers, add the pound of ground beef. Use your wooden spoon to break the meat into small crumbles as it cooks. You want to cook it until no pink remains, which usually takes about 6 to 8 minutes. It should smell toasted and savory. Ensure the internal temperature of the meat reaches at least 160 degrees Fahrenheit to be safe, as verified by a food thermometer.
Step 3: Simmer the meat sauce
Once the beef is browned, drain any excess grease from the pan to prevent the sandwiches from becoming oily. Lower the heat to medium-low and pour in the marinara sauce. Add the garlic powder, oregano, salt, and pepper. Stir well to combine. Let this mixture simmer for about 5 to 7 minutes. You want the sauce to thicken slightly so it clings to the meat rather than running off the bread later.
Step 4: Toast the buns
While the sauce is simmering, place the split hamburger buns cut-side up on a baking sheet lined with aluminum foil. Place the tray in the oven for about 3 to 4 minutes. You are just looking for the surface of the bread to feel slightly dry and light golden brown. This step is vital because it creates a moisture barrier that keeps the bottom of the sandwich from getting soggy when you add the hot meat mixture.
Step 5: Assemble the sandwiches
Carefully remove the baking sheet from the oven. Spoon a generous amount of the meat and sauce mixture onto each bun half. Use the back of your spoon to spread it out evenly, reaching almost to the edges of the bread. Sprinkle a thick layer of the shredded mozzarella over the top of each sandwich. Do not be afraid to be generous with the cheese, as it acts as a seal for the meat.
Step 6: Final bake
Place the baking sheet back into the 400 degree Fahrenheit oven. Bake for about 8 to 10 minutes. You want the cheese to be fully melted, bubbly, and showing light brown spots. Keep a close eye on it during the last two minutes so the bread edges do not get too dark. Once it looks melted and golden, remove it from the oven and let it sit for two minutes before serving. This allows the cheese to set slightly so it does not slide off immediately upon the first bite.
Mistakes I Made (So You Don't Have To)
Mistake 1: Using too much sauce
Early on, I used to pour the entire jar of sauce into the beef. This resulted in a very loose mixture that made the buns turn into a soggy mess almost instantly. The fix is to start with one cup and add more only if the beef looks dry. You want the meat to be coated, not swimming in a pool of tomato liquid.
Mistake 2: Not toasting the buns first
I once tried putting the raw meat mixture directly onto untoasted bread. The bottom absorbed all the juices and fat from the beef, making the sandwiches fall apart when I tried to pick them up. Toasting the buns for 3 to 4 minutes creates a crispy surface that acts like a shield, keeping the structure intact even when loaded with toppings.
Mistake 3: Buying pre-shredded cheese
I thought saving time by buying a bag of pre-shredded cheese would be smart. However, the anti-caking agents added to the bag prevent the cheese from melting into that smooth, stretchy layer. It ends up grainy and does not cover the beef properly. Always grate your own block of cheese to get that authentic melt.
Mistake 4: Burning the bread edges
When I first started, I would get distracted and leave the baking sheet in for too long during the final bake. The centers would be fine, but the edges of the buns would turn into charcoal. Now, I set a timer for 8 minutes and check them visually. If they are not quite ready, I add 60 seconds at a time. It is much better to take them out a little early than to have to scrape burnt edges.
Variations and Tips
Make it spicy
If your family enjoys a bit of heat, add a half teaspoon of red pepper flakes to the beef mixture while it simmers. Alternatively, you can add diced jalapeños on top of the meat before adding the cheese to get a nice kick of spice in every bite.
Adding extra veggies
Sometimes I like to sneak in some finely diced bell peppers or mushrooms. If you do this, sauté them in the skillet with the beef until they are soft. Make sure to drain any liquid that the vegetables release before adding the tomato sauce, otherwise you will end up with a watery mixture.
The time-saving hack
If you are planning to have a busy week, you can cook the meat and sauce mixture a day in advance. Store it in an airtight container in the fridge. When you are ready to eat, simply preheat your oven, toast your buns, spoon the cold meat mixture on, top with cheese, and bake. Just remember to add an extra 2 to 3 minutes to the final bake time since the meat starts out cold.
Herb additions
Fresh basil is a wonderful addition to these sandwiches. Add a handful of chopped fresh basil right at the end of the simmering process before you put the mixture on the buns. The heat will release the oils and add a bright, fresh note that balances the heavy tomato and meat flavors perfectly.
Storage and Reheating
If you have leftovers, store them in an airtight container in the refrigerator within two hours of cooking. They will stay fresh for up to 3 days. Do not try to freeze the assembled sandwiches, as the bread will become mushy and the cheese will lose its texture upon thawing.
To reheat, I suggest using the oven or a toaster oven set to 350 degrees Fahrenheit. Place the sandwiches on a tray and heat them for about 8 to 10 minutes until the center is steaming hot and the cheese has softened again. You want to ensure the internal temperature of the meat reaches 165 degrees Fahrenheit for food safety. Avoid the microwave, as it will make the bun chewy and soft rather than crisp.
Frequently Asked Questions
Can I use ground turkey instead of ground beef?
Yes, ground turkey works perfectly fine for this recipe. Just be aware that it tends to be leaner than beef, so you might need to add a splash more olive oil to the pan when browning it to ensure it does not dry out. Follow the same seasoning instructions to ensure it remains savory.
Is there a way to make this meal gluten-free?
Certainly, you can make this gluten-free by using gluten-free burger buns. Many grocery stores now carry high-quality options that hold up well in the oven. Just be sure to check the ingredient label on your jarred marinara sauce as well, as some brands include thickeners that may contain gluten.
Can I add extra cheese types?
Adding extra cheese is a great way to customize the flavor. A little bit of parmesan, fontina, or provolone mixed in with the mozzarella adds a great depth of flavor. Just make sure the bulk of the cheese is mozzarella so you still get that excellent melting property and signature cheese pull.
Should I cover the tray with foil while baking?
You should leave the sandwiches uncovered while they are in the oven. If you cover them, the steam will get trapped, making the buns soft and preventing the cheese from getting that nice, bubbly golden finish. The open air is what helps the bread stay crisp and the cheese get that slightly browned look.
How do I know when the meat is done?
The ground beef is done when it is fully browned and has an internal temperature of at least 160 degrees Fahrenheit. I always check with a food thermometer to be sure. You should not see any pink in the pan before you add the sauce and start the assembly process.
Final Thoughts
Making these open face meatball pizza sandwiches is a simple way to bring a bit of joy to a busy evening. They are hearty enough to satisfy the hungriest eaters and consistent enough that you know exactly what the result will be every time. It is refreshing to have a reliable meal that does not rely on complicated techniques or hard-to-find ingredients.
I hope this becomes a staple in your kitchen just like it is in mine. It is one of those meals that reminds you that you do not need a lot of time to put something warm and comforting on the table for the people you care about. Enjoy the process, and do not forget to let the sandwiches cool just for a moment before that first bite.