
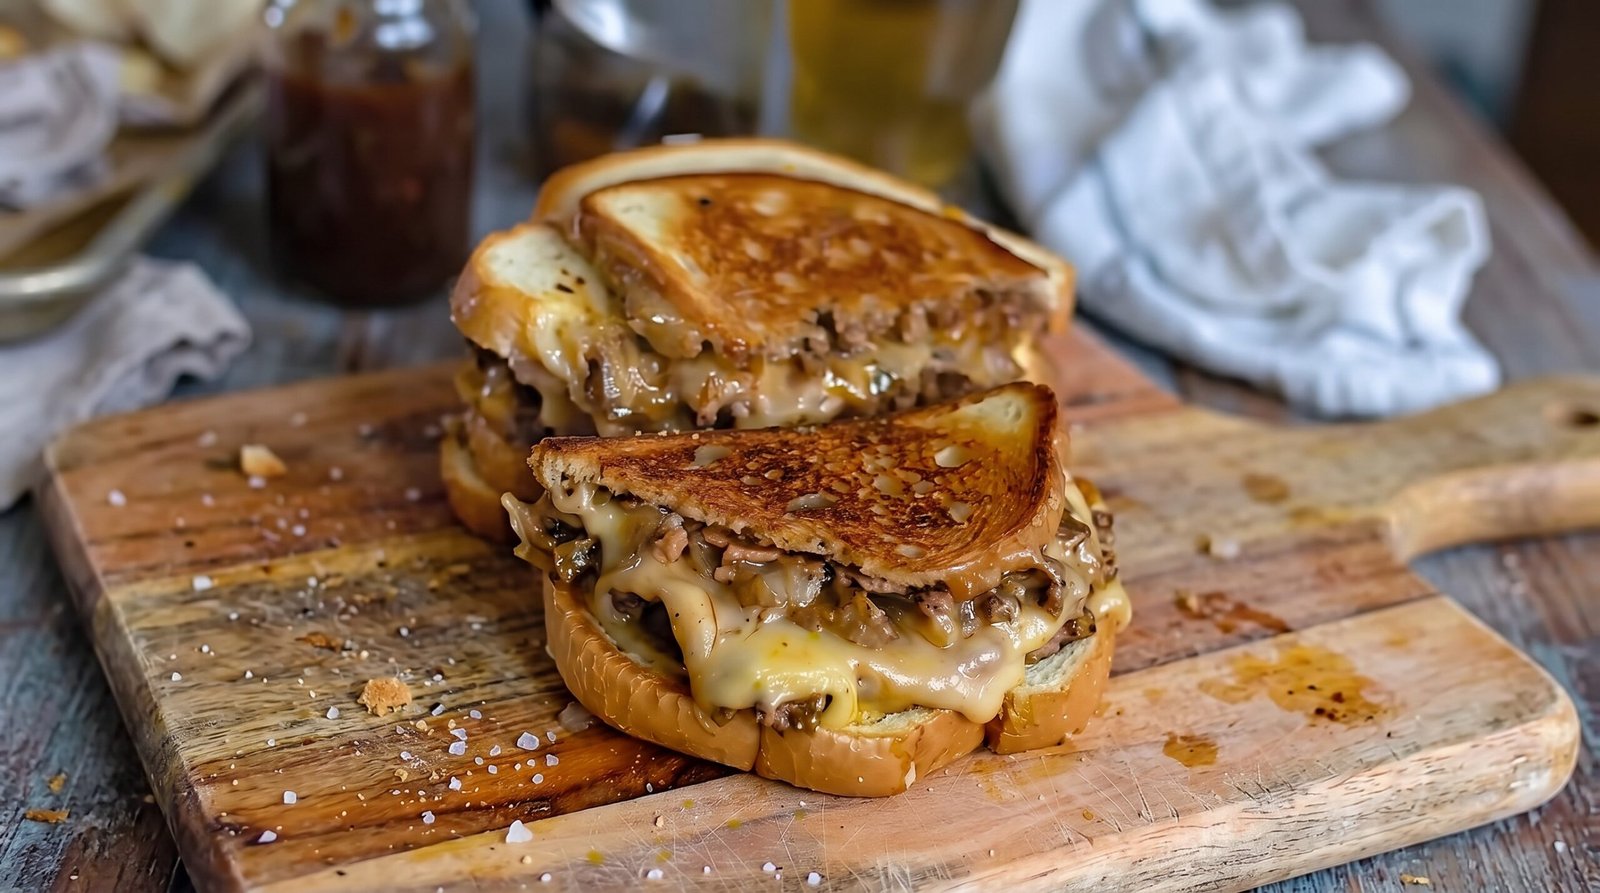
I often find myself standing in the kitchen after a long day, staring at the pantry and wondering what to make that feels substantial without taking all night. A patty melt sandwich is exactly what I reach for in those moments. It hits that sweet spot between a hearty burger and a grilled cheese, offering a warm, toasted exterior that hides a savory, juicy filling inside. There is something comforting about the way the onions and meat meld together under a layer of melted cheese, making it a reliable choice for lunch or a quick dinner.
When you want a meal that brings warmth and satisfaction, this sandwich is a solid winner. I have been making these for years, and they are always a hit when I need to feed a hungry household. You get the crunch of the toasted bread, the bite of the cooked onions, and the richness of the ground beef, all in one handheld package. It is straightforward to put together once you have the rhythm down, and it relies on basic pantry items that you probably have on hand right now.
Why This Recipe Works
The success of a good patty melt comes down to the balance of textures and the timing of each component. By cooking the onions low and slow, you create a deep, savory flavor that contrasts nicely with the richness of the ground beef. Because the beef is shaped into thin patties, it cooks through quickly while staying moist, ensuring that you do not end up with a dry, tough center. The choice of bread is also key; a sturdy rye or sourdough holds up well to the heat and the moisture from the filling, keeping the sandwich intact until the last bite.
Another reason this recipe is so reliable is the layering process. By placing the cheese directly against the bread, it acts as a barrier that prevents the filling from making the toast soggy, while simultaneously creating a glue that holds the entire sandwich together. The cooking method, which involves searing the patty and then griddling the whole sandwich, ensures that you get that golden-brown finish on the outside of the bread while the center reaches the proper temperature. It is a one-pan process, which makes cleanup much easier than a full-scale burger night.
The flavor profile is simple but robust. You have the sweetness of the onions, the saltiness of the beef, and the creaminess of the melted cheese. Unlike a traditional burger which can sometimes fall apart or feel messy, the patty melt is contained, making it easier to enjoy without needing a mountain of napkins. It is a classic for a reason, and once you master the heat control on your stovetop, you will find it is one of the most consistent meals in your regular rotation.
Ingredient Notes
The Beef and Onions
For the meat, I always use ground beef with a fat content around 20 percent. This amount of fat is necessary to keep the patty juicy. If the meat is too lean, the patty can dry out during the searing process. I try to shape the patties into a rectangular or oval shape that roughly matches the dimensions of the bread, which helps with even cooking. When it comes to the onions, a standard yellow onion is my go-to. I slice them into thin half-moons so they cook down into a soft, consistent texture that integrates easily into the sandwich.
The Bread and Cheese
The bread is the foundation. I prefer a classic sliced rye because its flavor holds its own against the beef and onions. Sourdough also works well if you want a lighter, tangier profile. The key is to find a bread that is sturdy enough to handle the weight of the filling without falling apart. For the cheese, a mild Swiss or a processed cheddar is traditional. I personally lean toward Swiss because it melts into a smooth, stretchy consistency that binds the ingredients perfectly. You need enough cheese to cover the entire slice of bread to ensure good coverage.
Pantry Essentials
You will need butter for griddling the bread. Using salted butter adds a nice layer of flavor to the exterior, giving it that characteristic golden look. I also keep some salt and black pepper on hand to season the beef properly before it hits the pan. Do not skip the seasoning, as the beef needs that extra kick to stand out. Some people like to add a splash of Worcestershire sauce to the onions as they cook down to deepen the color and taste.
| Ingredient | Amount | Notes |
|---|---|---|
| Ground beef | 1 pound | 80/20 fat ratio |
| Yellow onions | 2 medium | Thinly sliced |
| Rye bread | 8 slices | Sturdy, thick cut |
| Swiss cheese | 8 slices | Or processed cheddar |
| Salt | 1/2 teaspoon | For the beef |
| Black pepper | 1/4 teaspoon | Freshly ground |
| Unsalted butter | 4 tablespoons | For the pan |
| Worcestershire sauce | 1 teaspoon | Optional for onions |
The Recipe
- Prep Time: 15 minutes
- Cook Time: 25 minutes
- Total Time: 40 minutes
- Servings: 4
- Difficulty: Simple
Equipment Needed:
– Large heavy-bottomed skillet or griddle
– Spatula
– Cutting board
– Chef's knife
– Tongs
Step-by-Step Instructions
Step 1: Prepare the Onions
Start by heating a tablespoon of butter in your large skillet over medium heat. Once it is bubbling, add the sliced onions. You want to cook these slowly, stirring occasionally. This should take about 10 to 12 minutes. The goal is to get them soft and golden, but not burnt. If they start to brown too quickly, turn the heat down to low. If you are using the optional Worcestershire sauce, add it during the last two minutes of cooking to coat the onions evenly. Once they are soft and jam-like, remove them from the pan and set them aside on a plate.
Step 2: Shape and Season the Patties
While the onions are cooking, divide your ground beef into four equal portions. Gently press each portion into an oval shape that mimics the footprint of your bread slices. Make sure the patties are thin so they cook quickly and fit neatly inside the bread. Sprinkle both sides of each patty with your salt and pepper. Keep the patties cold until the moment they go into the pan, as this helps them hold their shape better.
Step 3: Sear the Meat
Wipe your skillet clean if there are any stray bits from the onions, then return it to medium-high heat. Add another small knob of butter. Place the patties into the hot pan. You want to cook them for about 3 to 4 minutes per side. Use a meat thermometer to ensure they reach an internal temperature of 160 degrees Fahrenheit. This is the safe temperature for ground beef to ensure any harmful bacteria are destroyed. Do not press down on the patties with your spatula, as you want to keep the juices inside. Once done, move the patties to a clean plate.
Step 4: Assemble the Sandwiches
Wipe the skillet out once more and lower the heat to medium. Butter one side of each slice of bread. Place four slices of bread, buttered-side down, into the pan. Immediately place a slice of cheese on each piece of bread. Add a cooked patty on top of the cheese, then divide the cooked onions evenly among the four sandwiches. Place another slice of cheese over the onions, and finish with the remaining slice of bread, buttered-side facing up.
Step 5: Grill the Sandwiches
Cook the sandwiches for about 3 to 4 minutes on the first side. You are looking for a deep golden-brown color on the bread. Use a spatula to carefully flip the sandwiches over. The cheese should be starting to melt at this point. Grill the second side for another 3 to 4 minutes until the bread is toasted and the cheese is fully melted and gooey. If the bread browns too fast but the cheese hasn't melted yet, cover the skillet with a lid for a minute to trap the heat.
Mistakes I Made (So You Don't Have To)
Overloading the Bread
Early on, I used to put way too much onion and meat inside the sandwich. It made the whole thing impossible to flip and it would just fall apart in the pan. Now, I make sure the patties are thin and the layer of onions is spread out evenly. This keeps the structure sound and makes it easier to eat as a proper sandwich. If you have extra onions, just serve them on the side rather than trying to cram them all inside.
Burning the Bread
I often used to crank the heat up to high because I wanted the bread to toast fast. This resulted in burnt bread on the outside and cold, unmelted cheese on the inside. I learned that medium heat is the secret. It allows the heat to penetrate the layers gradually, giving the cheese enough time to melt without scorching the exterior. If you notice your pan is getting too hot, move it off the burner for a moment to let it cool down before continuing.
Using Lean Beef
I once tried to make these with very lean ground beef, thinking it would be better. The result was a dry, crumbly patty that had no flavor. The fat in the 80/20 mix is what gives the sandwich its moisture and richness. The fat also helps conduct the heat while the meat is searing in the pan. If you use lean meat, you end up with a very unsatisfying result that feels like eating dry cardboard instead of a hearty meal.
Rushing the Onions
I used to try and rush the onion cooking process by turning the heat up. The onions ended up being crispy on the edges but still raw and crunchy in the middle, which is not what you want for a patty melt. They really need that low and slow treatment to break down properly. Now, I start the onions first thing and let them cook while I prep the rest of the ingredients. Patience here is definitely rewarded with a much better final product.
Variations and Tips
Using Different Cheeses
While Swiss is the classic choice, I have had great success with other melting cheeses. Havarti is excellent because it is very creamy, though it can be a bit runny. Sharp cheddar provides a nice contrast to the beef but takes a bit longer to melt, so you might need to use that lid trick I mentioned earlier. I avoid soft, spreadable cheeses like goat cheese because they do not provide the structural integrity that a solid slice of cheese does for a grilled sandwich.
Adding Aromatics
If you want to spice things up, try adding a few minced cloves of garlic to the pan when the onions are almost done. You could also stir in a tiny bit of smoked paprika to give the meat a deeper, more savory flavor profile. Keep it light, though, as you do not want to overpower the simple, classic taste of the beef and bread. Fresh herbs like thyme added to the onions while they cook can also add a nice, subtle earthy note.
The Prep Ahead Method
To save time during the week, you can cook the onions the night before and keep them in the fridge. This cuts the active cooking time down by about 10 minutes. When you are ready to make the sandwiches, you just need to shape and sear the patties and then move straight to the grilling step. Just make sure the onions are stored in an airtight container and brought to room temperature before you start assembly so they do not cool down the pan too much.
Bread Substitutes
If you cannot find rye or sourdough, a good quality thick-cut white bread will work, though it is not as sturdy. If you use white bread, you need to be very careful when flipping, as it tends to tear more easily than the denser varieties. Another option is a thicker wheat bread, which offers a nuttier flavor. Just ensure whatever you choose is thick enough to hold the weight of the meat and cheese without becoming saturated.
Storage and Reheating
If you happen to have leftovers, let the sandwiches cool down completely before putting them in an airtight container. You can store them in the refrigerator for up to 3 days. I do not recommend freezing these, as the bread will lose its texture and the onions will make the sandwich soggy once thawed. When you are ready to reheat, the best method is to use a pan on the stove over medium-low heat.
Place the sandwich back in the pan and heat it gently, flipping it once or twice. You want to get it steaming hot throughout, aiming for an internal temperature of 165 degrees Fahrenheit. This usually takes about 5 to 7 minutes. Using a microwave is not ideal because the bread will turn chewy and soft rather than crispy. If you are in a rush and must use the microwave, heat it for 60 seconds, but know that you will lose the crunchy texture that makes this dish so enjoyable.
Frequently Asked Questions
Can I make the patties ahead of time?
Yes, you can shape the patties and store them in the refrigerator for up to 24 hours. I recommend keeping them between sheets of parchment paper so they do not stick together. Make sure to keep them chilled right until you are ready to put them in the pan to maintain the best texture. If you store them longer than a day, the quality of the meat will decline, so it is best to cook them within that window.
Why does my cheese not melt all the way?
This usually happens because the heat is too high or the cheese slices are too thick. If you are using a thicker variety of cheese, it will take longer to melt than a thin, processed slice. My favorite trick is to place a lid over the skillet for the last minute of cooking. This traps the steam and heat, which helps the cheese melt quickly without over-toasting the bread. You can also add a tiny splash of water to the pan away from the bread to create extra steam.
Is there a way to make this without butter?
You can use a small amount of oil, like avocado or vegetable oil, to toast the bread. It will still get crispy, but you will miss that distinct buttery flavor that is traditional for a patty melt. Avoid using olive oil, as it has a lower smoke point and might impart a flavor that clashes with the beef. If you do use oil, use it sparingly so the bread doesn't end up greasy.
Can I use turkey or ground chicken instead of beef?
You can certainly substitute ground turkey or chicken, but you need to be aware of the lower fat content. These meats dry out much faster than beef. If you use them, I recommend adding a little bit of olive oil or minced herbs to the mixture to keep the patties moist. Also, be sure to cook them to an internal temperature of 165 degrees Fahrenheit to ensure they are safe to eat, as poultry requires a higher heat than beef.
What should I serve with this?
A patty melt is quite heavy, so I like to serve it with something acidic or crisp to balance the richness. A simple side salad with a vinaigrette or some crisp pickles are my go-to choices. Potato chips or a simple slaw also work very well. The goal is to provide a contrast to the dense, warm sandwich, so avoid anything too creamy or heavy as a side dish.
Final Thoughts
Making a patty melt is all about the simple pleasure of a well-cooked, toasted sandwich. It is the kind of meal that makes you feel like you have really accomplished something in the kitchen without having to spend hours on a complicated process. Once you get the hang of balancing the heat and the timing of your ingredients, you will find yourself reaching for this recipe whenever you want something truly satisfying.
I hope you enjoy making this as much as I do. There is a real comfort in the combination of these basic flavors, and it is a wonderful way to turn humble ingredients into something that feels like a treat. Just remember to keep an eye on your heat and take your time with those onions, and you will have a perfect meal every single time. Happy cooking.