
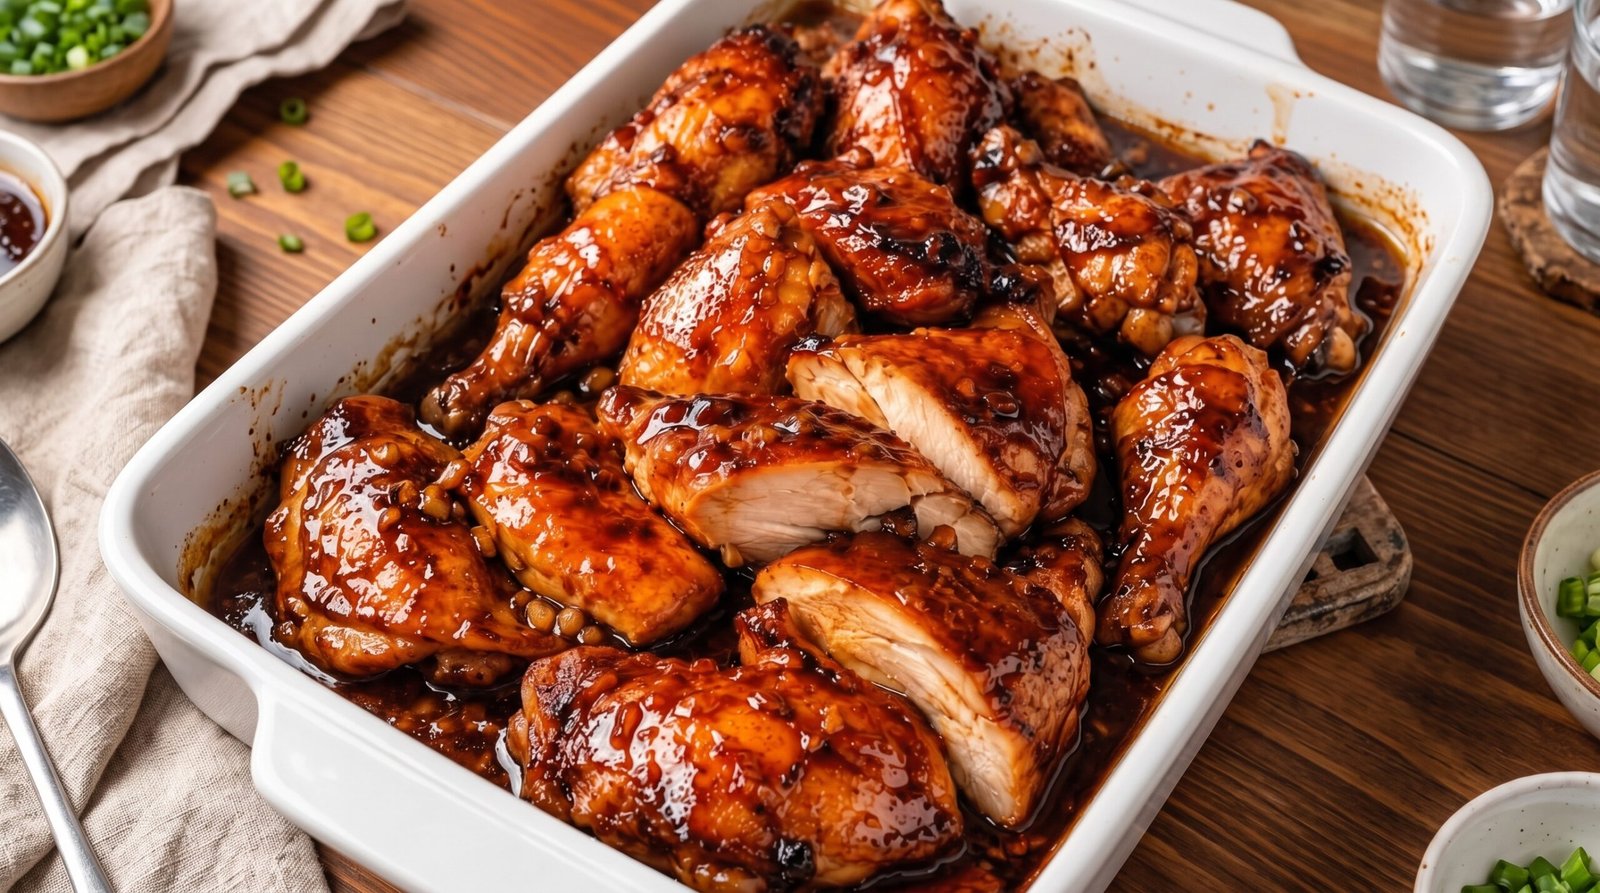
I often find myself standing in my kitchen at five in the evening, staring at the refrigerator and wishing dinner would just appear. We all have those days where energy is low and the thought of standing over a hot stove for an hour feels impossible. I used to reach for takeout menus during these times, but I eventually realized that I could make something much better with just a few pantry staples. This dish of baked soy glazed chicken thighs has become my go-to for those exact moments. It takes minimal effort to put together, but the result is a savory, glossy piece of meat that satisfies everyone at the table. It is not complicated, it does not require fancy equipment, and the cleanup is manageable. When I need a reliable meal that feels special without the stress, this is exactly what I turn to. You will find that this method produces a tender, flavorful dinner that pairs well with steamed rice or simple roasted vegetables.
Why This Recipe Works
This recipe relies on the power of a simple reduction to do the heavy lifting in terms of flavor. When you combine soy sauce, garlic, ginger, and a touch of sweetness, you create a marinade that penetrates the meat while it bakes. The beauty of using chicken thighs is that they are much more forgiving than breasts. If you leave them in the oven for five minutes too long, they stay moist and juicy instead of turning into a dry, chewy mess.
Another reason I gravitate toward this recipe is the predictable nature of oven baking. Once the tray is in the oven, you are free to do other things, like toss a salad or set the table. There is no active flipping or watching for flare-ups like you would have on a grill. You just set a timer and let the heat do its job.
The glaze itself is what ties everything together. As the sugars in the sauce interact with the high heat of the oven, they bubble up and coat the chicken in a rich, dark layer. This is not a crisp-skinned chicken, as the moisture from the soy glaze keeps the skin soft and infused with flavor. However, the depth of savory flavor you get from the soy sauce combined with the aromatics creates a profile that feels much more complex than the small list of ingredients suggests. It is a straightforward, honest meal that relies on basic kitchen chemistry to deliver consistent results every single time. You do not need professional training to get that glossy look, just a bit of patience while the sauce reduces at the end.
Ingredient Notes
The Poultry
When choosing your chicken, always look for bone-in, skin-on thighs if possible. The bone helps the chicken stay moist and adds a bit more flavor to the sauce as it renders out during the cooking process. You can use boneless thighs if that is what you have on hand, but you will need to reduce the oven time by about ten minutes to prevent them from overcooking. I try to buy organic or free-range chicken when the budget allows, as I find it holds its shape better during the baking process. Ensure that each piece is roughly the same size so they cook evenly on the tray.
The Glaze Components
The base of the sauce is soy sauce. I prefer using a standard or light soy sauce, as the dark variety can be a bit too intense and salty for a glaze that needs to reduce. For the sweetness, brown sugar works best because it has a slight molasses note that pairs beautifully with the saltiness of the soy. If you do not have brown sugar, white sugar or honey will work, though honey will give the glaze a slightly different sheen. Fresh garlic and ginger are non-negotiable for me. I know it is tempting to use the powder, but the brightness and punch you get from grating fresh garlic and ginger into the sauce is what makes the dish taste like it came from a restaurant.
| Ingredient | Amount | Notes |
|---|---|---|
| Chicken thighs | 6 to 8 pieces | Bone-in, skin-on for best results |
| Soy sauce | 1/2 cup | Use a standard low-sodium variety |
| Brown sugar | 1/3 cup | Packed tightly into the measuring cup |
| Garlic | 4 cloves | Minced very finely |
| Fresh ginger | 1 tablespoon | Peeled and grated on a microplane |
| Rice vinegar | 1 tablespoon | Adds a necessary touch of acidity |
| Toasted sesame oil | 1 teaspoon | Just a drop for deep flavor |
The Recipe
- Prep Time: 10 minutes
- Cook Time: 45 minutes
- Total Time: 55 minutes
- Servings: 4 people
- Difficulty: Simple
Equipment Needed:
– Large shallow baking dish
– Small mixing bowl
– Measuring cups and spoons
– Meat thermometer
– Whisk or fork
Step-by-Step Instructions
Step 1: Prep the Oven and Pan
Start by preheating your oven to 400 degrees Fahrenheit. It is important to let the oven reach the full temperature before you put the chicken inside so that the baking process starts immediately. While the oven heats up, take your baking dish and lightly brush it with a tiny bit of oil, just to make sure the glaze does not stick too stubbornly to the bottom during the final minutes of cooking.
Step 2: Mix the Glaze
In your small mixing bowl, whisk together the soy sauce, brown sugar, minced garlic, grated ginger, rice vinegar, and sesame oil. Make sure you whisk it until the sugar has mostly dissolved into the soy sauce. I always taste a tiny bit at this stage to check the balance; it should be very savory and sweet, with the ginger providing a sharp, clean finish. If it feels too salty, add a tiny bit more sugar.
Step 3: Arrange the Chicken
Pat your chicken thighs dry with a paper towel. This helps the seasoning adhere to the skin better. Place the thighs in the baking dish, skin side up. Make sure they are not overcrowded, as you want the hot air to circulate around each piece. Pour the glaze evenly over the chicken. You want to make sure every piece is well-coated, but do not worry if the bottom of the dish seems to have a lot of liquid; this will reduce into a thick syrup.
Step 4: Initial Bake
Place the dish in the center rack of your preheated oven. Bake the chicken for 30 minutes. At this point, the chicken will be mostly cooked through, but it will look a bit pale. You want to see the glaze starting to bubble around the edges of the pan. This is when the magic starts to happen as the water evaporates from the sauce.
Step 5: Basting and Finishing
After 30 minutes, open the oven and carefully use a spoon to scoop some of the hot liquid from the bottom of the dish and drizzle it over the skin of the chicken. Repeat this for every piece. Return the dish to the oven for another 15 minutes. You are looking for an internal temperature of 165 degrees Fahrenheit when a thermometer is inserted into the thickest part of the meat, avoiding the bone. The sauce should be dark and thick, sticking to the back of your spoon.
Step 6: Rest and Serve
Remove the dish from the oven and let it sit for at least 5 minutes before serving. This rest period is crucial because it allows the juices inside the chicken to redistribute. If you cut into it too soon, those precious juices will run out onto the plate. Serve the chicken directly from the baking dish, making sure to spoon that thick, flavorful sauce over the top of each piece before it hits the table.
Mistakes I Made (So You Don't Have To)
Using a Pan That Was Too Small
Early on, I tried to pack as many chicken thighs as possible into a small pan. The result was a disaster because the pieces were so close together that they steamed instead of roasting. The glaze never thickened because the steam couldn't escape, and the chicken remained pale and sad. The fix is simple: use a baking dish large enough that the chicken thighs have a little bit of room between them. If you only have one small dish, cook in two batches.
Burning the Garlic
I once added the garlic to the glaze and let it sit out for an hour before baking. By the time it went into the oven, the garlic had started to turn bitter from the acidity of the soy sauce. Now, I always mix the glaze right before I am ready to pour it over the chicken. If you need to prep in advance, keep the garlic separate until the last second. It keeps the flavor fresh and prevents that harsh, metallic aftertaste.
Ignoring the Internal Temperature
I used to rely solely on the clock, guessing that after 45 minutes everything must be done. One time, I ended up with undercooked chicken because my oven ran slightly cool. It was not a safe situation. Since then, I always use a meat thermometer. It takes the guesswork out of the process and ensures that the meat is perfectly cooked every time. Aim for 165 degrees Fahrenheit. It is the only way to be sure.
Overloading with Salt
The first time I made this, I used regular soy sauce and added extra salt to the rub. The final dish was so salty it was nearly inedible. You have to remember that soy sauce is naturally very salty. When you reduce it, the salt concentration becomes even higher. Stick to the amount listed in the recipe and avoid adding any extra salt to the meat itself. The soy sauce provides all the seasoning you need.
Variations and Tips
Adding Some Heat
If you enjoy a bit of spice, add a teaspoon of chili flakes or a tablespoon of chili garlic sauce to your glaze mixture. It changes the flavor profile entirely and adds a nice warmth that hits the back of your throat. This works especially well if you are serving the chicken over plain white rice, as the heat helps cut through the sweetness of the sugar.
Using Different Aromatics
While ginger and garlic are standard, you can experiment with other flavors. A splash of orange juice or a bit of orange zest added to the glaze gives it a bright, citrusy note that goes perfectly with the soy. You can also throw in a star anise or a cinnamon stick into the liquid while it bakes to infuse it with a subtle, earthy aroma. Just remember to remove them before you serve.
Making It Ahead
You can mix the glaze ahead of time and store it in a jar in the refrigerator for up to 24 hours. When you are ready to cook, just pour it over the chicken. I often do this in the morning before I head to work, so when I get home, I just have to pop the chicken into the oven. It saves me about ten minutes of cleanup and prep time during the dinner rush.
Thinner Glaze Strategy
If you find that your sauce is not thickening enough by the end of the 45 minutes, remove the chicken to a serving platter and put the baking dish directly on the stovetop over medium heat. Whisk the liquid for 2 to 3 minutes until it reduces into a syrupy consistency. This is a great trick to rescue a sauce that seems too watery. Be careful not to let it burn, as the sugar content makes it sensitive to high heat.
Storage and Reheating
If you happen to have leftovers, they keep quite well. Transfer the chicken and any remaining sauce into an airtight container once it has cooled down. It is important to get the food into the refrigerator within two hours of cooking to keep it safe. You can keep this in the fridge for up to 3 days.
When it comes to reheating, you want to bring the chicken back to a safe internal temperature of 165 degrees Fahrenheit. I recommend reheating it in a preheated 350-degree oven for about 15 minutes, adding a splash of water to the pan to keep the glaze from drying out or burning. You can also use a microwave, but the texture of the chicken skin often suffers. If you use a microwave, cover the dish with a damp paper towel and heat in one-minute intervals until steaming hot. I do not recommend freezing this dish, as the texture of the chicken and the consistency of the glaze change significantly once thawed. It is best enjoyed fresh or within a few days of cooking.
Frequently Asked Questions
Can I use chicken breasts instead of thighs for this recipe?
You certainly can, but you must be careful with the timing. Chicken breasts are much leaner and will dry out if cooked for 45 minutes. I suggest reducing the baking time to about 25 to 30 minutes, or until the thickest part reaches 165 degrees Fahrenheit. Keep a close eye on the thermometer to ensure you do not overcook them.
Why does my sauce look thin after 45 minutes of baking?
This usually happens because the oven temperature was not high enough or the baking dish was too crowded, preventing evaporation. If your sauce is thin, you can move the liquid to a small saucepan on the stove and simmer it over medium heat for a few minutes. It will reduce quickly and become the thick, glossy glaze you are looking for.
Can I skip the brown sugar to make it less sweet?
The sugar is essential not just for flavor, but for the texture of the glaze. It acts as a thickening agent as it caramelizes. If you want it less sweet, you can reduce the amount to two tablespoons, but keep in mind that the sauce will be thinner and less syrupy. You might need to adjust the cooking time as well.
Is it safe to eat the sauce if it has been in contact with raw chicken?
Yes, it is perfectly safe as long as the sauce reaches a high temperature. Because the sauce is in the oven with the chicken for the entire duration of the cooking time, it is heated to a temperature that kills any potential bacteria. The sauce effectively pasteurizes itself as it bubbles around the chicken.
What should I serve with this chicken?
This dish is quite savory and sweet, so it pairs best with neutral sides that can soak up the extra sauce. Steamed white rice is the most traditional choice, but it also goes well with mashed potatoes or a simple stir-fry of green beans or broccoli. The goal is to choose a side that won't clash with the strong soy and ginger flavors.
Final Thoughts
Making this meal reminds me that you do not need to spend hours in the kitchen to produce a dinner that feels like it was planned with care. It is all about choosing ingredients that work well together and trusting the process of roasting to create those deep, savory flavors. I find that when I keep the process simple, I am much more likely to actually enjoy the time I spend cooking rather than seeing it as a chore.
If you are looking for a reliable way to get a flavorful dinner on the table without needing a long list of ingredients, give this a try. It is a humble, honest recipe that I find myself returning to again and again, especially when the week has been long and I just want something that works. I hope it becomes a regular part of your rotation as well.