
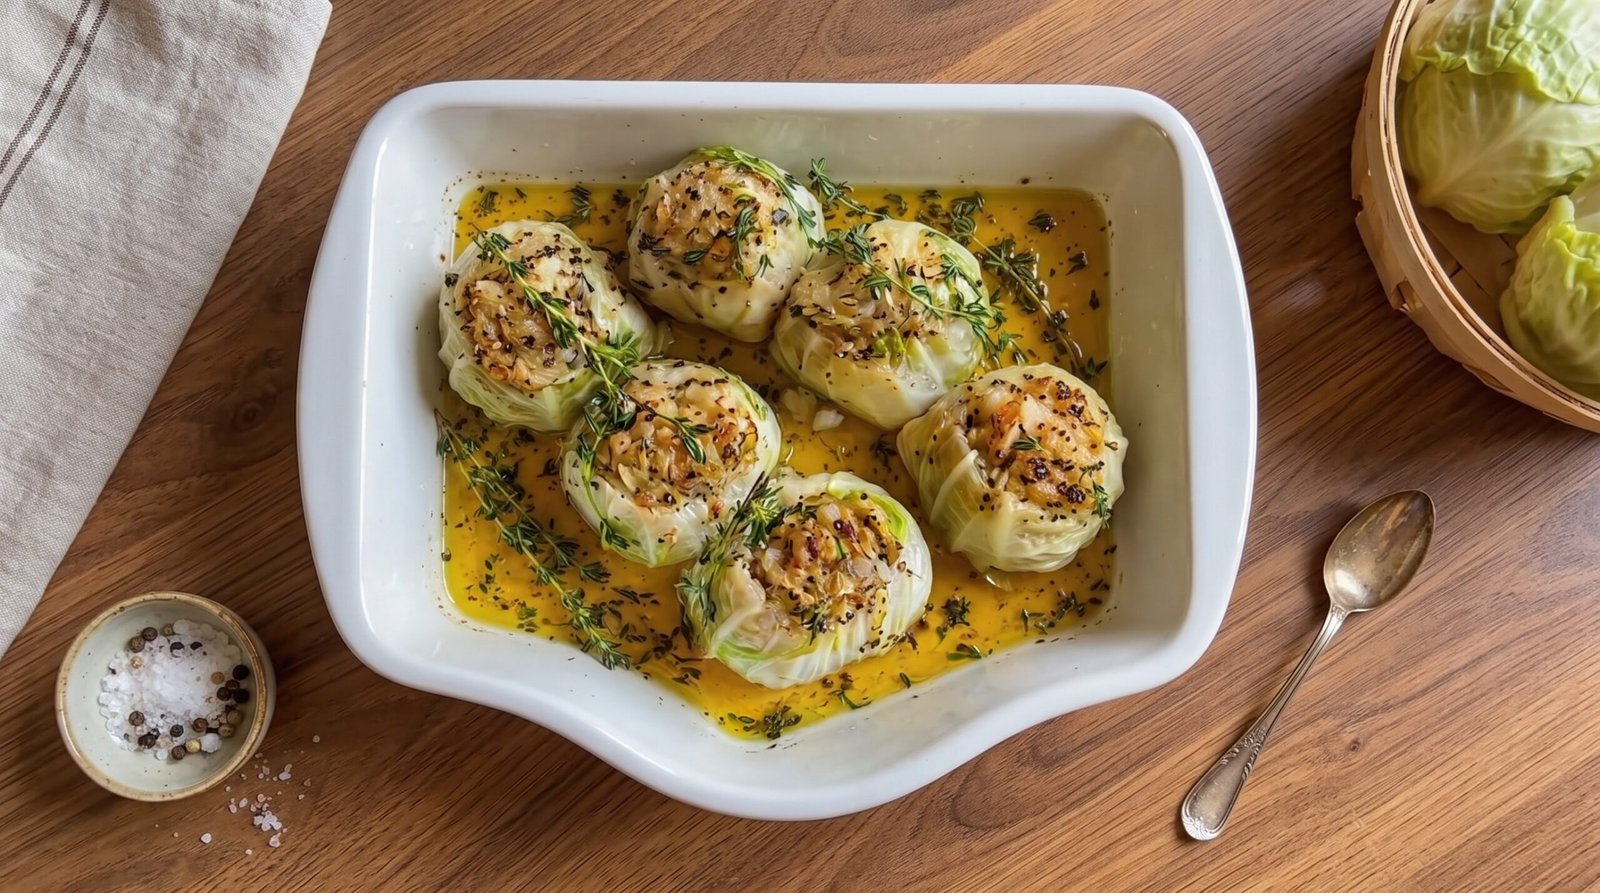
I used to think cabbage was just something meant to be shredded for coleslaw or thrown into a long-simmered pot of corned beef. It sat in my crisper drawer for weeks, often forgotten until it wilted, because I just did not have the inspiration to use it differently. Then, I tried roasting cabbage this way, cutting it into thick steaks or hearts, and it changed how I look at this humble vegetable entirely. When you roast these wedges at a high heat, the edges turn tender and sweet while the inside remains soft and buttery. It is a simple preparation that does not require fancy techniques, just a sharp knife and a hot oven. I find myself making this whenever I need a quick, reliable vegetable side that feels a bit more thoughtful than plain steamed greens. It holds up well alongside roast pork, sausages, or even a simple piece of baked fish. You get these lovely, slightly charred edges that contrast with the mellow sweetness of the cooked cabbage leaves. It is a quiet, reliable dish that has saved me many times when I had guests coming over and realized I had nothing green planned.
Why This Recipe Works
This method relies on high-heat roasting to transform the texture of the cabbage. Raw cabbage is dense, but once it spends time in a hot oven, it softens into something quite luxurious. The outer layers get a bit of color and texture while the inner core stays moist. You are essentially caramelizing the natural sugars in the leaves, which removes that sharp, pungent quality people often dislike about raw cabbage. This transformation is straightforward and relies on the oven to do the heavy lifting.
The flavor profile is very clean and simple, making it versatile enough to match almost any main course. Because I use a mix of garlic, olive oil, and fresh herbs, the aromatics penetrate the leaves as they soften. Using fresh thyme adds a woody, earthy note that complements the slight sweetness of the roasted cabbage. The salt and pepper help pull out the moisture, creating a subtle sauce in the bottom of the dish that you can drizzle back over the cabbage before serving. It feels sophisticated despite using very basic ingredients that are almost certainly already in your pantry.
Ease is another big factor here. You do not need to stand over a stove stirring a pot. Once you prepare the wedges and place them in the baking dish, the oven takes over. It is a hands-off approach that lets me focus on the rest of the meal. I also appreciate that it uses a whole head of cabbage, which is an inexpensive ingredient that stays fresh for quite a while in the refrigerator. If you are looking for a way to get more vegetables on your plate without a lot of fuss or complex cleanup, this is a method that truly delivers on all fronts. It does not try to be anything it is not, and that is exactly why I keep coming back to it.
Ingredient Notes
The Main Vegetable
You want to start with a head of green cabbage that feels heavy for its size. Look for one where the leaves are tight against the head rather than loose and separating. Avoid any heads that have deep brown spots or leaves that look dry and brittle at the edges. Since you are cutting these into thick wedges or hearts, you want the core to be intact. The core is the structural element that keeps all those layers together, so when you cut the cabbage, make sure you go straight through the center base. If you trim too much off the bottom, the wedge will fall apart into loose leaves as it cooks. You can use Savoy cabbage if you prefer a softer, frilled leaf, but green cabbage is the classic choice here because it stands up so well to the heat.
Aromatics and Seasoning
For the fat, I recommend a good quality extra virgin olive oil. Because there are so few ingredients, the flavor of the oil really comes through, so reach for one that you enjoy the taste of on its own. Garlic is non-negotiable for me. I prefer to slice it thinly rather than mincing it; this way, the garlic infuses the oil without burning as quickly in the heat of the oven. Fresh thyme is my preferred herb here because its stems are sturdy and it keeps its fragrance through the cooking process. If you do not have fresh thyme, you could use a small amount of dried oregano, but fresh really makes a difference in the aroma of the finished dish. Kosher salt and freshly cracked black pepper are the final pieces. Be generous with the salt, as cabbage needs a fair amount to bring out its best flavor.
| Ingredient | Amount | Notes |
|---|---|---|
| Green cabbage | 1 medium head | Must keep the core intact |
| Olive oil | 4 tablespoons | Extra virgin for best flavor |
| Garlic | 4 cloves | Thinly sliced |
| Fresh thyme | 6 sprigs | Leaves removed or whole stems |
| Kosher salt | 1 teaspoon | Add to taste |
| Black pepper | 0.5 teaspoon | Freshly cracked |
The Recipe
- Prep Time: 10 minutes
- Cook Time: 40 minutes
- Total Time: 50 minutes
- Servings: 4 servings
- Difficulty: Simple
Equipment needed:
– Large cutting board
– Very sharp chef's knife
– 9×13 inch baking dish
– Small bowl for mixing oil and aromatics
Step-by-Step Instructions
Step 1: Prepare the Oven and Dish
Preheat your oven to 400 degrees Fahrenheit. Make sure your oven rack is in the center position so the heat circulates evenly around the baking dish. While the oven is warming up, lightly grease your 9×13 inch baking dish with a small splash of olive oil to prevent any sticking. It is important to have the oven fully at temperature before you put the cabbage in, as the initial blast of heat is what helps the edges get that nice color.
Step 2: Cut the Cabbage Hearts
Remove any damaged outer leaves from your head of cabbage. Place the head on a cutting board with the stem side facing down. Use your sharp knife to cut the cabbage through the core into four equal wedges or thick hearts. If the head is large, you might get six wedges instead, which is fine, just adjust your baking dish accordingly. The key is to ensure that every piece has a portion of the hard core at the bottom to hold the leaves together while they roast.
Step 3: Seasoning the Wedges
In a small bowl, whisk together the olive oil, the thinly sliced garlic, half of the fresh thyme leaves, the salt, and the pepper. Place the cabbage wedges cut-side up in your prepared baking dish. Use a pastry brush or a spoon to generously coat the tops and sides of each wedge with the seasoned oil mixture. Take a moment to tuck some of the sliced garlic and remaining thyme sprigs into the gaps between the cabbage leaves. This ensures the aromatics are spread throughout the dish.
Step 4: The Initial Roast
Place the baking dish into the center of your 400-degree oven. Roast the cabbage for 20 minutes without touching it. During this time, the edges of the leaves will begin to soften and take on a golden color. The garlic in the oil will also start to become fragrant. Do not be tempted to stir or move the wedges yet, as they are fragile at this stage and you want to allow that initial sear to develop on the surface.
Step 5: Flipping and Finishing
After the first 20 minutes, carefully turn each cabbage wedge over so the other side is facing up. Use a pair of tongs to do this gently so you do not break the hearts apart. Drizzle any oil that has collected at the bottom of the dish back over the cut sides of the cabbage. Return the dish to the oven for another 20 minutes. The cabbage is done when the leaves are very tender all the way through, and the garlic is soft and golden brown. The total cook time should be 40 minutes for a standard head of cabbage.
Step 6: Serving
Remove the dish from the oven and let it sit for about 5 minutes before serving. This allows the juices to settle and the internal heat to distribute. The cabbage should be served warm, straight from the dish. Use a wide spatula to lift each heart onto a plate, making sure to spoon a bit of the garlic-infused oil from the bottom of the pan over the top. The texture will be soft, buttery, and the flavor will be a balanced mix of savory and sweet.
Mistakes I Made (So You Don't Have To)
Removing the Core Entirely
The first time I made this, I cut the core out because I thought it would be too tough to eat. When I went to roast the wedges, they immediately turned into a pile of loose cabbage shreds. The core is the structural foundation that holds everything together. Now, I always leave the core intact. You do not have to eat the very end of the core if you find it too dense, but keep it there during the cooking process. It allows for the beautiful wedge presentation and keeps the leaves from turning into mush.
Crowding the Baking Dish
I once tried to squeeze a very large head of cabbage into a dish that was too small. Because the wedges were packed tightly together, the air could not circulate properly, and the cabbage ended up steaming rather than roasting. The result was soggy, limp cabbage rather than the tender, caramelized version I wanted. Now, I make sure there is at least an inch of space between each wedge. If you have a large head of cabbage, use a larger baking dish or two separate ones to ensure they get enough space.
Cutting the Wedges Too Thin
I used to think thinner slices would cook faster and be easier to eat. The problem was that thinner slices dried out before the core became tender. They also lost their shape completely and turned into charred, brittle ribbons. Now, I stick to thick wedges, about 1.5 to 2 inches at the widest point. This thickness allows the center to become soft while the outside develops that lovely color. It is a better balance of textures, providing a hearty, satisfying bite.
Adding Herbs Too Late
I used to wait until after the cabbage was roasted to add the thyme. I thought it would keep the flavor brighter, but the herbs just sat on top and felt like a garnish rather than part of the dish. Now, I add the thyme halfway through the cooking process or even at the beginning when I coat the cabbage with oil. This lets the herbs infuse into the oil and the cabbage leaves, creating a much deeper, more cohesive flavor profile that permeates the whole vegetable.
Variations and Tips
Adding Acidic Balance
If you want to cut through the richness of the olive oil and the natural sweetness of the cabbage, finish the dish with a squeeze of fresh lemon juice or a light drizzle of balsamic glaze right before serving. The acidity adds a brightness that makes the flavors pop. I find that a little bit of lemon zest also goes a long way here. It is a simple addition that changes the character of the dish without needing extra cooking time.
Playing with Aromatics
While garlic is my standard, you can definitely experiment with other flavors. I have tried adding a pinch of red pepper flakes to the oil for a bit of warmth, or using a dash of smoked paprika if I am serving the cabbage with a smoky sausage. You could also sprinkle some toasted pine nuts or sunflower seeds over the top for a little crunch right before you take the dish out of the oven. Just keep an eye on them so they do not burn during those final minutes of roasting.
Making it Ahead
This is a great dish for when you have company because you can prep the cabbage wedges earlier in the day. Get them arranged in the baking dish, coat them with the oil and aromatics, and cover the dish with plastic wrap. Keep it in the refrigerator until you are ready to roast. Just remember to take the dish out about 20 minutes before putting it in the oven so it is not ice cold. You might need to add an extra 5 minutes to the total cooking time if the cabbage starts cold.
Choosing the Right Cabbage
While green cabbage is the standard, try using Savoy cabbage if you want a lighter texture. The leaves are more crinkly and delicate, which means they absorb the oil and seasonings beautifully. Because Savoy is a bit more tender than standard green cabbage, it might cook about 5 minutes faster, so keep a close eye on it around the 35-minute mark. Whatever type you choose, make sure it is fresh and firm, as that is the secret to a good result.
Storage and Reheating
If you have leftovers, they keep well in an airtight container in the refrigerator for up to 3 days. I find that the flavors actually meld a bit more the next day, making it a great vegetable side for lunch. When you are ready to eat them again, avoid the microwave if possible, as it can make the cabbage watery. Instead, place the wedges in a small baking dish or on a tray and reheat them in a 350-degree oven for about 10 to 15 minutes, until they are heated through.
Do not try to freeze this dish. Cabbage has a high water content, and the freezing process will turn the softened leaves into a mushy, watery mess once they thaw. It is best enjoyed fresh or within a few days of cooking. Always ensure that you store your leftovers within 2 hours of pulling them out of the oven to keep them food-safe. If you are reheating, make sure they are steaming hot throughout before you serve them again.
Frequently Asked Questions
Can I use a different oil than olive oil?
You can use other fats, but the flavor will definitely change. Grapeseed or avocado oil are good choices because they handle the high heat well, but they lack the distinct, savory flavor that extra virgin olive oil provides. Avoid using butter, as the milk solids in butter will burn during the 40-minute roasting process at 400 degrees. If you love the taste of butter, you can add a small pat to the dish in the last 5 minutes of roasting for flavor, but stick with olive oil for the main roasting phase.
Why does my cabbage taste bitter?
Bitterness in roasted cabbage usually happens for two reasons: either the cabbage was old to begin with, or it was roasted at a temperature that was too high for too long, causing the edges to turn into burnt carbon rather than caramelized sweetness. Ensure your oven is calibrated correctly to 400 degrees and try not to let the edges get too dark. If you notice your cabbage is bitter even when not burnt, it might be the specific head you bought. Younger, smaller heads of cabbage tend to be sweeter.
What should I serve this with?
This dish is incredibly versatile. I love it alongside roasted meats like pork loin, chicken thighs, or even simple pan-seared sausages. It also makes a great vegetarian main if you serve it with a side of white beans or some crusty bread to soak up the garlic oil from the dish. Because the flavor profile is so neutral, it works well with dishes that have strong herbs or spices, as the cabbage mellows everything out nicely.
Can I make this in the air fryer?
Yes, you can use an air fryer, but you need to adjust your expectations and times. Cut the wedges smaller so they fit in your air fryer basket, and roast them at 375 degrees for about 15 to 20 minutes, turning them halfway through. The air fryer creates more of a dry, crisp texture on the outside compared to the oven, which keeps the interior a bit more moist. Keep a close eye on the cabbage, as the high-speed air can dry out the leaves faster than a conventional oven.
How do I know when the cabbage is fully cooked?
You are looking for the leaves to look soft, translucent, and slightly golden at the edges. When you pierce the thickest part of the core with a fork or the tip of a paring knife, it should go through with almost no resistance. If the fork meets a lot of hard resistance in the center of the core, it needs a few more minutes. The leaves themselves should be very tender and easy to cut. If they still have a crunch like raw cabbage, they need more time in the oven.
Final Thoughts
Making these cabbage hearts has completely changed how I think about vegetable prep during the week. It is one of those dishes that proves you do not need complicated ingredients to create something really satisfying. I hope this becomes a staple in your kitchen just like it has in mine.
Once you get the hang of the timing, you can easily adapt this to whatever herbs you have on hand or whatever is growing in your garden. It is a forgiving, simple, and honest way to eat. Give it a try next time you have a head of cabbage sitting in your fridge and see how quickly it disappears.