
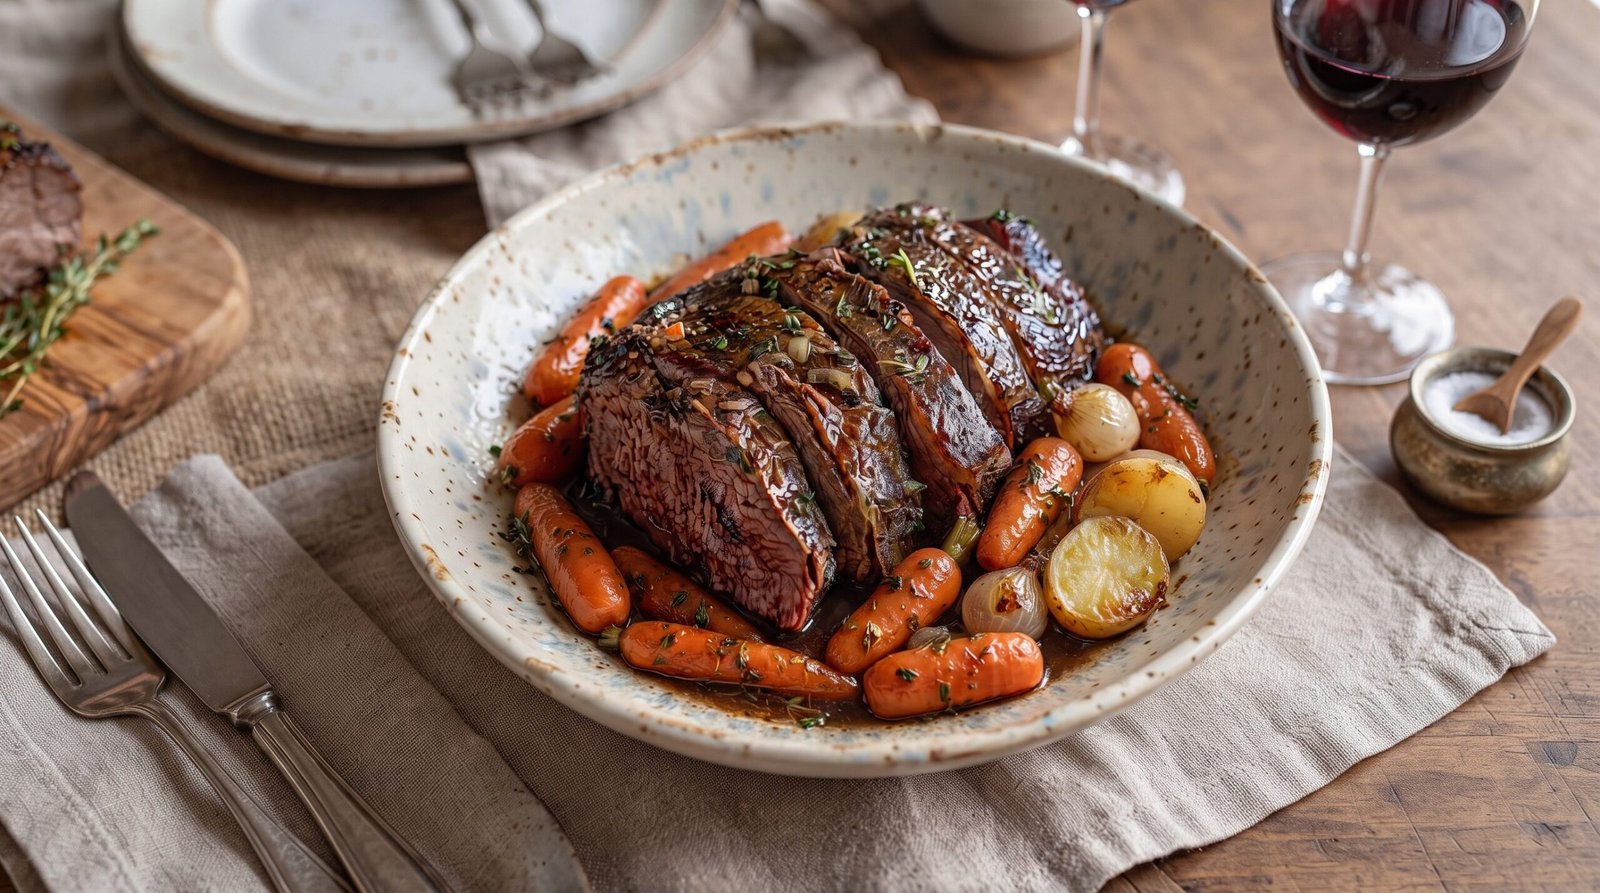
I remember the first time I tried to make a pot roast for a Sunday dinner. I was living in a drafty apartment, trying to impress some friends, and I ended up with a piece of beef that was tough as leather. It took me a long time to learn that patience is the main ingredient when you are working with a tougher cut of meat like a chuck roast. You cannot rush the process if you want the fibers to relax and become tender enough to fall apart with just a fork.
Making a classic beef chuck roast with carrots and pearl onions is a rewarding project for a quiet weekend. When you slow roast this cut, the connective tissue melts down into a rich, savory liquid that creates its own sauce. This dish fills the house with a comforting scent that reminds me of long afternoons spent in the kitchen. If you follow a few simple rules about searing and liquid levels, you will end up with a meal that feels special without needing any fancy techniques.
Why This Recipe Works
This recipe relies on the natural properties of the chuck roast. This cut comes from the shoulder of the cow, which is a hardworking muscle. Because of that, it is full of connective tissue that turns into gelatin during a long, slow cook. That gelatin is what gives the finished sauce its mouth-coating texture and richness. Unlike a lean cut of beef that would dry out in the oven, a chuck roast actually gets better the longer it sits in the braising liquid.
The combination of carrots and pearl onions adds a necessary sweetness that balances the deep, savory beef flavor. Carrots become soft and absorb the juices of the meat, while the pearl onions provide little pops of concentrated sweetness. I prefer using pearl onions because they hold their shape better than a large chopped onion, which would disintegrate over several hours of cooking.
Another reason this method works is the searing stage. By browning the exterior of the beef before adding any liquid, you create a layer of flavor that you simply cannot get if you just put the raw meat into the pot. That dark crust is where the Maillard reaction happens. It adds a complexity to the sauce that turns a plain beef dinner into something much deeper and more flavorful.
Finally, the low temperature in the oven ensures that the meat remains moist. Cooking at a high temperature causes the muscle fibers to contract quickly and squeeze out their moisture. By keeping the oven at 300 degrees Fahrenheit, we allow the heat to penetrate the meat gently. This ensures the beef is cooked through to the center while still retaining enough juiciness to pull apart in chunks.
Ingredient Notes
The Beef
The star of this dish is the chuck roast. When you are at the store, look for a piece of meat that has visible white marbling throughout the muscle. That fat is essential because it renders down and keeps the roast moist. Avoid meat that looks too lean or has large, hard clumps of fat on the exterior, as that will not render well. A three to four-pound piece is ideal for a standard dutch oven.
The Vegetables
I use whole peeled pearl onions because they look beautiful and offer a mild, sweet onion flavor. You can find these in the freezer section if you do not want to peel them by hand, which is a tedious task. For the carrots, use whole carrots that you peel and cut into large, two-inch chunks. Baby carrots are okay if you are in a hurry, but thicker pieces of regular carrots hold up much better during a long stay in the hot oven.
The Braising Liquid
You need a liquid that provides depth and acidity. I use a combination of dry red wine and beef stock. The wine adds a slight acidity that cuts through the richness of the beef fat. You do not need an expensive bottle, just a dry red like a Cabernet or Merlot that you would be happy to drink. If you prefer not to use wine, you can replace it with more beef stock and a tablespoon of balsamic vinegar for that same acidity.
| Ingredient | Amount | Notes |
|---|---|---|
| Beef chuck roast | 3-4 pounds | Well-marbled piece |
| Carrots | 1 pound | Peeled and cut into 2-inch chunks |
| Pearl onions | 10-12 ounces | Peeled or frozen |
| Red wine | 1 cup | Dry variety like Cabernet |
| Beef stock | 2 cups | Low sodium preferred |
| Garlic cloves | 4 cloves | Smashed |
| Fresh thyme | 4 sprigs | Tied together |
| Olive oil | 2 tablespoons | For searing |
| Salt | 1 tablespoon | Kosher salt |
| Black pepper | 1 teaspoon | Freshly ground |
The Recipe
- Prep time: 20 minutes
- Cook time: 3 hours and 30 minutes
- Total time: 3 hours and 50 minutes
- Servings: 6
- Difficulty: Simple
Equipment needed: Large heavy-bottomed dutch oven with a lid, kitchen tongs, small bowl, meat thermometer.
Step-by-Step Instructions
Step 1: Prep the meat
Take the beef chuck roast out of the refrigerator about thirty minutes before you plan to cook. This takes the chill off the surface and helps with an even sear. Pat the meat thoroughly dry with paper towels. Moisture is the enemy of a good sear, so make sure the surface is as dry as you can get it. If the meat is wet, it will steam instead of browning.
Generously season the roast on all sides with the salt and black pepper. Use your hands to press the seasoning into the meat so it sticks. While the beef rests, peel your carrots and cut them into large, uniform chunks. If you are using fresh pearl onions, trim the ends and peel away the papery skin.
Step 2: Sear the beef
Preheat your oven to 300 degrees Fahrenheit. Place the dutch oven on the stove over medium-high heat. Add the olive oil and let it shimmer. Carefully place the beef roast into the pot. Do not move it for at least three to four minutes. You want to see a deep brown crust develop on the bottom surface.
Once it releases easily from the bottom of the pot, use your tongs to flip the roast. Continue searing every side until the entire surface of the beef is browned. This process takes about ten minutes total. Once browned, lift the roast out of the pot and set it on a plate for a moment.
Step 3: Deglaze the pot
With the pot still on the stove over medium heat, pour in the red wine. Use a wooden spoon to scrape up all the brown bits stuck to the bottom of the pot. These bits are called fond and they are packed with flavor. Let the wine simmer for about three minutes until it has reduced by half.
Most of the alcohol will cook off during this time, leaving behind a concentrated wine flavor. Once the liquid is syrupy, turn off the heat. Add the beef stock to the pot and stir to combine it with the reduced wine. This is the base of your braising liquid.
Step 4: Assemble the roast
Place the seared beef back into the pot, nestling it into the liquid. Arrange the carrot chunks and the pearl onions around the sides of the beef. Place the smashed garlic cloves and the bundle of fresh thyme into the liquid. The liquid should come about halfway up the sides of the roast.
Cover the dutch oven tightly with its lid. If your lid does not seal well, you can place a piece of aluminum foil over the pot before putting the lid on to keep all the steam inside. Place the pot into the center of the preheated oven.
Step 5: The long roast
Let the beef cook in the oven for three and a half hours. Resist the urge to peek during the first three hours. Opening the oven lets out heat and steam, which slows down the cooking process. After three and a half hours, check the meat with a fork. It should offer no resistance and feel very soft.
Use a meat thermometer to ensure the internal temperature is at least 195 degrees Fahrenheit. At this temperature, the collagen in the meat has fully broken down. If the beef still feels firm, put the lid back on and continue cooking for another twenty minutes. When finished, carefully remove the pot from the oven.
Step 6: Rest and serve
Let the roast rest in the pot for fifteen minutes before serving. This allows the juices to redistribute throughout the meat, keeping it moist when you start pulling it apart. Carefully remove the thyme sprigs and discard them. You can shred the beef directly in the pot using two forks, or lift it out to a cutting board to slice into thick portions.
Spoon the vegetables and the pan juices over the beef before serving. The liquid will be thin but flavorful. If you want a thicker sauce, you can remove the beef and vegetables, then boil the liquid on the stove over high heat for five minutes to concentrate it further. Serve hot on large plates.
Mistakes I Made (So You Don't Have To)
Not drying the meat enough
In my early days, I would toss the beef into the pot right from the package. It would hiss and steam, and the meat would turn a greyish color instead of a deep, dark brown. I learned that taking the time to pat the meat dry with paper towels is the most important step for getting a good flavor base. Now, I use a lot of paper towels until the meat is bone dry.
Overcrowding the vegetables
I once tried to cram way too many carrots and onions into the pot because I wanted more leftovers. The result was that the vegetables on top stayed crunchy and did not absorb any of the beef juices. Now I only put in enough vegetables to comfortably fit around the roast without piling them high. If you have extra vegetables, cook them separately on the stovetop.
Cooking at too high a temperature
I once thought I could speed up the process by cranking the oven to 400 degrees Fahrenheit. The outside of the beef burnt, but the inside stayed tough and chewy. It turns out you cannot speed up the breakdown of connective tissue. The meat needs a steady, low heat to become tender. I now stick strictly to 300 degrees Fahrenheit and accept that it takes several hours.
Removing the lid too often
I used to check on the roast every thirty minutes to make sure there was enough liquid. Each time I opened the oven, the temperature dropped and the moisture escaped. This led to a dry, stringy roast. Now I set a timer for the full duration and do not open the oven door at all until the time is up. It is difficult to wait, but the result is much better.
Variations and Tips
Adding mushrooms
If you want an extra layer of earthy flavor, add a pound of cremini mushrooms to the pot during the last hour of cooking. Do not add them at the start, or they will completely dissolve into the sauce. Quarter them before adding them in so they hold their texture. They soak up the beef fat and wine and become very tender.
Using root vegetables
You can swap the carrots for other hearty root vegetables like parsnips or chunks of celery root. These cook at the same rate as carrots and add a lovely sweetness to the final dish. Just make sure to cut them into similar sizes so they all finish cooking at the same time. Do not use potatoes, as they tend to turn into mush after three hours in the oven.
Make-ahead tip
This dish is actually better the next day. You can cook the entire roast, let it cool completely, and store it in the refrigerator overnight. The next day, you can easily remove the layer of hardened fat that forms on the surface of the liquid. Reheat the whole pot on the stove over low heat until the meat is hot and steaming, then serve.
Fresh herbs
While thyme is my favorite for this recipe, you can experiment with rosemary or bay leaves. If you use rosemary, use only one small sprig because its flavor is quite strong and can easily overwhelm the beef. Always bundle your herbs with a bit of kitchen twine so you can easily fish them out of the pot before you serve the meal to your guests.
Storage and Reheating
If you have leftovers, store the meat and vegetables in an airtight container with enough of the pan juices to keep everything moist. You must get the food into the refrigerator within two hours of taking it out of the oven to keep it safe. The leftovers will keep well in the fridge for up to three days.
Do not try to freeze the cooked vegetables, as they will turn into a watery mess once thawed. However, the beef itself freezes quite well. Shred the beef and store it in a freezer-safe bag with a little bit of the sauce. It will keep for up to two months. When you are ready to eat, thaw it in the fridge overnight and reheat it until it reaches an internal temperature of 165 degrees Fahrenheit.
When reheating, avoid the microwave if possible. It tends to heat the meat unevenly and can make parts of it rubbery. Reheat the beef in a small saucepan on the stove over low heat with a splash of water or extra stock. Stir it gently until the center is steaming hot. This keeps the texture of the meat as close as possible to when it was first cooked.
Frequently Asked Questions
Why does my beef still feel tough after three hours?
If the meat feels tough, it simply needs more time. The breakdown of connective tissue depends on the specific piece of meat you bought, as every roast is slightly different. If you check it with a fork and it does not give way easily, put it back in the oven and check it again every twenty minutes. Do not worry about overcooking it unless you leave it for way too long.
Can I use a slow cooker for this recipe?
You can, but the method is slightly different. You would sear the beef in a pan first, then place it into the slow cooker with the vegetables and liquids. Cook it on low for about eight hours. I personally prefer the oven method because it creates a more concentrated sauce and a better texture on the exterior of the beef, but a slow cooker is a great option if you are away from home.
Do I need to brown the beef if I am in a hurry?
You technically could skip the searing, but I really advise against it. The browning process is where most of the deep flavor comes from. Without that dark crust, the final result will taste flat and lack the depth that makes a pot roast so good. If you are in a rush, just make something else. This dish is built on patience and the effort you put in at the start.
What should I serve with this beef?
This dish is very rich, so I like to serve it with something that can soak up the juices. Creamy mashed potatoes are the traditional choice. They provide a neutral base that lets the flavor of the beef and the wine sauce stand out. You could also serve it with some crusty bread or just a simple side salad with a bright vinaigrette to cut through the richness of the meat.
Is the alcohol in the wine dangerous?
Most of the alcohol cooks off during the long time in the oven and the initial reduction on the stove. By the time you serve the dish, only a tiny trace of alcohol remains. If you are concerned for any reason, you can substitute the wine with extra beef stock mixed with a teaspoon of red wine vinegar or balsamic vinegar to get that similar acidity.
Final Thoughts
Making this beef roast is a quiet, meditative process. It is the type of meal that rewards you for paying attention at the beginning and then letting go for a few hours. I love how the house smells while it is in the oven, and it is a meal that makes me feel like I have really accomplished something by the time dinner is ready.
I hope you find this recipe as comforting as I do. It is a reliable favorite in my kitchen, especially when I want a meal that feels like a classic. Just take your time with the prep, keep the oven temperature steady, and you will have a dinner that is tender, flavorful, and worth every minute of the wait.