
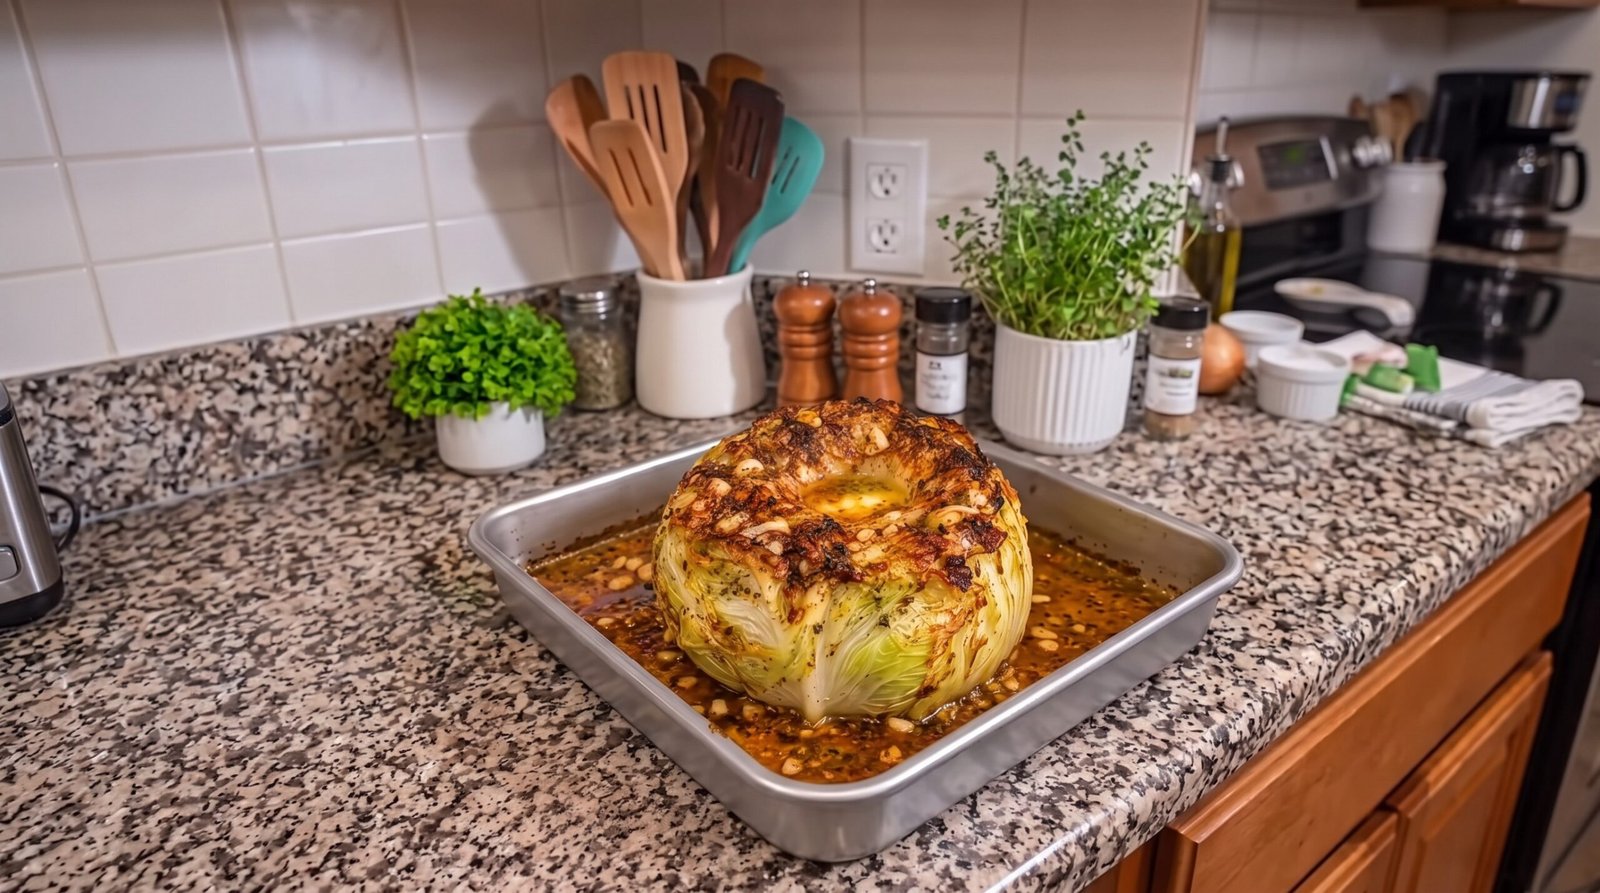
I remember the first time I decided to roast a whole cabbage. I was staring at a large, tight head of green cabbage sitting on my counter, wondering how to make it more than just a slaw ingredient. Most people think of cabbage as something to be shredded or boiled into oblivion, but the oven transforms it into something entirely different. When you roast the whole head, the exterior leaves turn dark and soft, while the center becomes tender and sweet as it steams in its own juices. It has become a regular rotation in my kitchen because it is simple, requires very few dishes, and looks quite impressive when you bring it to the table. This roasted cabbage head with garlic and herb butter has a deep, savory flavor that goes well with almost any meal. It is a satisfying way to enjoy a humble vegetable that often gets ignored.
Why This Recipe Works
This dish works because of the way high heat interacts with the layers of a dense vegetable. By keeping the head intact, you allow the internal moisture to circulate through the leaves as they cook. The butter and aromatics seep down between the layers as they soften, infusing every bit of the vegetable with flavor. Unlike boiled cabbage, which can become waterlogged and mushy, roasting creates a concentrated, savory profile. The outermost leaves catch the heat and turn a deep golden brown, providing a contrast to the tender, buttery core.
Another reason this recipe is a staple is the ease of preparation. You do not have to spend time chopping or shredding. You simply trim the base, score the top, and let the oven handle the work. This makes it a great choice when you have a busy afternoon and need to focus on other parts of a meal. The ingredients are inexpensive and easy to find at any local grocery store. Because it cooks in one pan, the cleanup is minimal, which is always a bonus when you want to enjoy a quiet meal at home without a mountain of pots and pans to scrub afterward.
The texture is also something that keeps me coming back. When you cut into the cooked head, the leaves are soft enough to eat with a fork, but they still retain a bit of structure. You get a range of textures, from the slightly charred edges to the succulent, steamed center. It is a balanced, approachable way to eat more vegetables without feeling like you are forcing yourself to have a side dish. It is comfort food in its most basic, honest form.
Ingredient Notes
The Main Vegetable
The star of this dish is a standard head of green cabbage. You want to choose one that feels heavy for its size and looks tight. Avoid heads that have loose, wilted leaves on the outside or any brown spots on the stem. If you see signs of dryness, put it back and find a fresher one. You can use Savoy cabbage if you prefer a slightly milder flavor and a more textured leaf, but standard green cabbage is what I use most often because it holds up so well during the long roasting time.
The Fat and Flavor Base
Butter is essential here because it adds a rich, toasted depth that oil alone cannot provide. I prefer using high-quality unsalted butter so I can control the level of saltiness myself. You will also need plenty of fresh garlic. Freshly minced garlic is far better than the jarred variety, as the flavor is more vibrant. For the herbs, thyme and rosemary are my go-to choices. They can withstand the hour of heat without losing their aromatic qualities. If you only have dried herbs, use them sparingly, as they are more potent than fresh.
Salt and Seasoning
You will need a good amount of sea salt or kosher salt to pull the moisture out of the vegetable. I also like to add freshly cracked black pepper and a pinch of red chili flakes if I want a subtle heat that lingers on the tongue. Some recipes call for heavy amounts of stock, but I find that the butter and the natural moisture of the cabbage are enough to create a small pool of liquid in the pan that finishes the vegetable nicely.
| Ingredient | Amount | Notes |
|---|---|---|
| Green cabbage | 1 whole head | Medium size, about 2-3 pounds |
| Unsalted butter | 4 tablespoons | Melted for easy brushing |
| Garlic | 4 cloves | Finely minced or pressed |
| Fresh thyme | 1 tablespoon | Leaves only, stripped from stems |
| Fresh rosemary | 1 teaspoon | Finely chopped |
| Kosher salt | 1 teaspoon | Plus more to taste |
| Black pepper | 1/2 teaspoon | Freshly cracked |
| Red chili flakes | 1/4 teaspoon | Optional for a mild kick |
The Recipe
- Prep Time: 10 minutes
- Cook Time: 60 minutes
- Total Time: 70 minutes
- Servings: 4
- Difficulty: Easy
Equipment Needed:
– Sharp chef’s knife
– Small mixing bowl
– Pastry brush
– Small baking sheet or cast-iron skillet
– Aluminum foil (optional)
Step-by-Step Instructions
Step 1: Prep the Oven and Pan
Preheat your oven to 400 degrees Fahrenheit. Making sure the oven is fully heated before you put the cabbage in is important for getting the right texture on the outer leaves. While the oven heats up, prepare your pan. I usually use a small rimmed baking sheet or a cast-iron skillet that is just slightly larger than the cabbage head. If you use a pan that is too large, the butter will spread out too thin and burn on the bottom instead of basting the cabbage.
Step 2: Trim the Cabbage
Remove any damaged or thick, tough outer leaves from the cabbage head. Take your knife and cut a small, flat slice off the base of the cabbage. You want it to be perfectly flat so it can sit securely in the center of your pan without tipping over. Once the base is flat, turn the cabbage over and cut a deep cross, or an X shape, into the top of the head. Cut about halfway down into the core, but be careful not to cut all the way through to the bottom. This allows the heat and the butter to reach the center of the cabbage.
Step 3: Prepare the Butter Mixture
In a small bowl, combine your melted butter, minced garlic, chopped thyme, rosemary, salt, pepper, and red chili flakes. Stir everything until the spices are evenly distributed throughout the butter. The smell should be quite strong and savory. If the butter cools down too quickly, just pop it in the microwave for five seconds to keep it liquid enough for brushing.
Step 4: Season the Cabbage
Place the cabbage in the center of your prepared pan. Use the pastry brush to coat the entire exterior of the cabbage with the butter mixture. Make sure you brush it into the crevices you created with the X-cut. Use your hands to gently pull open the leaves slightly to get some of the butter down into the deeper layers. The more butter you get inside, the more uniform the flavor will be. Pour any remaining butter from the bowl over the top, letting it run down the sides of the cabbage.
Step 5: Roast the Cabbage
Place the pan on the middle rack of your oven. Roast the cabbage for 60 minutes. Every 20 minutes, take a spoon and scoop up the butter and juices from the bottom of the pan and pour them back over the top of the cabbage. This is called basting, and it is the key to ensuring the outer leaves stay soft and flavorful rather than drying out. The cabbage is done when the outside is dark brown and the center can be easily pierced with a sharp knife with no resistance.
Step 6: Rest and Serve
Once the cabbage is cooked through, carefully remove it from the oven and let it sit in the pan for about 5 to 10 minutes. This resting period allows the internal juices to settle. When you are ready to serve, use a sturdy spatula to transfer the head to a cutting board. Cut it into wedges, just like you would a pie. Use a large spoon to drizzle the remaining juices from the pan over each wedge before you plate them.
Mistakes I Made (So You Don't Have To)
Too High Heat
The first time I tried this, I set the oven to 450 degrees Fahrenheit. I thought it would speed up the process, but all it did was burn the outer layers of the cabbage while leaving the center raw and tough. The outside turned into a bitter, charred mess within 20 minutes. I learned that 400 degrees is the sweet spot. It is hot enough to brown the edges but gentle enough to allow the heat to penetrate to the dense center of the cabbage.
Leaving the Stem Long
Early on, I didn't trim the base of the cabbage properly. I left the core sticking out, which meant the cabbage wobbled in the pan. Because it wasn't sitting flat, it didn't cook evenly, and the butter didn't stay in the center cuts. Now, I always make sure to cut a clean, flat bottom. It makes a huge difference in how the vegetable sits and how it cooks. If your cabbage is still uneven, trim a bit more off the base until it stays put.
Not Basting Often
I used to put the cabbage in the oven and forget about it until the timer went off. The problem with that is the top of the cabbage dries out and becomes papery rather than tender. Basting every 20 minutes keeps the surface moist and pushes all that lovely garlic and herb butter into the center of the head. Skipping the basting step results in a bland dish, so set a timer for yourself to check on the pan every 20 minutes.
Overcrowding the Pan
I once used a massive roasting pan that was much too big. The small amount of butter and juices spread out across the entire surface of the pan, which caused it to evaporate quickly and burn, leaving me with a dry, bitter residue instead of a flavorful sauce. Always use the smallest pan that will fit your head of cabbage. It concentrates the juices and keeps the butter pooled right around the base of the vegetable where it can be used for basting.
Variations and Tips
Adding Bacon or Pancetta
If you want an extra layer of savory flavor, you can scatter some small cubes of pancetta or bacon around the base of the cabbage before putting it in the oven. The fat from the meat will render out and mix with the butter, creating a delicious sauce that is perfect for drizzling over the finished cabbage. It adds a bit of saltiness that pairs perfectly with the sweetness of the roasted cabbage.
Using Vegetable Stock
If you are worried about the butter burning, you can add about a quarter cup of vegetable stock to the bottom of the pan. This provides extra liquid for the cabbage to steam in during the first half of the roasting time. By the time it finishes, most of the liquid will have evaporated, leaving behind a concentrated, flavorful glaze.
Make-Ahead Strategy
You can prep the cabbage by cutting the X and making the butter mixture in the morning. Keep the cabbage in the fridge and have the butter mixture ready in a small container. When you are ready to cook, just pull it out, brush it, and put it in the oven. It saves you the mess of prep work when you are trying to get dinner on the table at the end of a long day.
Different Herb Combinations
While I love thyme and rosemary, you can experiment with other flavors. A little bit of smoked paprika adds a nice earthy depth, while lemon zest mixed into the butter right before serving gives it a bright, fresh finish. If you like it spicy, feel free to add more red chili flakes or even a tiny splash of hot sauce to the butter mix. Just be sure to adjust the salt accordingly if your hot sauce is particularly salty.
Storage and Reheating
If you have leftovers, they keep well in the refrigerator. Store the cabbage in an airtight container within two hours of cooking. It will stay good for up to three days. I do not recommend freezing this dish, as the cabbage loses its structure when thawed and turns into a watery mush.
To reheat, put the wedges in a pan with a tiny splash of water and cover it, or use a microwave-safe dish. Heat it until it is steaming hot, reaching an internal temperature of 165 degrees Fahrenheit. Because the cabbage is already cooked, it only takes a few minutes to get it hot. Do not let it sit out for too long after reheating.
Frequently Asked Questions
Can I use a smaller cabbage?
Yes, you can use a smaller head of cabbage if you prefer. Just keep in mind that it will cook faster than a larger head. Start checking for doneness after about 45 minutes of roasting time. The same visual cues apply: the outside should be browned and soft, and the center should be tender when pierced with a knife.
Do I need to wrap the cabbage in foil?
I generally do not wrap it because I want the outer leaves to get that nice browned color. However, if you find that the edges are darkening too quickly after 30 minutes, you can tent a piece of aluminum foil over the top to slow down the browning while the center continues to soften.
How do I know when the cabbage is fully cooked?
The best way to tell is by the feel. Take a sharp knife and insert it into the center of the cabbage through one of the cuts you made earlier. It should slide in and out with almost no resistance, just like cutting through a soft, steamed vegetable. If you feel any hard crunch or resistance, give it another 10 minutes in the oven.
Is the core edible?
Yes, the core is completely edible once it has been roasted for an hour. It becomes very tender and holds quite a bit of the butter and herb flavor. Many people find the core to be the best part because it absorbs the seasonings so well. Just make sure it is cooked through so it is soft rather than firm.
Can I add other vegetables to the pan?
You can certainly add things like quartered shallots or even small carrots around the base of the cabbage. They will cook in the juices and become very soft and sweet. Just be careful not to crowd the pan too much, as you want the heat to circulate around the cabbage head to ensure even cooking.
Final Thoughts
Making this roasted cabbage is one of those simple pleasures that reminds me why I enjoy being in the kitchen. It is not about fancy techniques or expensive ingredients; it is about taking a simple, healthy vegetable and using a bit of heat and butter to bring out its best qualities. There is something satisfying about seeing the transformation from a firm, raw head into something soft and savory.
I hope you give this a try the next time you are looking for a side dish that is a little different from the usual. It is a reliable recipe that I have made dozens of times, and it never fails to satisfy. Whether you are cooking for your family or just having a quiet dinner, it is a great way to make the most of what is in your pantry. Enjoy the process and the result.