
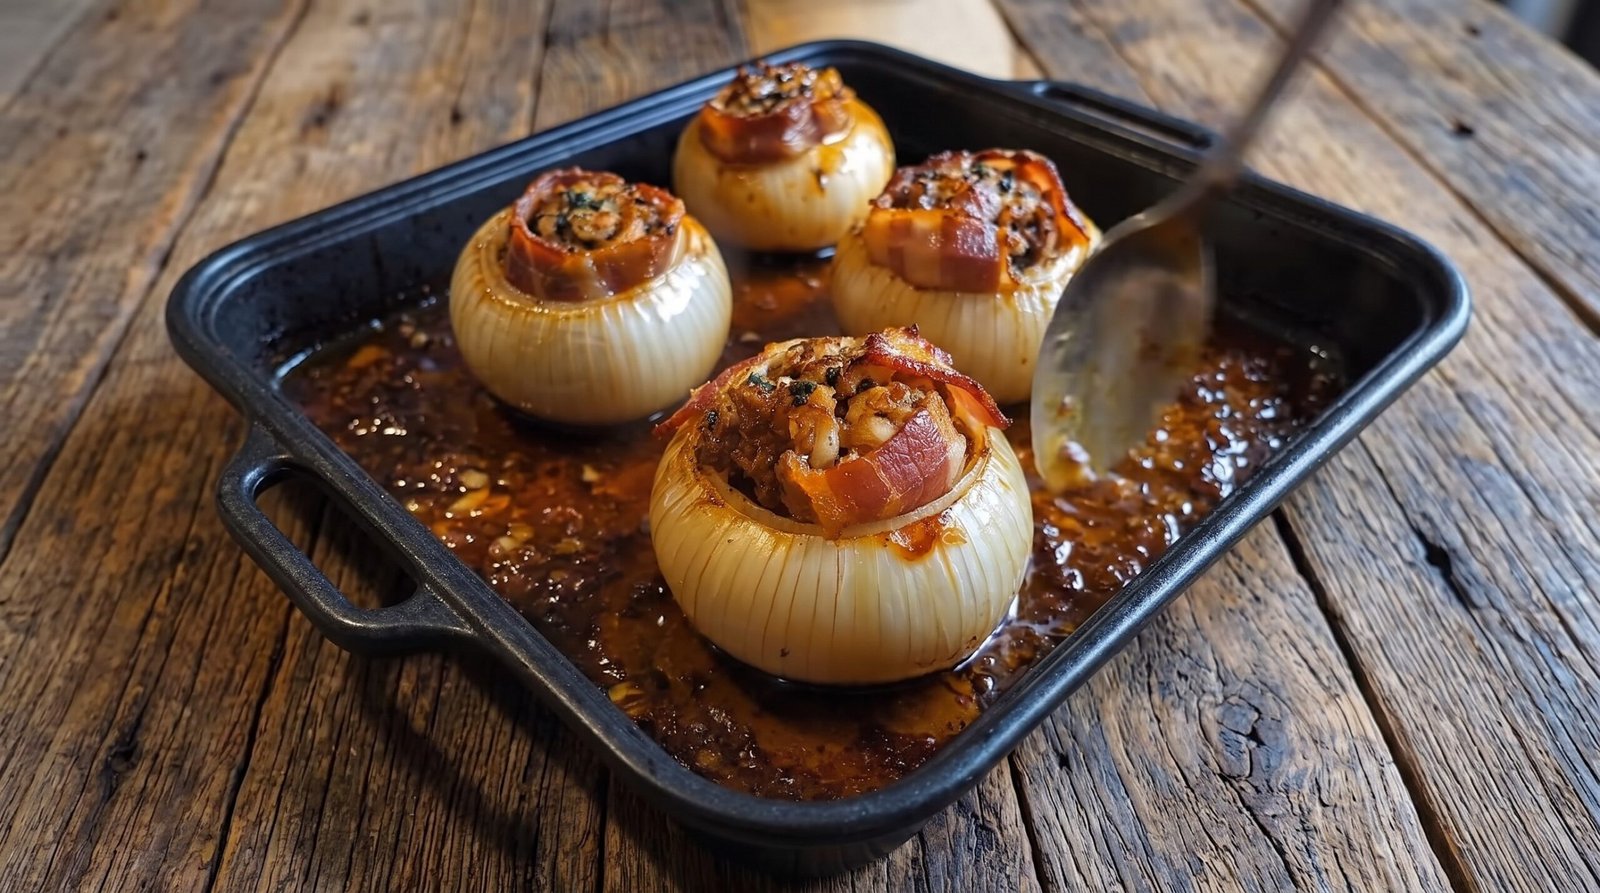
I remember the first time I stood in my kitchen staring at a bag of large yellow onions, wondering how to turn them into something more than just a base for a sauce. We have all been there, staring at a handful of basic pantry staples and hoping for a meal that feels a bit special without requiring an expensive trip to the store. That is when I tried hollowing out these onions and filling them with a savory mixture of ground meat and spices. The result was a revelation. By wrapping the stuffed onions in thin strips of bacon, you add a layer of fat and salt that permeates the vegetable as it roasts, softening the pungent bite of the onion into something mellow and sweet. This dish is hearty, satisfying, and looks impressive enough to serve to guests while remaining simple enough for a Tuesday evening. It turns a humble bulb into the star of the plate.
In this guide, I will walk you through how to properly prep, fill, and roast your bacon wrapped stuffed onions. You will learn the best way to scoop out the centers without ruining the exterior, how to ensure your meat filling reaches a safe internal temperature, and how to balance the flavors of the onion against the saltiness of the bacon. Whether you are looking for a new way to utilize ground beef or just want to try a different way to prepare root vegetables, this recipe gives you a clear path to a cozy, home-cooked meal.
Why This Recipe Works
The genius of this dish lies in the chemistry of the roast. When you place a hollowed onion in the heat of the oven, it begins to soften and release its natural sugars. Usually, onions can be quite sharp, but when they are slow-roasted in this manner, they lose that aggressive sulfurous quality and turn into soft, sweet vessels for the filling. The bacon plays a double role here. It provides a protective barrier that keeps the filling from drying out while also rendering its fat into the layers of the onion. This creates a basting effect that happens from the outside in.
The texture contrast is another reason why this method is successful. You get the slight resistance of the tender onion wall, followed by the savory, spiced meat mixture that has absorbed the juices of the onion during the long bake. Because the onions are quite large, they act like a self-contained casserole. You do not have to worry about individual components falling apart on the plate. Everything stays together, making it a very tidy meal to serve.
From a practical standpoint, this recipe is quite forgiving. You do not need precise culinary skills to carve the onion, and the filling can be adjusted based on whatever ground meat you have in the fridge. It requires minimal active prep time. Once you have the onions hollowed out and filled, the oven does all the heavy lifting for the next hour. It is a set-it-and-forget-it type of meal that frees you up to attend to other things while the kitchen fills with the scent of roasted aromatics.
Ingredient Notes
The Produce
You need large yellow onions for this. Avoid red onions if you can, as they tend to become a bit watery and lose their structural integrity faster under high heat. Look for onions that feel firm to the touch and have a dry, papery skin. You should choose ones that are roughly the same size so they cook evenly on the tray. If you have to choose between a medium onion and a large one, always go with the large one, as it provides a better cavity for the filling.
The Meat
I typically use a blend of ground beef and a little bit of pork sausage. The beef provides the structure, while the pork adds extra moisture and fat that keeps the center tender. If you only have ground beef, that works fine, but I recommend choosing a variety with at least 15 to 20 percent fat content. A lean ground beef can become dry and crumbly when roasted inside the onion. You can also experiment with ground turkey or lamb if you prefer different flavor profiles.
The Binder and Flavor
To keep the meat from turning into a tough puck, you need a binder. I use breadcrumbs and a single egg. The breadcrumbs soak up the juices released by the onion and the meat, keeping the center light and fluffy. Fresh herbs like thyme, parsley, or even a bit of chopped sage can brighten up the heavy profile of the bacon and onion. Do not skip the salt and pepper, but go easy on the salt if your bacon is particularly cure-heavy.
| Ingredient | Amount | Notes |
|---|---|---|
| Large yellow onions | 4 count | Peel and cut off the tops and bottoms |
| Ground beef | 1 pound | Use 80/20 fat ratio for moisture |
| Bacon strips | 8-12 slices | Thin-cut is better for wrapping |
| Breadcrumbs | 1/2 cup | Plain or panko works well |
| Egg | 1 large | Acts as the binder for the meat |
| Garlic | 2 cloves | Finely minced for the filling |
| Dried thyme | 1 teaspoon | Adds a nice earthy aroma |
| Salt and pepper | To taste | Adjust based on the saltiness of your bacon |
The Recipe
- Prep Time: 20 minutes
- Cook Time: 60 minutes
- Total Time: 1 hour 20 minutes
- Servings: 4 servings
- Difficulty: Easy
Equipment needed:
– A large mixing bowl
– A sharp paring knife
– A spoon for scooping
– A baking dish or rimmed sheet pan
– A meat thermometer
Step-by-Step Instructions
Step 1: Prep the Onions
Start by peeling your onions completely, removing the dry outer layers. Use a sharp knife to cut off the root end just enough so the onion can sit flat, and then cut off the top quarter of the onion. This top portion will be the lid or the opening of your vessel. Using a small paring knife, cut a circle around the center core of the onion, about half an inch from the edge.
Use a spoon to carefully scoop out the center layers of the onion. You want to create a bowl that has at least two to three layers of onion as the wall. Do not discard the scooped-out onion centers. You can chop those up finely and mix them into the meat filling, or save them for a soup or omelet later. Keep the hollowed shells aside on a plate.
Step 2: Prepare the Filling
In your large mixing bowl, combine the ground beef, the finely chopped onion scraps, breadcrumbs, egg, minced garlic, and the dried thyme. Sprinkle in a pinch of salt and black pepper. Use your hands to mix everything together, but be careful not to overwork the meat. You just want it to be uniformly combined.
Overmixing can make the meat dense. Once the ingredients are evenly distributed, stop mixing. If the mixture feels a bit too dry, you can add a tiny splash of water or milk to lighten it up. The goal is a texture that is moist but firm enough to hold its shape when you pack it into the onion shells.
Step 3: Fill the Onions
Take your hollowed-out onion shells and place them on a flat surface. Divide the meat mixture into four equal portions. Gently press the meat into each onion shell. You want to fill it all the way to the top, maybe even letting it mound slightly over the edge if you have extra.
Make sure you press the meat down firmly into the bottom and against the sides of the onion shell. This ensures there are no large air pockets. Once filled, the onions should feel heavy and sturdy. If you have extra meat, you can make a small meatball and bake it alongside the onions.
Step 4: The Bacon Wrap
Take your bacon strips and wrap them around the outside of each stuffed onion. Depending on the size of your onions, you might need two or three strips per onion to cover the sides fully. Use a toothpick to pin the bacon in place if it tries to slide off.
The bacon should wrap snugly around the circumference of the onion. It does not need to cover the top of the meat filling completely; leaving it exposed helps the meat brown nicely. Place the onions in your baking dish so they are sitting upright and touching each other, which helps them stay stable during the cooking process.
Step 5: Roast the Dish
Preheat your oven to 375 degrees Fahrenheit. Place your baking dish on the center rack. Roast the onions for 60 minutes. You want the bacon to look browned and slightly crispy, and the onion should be tender enough that you can easily pierce it with a knife.
Check the internal temperature of the meat filling using a thermometer. It needs to reach 160 degrees Fahrenheit to be considered safe to eat. If the bacon starts to burn before the meat is cooked through, you can loosely tent a piece of aluminum foil over the top of the dish for the last 15 minutes of cooking.
Step 6: Serve and Enjoy
Once the onions are cooked, remove them from the oven and let them rest for at least 5 to 10 minutes. This resting time is important because it allows the juices in the meat to redistribute, making the filling more tender.
Carefully remove the toothpicks if you used them. Serve each onion on a plate as a standalone portion. The juices that have collected in the bottom of the pan are excellent, so feel free to spoon some of that over the onions before bringing them to the table.
Mistakes I Made (So You Don't Have To)
Mistake 1: Choosing onions that were too small
Early on, I tried using medium-sized onions because they looked cute. The problem was that after scooping them out, there was almost no room left for the meat. I ended up with thin, fragile onion skins that collapsed under the weight of the filling while roasting. The fix is to buy the largest onions you can find in the bin. If they look big, they are the right size.
Mistake 2: Forgetting to secure the bacon
I once thought the bacon would stay in place on its own as it rendered and tightened around the onion. I was wrong. Halfway through cooking, the bacon slid down, leaving the onion naked and the meat exposed to the direct heat of the oven, which dried it out. Now, I always use two toothpicks per onion to pin the bacon into the onion flesh. It is a simple step that saves the appearance of the dish.
Mistake 3: Overstuffing the onions
I used to pack the meat in as tightly as I could, thinking more was better. However, because the meat has an egg and breadcrumbs, it expands slightly as it cooks. If it is packed too tight, it can push the layers of the onion apart or cause the top of the meat to become tough. Now, I fill it to the top but do not press down with excessive force. I leave just a tiny bit of room for the meat to breathe.
Mistake 4: Not checking the internal temperature
In my early days, I would go by time alone. One time, I pulled the onions out after 45 minutes because the bacon looked done. When I cut into the center, the meat was still slightly pink and undercooked. Now, I always use a digital meat thermometer. Waiting until the center hits 160 degrees Fahrenheit is the only way to be sure it is fully cooked and safe.
Variations and Tips
Add a Cheesy Crust
If you want to take this to the next level, sprinkle some grated cheddar or parmesan cheese over the top of the meat filling during the last 10 minutes of cooking. It creates a salty, bubbling crust that pairs beautifully with the savory bacon and the sweetness of the onion.
Use Different Sausages
You do not have to stick to plain ground beef. I find that using spicy Italian sausage instead of half the beef adds a wonderful depth of flavor. If you use a very flavorful sausage, you can cut back on the extra herbs, as the spices in the sausage will do the work for you.
Make-Ahead Strategy
You can prepare these entirely, wrap them in bacon, and store them in the fridge up to 24 hours before you plan to roast them. Just keep them in a covered container. When you are ready to eat, take them out of the fridge about 20 minutes before putting them in the oven so they aren't ice cold. This saves a lot of time on a busy day.
The Stovetop Alternative
If you don't want to use the oven, you can actually cook these in a large skillet with a lid. Pour a cup of beef broth into the pan, place the onions in, cover tightly, and simmer on low heat for about 45 to 50 minutes. The bacon won't get as crispy as in the oven, but the onions will be incredibly tender and juicy.
Storage and Reheating
If you have leftovers, they are perfectly fine to keep for later. Let the onions cool down to room temperature, but do not leave them out for longer than two hours. Once cooled, place them in an airtight container and store them in the refrigerator. They will keep for up to three days.
To reheat, the oven is your best friend. Preheat it to 350 degrees Fahrenheit and place the onions in a small baking dish with a splash of water or broth to keep them from drying out. Bake for about 15 to 20 minutes, or until the center is steaming hot and reaches 165 degrees Fahrenheit. I do not recommend freezing this dish, as the texture of the onion changes too much during the thawing and reheating process. It tends to become mushy and watery, which ruins the experience.
Frequently Asked Questions
Can I use red onions for this recipe?
I generally advise against it. Red onions tend to have a higher moisture content and a thinner structure than yellow onions. They often fall apart or get mushy when roasted for the time required to cook the meat. Yellow or white onions hold their shape much better and provide a firmer structure to hold the filling.
Do I need to pre-cook the bacon?
No, you definitely should not pre-cook the bacon. You want the raw bacon strips to render their fat into the onion as they roast together. If you pre-cook the bacon, it will be dry and brittle by the time the onion is finished. The raw strips will wrap easily and cook to a nice texture while sitting on the onion.
What should I serve on the side?
These onions are quite filling on their own, but they pair well with simple sides that don't compete for attention. A light green salad with a sharp vinaigrette helps cut through the richness of the bacon. Alternatively, some roasted potatoes or a slice of crusty bread to soak up the juices from the pan makes for a very satisfying meal.
How do I know when the onion is perfectly cooked?
The onion is ready when it is soft to the touch and can be pierced easily with a fork or knife. You don't want it turning into mush, so keep an eye on it. If the exterior of the onion is still hard, it needs more time, even if the meat is finished. That is why covering the dish can sometimes help steam the onion a bit faster.
Is it safe to eat the onion peel?
You should peel the outer, papery layers of the onion off before you begin. These layers are tough and dry, and they don't soften even with long roasting. You want to reach the inner, fleshy layers of the onion. After you remove the dry skins, the remaining layers are perfectly tender and edible once roasted.
Final Thoughts
Making bacon wrapped stuffed onions is one of those simple pleasures that reminds me why I enjoy cooking so much. It turns basic ingredients into a meal that feels intentional and hearty. It requires a bit of patience during the roasting process, but the results are always worth the wait.
I hope this recipe becomes a staple in your kitchen just as it has in mine. It is a reliable dish that handles changes well and always delivers on flavor. Once you get the hang of scooping the onions, you will find yourself reaching for this idea whenever you want something cozy and satisfying to end the day.