
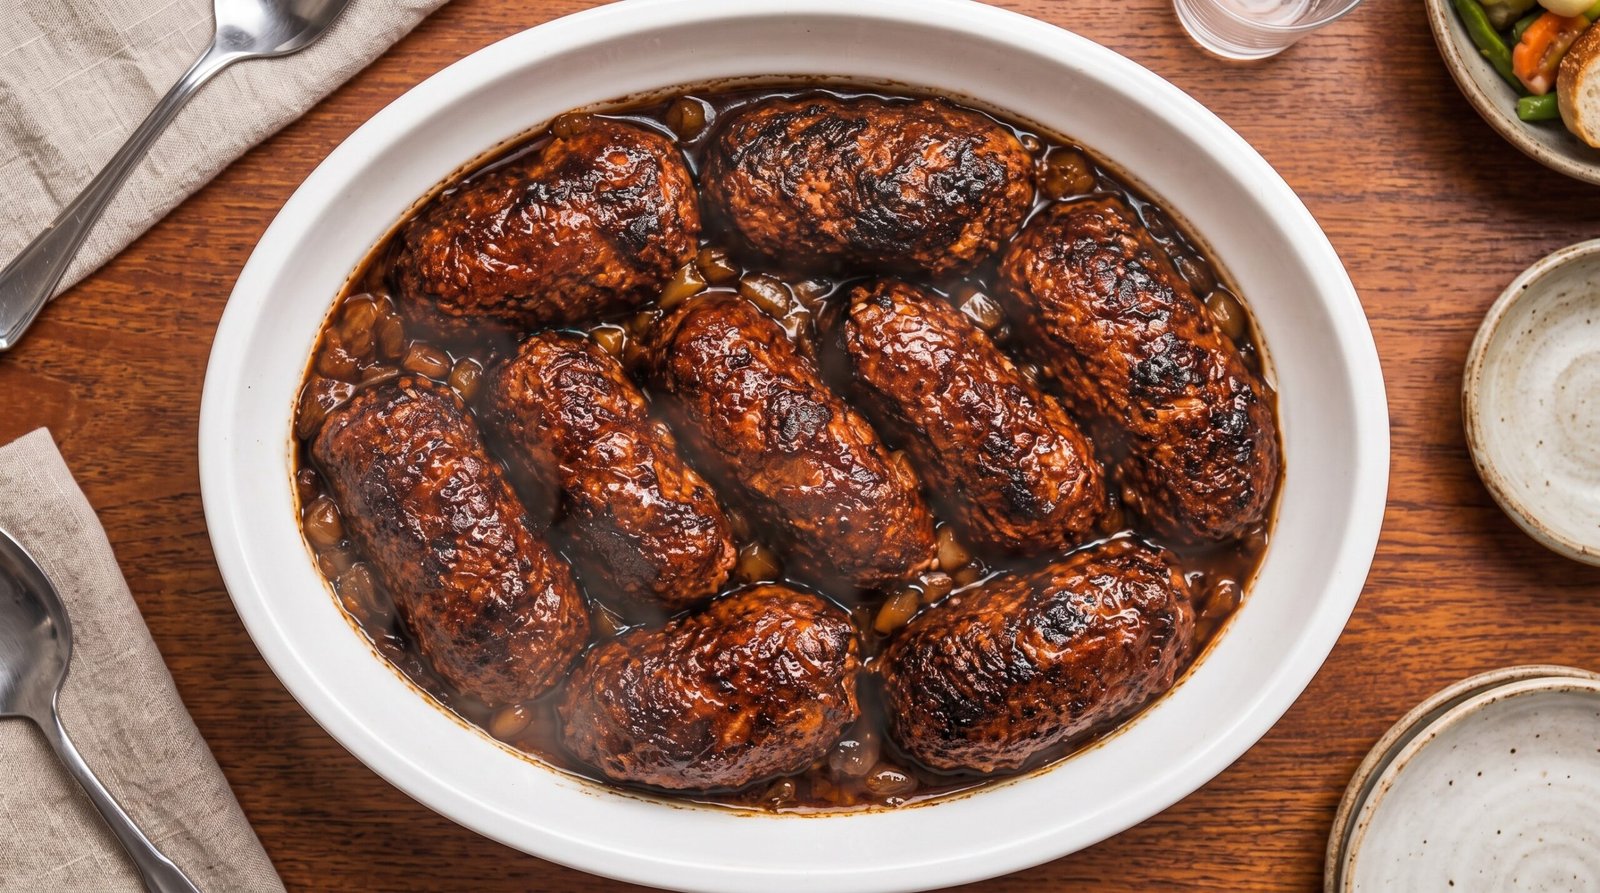
Finding a dinner that feels like a special occasion without keeping me stuck in the kitchen for hours is my constant goal. I often turn to these beef rolls because they bridge the gap between humble pantry staples and a hearty meal that looks impressive on the table. My initial attempts at making these were a bit messy, but over time I learned that the secret is all in the slow, low-temperature cook that allows the meat to become tender while soaking up the flavors of the cooking liquid. This dish creates a deep, savory aroma that fills the house and makes the waiting part of the enjoyment. Whether it is a chilly evening or a Sunday when I have a little extra time to focus on the stove, this recipe provides a comforting result that never fails to satisfy. You will walk away from this process with a flavorful, fork-tender dinner that is as reliable as it is satisfying.
Why This Recipe Works
This dish works because it relies on the principle of braising, which is the most reliable way to turn tough, affordable cuts of beef into something soft and luxurious. By wrapping the meat tightly and simmering it in a rich liquid, you create an environment where the proteins break down slowly. The result is a roll of beef that holds its shape while offering a texture that barely requires a knife to eat. The onion gravy that forms in the bottom of the dish provides a base of flavor that is both sweet from the cooked onions and savory from the beef juices, tying the entire plate together without needing a long list of complicated spices.
The texture is the main benefit here. Because the rolls are seared on the outside before being submerged in the cooking liquid, they maintain a firm, golden exterior that contrasts beautifully with the tender, juicy interior. This textural variety makes each bite feel balanced and well-prepared. You get the crunch of the seared surface followed by the softness of the slow-cooked meat. It is a satisfying experience that feels much more sophisticated than a standard stew or roast, even though the techniques used are quite simple.
Another reason this recipe is a staple in my rotation is how predictable the process is. There is no guessing game with temperature or complex timing. Once the rolls are prepared and in the dish, the oven does all the heavy lifting. This allows me to tidy up the kitchen or prepare a simple side dish while the main course is cooking. The recipe is also very forgiving. If you accidentally leave the beef in the oven for an extra ten or fifteen minutes, the meat just gets more tender rather than drying out or becoming ruined. It is a robust method that survives minor distractions in the kitchen, which is exactly what I need when life gets busy.
Ingredient Notes
The Beef and Filling
For the meat, I look for thin, flat cuts like top round or sirloin. The goal is to have a uniform thickness so that the rolls cook evenly. If your butcher has pre-cut thin slices, that is a huge time-saver. If not, I lay the meat flat and use a meat mallet to pound it slightly. This step is essential because it tenderizes the connective tissue and ensures the meat is thin enough to roll securely. A piece of meat that is about a quarter-inch thick is ideal. For the inside, I prefer a simple mixture of chopped onions, a touch of mustard for acidity, and maybe some bacon or thin pickle slices if I have them on hand. Salt and black pepper are non-negotiable here; they draw out the moisture and season the beef from the inside out.
The Braising Liquid
The liquid needs to be bold enough to handle the beef. I use a combination of good quality beef broth and a small amount of dark soy sauce or a splash of red wine. These add depth and color to the gravy. The onions are the most important part of the liquid component. When you slice several large onions and sauté them before adding the liquid, they slowly melt into the sauce, creating a thick, jammy gravy that covers every bite of the meat. You do not need thickeners like cornstarch if you take the time to let the onions break down properly during the braising process.
| Ingredient | Amount | Notes |
|---|---|---|
| Beef top round | 2 pounds | Cut into 6-8 uniform thin slices |
| Yellow onions | 3 large | Thinly sliced or finely diced |
| Dijon mustard | 3 tablespoons | For spreading on the meat |
| Beef broth | 2 cups | Low sodium allows for better salt control |
| Vegetable oil | 3 tablespoons | For searing the meat |
| Black pepper | 1 teaspoon | Freshly cracked is best |
| Salt | 1 teaspoon | Adjust based on broth saltiness |
| Garlic cloves | 4 pieces | Minced for the sauce |
The Recipe
- Prep time: 30 minutes
- Cook time: 2 hours 30 minutes
- Total time: 3 hours
- Servings: 4 to 6
- Difficulty: Intermediate
Equipment needed:
– Heavy-bottomed skillet or Dutch oven
– Meat mallet
– Kitchen twine or wooden toothpicks
– Baking dish
– Tongs
– Measuring cups and spoons
Step-by-Step Instructions
Step 1: Prep the Meat
I start by laying out the beef slices on a clean cutting board. If they are uneven, I cover them with a piece of plastic wrap and use the flat side of a meat mallet to pound them to an even thickness of about a quarter-inch. I season each piece generously with salt and pepper on both sides. Next, I spread a thin layer of mustard over one side of the meat. If you like, you can add a few sautéed onions or bacon bits here. Roll the meat tightly, starting from the short end, and secure it with a piece of kitchen twine or a wooden toothpick. Make sure the roll is tight so it does not fall apart during searing.
Step 2: Sear the Rolls
Heat two tablespoons of oil in your skillet over medium-high heat. Once the oil is shimmering, place the beef rolls in the pan, seam side down. Do not overcrowd the pan; work in batches if necessary. Sear the meat for about two to three minutes per side, turning them until they are browned on all sides. You are looking for a deep brown color, not cooking the meat all the way through at this stage. Once browned, remove the rolls and set them aside on a plate.
Step 3: Sauté the Aromatics
In the same pan, add the remaining oil if the surface looks dry. Toss in the sliced onions and cook them over medium heat until they become translucent and start to turn light brown. This will take about ten minutes. Add the minced garlic and cook for another minute until fragrant. The goal is to build a foundation of flavor in the bottom of the pan. The brown bits left over from the beef will loosen as the onions soften, which adds flavor to the final gravy.
Step 4: Assemble the Dish
Transfer the sautéed onion mixture into the bottom of a deep baking dish. Place the seared beef rolls on top of the onion bed. Pour the beef broth around the rolls, making sure it goes up about halfway to the top of the meat. You do not want the beef fully submerged, just surrounded by liquid so it braises without boiling. Cover the dish tightly with a lid or heavy-duty aluminum foil to keep the moisture inside.
Step 5: The Slow Braise
Preheat your oven to 325 degrees Fahrenheit. Place the baking dish on the center rack and let it cook for two hours and thirty minutes. At the two-hour mark, I take a peek to ensure the liquid hasn't evaporated too much. If it looks dry, add a splash more broth. The beef is done when it is fork-tender and pulls apart easily with little resistance. Use a meat thermometer to ensure the internal temperature has reached at least 160 degrees Fahrenheit for a safe and tender result.
Mistakes I Made (So You Don't Have To)
Using Too Much Liquid
Early on, I used to drown the beef in broth, essentially boiling it. This resulted in pale, mushy meat. You want the beef to braise, not swim. Only add enough broth to cover the bottom of the dish and come about a third to a half-way up the sides of the rolls. The onions will release their own juices during the long cook time, which will further deepen the liquid.
Skipping the Sear
I once thought I could skip the searing step to save time, but I quickly learned that skipping this makes a huge difference. Searing provides the color and the base flavor for the gravy. Without that brown crust on the beef, the final sauce ends up tasting thin and one-dimensional. Never skip this step; it is the most important part of building the profile of the sauce.
Uneven Rolling
If you don't roll the meat tightly, it will unspool in the pan. I have spent time fishing out pieces of loose meat from the gravy because I didn't secure them well enough. Spend the extra few seconds to tie them with twine or use secure toothpicks. This keeps the roll intact, looks better on the plate, and makes serving much easier.
Leaving the Meat Too Thick
If the meat is too thick, it will not roll properly and the center will remain chewy. Using a mallet is vital. Do not be afraid to pound the beef thin. It might look like you are destroying the meat, but it is necessary for the rolls to cook through at the same rate as the exterior. If it stays thick, the outside will be done while the middle remains tough.
Variations and Tips
Add a Crunch
For a traditional touch, I sometimes place a small slice of pickle or a strip of bacon inside the roll before I tie it. This adds a nice contrast of texture and acidity that cuts through the richness of the beef and the gravy. It is a simple addition, but it changes the flavor profile entirely.
Time-Saving Tip
You can assemble the rolls, sear them, and store them in the refrigerator up to 24 hours before you plan to bake them. Just keep them in a sealed container and finish the braising process when you are ready to eat. This is a great way to handle dinner when you know you will have a busy evening.
Adjusting the Sauce
If the gravy is too thin after the beef is cooked, remove the rolls and place the pan on the stovetop over medium-high heat. Let the liquid bubble away for five to ten minutes until it reduces to your preferred consistency. This intensifies the flavor and gives you a thick, glossy sauce that coats the beef beautifully.
Serving Suggestions
These rolls are best served over mashed potatoes or buttered egg noodles. The starch absorbs the rich onion gravy perfectly. I usually serve them with a side of steamed green beans or roasted carrots to add a bit of color and brightness to the plate, which helps balance the heaviness of the beef.
Storage and Reheating
If you have leftovers, allow the beef to cool completely before placing it in an airtight container with its gravy. Store it in the refrigerator within two hours of cooking. It will keep well for up to three days. When reheating, do it gently on the stovetop or in the oven at a low heat until the center of the meat reaches 165 degrees Fahrenheit. I do not recommend freezing this dish, as the texture of the braised beef can become slightly grainy and the gravy may separate upon thawing. It is best enjoyed fresh or within a few days of being cooked.
Frequently Asked Questions
Can I use a different cut of meat?
Yes, you can use any thin, lean slice of beef that is meant for braising. Just ensure it is trimmed of excess fat and pounded to an even thickness. Cuts like sirloin or eye of round work well because they are lean and become tender through the slow-cooking process. Avoid expensive steaks like filet mignon, as they are too tender to benefit from this long cooking method and may become dry.
How do I know if the beef is done?
The best way to know is by checking the texture with a fork. It should offer almost no resistance when you pull at it. You can also use a meat thermometer inserted into the center of one of the rolls to ensure it hits 160 degrees Fahrenheit. Because you are braising it for over two hours at a consistent temperature, it will be thoroughly cooked and safe to eat.
Is it necessary to use toothpicks or twine?
Yes, it is necessary to secure the rolls to keep them from unspooling during the searing and braising process. If you don't secure them, the rolls will flatten out, and you will lose the flavor inside. Twine is the most secure method, but if you don't have it, a small, sturdy wooden toothpick works perfectly. Just remember to remove the toothpicks before serving so no one accidentally bites into one.
Can I make this in an air fryer?
I would not recommend using an air fryer for this dish. Braising requires a moist, enclosed environment that a standard baking dish in the oven provides. An air fryer is designed to circulate dry, hot air, which would dry out the exterior of the beef rolls long before the interior has a chance to become tender. Stick to the oven for the best, most consistent results.
Why is my gravy thin?
If your gravy is too thin, it is likely because the onions didn't break down enough or the liquid ratio was too high. You can fix this by removing the beef and simmering the sauce in a skillet on the stovetop until the liquid reduces. As the water evaporates, the flavors concentrate and the sauce will naturally thicken into a rich, glossy gravy that is much more satisfying.
Final Thoughts
Making these beef rolls has become one of my favorite ways to enjoy a quiet, hearty meal. The process of searing, rolling, and letting the oven do the work makes it a manageable dish, even if I have had a long day. It feels like a project, but the rewards are clearly tasted in the final, fork-tender bites.
I hope you find this recipe as dependable as I have. It is a wonderful way to practice basic cooking techniques while ending up with something that feels like a treat. Just remember to keep an eye on the oven, take your time with the searing, and enjoy the process of turning simple ingredients into a warm, filling dinner.