
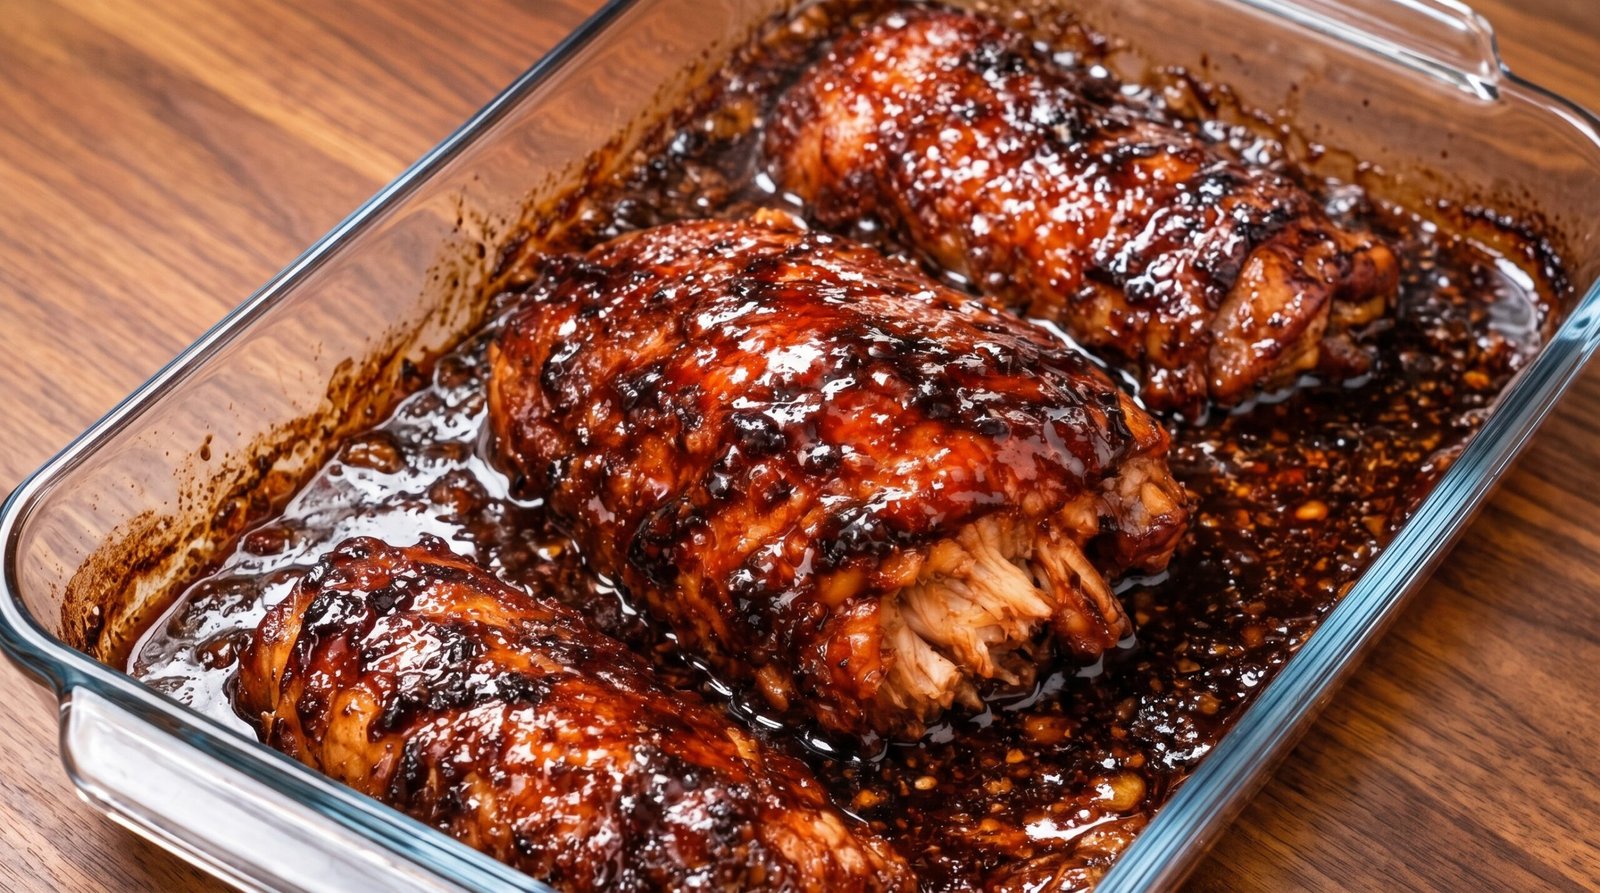
Finding time to put a decent dinner on the table during the work week often feels like a losing battle. My kitchen usually ends up messy, and I find myself reaching for things that take twenty minutes but end up tasting bland. I have spent years trying to find a balance where I get high quality flavor without needing to hover over a stove for hours. That is where these sticky soy glazed chicken thighs come in. They rely on a few pantry staples to create a deep, savory coating that clings to the meat. It is one of those meals that smells so good while it is cooking that my neighbors have actually asked what I am making. This approach to chicken thighs allows the skin to render down while the sauce reduces into a thick, syrupy glaze that coats everything in the pan. You get a combination of salty, sweet, and a touch of richness that feels far more involved than it actually is.
Why This Recipe Works
The primary reason this dish is a staple in my rotation is how it handles the chicken thighs. Thighs are much more forgiving than breasts because they have a higher fat content, which keeps them from turning into dry strips of rubber if they stay in the oven a few minutes too long. By using bone-in, skin-on thighs, you allow the heat to slowly render the fat under the skin, which contributes to a much better mouthfeel than using skinless pieces. The sauce acts as a baster and a coating at the same time. As the liquid heats up, it dissolves the sugars and soy components, creating a glaze that bubbles around the edges of the meat.
Another factor is the way the sauce interacts with the high heat of the oven. Because the glaze is applied early and allowed to reduce during the cooking process, the flavors concentrate as the water content evaporates. You are not just pouring a thin liquid over the top; you are actively building a sticky barrier that protects the meat and traps the savory juices inside. This creates a contrast between the exterior, which gets tacky and dark from the soy and sugar, and the interior, which stays moist and tender.
Finally, the cleanup is simple because everything happens in one vessel. I use a glass baking dish, which conducts heat evenly and allows me to see how the glaze is bubbling at the bottom. Since the sauce is concentrated, there is no need for a complicated thickening step like making a roux or adding cornstarch slurry at the end. The reduction happens naturally while the chicken finishes cooking. It is a reliable method that delivers consistent results every time, which is exactly what I need when I am trying to juggle other tasks in the kitchen.
Ingredient Notes
The Chicken
For this recipe, you need four to six bone-in, skin-on chicken thighs. Do not swap these for boneless, skinless breasts, as they will dry out before the glaze has a chance to properly thicken and coat the surface. The bone provides a bit of insulation, allowing the chicken to cook slowly so the connective tissue breaks down, making the meat pull away from the bone easily once it hits 175 degrees Fahrenheit.
The Glaze Components
The base of the glaze is soy sauce, which provides the salt and the depth of color. I prefer using a standard all-purpose soy sauce rather than a low-sodium version, as the salt content is necessary for the final balance. For the sweetener, I use brown sugar because it contains molasses, which adds a layer of complexity and helps the sauce darken. Garlic is essential here, and I always grate it finely using a microplane so it melts into the glaze rather than staying in large, bitter chunks. You can also add a splash of rice vinegar to provide a sharp note that cuts through the richness of the chicken skin.
Seasonings and Aromatics
Fresh ginger is a must for me, and I suggest peeling it with the back of a spoon before grating it into the mixture. The ginger provides a bright, slightly spicy note that balances the heavy saltiness of the soy. If you want a little bit of heat, you can stir in some red pepper flakes or a small amount of chili paste, but be careful not to go overboard, as the glaze is already quite concentrated in flavor.
| Ingredient | Amount | Notes |
|---|---|---|
| Chicken thighs | 4-6 pieces | Bone-in, skin-on for best results |
| Soy sauce | 1/2 cup | Standard all-purpose soy sauce |
| Brown sugar | 1/3 cup | Packed firmly into the measuring cup |
| Garlic | 3 cloves | Minced or grated into a fine paste |
| Fresh ginger | 1 tablespoon | Grated finely with a microplane |
| Rice vinegar | 1 tablespoon | Adds necessary acidity |
| Red pepper flakes | 1/2 teaspoon | Optional for a subtle kick |
The Recipe
- Prep time: 10 minutes
- Cook time: 45 minutes
- Total time: 55 minutes
- Servings: 3-4 people
- Difficulty: Easy
- Equipment: Glass baking dish, medium mixing bowl, whisk, meat thermometer, pastry brush
Step-by-Step Instructions
Step 1: Preparing the Oven and Chicken
Start by preheating your oven to 400 degrees Fahrenheit. While the oven heats, take your chicken thighs out of the refrigerator and pat them very dry with paper towels. Removing the moisture from the skin is the most important step for getting a nice texture later on. If the skin is wet, it will steam rather than render its fat properly. Once dry, place the chicken pieces into your glass baking dish, skin side up, leaving a little bit of space between each one.
Step 2: Mixing the Glaze
In a medium mixing bowl, combine the soy sauce, brown sugar, minced garlic, grated ginger, rice vinegar, and red pepper flakes if you are using them. Use a whisk to stir the mixture vigorously until all the brown sugar is fully dissolved. You want a smooth, dark liquid. Taste a tiny amount if you like, but keep in mind that the flavor will intensify as it reduces in the oven. Do not add extra salt, as the soy sauce is already quite potent.
Step 3: Initial Coating
Pour about two-thirds of the glaze mixture directly over the chicken thighs, making sure to hit the skin side. Use a pastry brush or the back of a spoon to ensure the glaze is distributed evenly. The liquid will pool at the bottom of the baking dish, which is exactly what you want. This pool of sauce will start to bubble as the heat hits the dish, and it will eventually become the sticky syrup that coats your chicken at the end.
Step 4: First Bake
Place the baking dish in the center rack of your preheated 400 degree oven. Bake the chicken uncovered for 25 minutes. During this time, the fat in the skin will begin to melt, and the sugars in the glaze will start to darken. You might notice the smell of the garlic and ginger blooming throughout the kitchen. Do not worry if the liquid in the bottom of the pan looks thin; it needs the full cooking time to concentrate and thicken into the desired consistency.
Step 5: Basting and Final Cook
After 25 minutes, carefully remove the dish from the oven. Using a spoon, scoop up some of the hot liquid from the bottom of the dish and drizzle it over the chicken thighs. This basting process helps the glaze to stick to the meat. Use the rest of the remaining glaze to coat the thighs again. Return the dish to the oven and cook for another 20 minutes. Keep a close eye on the sauce in the pan so it does not burn. It should be thick, dark, and bubbly.
Step 6: Checking for Doneness
The chicken is done when the internal temperature, taken by inserting a thermometer into the thickest part of the meat without touching the bone, reaches 175 degrees Fahrenheit. The juices should run clear, and the skin should be a deep, rich brown color. If the sauce is still too thin, you can spoon it over the chicken one last time and let it rest for five minutes. The cooling process helps the glaze set into a sticky, glossy layer.
Mistakes I Made (So You Don't Have To)
Overloading the Pan
The first time I made this, I crowded too many chicken thighs into the baking dish because I wanted to feed a large group. Because they were touching, the sides of the chicken steamed instead of roasting. This prevented the skin from rendering properly, and the sauce stayed watery. Now, I make sure there is at least an inch of space between each thigh so the hot air can circulate around the entire piece of meat.
Forgetting to Dry the Skin
I once thought that because I was applying a liquid glaze, I did not need to worry about drying the chicken. That was a mistake. If the skin starts off wet, it takes much longer to achieve that tacky, deep-brown finish. I now spend an extra minute with paper towels to make sure the skin is bone-dry before it ever touches the baking dish. This small step makes a huge difference in the final texture of the glaze.
Burning the Garlic
I used to chop my garlic into large, rustic pieces. During the 45-minute bake time, those large chunks would often burn and turn bitter, ruining the balance of the sauce. I switched to using a microplane or a very fine grater. By turning the garlic into a paste, it disperses evenly throughout the liquid. It flavors the entire glaze without creating those burnt, bitter bits that can ruin a bite.
Measuring the Temperature Too Soon
I learned the hard way that guessing when the chicken is done is a risky game. Once, I pulled the chicken out too early because it looked dark and finished, but the meat near the bone was still undercooked and rubbery. Now, I always use a digital meat thermometer. Waiting for that 175-degree mark ensures the collagen in the thighs has broken down, which is the secret to getting that tender, melt-in-your-mouth texture.
Variations and Tips
Adding Citrus Notes
If you want to brighten up the heavy soy flavor, try adding a tablespoon of orange zest or a squeeze of fresh orange juice into the glaze mixture. The sweetness of the orange pairs beautifully with the ginger and soy, adding a hint of freshness that makes the dish taste lighter. Just be careful not to add too much acidity, as it can overwhelm the savory notes of the soy sauce.
Cooking in an Air Fryer
If you do not want to heat up your whole oven, you can prepare these in an air fryer. Reduce the heat to 375 degrees Fahrenheit and cook for about 25 to 30 minutes. You will need to check the temperature periodically because air fryers cook much faster and can burn the sugar in the glaze more quickly. If the skin gets dark too fast, tent a piece of foil over the top.
The Make-Ahead Trick
You can marinate the chicken in half of the glaze for up to four hours before cooking. This allows the savory flavors to penetrate the meat deeper. Do not leave the chicken in the marinade for longer than four hours, though, as the salt in the soy sauce can start to change the texture of the meat, making it slightly salty or firm. Keep the remaining glaze separate and add it during the baking process as instructed.
Serving Suggestions
I find that these thighs go perfectly with a side of steamed white rice or roasted vegetables like broccoli or carrots. Because the sauce is so flavorful, it acts as a secondary dressing for the rice. I often steam the rice while the chicken is in the oven so everything is hot and ready at the same time. The simplicity of a plain grain helps to balance the intense, savory profile of the chicken.
Storage and Reheating
If you have leftovers, you need to store them within two hours of cooking. Place the cooled chicken in an airtight container in the refrigerator, where it will stay fresh for up to three days. I do not recommend freezing this dish, as the sauce tends to separate when thawed, and the texture of the chicken skin often becomes soggy once it has been frozen and reheated.
When you are ready to eat the leftovers, the best way to reheat them is in the oven at 350 degrees Fahrenheit. Place the chicken in a baking dish and add a tiny splash of water or broth to the bottom to help loosen the glaze. Heat until the internal temperature reaches 165 degrees Fahrenheit. You can also use the microwave, but the skin will lose its tacky, glazed quality and become soft.
Frequently Asked Questions
Can I use chicken breasts instead of thighs?
I strongly advise against using chicken breasts for this specific recipe. The sauce requires a longer cooking time to reduce and thicken properly, and breast meat simply dries out during that window. If you only have breasts, you would need to adjust the cooking time significantly, but you will miss out on the deep, rendered fat that makes this dish what it is.
Is it okay to use honey instead of brown sugar?
You can use honey, but keep in mind that honey burns at a lower temperature than brown sugar. If you swap it, you will need to keep a very close eye on the baking dish to ensure the glaze does not char before the chicken is cooked through. If you notice the edges of the glaze turning black, loosely cover the dish with a piece of aluminum foil.
Why is my sauce still watery after baking?
If the sauce remains watery, it is usually because the oven temperature was not high enough or the baking dish was too large. A larger surface area allows moisture to evaporate faster, but if the heat is too low, the reduction will not happen. You can try transferring the chicken to a smaller pan for the final ten minutes, or place the liquid in a small saucepan on the stove over medium heat to reduce it quickly.
Can I add vegetables to the baking dish?
Yes, you can add hearty vegetables like carrots, chunks of potatoes, or broccoli florets to the dish during the final 20 minutes of cooking. They will soak up the soy glaze and cook in the chicken fat, which adds a lot of flavor. Just make sure the vegetables are cut into uniform pieces so they cook through at the same rate as the meat.
Is there a way to make this spicier?
You can easily increase the heat by adding more red pepper flakes, or by whisking in a tablespoon of chili garlic sauce or sriracha into the initial glaze mixture. If you want a more complex spice profile, a pinch of five-spice powder or a little bit of grated fresh chili also works wonders. Start with a small amount, as the heat will concentrate as the sauce reduces.
Final Thoughts
Making this sticky soy glazed chicken has become a reliable way for me to get a satisfying dinner without any fuss. It is a dish that does not require fancy techniques, just a little bit of patience while the oven works on the sauce. When the kitchen starts to smell like toasted garlic and ginger, you know you are on the right track.
I find that the best part of this meal is how the simple ingredients transform into something that feels like a real treat. Once you get the timing down for your specific oven, you will be able to whip this up whenever you need a reliable, flavorful meal that brings everyone to the table. Enjoy the process of building those layers of flavor and the final, glossy result.