
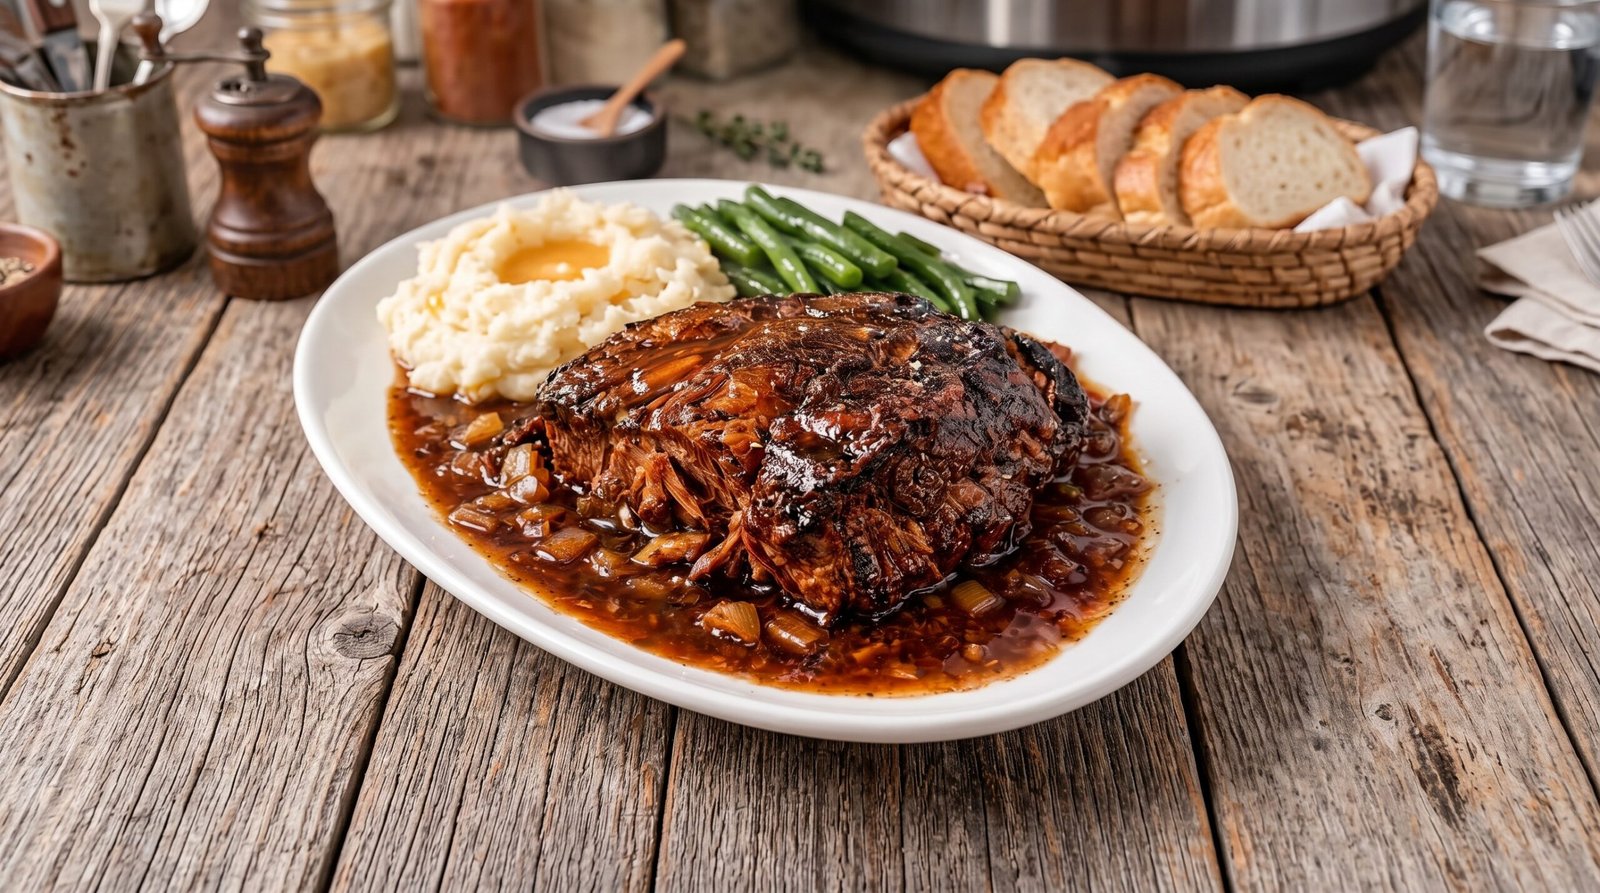
I remember the first time I tried to make a pot roast. I was in a rush, grabbed a random cut of meat, and threw it into a pan with way too much liquid and not enough patience. The result was tough, stringy, and frankly, quite disappointing for a Sunday dinner. Over the years, I have learned that the key to a tender, flavorful braised beef pot roast is all about selecting the right cut and allowing it to cook slowly in its own juices and aromatics. This dish is a staple in my house because it fills the kitchen with such a comforting scent and always guarantees leftovers for the next few days. It takes a bit of time to prep and watch over, but the end result is something you will feel proud to serve.
This recipe for braised beef pot roast uses basic, accessible ingredients that you can find at any grocery store. By searing the meat first and then simmering it in a rich broth with plenty of onions, you create a deep, savory foundation that pulls everything together. You will get a piece of beef that breaks apart with just a fork, sitting in a pool of gravy that is perfect for pairing with mashed potatoes or thick slices of bread. Whether you are hosting a quiet dinner for your family or just want a meal that provides comfort after a long week, this approach yields consistent results.
Why This Recipe Works
The primary reason this recipe succeeds is the choice of cut combined with the braising technique. I always reach for a chuck roast because it has a good amount of fat and connective tissue. When you cook this piece of meat at a low temperature for several hours, that tissue slowly breaks down into gelatin. This process is what gives the meat its tender, melting texture rather than becoming dry or chewy. If you tried to grill a piece of chuck steak the same way you would a sirloin, you would be fighting to chew it, but here, the slow braising makes all the difference in the final mouthfeel.
Another factor is the onion gravy. I use a large amount of yellow onions, cooking them down until they soften and start to release their natural sugars. They form the base of the braising liquid. As the beef cooks, it releases its own juices into this mix, creating a concentrated sauce that is far better than anything you could buy in a jar. By deglazing the pot after searing the beef, you capture all those browned bits of flavor from the bottom of the pan, which are essential for the final richness of the gravy. It is a simple step, but skipping it means losing out on a layer of savory flavor that defines the dish.
The cooking time is also specifically calibrated. Three to four hours at a low simmer on the stovetop is the sweet spot. It is long enough to ensure the beef is tender without falling apart into complete mush or turning dry. Because the liquid level is kept relatively low, the beef stays moist and flavorful throughout the process. The simplicity of the method means you do not need special equipment beyond a heavy-bottomed pot or Dutch oven, making it a reliable meal you can master in your own kitchen with tools you likely already own.
Ingredient Notes
The Beef
For the best results, you need a chuck roast. Look for one that weighs about three to four pounds. You want to see some white fat marbling throughout the meat, as this will render down and keep the roast juicy. Avoid cuts that are too lean, as they will dry out during the long cooking process. If you cannot find a whole chuck roast, a beef brisket can also work, though it will have a different texture. Make sure to pat the meat completely dry with paper towels before you start searing, as moisture on the surface will prevent a nice, browned crust from forming.
The Aromatics
Yellow onions are the star of the gravy. I use three large ones because they melt away into the sauce, providing body and a mild sweetness. Garlic is also important, but add it toward the end of the searing process so it does not burn and turn bitter. Fresh thyme or rosemary adds an earthy note that cuts through the richness of the beef. If you do not have fresh herbs, you can use dried ones, but use about a third of the amount, as dried herbs are more potent.
The Braising Liquid
You will need a combination of beef broth and a splash of something acidic. I usually use a dry red wine to deglaze the pan. If you prefer not to use wine, a tablespoon of balsamic or red wine vinegar mixed with extra beef broth is a solid alternative. The acidity is crucial because it helps to tenderize the meat fibers as they cook. Use a high-quality low-sodium beef broth so that you have full control over the salt levels in the final gravy.
| Ingredient | Amount | Notes |
|---|---|---|
| Beef chuck roast | 3-4 pounds | Trim excess surface fat |
| Yellow onions | 3 large | Peeled and sliced thick |
| Beef broth | 2 cups | Low-sodium preferred |
| Dry red wine | 1/2 cup | Or extra broth plus 1 tbsp vinegar |
| Garlic cloves | 4 whole | Smashed |
| Fresh thyme | 4-5 sprigs | Or 1/2 tsp dried |
| Vegetable oil | 2 tablespoons | For searing |
| Kosher salt | To taste | Add in stages |
| Black pepper | To taste | Freshly cracked |
The Recipe
- Prep time: 20 minutes
- Cook time: 3 hours 30 minutes
- Total time: 3 hours 50 minutes
- Servings: 6 to 8
- Difficulty: Intermediate
Equipment needed: Heavy-bottomed Dutch oven or large lidded pot, kitchen tongs, cutting board, sharp chef knife, meat thermometer.
Step 1: Prep and Season the Beef
Take your chuck roast out of the refrigerator about 30 minutes before you plan to start cooking. Cold meat reacts poorly to a hot pan, so bringing it toward room temperature helps it cook more evenly. Pat the entire surface of the roast dry with paper towels. If there is a thick layer of fat on one side, you can trim a bit of it off, but leave some as it provides flavor. Season the beef heavily on all sides with kosher salt and freshly cracked black pepper. Do not be shy with the seasoning, as this is the only chance you have to flavor the meat itself.
Step 2: Sear for Color
Heat the vegetable oil in your Dutch oven over medium-high heat. You want the oil to shimmer but not quite reach the smoking point. Carefully place the seasoned roast into the hot pan. Let it sit undisturbed for about 5 to 7 minutes. You are looking for a deep, brown crust to form on the surface. If you try to move it too soon, it will stick. Once the first side is browned, use your tongs to flip the meat and repeat the process on the other side and the edges until the entire roast has a uniform color. Remove the beef and set it aside on a plate for a moment.
Step 3: Cook the Onions and Aromatics
Lower the heat to medium. Add the sliced onions to the pot, using the rendered fat from the beef. Stir them around, scraping up the browned bits left on the bottom of the pan from the meat. This process, known as deglazing, ensures those savory flavors end up in your gravy. Cook the onions for about 10 to 12 minutes until they become soft and translucent. Add the smashed garlic cloves and the thyme sprigs during the last minute of cooking, stirring constantly so they do not brown too quickly.
Step 4: Deglaze and Combine
Pour in the red wine to the pot with the onions. Let it bubble away for 2 to 3 minutes, stirring to continue scraping the bottom. This reduces the wine and mellows out the harsh alcohol bite, leaving just the concentrated fruitiness behind. Place the seared beef roast back into the pot, nestling it down into the onions. Pour the beef broth over the beef. The liquid should come about halfway up the sides of the roast. Do not submerge it completely, as you want the top to stay slightly exposed to the heat of the oven or the steam in the pot.
Step 5: The Long Simmer
Cover the pot with a tight-fitting lid. If your stove heat is high, turn it down to the lowest possible setting. You want a very slow, gentle simmer. Let the beef cook for 3 hours and 30 minutes. Resist the urge to peek at it too often. Every time you lift the lid, you lose valuable heat and steam. After the timer goes off, carefully insert a meat thermometer into the thickest part of the roast. You are looking for an internal temperature of at least 195°F to 205°F for a tender, pull-apart texture. If it feels firm, give it another 30 minutes.
Step 6: Rest and Serve
Remove the roast from the pot and place it on a carving board. Let it rest for at least 15 minutes before you try to slice or shred it. This resting period allows the juices to redistribute back into the meat. While the beef rests, skim any excess oil off the top of the onions and braising liquid in the pot. You can serve the onions and the thickened juice as a chunky, rustic gravy. Either slice the beef into thick slabs or use two forks to pull it into large chunks. Serve hot with the onion gravy spooned generously over the top.
Mistakes I Made (So You Don't Have To)
Not Searing the Meat Properly
When I first started cooking this, I thought searing was just a suggestion and would skip it to save time. I learned the hard way that missing this step results in a bland, gray-looking roast. The browning process, known as the Maillard reaction, creates a whole range of savory flavor compounds that simple boiling cannot replicate. If you do not get that dark brown crust, the gravy will taste thin and one-dimensional. Make sure your pan is hot, and do not crowd the meat. If the roast is too large for the pan to brown the sides easily, hold it with your tongs to ensure even contact.
Using Too Much Liquid
In my early attempts, I would cover the beef completely in broth. This basically resulted in a boiled roast rather than a braised one. The meat lost all its flavor to the liquid, and the final texture was waterlogged and bland. You only need enough liquid to reach about halfway up the roast. The beef will release its own juices, and the onions will create a lot of moisture as they break down. Keeping the liquid level low ensures the flavor stays concentrated and the meat retains a better texture.
Cutting the Meat Too Soon
I have definitely been guilty of pulling a roast out of the pot and attacking it with a knife immediately because I was hungry. The result was a mess of dry, shredded fibers with the juices running all over the cutting board instead of staying inside the beef. Resting is not just for steaks; it is vital for large pot roasts too. Those 15 minutes of rest allow the internal temperatures to settle. When you finally slice it, the meat will stay intact and moist. If you are in a rush, just cover it with foil to keep it warm while it rests.
Forgetting to Check Internal Temperature
I once relied solely on the "fork test" and assumed the roast was done because it felt soft. It turned out it was still a bit tough in the center because the connective tissue hadn't fully melted. Now, I always use a meat thermometer. A roast is truly tender when it hits that 195°F to 205°F range. It is the only way to be sure without guessing. If the thermometer encounters resistance when sliding in, it is not ready. Don't worry about overcooking it by an extra 15 minutes; with this amount of collagen, the meat actually gets more tender the longer it stays in that temperature window.
Variations and Tips
Add Root Vegetables
If you want a one-pot meal, you can add large chunks of carrots, celery, or potatoes to the pot about 45 minutes before the end of the cooking time. Cut them into thick pieces, at least two inches, so they do not fall apart during the long simmer. If you add them too early, they will turn into mush and disappear into the gravy. Adding them near the end ensures they are fork-tender and perfectly cooked, soaking up all that beefy flavor without disintegrating.
Using Other Aromatics
You can change the flavor profile of the gravy significantly by swapping out the herbs. While thyme is my go-to, fresh rosemary or even a few dried bay leaves add a lovely depth. Some people enjoy adding a few cloves or even a small piece of star anise to the braising liquid for a hint of warmth, though I prefer to keep the flavor profile simple with just onion and garlic. If you like heat, a single whole dried chili pepper thrown into the pot adds a subtle background warmth that is very pleasant.
Thicken the Gravy
The gravy is naturally thickened by the broken-down onions, but if you prefer a thicker, more traditional sauce, you can make a small slurry. Mix one tablespoon of cornstarch with one tablespoon of cold water until smooth. Once the roast is out of the pot, turn the heat to medium-high and stir in the slurry. Let the liquid bubble for two minutes. This will give you a glossy, thick gravy that clings to the meat and the potatoes. Be careful not to use too much, as you still want it to have that rustic, homemade feel.
Time-Saving Tip
You can sear the beef and prep the onions the night before. Store the browned beef and the sliced onions in separate containers in the refrigerator. When you are ready to cook, just combine everything in the pot, pour in the liquids, and bring it to a simmer. It saves you about 20 minutes of active work on the day you want to eat. Just keep in mind that the cold beef will take about 10 to 15 minutes longer to reach a simmer, so adjust your timing slightly to ensure the meat is fully tender by dinner time.
Storage and Reheating
If you have leftovers, you are in luck. Pot roast actually tastes better the next day as the flavors have more time to mingle. Store any remaining beef and gravy in an airtight container in the refrigerator. It will stay safe to eat for up to 3 days. Make sure you keep the meat submerged in the gravy as much as possible, as this prevents it from drying out while sitting in the fridge.
To reheat, the best method is low and slow. You can put the leftovers back into a small pot on the stove over low heat. Add a tiny splash of water or broth to loosen the gravy, as it will thicken significantly when cold. Heat it until the liquid is steaming and the meat reaches an internal temperature of 165°F. You can also reheat it in an oven-safe dish covered with foil at 300°F until warmed through. I would avoid the microwave if possible, as it tends to make the meat fibers rubbery and unevenly heated.
Freezing this dish is possible, though the texture of the onions may change slightly. Place the cooled beef and gravy in a freezer-safe bag or container, leaving a little room for expansion. It will last for up to 2 months. To eat, thaw it in the refrigerator overnight and then reheat it on the stovetop as described above. Do not try to rush the thawing process on the counter, as that is not food-safe.
Frequently Asked Questions
What is the best cut of meat for pot roast?
The chuck roast is the gold standard for this dish because of its high fat and collagen content. These elements are what transform during the slow cooking process. If you used a leaner cut like an eye of round, it would result in dry, tough meat regardless of how long you simmered it. You need that fat to keep the roast moist and to create a rich, silky gravy. Always look for a piece with visible white marbling throughout.
Can I do this in the oven instead of on the stovetop?
Absolutely. Once you have seared the beef and combined everything in your Dutch oven, you can move it to a preheated oven at 300°F. Cover it tightly and let it cook for the same 3.5 hours. The oven provides a more even, ambient heat which can be gentler than a stovetop flame. Just make sure your pot is oven-safe and the lid creates a good seal to prevent the liquid from evaporating too quickly.
Why is my gravy thin?
If your gravy is too thin, it is usually because the onions didn't fully break down or there was too much liquid added at the start. You can fix this by removing the beef and simmering the gravy uncovered over medium-high heat for about 10 minutes. This reduces the liquid and intensifies the flavor. If it is still thin, a cornstarch slurry added to the boiling liquid will fix the consistency quickly.
How do I know when the meat is done?
The best way is to use a meat thermometer. You are aiming for a temperature between 195°F and 205°F. At this stage, the collagen has turned to gelatin, which allows the meat to be easily pulled apart with a fork. If you don't have a thermometer, the meat should be very soft, and the connective tissues should have completely dissolved. If it feels firm or bounces back, it needs more time.
Can I make this with different vegetables?
Yes, this recipe is very forgiving. Aside from potatoes and carrots, you can add parsnips, turnips, or even chunks of fennel for a different flavor profile. The key is to add them toward the end of the cooking process so they retain some texture rather than turning into mush. Whatever you choose, ensure they are cut into large pieces so they don't break apart while simmering in the hot liquid.
Final Thoughts
Making a proper beef pot roast is one of those skills that feels like a real achievement once you get it down. It is not about fancy techniques or expensive tools, but rather about patience and understanding how different cuts of meat respond to heat. Once you taste that tender, savory beef coated in the rich onion gravy, you will understand why this dish has been a staple in kitchens for generations.
I hope this method helps you enjoy a stress-free meal at home. Serve it with something simple like mashed potatoes or crusty bread to mop up every last drop of the sauce. Don't be afraid to adjust the seasoning to your liking as you go, and always remember to let the meat rest. It really does change everything. Enjoy the process and the result.