
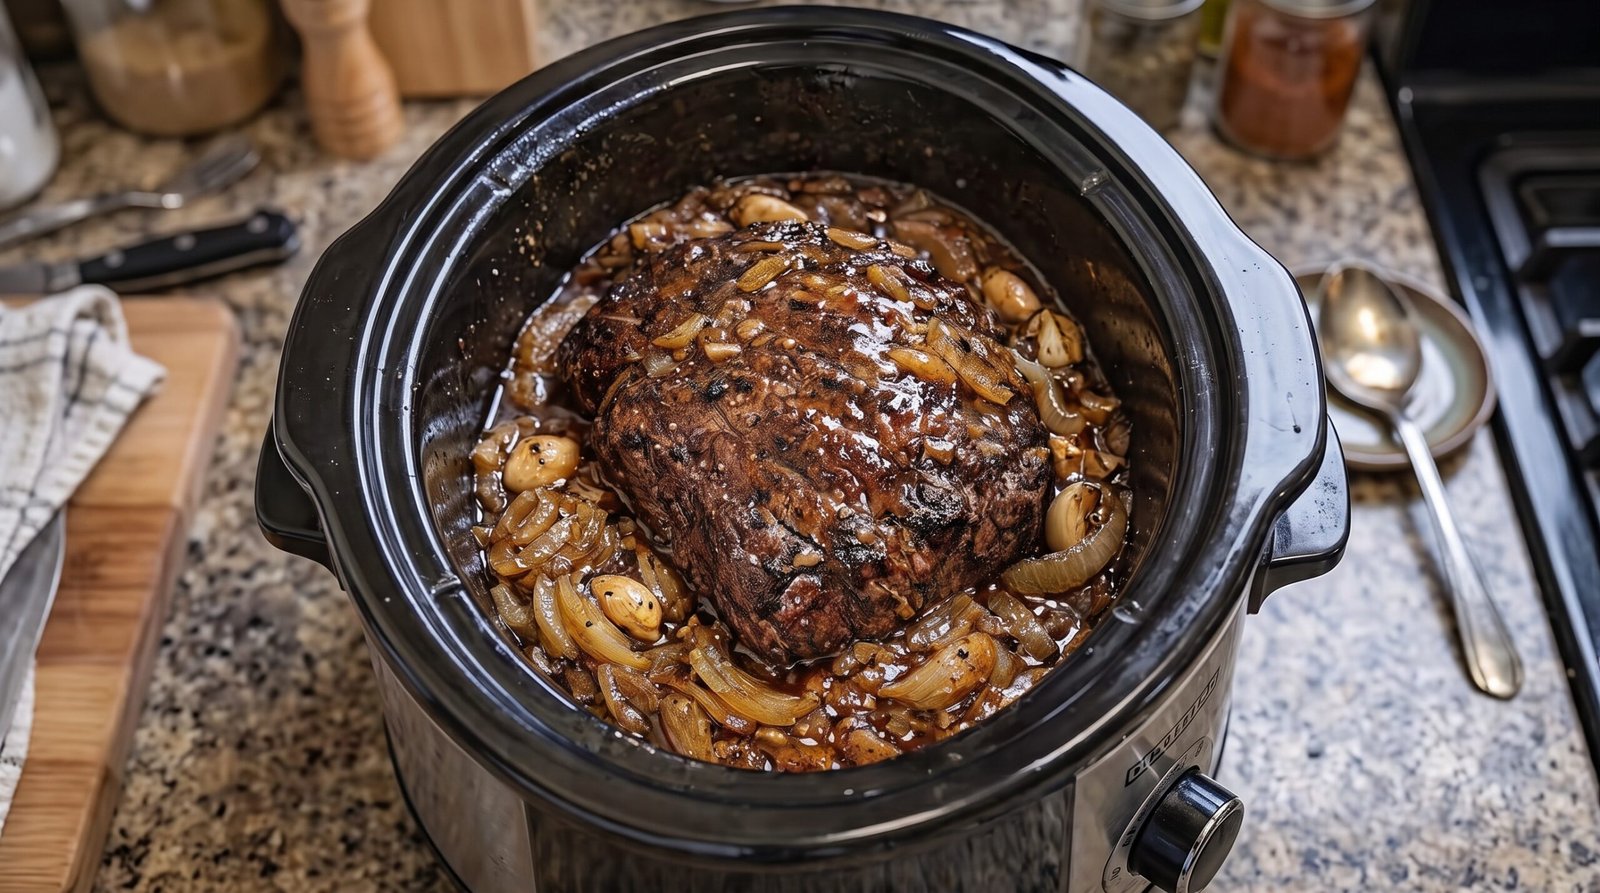
I remember the first time I tried to make a pot roast for a group of friends. I was so nervous about the meat turning out tough or bland that I spent hours hovering over the stove, constantly checking the heat and worrying about the liquid levels. It felt like a chore rather than a way to feed the people I care about. Over time, I learned that a good Slow Cooker Beef Pot Roast with Caramelized Onions does not require constant attention. It is a hearty, straightforward meal that relies on patience and the right choice of cut to get that tender result where the meat pulls apart with just the pressure of a fork.
When you have a busy week ahead, coming home to the smell of slow-cooked beef is a relief. This recipe focuses on letting the onions soften and break down alongside the beef, creating a deep, savory base that ties everything together. It is a reliable dish that works for a Sunday dinner or a casual meal with family, providing a satisfying, deep flavor without needing fancy techniques or expensive equipment. This guide will help you prepare it in your own kitchen with confidence.
Why This Recipe Works
The main reason I reach for this recipe is the way the slow cooking method transforms a tough, affordable cut of meat into something tender. By choosing a chuck roast, you are working with a cut that has enough connective tissue and fat to keep the meat moist during the long cooking period. As the meat cooks, that collagen breaks down into gelatin, which makes the beef feel buttery in your mouth rather than dry or stringy.
Using a generous amount of onions is the secret to the flavor here. They start as firm, raw slices but slowly release their sugars as they cook in the juices of the roast. This process gives the sauce a natural sweetness that balances the saltiness of the beef, creating a rich gravy without needing any thickeners. You do not need to stand there stirring a pot on the stove to get this result; the slow cooker does the work for you by keeping a steady, low heat that maintains the moisture.
This dish is also very forgiving. If you have to leave it for an extra hour because your day ran long, the beef will simply become even more tender. It is hard to ruin this meal as long as you provide enough time for the fibers to break down. The consistency of the results is why I keep coming back to this simple preparation, especially when the weather turns cold and I want something that feels grounding and substantial.
Ingredient Notes
The Beef
I always look for a beef chuck roast that is about 3 to 4 pounds. This cut comes from the shoulder of the cow and is the standard for long, slow cooking. Look for a roast that has some nice white marbling of fat throughout, rather than just large chunks on the outside. This fat will melt during the 8 hours of cooking and baste the meat from the inside. If the roast is too lean, it will dry out, so do not shy away from a piece that looks a bit marbled. You can find this at most supermarkets; if it is tied with butcher twine, you can leave it on or remove it before cooking.
The Onions
Yellow onions are my go-to for this recipe. They are sturdy enough to stand up to 8 hours of heat without turning into total mush, and they provide the right balance of sharp flavor and sweetness. You should use about 3 or 4 large onions for this dish. I like to slice them into thick strips rather than dicing them small because it makes them easier to serve alongside the meat. If you want a more complex flavor, you can mix in one red onion, but keep the yellow ones as your base.
Aromatics and Liquids
Garlic is necessary here, and I recommend using at least 6 cloves. You do not need to mince them; just peel them and smash them with the side of a knife. They will mellow out significantly as they cook. For the liquid, I stick to a splash of soy sauce for depth of saltiness and beef broth as the main base. I avoid adding too much liquid, as the onions and the beef will release a significant amount of their own moisture during the cooking process. A little dried thyme or rosemary works well to add an earthy note that cuts through the richness of the fat.
| Ingredient | Amount | Notes |
|---|---|---|
| Beef Chuck Roast | 3-4 pounds | Look for even marbling |
| Yellow Onions | 4 large | Slice into half-inch strips |
| Garlic Cloves | 6 cloves | Smashing them is fine |
| Beef Broth | 1 cup | Low sodium preferred |
| Soy Sauce | 2 tablespoons | Adds savory depth |
| Dried Thyme | 1 teaspoon | Adds a mild earthy scent |
| Salt | 1 teaspoon | Adjust to your taste |
| Black Pepper | 1/2 teaspoon | Freshly cracked is best |
| Olive Oil | 2 tablespoons | For searing the meat |
The Recipe
- Prep Time: 15 minutes
- Cook Time: 8 hours
- Total Time: 8 hours 15 minutes
- Servings: 6 servings
- Difficulty: Easy
Equipment needed:
– Large heavy-bottomed skillet for searing
– Slow cooker with a 6-quart capacity
– Tongs for turning the meat
– Meat thermometer for checking doneness
Step-by-Step Instructions
Step 1: Prep the Ingredients
Start by taking the beef chuck roast out of the refrigerator about 20 minutes before you plan to start. This helps it sear more evenly. Pat the surface of the meat completely dry with paper towels; moisture on the surface will prevent the meat from getting a good sear in the pan. Sprinkle the salt and black pepper all over the roast, pressing it into the sides so it sticks.
While the beef rests, peel your onions and cut them into thick strips. You want these to be substantial so they keep their structure during the long hours in the heat. Peel and smash your garlic cloves. Having everything ready before you turn on the stove makes the process much smoother.
Step 2: Sear the Beef
Heat your olive oil in a large skillet over medium-high heat until it shimmers. Place the roast into the hot pan. You want a deep brown crust to develop on the outside of the meat, which adds a lot of flavor to the final sauce. Do not rush this part. Let it sear for about 4 to 5 minutes on each side without moving it, until it releases easily from the pan.
Make sure you sear the ends of the roast as well by holding it with tongs if necessary. The result should be a nice, dark, browned exterior. Once you have browned all sides, take the meat out of the skillet and place it directly into the bottom of your slow cooker.
Step 3: Layer the Onions and Aromatics
In the same skillet where you seared the meat, toss in your sliced onions. Do not worry about cleaning the pan; you want to scrape up the browned bits left behind by the beef. Cook the onions over medium heat for about 5 minutes, just until they start to wilt and soften. They do not need to be fully browned yet, as they will spend the next 8 hours cooking.
Add the smashed garlic cloves to the onions and cook for another minute until you can smell them. Transfer this onion and garlic mixture on top of the beef in the slow cooker. Distributing them over the top ensures the meat stays surrounded by the aromatic vegetable base.
Step 4: Add Liquids and Set the Cooker
Pour the beef broth and the soy sauce over the onion and beef mixture. Sprinkle the dried thyme over everything. You do not need to stir, as the liquids will settle to the bottom as the beef releases its own fat and juices. Place the lid on your slow cooker.
Set the cooker to the low setting. This is the most important part of the recipe. Low and slow is what makes the roast tender. You will let this cook for 8 hours undisturbed. Resist the urge to lift the lid, as doing so lets the heat escape and adds time to the cooking process.
Step 5: Check and Serve
After 8 hours, check the roast with a fork. It should offer no resistance and feel like it is falling apart. If you have a meat thermometer, the internal temperature should be at least 195 degrees Fahrenheit for the most tender result. If it feels a bit firm, give it another 30 minutes.
Carefully lift the roast out of the slow cooker onto a cutting board. You can pull it apart into large chunks using two forks. Skim any excess fat off the top of the juices in the slow cooker if you prefer, then serve the meat with a generous portion of the onions and the cooking liquid spooned over the top.
Mistakes I Made (So You Don't Have To)
Overloading the Pan
Early on, I used to try to sear the roast in a pan that was too small or crowded. If the meat does not have space, it will steam instead of browning. This results in gray, unappealing meat rather than that deep, flavorful crust. Always use a large enough skillet and give the meat plenty of space. If your skillet is small, sear the roast in two stages rather than forcing it to fit.
Skipping the Sear
I once thought I could just throw the raw meat into the slow cooker to save time. It was a mistake. Without that initial sear on the stovetop, the meat is pale and lacks the deep savory flavor that only browned proteins can provide. The extra 10 minutes it takes to sear the meat is the difference between a flat-tasting meal and one that feels like it came from a professional kitchen.
Lifting the Lid Too Often
Checking the roast every hour was a habit I had to break. Every time you open the lid, you lose a significant amount of heat. This can add an hour or more to your total cook time because the slow cooker takes a long time to regain its internal temperature. Trust the process and leave the lid closed until the timer is up. It is the hardest part, but your patience will be rewarded.
Using Too Much Liquid
My first attempt at this dish ended with a watery mess because I added way too much beef broth. I forgot that the beef and the onions release a large amount of liquid as they shrink. You only need enough broth to get the process started. If you add too much, you end up with a soup instead of a rich, concentrated gravy. Stick to the one cup of liquid suggested, and you will get a thick, flavorful result.
Variations and Tips
Adding Root Vegetables
If you want to make this a one-pot meal, you can add large chunks of carrots or potatoes. Cut them into thick, 2-inch pieces so they do not turn into mush during the long 8-hour cooking cycle. Place them at the very bottom of the slow cooker, under the beef, so they cook in the juices and flavorings.
Making It Ahead
This recipe is actually better the next day. If you have time, cook it the day before, let it cool completely, and store it in the refrigerator overnight. The flavors have time to meld together, and it is much easier to skim off the solidified layer of fat from the top before you reheat it.
Using Different Herbs
While I prefer thyme, you can experiment with other dried herbs. A bay leaf or two added at the start provides a nice subtle aroma. If you have fresh rosemary, you can add a whole sprig during the last hour of cooking, but remove it before serving as the needles can be tough and unpleasant to eat.
A Faster Sear
If you are really short on time but still want the flavor of a sear, you can rub the beef with a little bit of flour before searing. This helps create a slightly thicker crust and will also help thicken the final sauce naturally as the flour incorporates into the juices during the slow cooking process.
Storage and Reheating
To store your leftovers, let the roast cool down at room temperature for no more than 2 hours. Once it has cooled, transfer the beef and the onions with the juices into airtight containers. You can keep them in the refrigerator for up to 3 days. When you are ready to eat, make sure to reheat the portions until the meat is steaming hot, reaching an internal temperature of at least 165 degrees Fahrenheit.
If you find that you have more than you can eat, you can freeze the leftovers, though the texture of the onions may become a little softer after being thawed. To freeze, place the cooled meat and onions in a freezer-safe bag or container, covering them with the cooking juices to prevent freezer burn. They can stay in the freezer for up to one month. Thaw in the refrigerator overnight before reheating on the stove until steaming hot.
Frequently Asked Questions
Why does my beef still feel tough after 8 hours?
If the meat is still tough, it usually means it has not had enough time to break down the connective tissue. Some cuts of chuck roast are thicker or have more gristle than others. If you check the meat at the 8-hour mark and it is not fork-tender, simply put the lid back on and give it another 30 to 60 minutes.
Can I use a different cut of meat for this recipe?
You really should stick with a chuck roast or a similar cut from the shoulder. Leaner cuts like sirloin or round steak do not have enough fat or connective tissue to handle the long cooking time. They will end up being very dry and stringy if you cook them for 8 hours, even if they are sitting in liquid.
Do I need to add water if the liquid level looks low?
You generally do not need to add extra water. The beef and the onions will release plenty of liquid as they reach temperature. Even if the meat does not look fully submerged at the start, as the onions soften and the beef shrinks, the total volume of liquid will increase significantly.
Can I leave the slow cooker on while I am at work?
Yes, this recipe is designed for that. As long as you have a slow cooker that maintains a consistent low heat, it is safe to leave it unattended for the 8-hour duration. Just make sure the unit is on a stable, heat-resistant surface and away from any flammable items.
Should I trim the fat off the roast before cooking?
I recommend leaving most of the fat on the roast. That fat is what keeps the meat moist during the long cooking time. You can always skim the rendered fat off the surface of the sauce once the cooking is finished, but cutting it away before cooking will result in a drier final product.
Final Thoughts
Making a slow-cooked meal at home is one of the most rewarding things you can do for yourself and your family. It is a slow, quiet process that results in something far better than anything you can find in a hurry. When you pull that tender beef from the slow cooker, you realize that the wait was worth every minute.
I hope you find this recipe to be a reliable favorite in your kitchen. It is a simple way to bring a bit of warmth to your table, and I am sure you will find your own ways to adjust it to suit your taste. Enjoy the process of preparing it, and most importantly, enjoy the meal.