
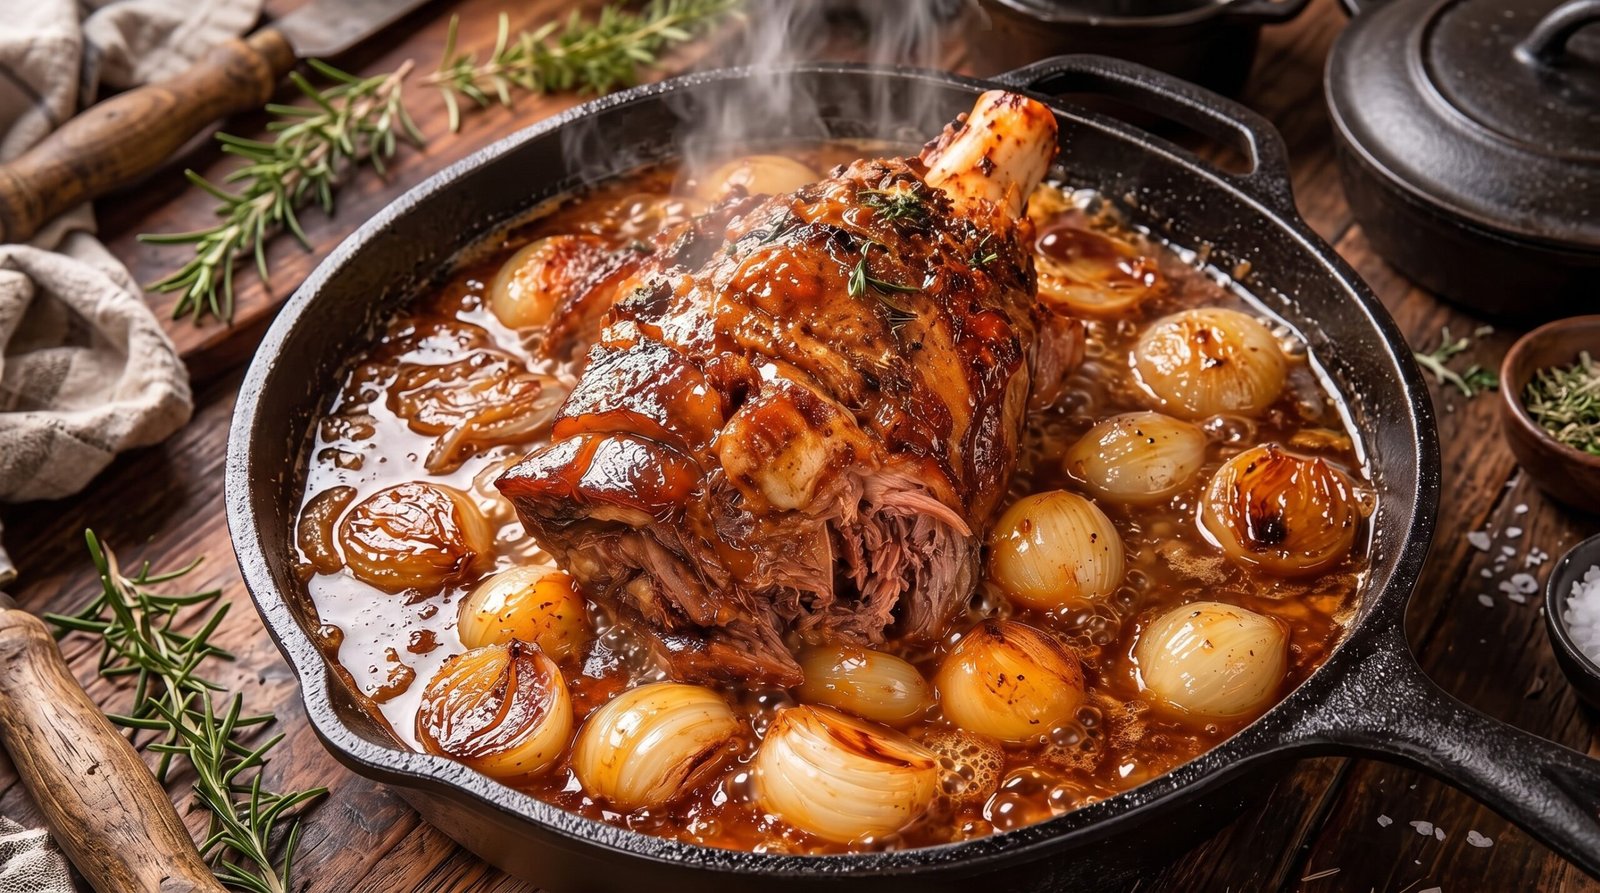
I remember the first time I stood in my kitchen on a cold Tuesday, staring at a package of lamb shanks and wondering if I was really ready to cook them. They can look intimidating with that long bone and dense muscle, but I quickly realized that a long, slow braise is one of the most forgiving ways to prepare meat. There is a specific comfort in hearing the gentle simmer of a heavy pot while the house fills with the deep, savory scent of roasted meat and aromatics. That is exactly what happens when you make this braised lamb shank with pearl onions. It is a slow, methodical process that rewards you with meat so tender it pulls away from the bone with just the pressure of a fork. If you have been searching for a way to turn a tough, inexpensive cut into a centerpiece meal, this dish is for you.
Why This Recipe Works
This recipe relies on the power of time and moisture. Lamb shank is a cut taken from the lower leg of the animal, meaning it is full of connective tissue that becomes tough if cooked quickly. By using a heavy-duty pot and keeping the temperature low, we allow the collagen in the meat to break down gradually. This transformation turns a chewy cut into something gelatinous and buttery.
The combination of the lamb with pearl onions is intentional. As the onions simmer in the braising liquid, they soften and release their natural sugars. They soak up the juices from the meat while simultaneously acting as a sweet balance to the richness of the lamb. The liquid itself, which usually starts as a thin mixture, thickens over the course of the three-hour cooking time. It transforms into a glossy, dark glaze that coats the meat and onions, bringing the entire plate together.
Ease is another factor. Once the initial prep is done, the oven does all the heavy lifting. You do not need to stand over the stove stirring or checking for doneness every few minutes. You place the pot in the oven, set a timer, and go about your day. The process is simple, requiring only basic kitchen tools that most people already own. This makes it a great choice for a quiet weekend dinner when you want to make something that feels like an occasion without requiring constant attention. The results are consistent every time, provided you keep your liquid levels steady and your heat low enough to maintain a gentle simmer rather than a hard boil.
Ingredient Notes
The Lamb and Base Aromatics
The most important part of this dish is the meat. You want to look for shanks that have a good balance of meat to bone. The bone itself is essential for flavor, as it contains marrow that seeps into the liquid during the long cook time. If your butcher offers smaller or larger shanks, keep in mind that this will change your cooking time slightly, so check for tenderness at the three-hour mark.
| Lamb Shanks | 4 pieces | Look for bone-in shanks, trimmed of excess outer fat. |
| Pearl Onions | 2 cups | Use fresh or frozen; fresh ones need blanching to peel easily. |
| Garlic | 6 cloves | Peeled and smashed, but kept whole to infuse the sauce. |
| Fresh Thyme | 5 sprigs | Adds a woody, herbal note that cuts through the fat. |
| Beef Stock | 2 cups | Provides the base for the braising liquid; use low sodium if possible. |
| Olive Oil | 2 tablespoons | Necessary for searing the meat before the liquid is added. |
| Red Wine | 1 cup | A dry red like a Cabernet or Merlot works best here. |
| Salt and Pepper | To taste | Essential for seasoning the meat thoroughly before cooking. |
Liquids and Flavor Enhancers
The liquid creates the environment for the braising process. You need a mix of acidity and body. The red wine provides the acidity needed to tenderize the muscle fibers, while the beef stock adds depth and saltiness. I find that using a high-quality stock makes a big difference in the final flavor, as it will reduce down into a concentrated sauce. If you do not have beef stock, you could technically use chicken, but the flavor will be significantly lighter and less characteristic of a traditional lamb dish.
| Ingredient | Amount | Notes |
|---|---|---|
| Lamb Shanks | 4 large | Bone-in, trimmed |
| Pearl Onions | 2 cups | Peeled |
| Garlic Cloves | 6 whole | Smashed |
| Fresh Thyme | 5 sprigs | Fresh is better than dried |
| Beef Stock | 2 cups | High quality or homemade |
| Red Wine | 1 cup | Dry red wine |
| Olive Oil | 2 tablespoons | For searing |
| Kosher Salt | 1 tablespoon | For seasoning meat |
| Black Pepper | 1 teaspoon | Freshly cracked |
The Recipe
- Prep Time: 20 minutes
- Cook Time: 3 hours
- Total Time: 3 hours 20 minutes
- Servings: 4
- Difficulty: Intermediate
- Equipment: Large Dutch oven or heavy oven-safe pot, kitchen tongs, small bowl, oven mitts.
Step-by-Step Instructions
Step 1: Season and Sear the Lamb
Before you do anything else, take your lamb shanks out of the refrigerator about 20 minutes before cooking. Pat them dry with paper towels. This step is vital because if the meat is wet, it will steam instead of getting a good exterior color. Sprinkle the salt and pepper over all sides of each shank, pressing it into the meat with your hands.
Heat your heavy-bottomed Dutch oven over medium-high heat. Add the olive oil and wait until it shimmers. Place the shanks in the pot. Do not crowd them; if your pot is small, do this in two batches. Sear them for about 3 to 4 minutes per side until they develop a deep brown color. You are not trying to cook the inside here, just building the base flavor through this browning process. Once done, remove the shanks and set them aside on a plate.
Step 2: Prepare the Aromatics
Reduce the heat to medium. In the same pot, without cleaning it, add your pearl onions. The fat from the lamb will still be in the pot, which helps. Sauté the onions for about 5 minutes until they start to soften and take on a golden hue. Add the smashed garlic cloves and the fresh thyme sprigs. Stir them around for just about one minute until the garlic becomes fragrant.
Be careful not to burn the garlic, as that can make the entire sauce taste bitter. If you find the pot is becoming too dark, turn the heat down slightly. The goal here is to soften the onions and release the oils from the herbs into the pan juices.
Step 3: Deglaze and Combine
Pour in the red wine to deglaze the pot. Use a wooden spoon to scrape up all the browned bits, known as fond, from the bottom of the pan. This is where a lot of the deep flavor lives. Let the wine simmer for about 3 minutes to allow most of the alcohol to cook off. The liquid will reduce by about half.
Return the seared lamb shanks to the pot, nestling them among the onions and garlic. Pour the beef stock over the meat. The liquid should come about halfway up the sides of the shanks. If it does not, add a little more stock or a splash of water. Bring the liquid to a gentle simmer on the stovetop.
Step 4: The Slow Braise
Cover the pot with a tight-fitting lid. Transfer it to an oven preheated to 325 degrees Fahrenheit. Let the lamb braise for 3 hours. Do not be tempted to open the lid too often, as this lets out heat and moisture. At the 2-hour mark, you can gently turn the shanks over to ensure they are cooking evenly, but keep it quick.
You will know the lamb is ready when the meat is extremely tender and pulling away from the bone. The internal temperature of the meat should reach at least 195 degrees Fahrenheit for the best texture. If it feels firm, give it another 15 to 20 minutes.
Step 5: Final Reduction and Serving
Once the time is up, remove the pot from the oven. Carefully lift the lamb shanks out of the pot and onto a serving platter, covering them loosely with foil to keep them warm. If the sauce looks too thin, place the pot back on the stovetop over medium-high heat. Let it bubble for 5 to 10 minutes until it reduces to a thick, glossy glaze that coats the back of a spoon.
Taste the sauce and adjust the seasoning with more salt or pepper if needed. Spoon the pearl onions and the reduced sauce over the lamb shanks. Serve immediately while everything is steaming hot.
Mistakes I Made (So You Don't Have To)
Overcrowding the Pot
Early on, I tried to cram all four shanks into a pot that was just a little too small. Because they were touching, the sides did not sear properly. They ended up looking gray instead of brown. The fix is simple: work in batches. If the meat does not fit comfortably in a single layer with space between, cook two at a time. It adds an extra few minutes to your prep, but the flavor development is worth it.
Rushing the Searing Process
I used to think that the browning step was just about looks, so I would pull the meat out way too early. I learned that the color on the outside is actually flavor. If you do not let the meat develop that rich brown crust, the final sauce will lack depth and taste somewhat one-dimensional. Take your time during those first few minutes. Let the meat sit undisturbed until it releases from the pan naturally.
Boiling Instead of Simmering
One time, I had my oven temperature set too high, and the liquid in the pot was bubbling aggressively the entire time. This caused the meat to become stringy and dry rather than falling off the bone. Braising is a low-and-slow game. If you hear a vigorous boil inside the oven, turn the temperature down by 10 to 15 degrees. You want the liquid to move gently, like a very slow, lazy river.
Not Reducing the Sauce
I once served the braised lamb straight from the oven without reducing the liquid. The result was a watery, thin broth that just ran off the meat instead of clinging to it. The sauce is a key part of the experience. Always take that extra step at the end to thicken the liquid. It concentrates the flavor and makes the dish feel like it came from a professional kitchen.
Variations and Tips
A Touch of Citrus
If you want to brighten the dish, add a strip of lemon zest to the pot during the braising process. It sounds strange, but the acidity of the lemon cuts through the rich lamb fat beautifully. Just remove the peel before serving. Do not add the juice, as it might curdle the sauce; stick to the oils in the peel.
Adding Root Vegetables
You can add chunks of carrots or parsnips to the pot when you add the onions. They cook at a similar rate and absorb the same braising liquid. This turns the meal into a complete one-pot dinner. Just make sure the pieces are cut into large, chunky sections so they do not disintegrate during the 3-hour cook time.
Make Ahead Tip
This dish actually tastes better the next day. The flavors have more time to meld, and it is easier to skim off any hardened fat from the top of the pot after it has been in the refrigerator. To reheat, place the pot over low heat on the stove with a splash of water to loosen the sauce, until the meat is steaming hot and reaches an internal temperature of 165 degrees Fahrenheit.
Wine Substitutions
If you do not want to use red wine, you can use more beef stock mixed with a tablespoon of balsamic vinegar. The vinegar provides the necessary acidity that the wine would have contributed. It will taste slightly different, but it maintains the integrity of the cooking method and the tenderness of the meat.
Storage and Reheating
If you have leftovers, cool the lamb and the liquid down within 2 hours of taking them out of the oven. Transfer everything to an airtight container. You can keep this in the refrigerator for up to 3 days. To reheat, place the meat and the sauce in a pan on the stove over low heat. Cover it and let it simmer gently until it is steaming hot, reaching 165 degrees Fahrenheit.
Avoid freezing this dish if you can help it. The texture of the lamb tends to become slightly grainy after being frozen and thawed, and the onions can lose their structure, becoming mushy. If you must freeze it, do so for no longer than two weeks, and thaw it completely in the refrigerator before reheating. Always prioritize safety by making sure the center of the meat is piping hot before serving.
Frequently Asked Questions
Can I use a slow cooker for this recipe?
You can, but I find the results in the oven to be much better. The oven provides an even, all-around heat that helps the sauce reduce and thicken properly. If you use a slow cooker, cook on low for 6 to 8 hours. You will likely need to pour the liquid into a separate pan afterward to reduce it on the stove, as slow cookers trap all the moisture inside.
How do I know if my lamb is done?
The best way is to use a digital meat thermometer. You want the thickest part of the meat to reach at least 195 degrees Fahrenheit. At this point, the collagen has fully broken down, and the meat will be tender enough to eat with a fork. It should also visually pull away from the end of the bone.
Why are my pearl onions mushy?
Pearl onions are delicate. If you add them at the very beginning of the searing process, they might overcook by the time the lamb is ready. If you prefer them to hold their shape, add them to the pot during the last 45 minutes of the braising time instead of the beginning. This ensures they are soft but still whole.
Can I use lamb shoulder instead of shanks?
Yes, you can. Cut the shoulder into large, 2-inch chunks. Follow the exact same searing and braising process. Since shoulder is slightly more uniform than a shank, it might cook a little faster, so start checking for tenderness at the 2.5-hour mark. It will still be a rich, flavorful meal.
Do I have to peel the pearl onions?
You do, and it is the most tedious part of the prep. To make it easier, blanch the onions in boiling water for 30 seconds, then immediately plunge them into an ice bath. The skins will slide right off with a gentle squeeze. It saves a lot of time compared to peeling them raw.
Final Thoughts
Cooking a meal like this is about patience. When you take the time to let the heat do its work, you end up with something that feels much more sophisticated than the simple list of ingredients suggests. It is the kind of dish that turns a quiet evening into something memorable.
I hope you find as much joy in preparing these lamb shanks as I do. Keep your heat low, watch your liquid levels, and do not rush the process. When you pull that pot out of the oven and see the deep, dark sauce clinging to the meat, you will know exactly why it was worth the wait.