
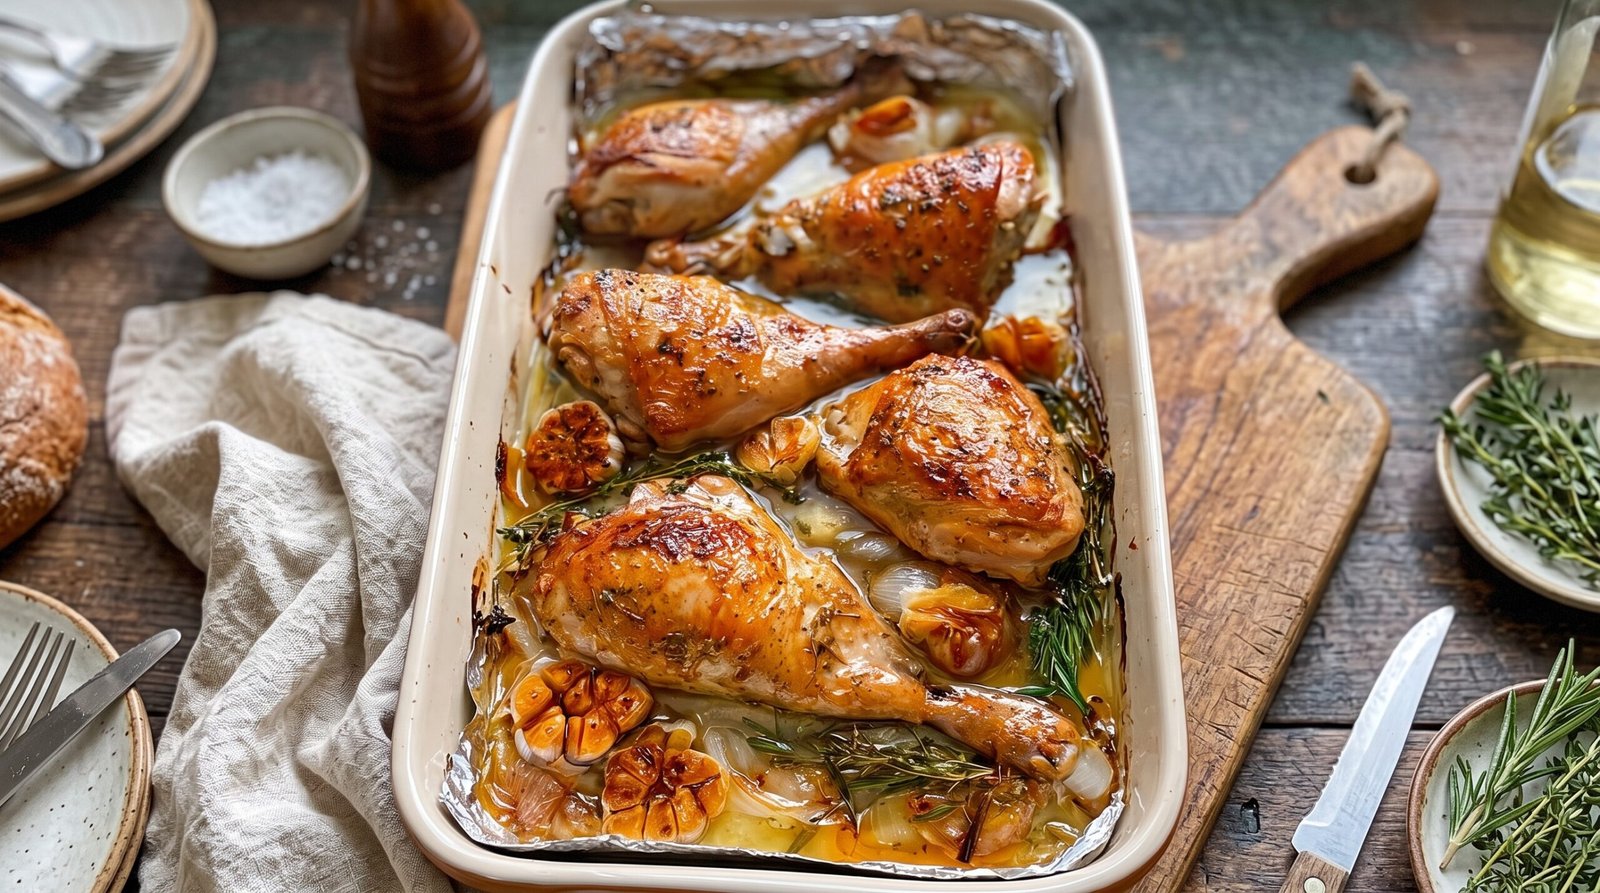
It happens every Tuesday evening. I come home from work, the sun is starting to dip, and I realize I have absolutely no plan for dinner. I want something that feels like a proper home-cooked meal, but I am too tired to stand over a frying pan for forty-five minutes or chop a dozen different vegetables. Most days, I just reach for a baking dish and some basic pantry staples. There is a quiet rhythm to turning on the oven, knowing that in about an hour, the house will fill with the smell of roasting garlic and savory herbs. This herb roasted chicken legs with garlic and onions recipe is my go-to solution for those busy nights when I need comfort without the fuss. It uses simple ingredients that provide a rich depth of flavor through slow roasting. You get tender meat that pulls away easily from the bone, paired with cloves of garlic that soften into a spreadable texture and onions that turn sweet in the juices. It is a humble, straightforward dinner that rewards you for very little actual work.
Why This Recipe Works
This dish relies on the principle of slow-roasting chicken on the bone. Because I use the whole chicken leg, which includes both the drumstick and the thigh, the meat stays succulent throughout the cooking process. Unlike chicken breasts, which can dry out quickly if you are not careful, these cuts have enough fat and connective tissue to handle the heat of the oven for a longer duration. The fat renders out and bastes the meat, ensuring that the skin becomes thin and flavorful without requiring any complicated techniques.
The combination of garlic and onions is intentional. When you roast whole garlic cloves in their skins, they steam inside, turning into a mild, creamy paste that is nothing like the sharp bite of raw or quickly sautéed garlic. The onions act as a base for the chicken, absorbing the juices and herbs to create a natural sauce as they soften. By letting these components sit together in the pan, the flavors meld into something deeper than the sum of their parts. It is a very forgiving cooking method. If you leave it in the oven for an extra five or ten minutes because you got distracted, the chicken is unlikely to suffer, and the onions just get a little deeper in color. It takes the stress out of timing the meal, as the dish holds heat well even if you are a few minutes late to the table.
Ingredient Notes
The Poultry
When picking out chicken legs, look for ones that appear firm and have a uniform color. I prefer buying them as whole legs rather than separated drumsticks and thighs, as the extra skin and fat help protect the meat during the long roasting time. You want about four to six legs depending on the size of your roasting dish. If your butcher has them available, organic or pasture-raised options often have a slightly firmer texture, but standard supermarket chicken works fine here as long as you pay attention to the cooking time. Always check the skin for any stray feathers or bits of cartilage before you begin, and pat the skin dry with paper towels. Excess moisture on the surface is the enemy of a nice texture on the skin, as it will cause the chicken to steam rather than roast.
Aromatics and Seasonings
The garlic is the most important element after the chicken. You should use at least two full heads of garlic. Yes, two whole heads. By cutting the tops off the heads to expose the cloves, you allow the heat to penetrate directly. Do not worry about the quantity; as the garlic roasts, it loses its harshness and becomes almost sweet. For the onions, yellow onions are the best choice. They provide a sturdy structure that does not break down into complete mush during the sixty minutes in the oven. Cut them into thick wedges so they hold their shape. Regarding the herbs, fresh thyme and rosemary are essential. Dried herbs can work in a pinch, but they do not provide the same aromatic lift. If you use dry, use half the amount, as they are more concentrated. Use a coarse sea salt or kosher salt, as it adheres better to the skin than fine table salt.
| Ingredient | Amount | Notes |
|---|---|---|
| Chicken legs | 4-6 pieces | Whole legs with skin and bone in |
| Garlic | 2 large heads | Cut horizontally to expose cloves |
| Yellow onions | 2 large | Cut into thick wedges |
| Fresh thyme | 5-6 sprigs | Left whole on the stems |
| Fresh rosemary | 3-4 sprigs | Left whole on the stems |
| Olive oil | 3 tablespoons | Extra virgin works best for flavor |
| Sea salt | 1 teaspoon | Plus more to taste |
| Black pepper | 1/2 teaspoon | Freshly cracked is best |
The Recipe
- Prep Time: 15 minutes
- Cook Time: 60 minutes
- Total Time: 75 minutes
- Servings: 3-4 servings
- Difficulty: Easy
Equipment needed: A large rectangular ceramic or glass baking dish, a sharp chef's knife, a cutting board, and a pair of tongs.
Step-by-Step Instructions
Step 1: Prep the Oven and Ingredients
Begin by preheating your oven to 400 degrees Fahrenheit. It is important to let the oven reach full temperature before the chicken goes in, as this heat helps render the fat immediately. While the oven heats up, take your chicken legs out of the refrigerator and lay them on a plate. Use paper towels to pat the skin dry. This step is non-negotiable if you want the chicken skin to have a decent texture rather than being soggy.
Slice your two heads of garlic across the middle, perpendicular to the cloves, so that the tops are exposed. You do not need to peel the individual cloves; the skins will protect them from burning. Peel your yellow onions, cut them into thick wedges, and scatter them across the bottom of your baking dish. This creates a bed for the chicken to rest on, which prevents the bottom of the chicken from sticking to the dish and allows the juices to pool around the onions.
Step 2: Season the Chicken
Place the chicken legs into the baking dish on top of the onions. Drizzle the olive oil over the chicken and use your hands to rub it into the skin, making sure to get underneath the legs as well. Season generously with the sea salt and cracked black pepper. Because the chicken is bone-in and skin-on, it needs a good amount of salt to penetrate the meat.
Tuck the sprigs of thyme and rosemary in between the chicken legs. Some people like to place the herbs on top, but I find that placing them in the juices allows them to infuse the liquid more effectively. Place the cut heads of garlic in the empty spaces between the chicken legs, cut side facing up. This arrangement keeps everything stable while roasting.
Step 3: The Initial Roast
Place the baking dish into the center rack of your preheated oven. Let it roast for 30 minutes without moving it. At the 30-minute mark, open the oven carefully and use your tongs to flip the chicken legs over. This ensures even browning on both sides. Stir the onion wedges slightly in the pan so they get coated in the rendered chicken fat.
Continue roasting for another 25 to 30 minutes. You will know it is getting close when the house smells strongly of roasted garlic and the onions have turned a translucent golden color. The skin of the chicken should have a deep golden-brown appearance and look slightly tightened.
Step 4: Checking for Doneness
To be absolutely sure the chicken is finished, use a digital meat thermometer. Insert the probe into the thickest part of the thigh, ensuring you do not touch the bone, as the bone will give you a false reading. You are looking for an internal temperature of at least 165 degrees Fahrenheit. The juices should run clear when you pierce the meat. If you see pinkish juices, give it another five minutes.
If the skin is not as dark as you would like, you can switch the oven to the broiler setting for 2 to 3 minutes, but watch it constantly. Chicken skin can go from golden to burnt in a heartbeat under the broiler. Once it reaches the safe temperature, pull the dish out and let it sit on the counter for at least 5 to 10 minutes. This resting time allows the juices to redistribute throughout the meat.
Step 5: Serving
When you are ready to serve, transfer the legs to a serving platter. Use a spoon to scoop up the onions and the softened garlic cloves. You can squeeze the roasted garlic out of the skins directly onto your plate; it will be buttery and sweet. Spoon some of the pan juices over the chicken before bringing it to the table. This dish pairs very well with a side of steamed green beans or a simple crusty bread to soak up the juices from the pan.
Mistakes I Made (So You Don't Have To)
Washing the Chicken
Early on, I used to wash my chicken under the faucet. I thought it was cleaner. It turns out that washing chicken does not actually remove bacteria; it mostly just splashes bacteria all over your sink and surrounding counters. It also makes the skin wet. Now, I skip the washing entirely and just pat the meat dry with paper towels. The results are much better for the texture of the skin.
Overcrowding the Pan
I once tried to squeeze eight chicken legs into a dish that was only meant for four. Because there was no space for air to circulate, the chicken didn't roast; it just boiled in the juices. The skin remained pale and soft, which was disappointing. Now, I make sure there is at least an inch of space between each piece of chicken. If you have a lot of chicken, use two separate baking dishes instead of crowding one.
Using Too Much Salt
I once used fine table salt instead of coarse salt and ended up with a very salty meal. Fine salt is much denser than kosher or sea salt, so the same measuring spoon of fine salt is much more powerful. I have learned to use coarse salt and sprinkle it by feel, tasting the chicken slightly near the skin before I commit to the full amount.
Skipping the Resting Time
I used to be so hungry that I would cut into the chicken the second it came out of the oven. All the juices would spill out onto the cutting board, leaving the meat inside feeling a bit dry. Now, I force myself to wait for those ten minutes of resting time. It is a small wait that makes a massive difference in how succulent the meat stays when you finally take that first bite.
Variations and Tips
Add Some Heat
If you enjoy a bit of spice, add a teaspoon of red pepper flakes to the olive oil before rubbing it on the chicken. The heat infuses the oil and gives the chicken a mild kick that balances well with the sweetness of the roasted garlic. You could also toss a few whole chili peppers into the pan alongside the onions for a more intense flavor.
Citrus Zest
Sometimes I add the zest of half a lemon to the chicken just before putting it in the oven. The brightness of the citrus cuts through the richness of the chicken skin. Be careful not to add the juice, as that will create too much liquid in the pan and prevent the skin from darkening properly. Just the zest is enough to lift the whole profile of the dish.
Make-Ahead Strategy
This dish is great for prepping in advance. You can season the chicken and place it with the onions in the baking dish, cover it, and keep it in the refrigerator for up to 4 hours before roasting. Just remember to let the dish sit on the counter for about 20 minutes to take the chill off before putting it into the oven. If the dish is ice-cold, it will take longer to cook and the timing will be off.
Using Other Roots
If you have potatoes in the pantry, you can cut them into one-inch cubes and toss them in the pan with the onions. They act like sponges for the chicken fat and the herb juices. Just ensure the potatoes are cut small enough so they cook through in the same amount of time as the chicken legs. If you use large chunks of potato, they will remain raw while the chicken finishes, which is a common error to avoid.
Storage and Reheating
If you have leftovers, they should be refrigerated within two hours of coming out of the oven. Store the chicken in an airtight container in the refrigerator for up to three days. I do not recommend keeping it longer than that for quality reasons. When you want to reheat the leftovers, the oven is your best friend. Set it to 350 degrees Fahrenheit and place the chicken on a baking sheet with a small splash of water to keep it from drying out. Heat it until the internal temperature reaches 165 degrees Fahrenheit. Microwaving usually makes the skin rubbery, so avoid that if you care about the texture. This dish does not freeze well because the onions and garlic break down significantly and the texture of the chicken skin suffers upon thawing, so I suggest eating it fresh within the three-day window.
Frequently Asked Questions
Can I use chicken breasts instead of legs?
You certainly can, but you will need to adjust the cooking time. Chicken breasts cook much faster than legs and have less fat. If you use breasts, they will likely be finished in about 30 to 35 minutes at 400 degrees Fahrenheit. Be careful not to overcook them, or they will become stringy and dry. Use your thermometer to pull them out as soon as they hit 165 degrees Fahrenheit.
Why did my chicken skin not get dark?
The most common cause is overcrowding the pan or having too much moisture. If the chicken legs are touching each other, they will release steam rather than roasting. If the skin was damp when it went into the oven, that moisture has to evaporate before the browning can start. Always pat the skin very dry and ensure there is plenty of room between each piece of chicken in your roasting dish.
Can I add vegetables like carrots or celery?
Yes, carrots work wonderfully. Cut them into thick sticks so they match the cooking time of the onions. Celery is a bit more delicate and might get very soft, but it adds a nice flavor to the pan juices. Just make sure you do not fill the dish so high that the air cannot flow around the chicken, otherwise, you will have a steamed vegetable dish rather than a roasted one.
Is it necessary to use fresh herbs?
While dried herbs are fine in a pinch, fresh herbs provide a level of aroma that you simply cannot get from dried ones. If you only have dried, use a smaller amount as the flavor is more concentrated. If you are using dried, add them at the very beginning with the oil, but keep in mind that dried herbs can burn if they are directly on the surface of the skin under high heat, so tuck them under the legs.
Can I leave the garlic skins on?
You definitely should leave the skins on the garlic heads when roasting. The skin acts as a protective shield that allows the garlic cloves to steam in their own juices. If you peel them before roasting, the garlic will likely burn and turn bitter before the chicken is finished. Once they are roasted, it is very easy to squeeze the soft garlic out of the skin right onto your plate or onto a piece of bread.
Final Thoughts
Making a meal like this reminds me why I enjoy cooking so much. It is not about complicated techniques or rare ingredients, but rather about taking a few good things, giving them some time and heat, and letting them transform. The house smells wonderful while it roasts, and the final result is always satisfying.
I hope you give this method a try the next time you find yourself staring into the fridge on a busy night. It is a simple, reliable way to put a proper dinner on the table without needing to stress over the details. Just turn the oven on, get the ingredients prepped, and let the heat do the rest.