
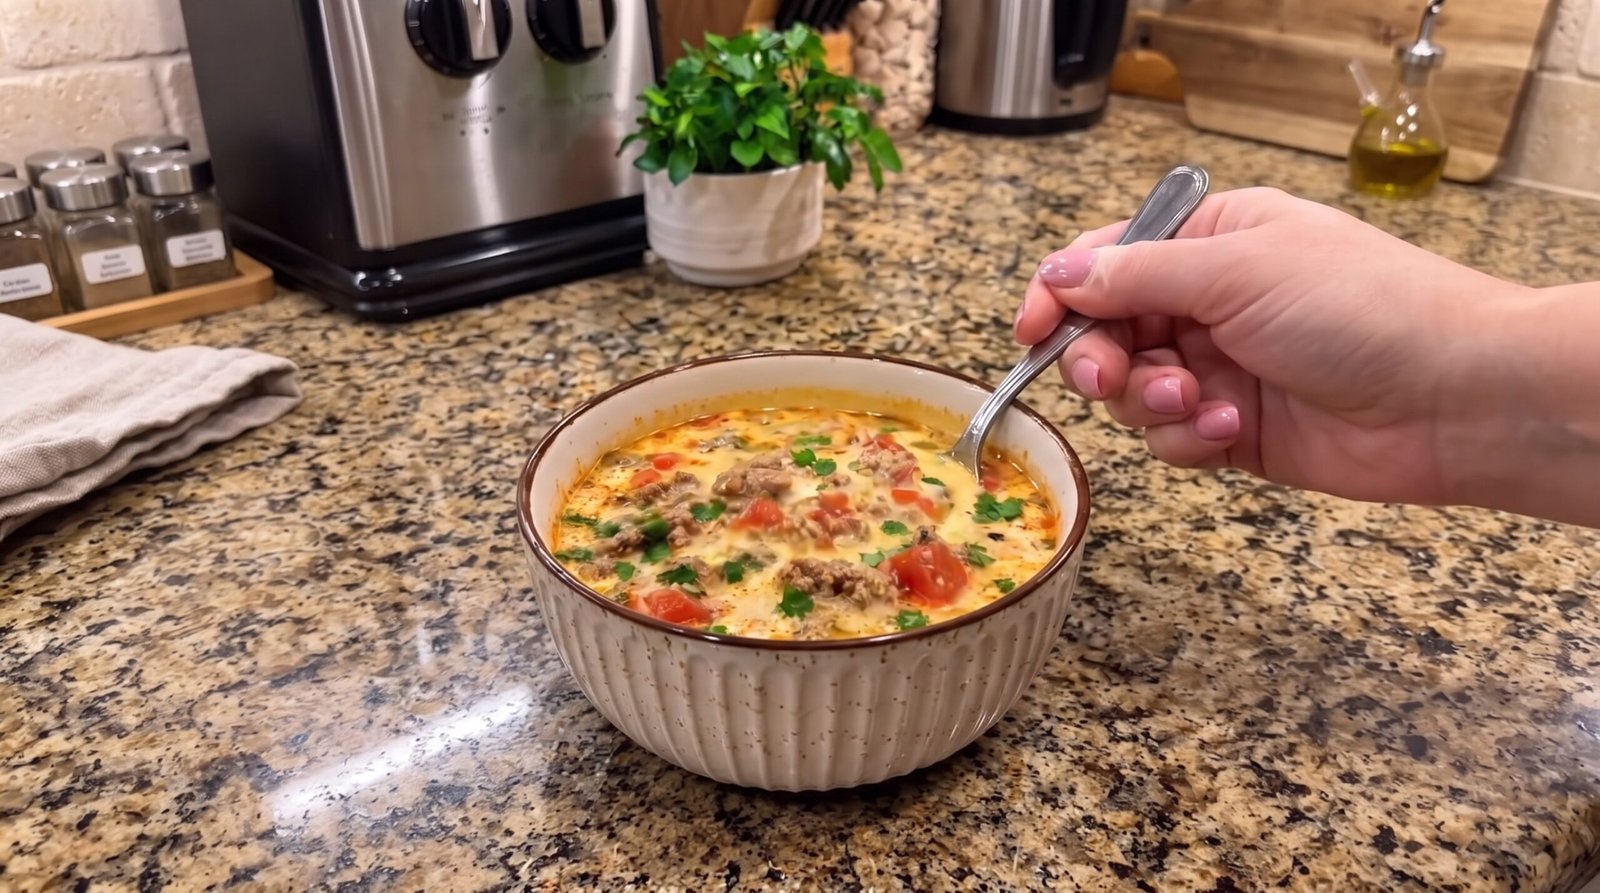
I used to think that making a hearty soup on a busy weeknight meant opening a store-bought can. My kitchen schedule is usually packed, and by the time I get home, I want something filling without spending hours over the stove. A few years ago, I started experimenting with ground beef because it cooks much faster than traditional stew meat. This creamy beef and tomato soup became a staple in my house because it uses simple ingredients that I almost always have in my pantry or fridge. It feels like a complete meal in a bowl, balancing the richness of heavy cream with the acidity of canned tomatoes and the savory bite of ground beef. If you are looking for a dinner that comes together in one pot, this is it. It has become my go-to when I need to get food on the table in under forty minutes.
Why This Recipe Works
This recipe works because it relies on high-impact ingredients that build layers of flavor quickly. By browning the ground beef first, you create a base of fat and flavor that seasons the entire pot. Many soups take a long time to develop depth, but the combination of beef and tomatoes does that work within the first few minutes of cooking. The cream is added right at the end, which changes the texture of the soup from a thin broth to a luxurious, velvety experience that coats the back of a spoon. It feels substantial without being heavy in the way some flour-thickened stews can be.
The balance of acid and fat is the primary reason this dish is so consistent. You have the acidity from the tomatoes which cuts through the richness of the beef and cream. This contrast keeps each bite interesting. Because the ingredients are simple, they are easy to adjust based on what you have on hand. If you want it a bit thicker, you can simmer it slightly longer, or if you prefer a thinner consistency, you can adjust the liquid levels. It is a forgiving recipe that does not require fancy techniques. You just need to watch your heat and monitor the browning of the meat, which ensures you get that savory quality in every spoonful.
Ingredient Notes
The Beef and Aromatics
The foundation of the soup is ground beef. I prefer using a ground beef with about 15 to 20 percent fat content because that fat carries flavor. If you use very lean meat, the soup might feel a bit dry or lack richness. You will also need some garlic to provide a sharp, aromatic base. Fresh garlic is best, but you can use jarred minced garlic if you are in a rush. I do not usually add onions to this specific recipe because I find the tomatoes and garlic provide enough flavor profile without making the soup too chunky or busy.
The Tomato Component
Canned diced tomatoes are the star here. I prefer fire-roasted diced tomatoes if I can find them, as they add a subtle smokiness that pairs well with the beef. You can use standard diced tomatoes as well. Make sure you do not drain the liquid from the can, as that juice is essential for the soup base. If you only have crushed tomatoes, you can use those for a thicker, more uniform texture, but I enjoy the texture of the chunks in the soup.
Cream and Liquid
You will need heavy cream to finish the dish. Do not use milk or half-and-half, as they tend to curdle or break when added to a hot, acidic tomato base. Heavy cream has enough fat content to stabilize the soup and create that smooth finish. For the liquid, use a good quality beef broth. If you do not have broth, you can use water with a bouillon cube, but broth adds a much deeper color and savory taste. Always check your labels to ensure the broth is something you are comfortable using, especially if you have specific dietary needs.
| Ingredient | Amount | Notes |
|---|---|---|
| Ground beef | 1 pound | 80/20 lean to fat ratio is best |
| Diced tomatoes | 14.5 ounces | One standard can with juices |
| Beef broth | 3 cups | Low sodium allows for better seasoning control |
| Heavy cream | 1/2 cup | Do not substitute with low fat milk |
| Garlic | 3 cloves | Minced finely |
| Dried oregano | 1 teaspoon | Adds a necessary herbal earthiness |
| Salt | 1/2 teaspoon | Adjust based on the saltiness of your broth |
| Black pepper | 1/4 teaspoon | Freshly cracked gives the best heat |
| Fresh parsley | 2 tablespoons | Chopped for a bright finish |
The Recipe
- Prep Time: 10 minutes
- Cook Time: 25 minutes
- Total Time: 35 minutes
- Servings: 4
- Difficulty: Easy
Equipment needed: Large heavy-bottomed pot or Dutch oven, wooden spoon, measuring cups, chef's knife, cutting board.
Step-by-Step Instructions
Step 1: Browning the Beef
Place your large pot over medium-high heat. Once the pot is hot, add the ground beef. Break it apart with your wooden spoon as it cooks. You want to cook the beef until it is no longer pink and starts to develop some brown bits on the bottom of the pot. This browning is critical for flavor. It should take about 7 to 9 minutes. If there is an excessive amount of grease in the pot, you can carefully spoon some out, but leave about a tablespoon to help carry the flavor of the garlic.
Step 2: Adding the Aromatics
Once the meat is browned, turn the heat down to medium. Add the minced garlic to the pot. Cook the garlic for about 1 minute, stirring constantly so it does not burn. You are looking for the garlic to become fragrant and slightly soft. Burning garlic happens very quickly, so stay close to the stove. You should be able to smell the aroma clearly before you move on to the next step.
Step 3: Simmering the Base
Pour in the entire can of diced tomatoes, including the liquid. Stir well to scrape up any browned bits of meat stuck to the bottom of the pot. These bits contain a lot of flavor. Then, pour in the 3 cups of beef broth. Add the dried oregano, salt, and black pepper. Stir everything to combine, and bring the mixture to a gentle boil. Once it reaches a boil, reduce the heat to low and let it simmer for about 15 minutes. This time allows the flavors to meld together and the tomatoes to soften further.
Step 4: Finishing with Cream
After the 15-minute simmer, remove the pot from the heat briefly. This helps prevent the cream from curdling when it hits the hot liquid. Slowly pour in the heavy cream while stirring gently. Once the cream is fully incorporated, return the pot to the stove on very low heat for just 2 or 3 minutes. You want the soup to be hot but not boiling vigorously. A gentle bubble is fine. Taste the soup at this point and add a little more salt or pepper if you feel it needs a boost.
Step 5: Final Serving
Ladle the soup into bowls while it is hot. Sprinkle the freshly chopped parsley over the top. This adds a pop of color and a fresh bite that contrasts with the rich, creamy tomato base. Serve immediately with a side of crusty bread if you like, or eat it on its own. The beef should be tender and fully cooked through. If you have any concerns about the meat, ensure that the pot reaches a simmer for the full duration specified to confirm the beef is thoroughly cooked.
Mistakes I Made (So You Don't Have To)
Overcooking the Garlic
In my early attempts, I would add the garlic at the same time as the beef. This usually led to the garlic burning before the beef was even browned, resulting in a bitter, acrid taste that ruined the entire batch. Now, I always cook the meat first, remove excess grease if needed, and then add the garlic for the final minute of the meat-browning phase or just before adding the liquid. This ensures the garlic stays sweet and mellow.
Using Lean Ground Beef
I once tried making this with extra-lean 95/5 ground beef, thinking it would be better. The result was a soup that lacked depth and had a gritty texture. That fat from the beef is what carries the flavor into the broth. If you find yourself with very lean meat, you might need to add a small splash of oil to the pot before cooking, but I have found that simply using a standard 80/20 mix is much more reliable and produces a far better result every time.
Boiling the Cream
I used to add the cream while the soup was at a rolling boil. This caused the cream to separate immediately, creating little white flecks throughout the broth that looked unappealing and affected the mouthfeel. Now, I always remove the pot from the heat, stir in the cream, and keep the heat very low. If you follow this simple step of tempering the cream, you will get a smooth, consistent texture that stays perfectly incorporated.
Skimping on Salt
Because this soup has a fair amount of liquid, it is easy to under-season it. The first few times I made it, the flavor felt flat. I learned to taste the broth right before adding the cream. If the flavor feels a bit dull, a pinch of extra salt usually wakes everything up. Just remember that the broth itself has salt, so add it gradually. You can always add more salt, but you cannot take it out once it is in there.
Variations and Tips
Adding Greens
For a bit of extra texture and color, I sometimes stir in a handful of fresh baby spinach right at the end. You add it after you turn off the heat, right when you are adding the cream. The residual heat of the soup will wilt the spinach in about 30 seconds. It makes the dish feel even more like a complete, balanced meal without changing the flavor profile of the beef and tomatoes significantly.
A Spicy Kick
If your family enjoys a bit of heat, try adding a half-teaspoon of red pepper flakes when you add the garlic. This provides a subtle warmth that develops as the soup simmers with the broth and tomatoes. It does not make the dish overwhelmingly spicy, but it adds a nice complexity that works very well with the richness of the cream. You can also garnish with a little bit of hot sauce if you prefer to keep the spice levels adjustable per serving.
Make Ahead Tip
This soup is actually even better the next day after the flavors have had time to settle in the fridge. If you are planning a busy week, you can make the entire recipe ahead of time. When you are ready to eat, simply reheat it on the stovetop over low heat. Be careful not to let it boil, as the cream can break. Just heat it until it is steaming hot, which is around 165 degrees Fahrenheit.
Thicker Consistency
If you prefer a heartier, thicker soup, you can smash some of the tomatoes against the side of the pot with your spoon during the simmer stage. This releases more of their pectin and thickens the base naturally. Alternatively, you can mix a tiny bit of cornstarch with cold water and stir it into the broth before adding the cream, but I generally find the natural reduction of the soup works just fine for most tastes.
Storage and Reheating
If you have leftovers, let the soup cool to room temperature, but do not leave it sitting out for longer than two hours. Transfer it to an airtight container and store it in the refrigerator. It will keep for up to three days. Because this recipe contains cream, it is best to consume it within that window. I do not recommend freezing this soup, as the cream and tomato base often separate and change texture significantly when thawed.
When you are ready to reheat the soup, place the desired portion in a small pot over low heat. Stir it occasionally to ensure even heating. Heat the soup until it is steaming hot throughout. If you have a food thermometer, check that it reaches 165 degrees Fahrenheit to ensure it is safe to eat. Avoid using the microwave if possible, as it tends to heat the soup unevenly and can cause the cream to break or separate, which changes the quality of the dish.
Frequently Asked Questions
Can I use ground turkey instead of ground beef?
Yes, you can substitute ground turkey for the beef. Keep in mind that turkey is leaner and has a milder flavor, so you might want to add an extra pinch of herbs or a little more salt to compensate. Because it is leaner, you may also want to use a teaspoon of oil in the pot when you begin cooking to help brown the meat properly. The overall texture will be slightly different, but it still works quite well with the creamy tomato base.
Do I need to peel the tomatoes?
There is no need to peel the tomatoes for this recipe. Canned diced tomatoes come peeled and ready to use, which makes the prep time very short. If you were using fresh tomatoes, you would need to blanch and peel them, but for this specific recipe, the canned version is perfect because it provides consistent quality, acidity, and texture throughout the year. The skins in the canned variety are already removed during the processing at the factory.
Why did my soup look curdled?
If your soup looked curdled, it was likely because the cream was added while the soup was boiling, or it was brought to a boil after the cream was added. Cream is sensitive to high heat, especially in an acidic environment like a tomato-based soup. To prevent this, always remove the pot from the heat or turn it to the absolute lowest setting before stirring in the cream. This keeps the fat and liquid emulsified for a smooth, velvety look.
Can I add pasta to this soup?
You can add pasta to the soup, but I recommend cooking the pasta separately and adding it to the bowl just before serving. If you cook the pasta directly in the soup, it will absorb a large amount of the broth and continue to soak up liquid even after the pot is turned off. This can make the soup too thick and turn the pasta into a mushy texture. Keep the pasta separate to ensure every serving is fresh.
Is this soup safe for kids?
This soup is generally well-liked by children because it is creamy and savory without being spicy. The texture is soft, and the flavor is not overwhelming. If you are serving it to young children, make sure the temperature is comfortable before they start eating. Because it is a simple, mild soup, it is an excellent way to introduce more texture and savory ingredients to a child's diet in a friendly, approachable format that feels like comfort food.
Final Thoughts
Making this creamy beef and tomato soup has simplified my dinner routine immensely. It provides a filling, satisfying meal using just a handful of pantry staples. I love that it doesn't require constant attention, leaving me free to handle other things in the kitchen or just relax while it simmers.
I hope this becomes a regular in your rotation as well. It is one of those reliable recipes that proves you don't need complex ingredients or advanced skills to put a great, warm meal on the table. Enjoy your cooking and the good food that comes from it.