
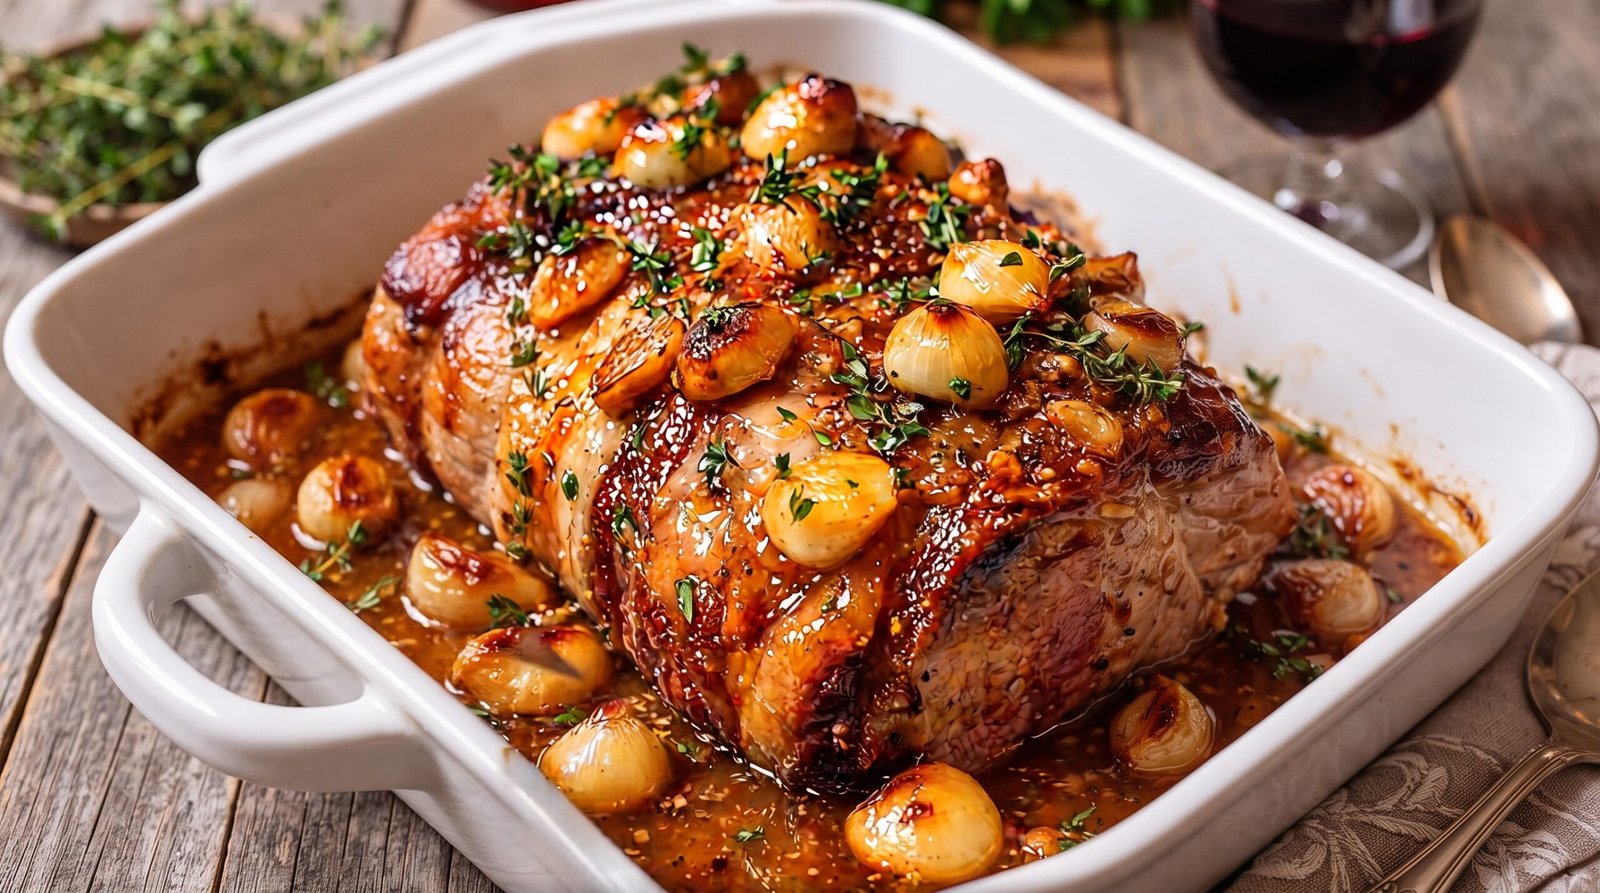
I remember the first time I tried to roast a whole beef tenderloin for a holiday gathering. I was nervous because it is such an expensive cut of meat, and I really did not want to ruin it. It turns out, the process is much simpler than most people think. You do not need fancy equipment or hours of hands-on time to get a tender, flavorful result that looks like it came from a high-end restaurant. The secret lies in treating the meat with respect and letting the oven do the heavy lifting.
This roasted beef tenderloin with glazed pearl onions has become my go-to for special dinners. It pairs the lean, buttery texture of the beef with the sweetness of soft, cooked onions and a savory glaze that ties everything together. Whether you are cooking for your family on a Sunday night or hosting friends for a celebration, this meal hits the right notes without keeping you trapped in the kitchen all evening. You will have a centerpiece dish that brings everyone to the table with ease.
Why This Recipe Works
The main reason I rely on this specific preparation is the balance of textures. Beef tenderloin is naturally very soft because it comes from a part of the cow that does not do much work. When you roast it at a moderate temperature, the outside gets a slightly firm, browned exterior while the inside stays tender. By adding pearl onions to the roasting pan, they soften and absorb the juices from the meat. This creates a savory, sweet sauce that coats the beef without needing a complicated reduction.
Another factor is the consistency. Because this cut is uniform in shape if you tie it properly, it cooks quite evenly. I find that using a meat thermometer is the key to success here. You do not have to guess if it is ready; you just look for the internal temperature. When you pull the meat out at the right time, you avoid the mistake of overcooking it into something tough and dry. The meat stays juicy throughout the whole piece.
The flavor profile is also very accessible. I use simple aromatics like fresh thyme and maybe a touch of garlic, which complement the natural beefy flavor rather than covering it up. The onions provide a nice contrast to the saltiness of the beef. It is a hearty meal that feels complete. Even if you are not a professional cook, you can achieve a result that looks sophisticated because the presentation is so clean. The meat slices easily, and the pearl onions look beautiful tucked around it on the serving platter.
Ingredient Notes
The Meat
For this dish, you need a whole beef tenderloin, often called a chateaubriand or a whole side of tenderloin. Look for one that has been trimmed of the silver skin, which is a tough connective tissue. If you buy it with the silver skin on, you will need a sharp, thin knife to peel it away, which can be tricky. When selecting the beef, look for a deep red color with some light marbling throughout. You want the meat to feel firm to the touch rather than mushy. Since this is a premium cut, make sure to ask your butcher to help you pick out the best piece if you are unsure.
The Aromatics and Vegetables
The pearl onions are the star of the vegetable side of this dish. You can buy them frozen and peeled, which saves a massive amount of time, or fresh if you enjoy the meditative process of blanching and peeling them. I usually keep a bag of frozen ones in the freezer for convenience. For the herbs, fresh thyme is essential. Dried thyme does not have the same bright, floral note that pairs with roast beef. I also use a few cloves of fresh garlic, smashed just enough to release their oils but left whole so they do not burn in the high heat of the oven.
The Glaze Components
To give the roast that deep color and savory finish, I use a combination of soy sauce, a bit of balsamic vinegar, and a touch of honey or brown sugar. The soy sauce provides the salt, while the balsamic vinegar offers a hint of acidity that cuts through the richness of the beef fat. The sugar or honey helps the exterior of the roast take on a beautiful color during the cooking process. You do not need much of these, as the drippings from the beef create the base of the liquid that stays in the pan.
| Ingredient | Amount | Notes |
|---|---|---|
| Whole beef tenderloin | 3 to 4 pounds | Trimmed of silver skin |
| Pearl onions | 1 pound | Peeled and left whole |
| Fresh thyme | 1 bunch | Leaves removed from stems |
| Garlic cloves | 6 cloves | Smashed but whole |
| Soy sauce | 3 tablespoons | Low sodium works best |
| Balsamic vinegar | 2 tablespoons | Aged is fine but standard is okay |
| Honey | 1 tablespoon | For balancing the acidity |
| Olive oil | 2 tablespoons | For searing and drizzling |
| Kosher salt | 1 tablespoon | Adjust to your preference |
| Black pepper | 1 teaspoon | Freshly cracked |
The Recipe
- Prep Time: 20 minutes
- Cook Time: 45 minutes
- Total Time: 1 hour 5 minutes
- Servings: 6 to 8 people
- Difficulty: Intermediate
Equipment Needed
- Large oven-safe skillet or roasting pan
- Meat thermometer
- Chef's knife
- Kitchen twine
- Basting brush
Step-by-Step Instructions
Step 1: Prepare the Beef
Start by taking the beef out of the refrigerator about 30 minutes before you plan to cook it. This helps the meat come closer to room temperature, which ensures that it cooks more evenly in the center. While the meat is resting, use your kitchen twine to tie the tenderloin at one-inch intervals. This creates a uniform cylinder shape, which is crucial for even cooking. After tying, pat the entire surface of the beef dry with paper towels. Moisture is the enemy of a good sear, so make sure it is very dry. Rub the meat with a bit of olive oil and generously season all sides with the kosher salt and black pepper.
Step 2: Sear the Exterior
Preheat your oven to 400 degrees Fahrenheit. Place a large oven-safe skillet over medium-high heat. Add the remaining olive oil and let it get shimmering hot. Carefully place the tied beef tenderloin into the hot skillet. Let it sit undisturbed for about 2 to 3 minutes per side. You are looking for a deep brown color on the surface. Use tongs to turn the meat gently, making sure to sear the ends as well. Once it is browned on all sides, turn off the burner. Remove the meat to a cutting board for a moment.
Step 3: Add the Onions and Aromatics
In the same skillet, scatter the peeled pearl onions and the smashed garlic cloves around the area where the beef was searing. Toss them slightly in the rendered beef fat left in the pan. The onions should be in a single layer so they can roast evenly. If the pan looks very dry, add a tiny splash of olive oil, but there should be enough fat from the beef. Arrange the beef back in the center of the skillet, sitting right on top of or nestled between the onions.
Step 4: Glaze and Roast
In a small bowl, whisk together the soy sauce, balsamic vinegar, and honey. Brush this mixture all over the seared beef. Sprinkle the fresh thyme leaves over both the beef and the pearl onions. Place the entire skillet into the preheated 400 degree oven. Roast the beef for about 30 to 40 minutes. The exact timing will depend on the thickness of your tenderloin. You want the beef to reach an internal temperature of 130 to 135 degrees Fahrenheit for medium-rare, which is the sweet spot for this cut. Use a meat thermometer to check the thickest part of the meat.
Step 5: Rest and Serve
Once the internal temperature hits 130 degrees, remove the skillet from the oven. The carry-over heat will continue to cook the meat as it rests. Transfer the beef to a carving board and cover it loosely with aluminum foil. Let the meat rest for at least 15 minutes. This step is non-negotiable because it allows the juices to redistribute throughout the meat. If you slice it too soon, the juices will run out onto the board and the beef will be dry. While it rests, give the pearl onions a quick stir in the pan drippings to coat them in the glaze. Slice the beef into thick rounds and serve with the onions on top.
Mistakes I Made (So You Don't Have To)
Forgetting to Tie the Meat
Early on, I thought tying the roast with twine was just for show, but I was wrong. Without the twine, the thinner end of the tenderloin cooks much faster than the thicker center, leading to an uneven roast where one end is gray and overcooked while the other is still raw. Always take the extra two minutes to tie it. It keeps the shape uniform and ensures that every slice is consistently cooked from the first to the last.
Not Using a Thermometer
I used to rely on timing alone, which is a recipe for disaster with expensive meat. Every oven runs a bit differently, and every piece of beef is shaped slightly differently. I once pulled a roast out too early, and it was practically raw in the middle, forcing me to put it back in and ruining the exterior crust. Now, I never cook beef without a digital meat thermometer. It takes the guesswork out of the process and guarantees the result I want every single time.
Crowding the Pan
I once tried to add too many vegetables to the skillet because I loved the side dish aspect so much. By crowding the pan, the pearl onions ended up steaming in their own moisture rather than roasting and glazing properly. They turned mushy and lost their shape. Now, I make sure there is plenty of space in the skillet so the onions can get that nice color from the heat of the oven. If you have a lot of onions, use a bigger pan or a separate baking sheet.
Slicing Too Soon
I have definitely been in a rush to eat and sliced into a hot roast right out of the oven. The result was a puddle of juice on my cutting board and meat that felt dry in the mouth. It is hard to wait those 15 minutes, but it is the most important part of the entire process. If you are worried about it getting cold, just place the foil over it, and the heat will hold perfectly while the juices settle into the fibers of the meat.
Variations and Tips
Adding Root Vegetables
If you want a more substantial meal, you can add small chunks of carrots or potatoes to the skillet along with the pearl onions. Just make sure to cut them into small, bite-sized pieces so they finish cooking at the same time as the beef. Because they take longer to soften than pearl onions, you might want to toss them in the oil and salt for 10 minutes before adding the beef to the oven, or roast them in a separate pan if the skillet is getting too crowded.
Herb Infusions
While I love the clean taste of thyme, you can experiment with other woody herbs. Rosemary works well but is much stronger, so use half the amount. A bay leaf tucked into the pan drippings adds a subtle, earthy depth that many people really enjoy. If you like a bit of heat, try adding a pinch of red pepper flakes to your glaze mixture before you brush it onto the beef. It adds a background warmth that plays nicely with the sweetness of the honey.
Make Ahead Tip
You can definitely tie your beef and prepare the vegetable mix a few hours before you plan to cook. Keep the meat in the refrigerator until you are ready to sear it. The glaze can also be whisked together in advance and kept in a small jar. This makes the final cooking process very stress-free. Just remember to pull the meat out of the fridge at least 30 minutes before it hits the skillet to ensure it does not go into the heat completely cold.
Choosing Your Doneness
If your family prefers meat that is more cooked, you can leave the beef in the oven until it reaches 145 degrees Fahrenheit, which will result in a medium finish. I personally find that tenderloin loses its best texture once you pass medium, so I rarely go beyond that. If you have guests with different preferences, you can cut the meat into larger sections and serve the center pieces to those who like it rare, and the ends to those who prefer it more well-done.
Storage and Reheating
If you have leftovers, they should be refrigerated within two hours of cooking. Place the beef and the remaining onions in an airtight container. The meat will stay good in the refrigerator for up to three days. I do not recommend freezing this dish once it is cooked, as the texture of the tenderloin changes and it tends to get quite dry when thawed and reheated.
To reheat, the best way is to use a low oven. Put the slices on a baking sheet, add a tiny splash of beef broth or water, and cover with foil. Heat at 300 degrees Fahrenheit until the internal temperature reaches 165 degrees. You want to bring it up to heat slowly so you do not cook it further. It is best enjoyed within the first two days of being stored.
Frequently Asked Questions
Can I use a different cut of meat for this recipe?
While you can technically roast other cuts like sirloin or eye of round using this method, they will not be as soft as beef tenderloin. If you choose a tougher cut, you will need to adjust the cooking time significantly, as those cuts benefit from a slower, longer roast or even a braise. Tenderloin is unique because it is very lean and needs high heat for a short time to stay juicy. If you swap the meat, keep a very close eye on the internal temperature.
Is it necessary to use a cast iron skillet?
An oven-safe skillet is ideal because it allows you to sear on the stovetop and then move directly into the oven. This saves you from cleaning an extra pan and keeps all the flavorful drippings in one place to glaze the onions. If you do not have an oven-safe skillet, you can sear the meat in a regular pan and then transfer it to a baking dish before adding the onions and putting it in the oven. Just be careful transferring the hot beef.
Why does my beef turn gray instead of brown?
If your beef is turning gray rather than brown, it is likely because the pan was not hot enough when you started the sear or the meat was still wet. Moisture creates steam, which prevents browning. Always pat the meat thoroughly with paper towels before seasoning, and wait until your oil is shimmering and just starting to smoke slightly before adding the beef. A good sear is purely about high heat and dry surface area.
What should I serve with this dish?
Since the beef is rich and the onions are sweet, I usually pair this with something simple that can soak up the pan juices. Mashed potatoes or a crisp green salad with a sharp vinaigrette are my favorite options. The brightness of a lemon-dressed salad helps cut through the heaviness of the beef, while the potatoes provide a classic, comforting base. You do not need anything too complex, as the meat is the center of attention.
Can I skip the honey in the glaze?
The honey is primarily there to help the meat brown and to balance the salt from the soy sauce and the acidity from the balsamic vinegar. If you prefer to skip it, you can use a small amount of maple syrup or even dark brown sugar. If you leave it out entirely, the beef will still be delicious, but the exterior crust might not be as deep or caramelized in appearance. You can also add a pinch of garlic powder if you want to boost the savory notes without adding sweetness.
Final Thoughts
Cooking a whole beef tenderloin might seem like a daunting task, but it is one of the most rewarding meals you can make. The process is straightforward, and the result is a show-stopping dish that is perfect for any occasion. Once you master the timing and the sear, you will feel much more confident in the kitchen.
Remember that the most important tool is your thermometer, and the most important step is letting the meat rest before you slice it. Take your time, enjoy the process of searing the beef and glazing those little onions, and have fun sharing the final result with the people you love. Good cooking is often about keeping things simple and letting quality ingredients do the work for you.